

Winged Bean Cost Savings: Are you dreaming of a lush, productive garden but dreading the ever-increasing grocery bills? I get it! We all want fresh, healthy food without breaking the bank. That’s why I’m so excited to share some incredible DIY tricks and hacks focused on maximizing your harvest and minimizing your expenses, all centered around the amazing winged bean!
The winged bean, also known as the Goa bean or asparagus pea, isn’t just another pretty plant. It’s a nutritional powerhouse with a fascinating history, cultivated for centuries in Southeast Asia and Papua New Guinea. Every part of the plant is edible – the pods, leaves, flowers, roots, and even the seeds! Imagine the possibilities!
But here’s the real kicker: growing your own winged beans can lead to significant Winged Bean Cost Savings. Think about it – no more pricey trips to specialty stores or farmers markets hoping to find this unique vegetable. With a few simple DIY techniques, you can cultivate a thriving winged bean patch right in your backyard, providing you with a continuous supply of fresh, delicious, and nutritious food. This article will guide you through easy-to-implement strategies, from seed starting to pest control, all designed to help you reap the rewards of a bountiful harvest without emptying your wallet. Let’s get growing!
Grow Your Own Winged Beans: A Beginner’s Guide to Saving Money and Enjoying Fresh Produce
Hey there, fellow gardening enthusiasts! Are you looking for a way to add a unique and nutritious vegetable to your diet while saving some serious cash? Look no further than the amazing winged bean! This climbing legume is not only delicious but also incredibly versatile – you can eat the pods, leaves, flowers, seeds, and even the roots! Plus, growing your own is surprisingly easy and rewarding. I’m going to walk you through everything you need to know to cultivate your own winged bean bounty.
What are Winged Beans and Why Grow Them?
Winged beans ( *Psophocarpus tetragonolobus*) are a tropical legume native to Southeast Asia. They get their name from the four frilly “wings” that run along the length of the pods. These beans are a nutritional powerhouse, packed with protein, vitamins, and minerals. They’re also relatively easy to grow, especially if you live in a warm climate.
Here’s why I think you should give winged beans a try:
* Cost Savings: Let’s face it, fresh produce can be expensive! Growing your own winged beans eliminates the need to buy them at the store, saving you money in the long run.
* Freshness and Flavor: Nothing beats the taste of homegrown vegetables. Winged beans picked fresh from your garden are bursting with flavor and nutrients.
* Nutritional Value: As I mentioned, winged beans are incredibly nutritious. They’re a great source of protein, fiber, and essential vitamins and minerals.
* Unique and Interesting: Winged beans are a conversation starter! They’re not something you see every day, and their unique appearance is sure to impress your friends and family.
* Versatility: You can use winged beans in a variety of dishes, from stir-fries and salads to soups and stews.
* Beautiful Vines: The winged bean plant itself is quite attractive, with its lush green foliage and delicate flowers. It can add a touch of beauty to your garden.
Getting Started: What You’ll Need
Before you dive in, let’s gather the necessary supplies. Don’t worry, you probably already have most of these items on hand.
* Winged Bean Seeds: You can find these online or at some specialty nurseries. Make sure you’re buying seeds from a reputable source.
* Well-Draining Soil: Winged beans prefer soil that is rich in organic matter and drains well.
* Compost or Manure: Adding compost or manure to your soil will provide essential nutrients for your plants.
* Trellis or Support Structure: Winged beans are climbing plants, so they need a trellis or other support structure to grow on.
* Watering Can or Hose: You’ll need a way to water your plants regularly.
* Gardening Gloves: Protect your hands from dirt and thorns.
* Shovel or Trowel: For planting your seeds.
* Optional: Nitrogen-fixing inoculant: This can help your winged beans fix nitrogen from the air, boosting their growth.
Step-by-Step Guide to Growing Winged Beans
Okay, let’s get our hands dirty! Here’s a detailed guide to growing your own winged beans:
1. Choosing the Right Location
* Sunlight: Winged beans need at least 6-8 hours of sunlight per day. Choose a location in your garden that gets plenty of sun.
* Soil: As I mentioned earlier, winged beans prefer well-draining soil that is rich in organic matter. If your soil is heavy clay, amend it with compost or other organic matter to improve drainage.
* Support Structure: Make sure your chosen location has a sturdy trellis or other support structure nearby. Winged beans can grow quite tall, so you’ll need something that can handle their weight. I’ve used everything from bamboo poles tied together to a repurposed chain-link fence.
2. Preparing the Soil
* Clear the Area: Remove any weeds, rocks, or debris from the planting area.
* Amend the Soil: Dig in plenty of compost or manure to improve the soil’s fertility and drainage. I usually aim for a ratio of about 1 part compost to 3 parts soil.
* Loosen the Soil: Use a shovel or trowel to loosen the soil to a depth of at least 12 inches. This will make it easier for the roots to grow.
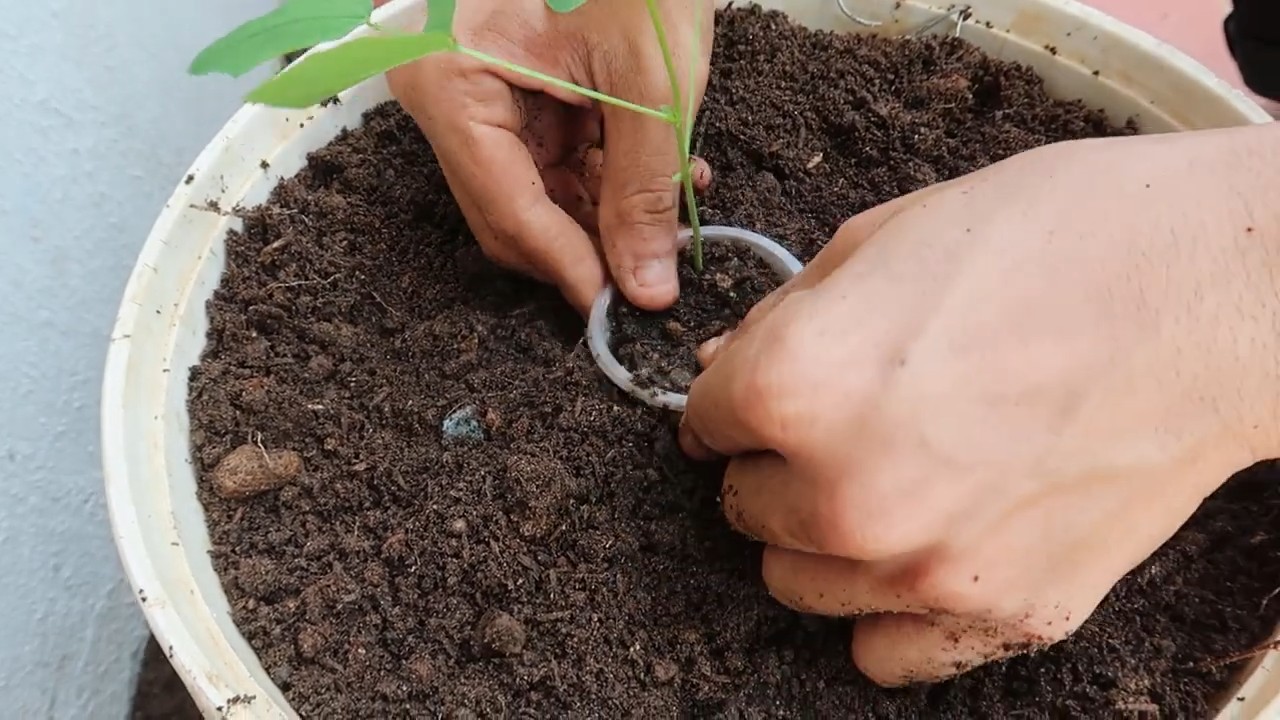
3. Sowing the Seeds
* Soaking the Seeds (Optional): Soaking the seeds in water for 24 hours before planting can help improve germination rates. I’ve found it makes a noticeable difference, especially with older seeds.
* Planting Depth: Plant the seeds about 1 inch deep and 2-3 inches apart.
* Spacing: If you’re planting multiple rows of winged beans, space the rows about 3-4 feet apart.
* Watering: Water the seeds thoroughly after planting.
4. Providing Support
* Install Trellis: If you haven’t already, install your trellis or support structure near the seedlings.
* Guide the Vines: As the winged bean vines grow, gently guide them onto the trellis. They’ll eventually start to climb on their own. You might need to initially tie them loosely to the support.
5. Watering and Fertilizing
* Watering: Water your winged beans regularly, especially during dry periods. They need consistent moisture to thrive. Aim for deep watering, allowing the water to soak into the soil.
* Fertilizing: Winged beans are legumes, which means they can fix nitrogen from the air. However, they still benefit from occasional fertilization. Use a balanced fertilizer or a fertilizer specifically formulated for legumes. I like to use a liquid seaweed fertilizer every few weeks.
6. Pest and Disease Control
* Pests: Winged beans are generally resistant to pests, but they can sometimes be affected by aphids, spider mites, or bean beetles. Inspect your plants regularly and take action if you see any signs of infestation. Insecticidal soap or neem oil can be effective treatments.
* Diseases: Winged beans are also relatively disease-resistant, but they can sometimes be affected by fungal diseases like powdery mildew. Ensure good air circulation around your plants and avoid overhead watering to prevent fungal problems. If you do notice any signs of disease, treat your plants with a fungicide.
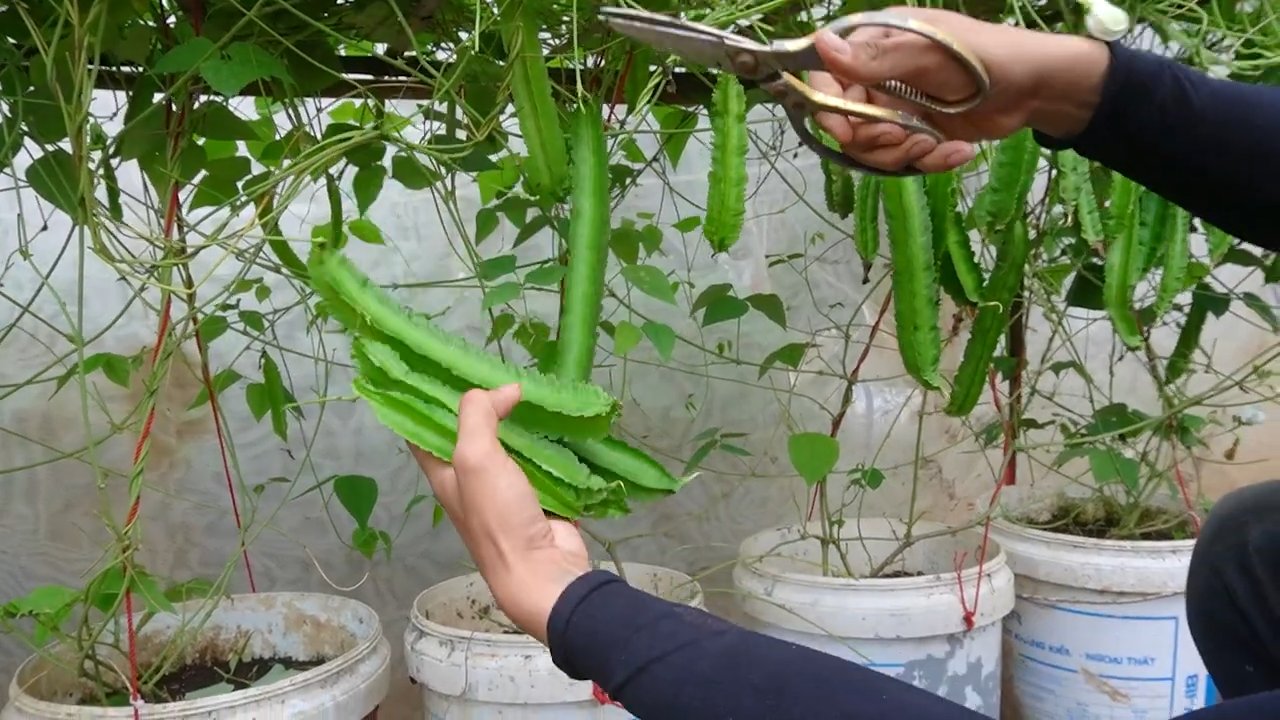
7. Harvesting Your Winged Beans
* Pod Harvesting: You can start harvesting the pods when they are about 6-8 inches long and still tender. The younger the pods, the more tender and flavorful they will be.
* Leaf Harvesting: You can also harvest the leaves of the winged bean plant. They can be used in salads or cooked like spinach.
* Flower Harvesting: The flowers are also edible and can be used in salads or as a garnish.
* Seed Harvesting: If you want to save seeds for next year, allow some of the pods to mature and dry on the vine. Once the pods are dry, you can harvest the seeds and store them in a cool, dry place.
* Root Harvesting: The roots can be harvested when the plant is mature. They can be boiled, roasted, or fried.
Troubleshooting Common Problems
Even with the best planning, you might encounter a few challenges along the way. Here are some common problems and how to address them:
* Poor Germination: If your seeds aren’t germinating, make sure the soil is warm enough and that you’re not overwatering. Soaking the seeds before planting can also help.
* Slow Growth: If your plants are growing slowly, make sure they’re getting enough sunlight and nutrients. Fertilize them regularly and check the soil pH. Winged beans prefer a slightly acidic soil.
* Yellowing Leaves: Yellowing leaves can be a sign of nutrient deficiency or overwatering. Check the soil drainage and fertilize your plants with a balanced fertilizer.
* Pest Infestation: If you notice pests on your plants, take action immediately. Insecticidal soap or neem oil can be effective treatments.
* Disease: If you notice any signs of disease, treat your plants with a fungicide. Ensure good air circulation around your plants and avoid overhead watering.
Enjoying Your Harvest
Now for the best part – enjoying the fruits (or rather, the beans!) of your labor. Winged beans are incredibly versatile in the kitchen. Here are a few ideas:
* Stir-fries: Winged beans are a great addition to stir-fries. Simply slice them thinly and add them to your favorite stir-fry recipe.
* Salads: The young, tender pods can be eaten raw in salads.
* Soups and Stews: Winged beans can be added to soups and stews for extra flavor and nutrition.
* Steamed or Boiled: You can also steam or
Conclusion
So, there you have it! Transforming those often-discarded winged bean pods into a delicious and nutritious meal is not only incredibly satisfying but also a fantastic way to embrace sustainable cooking and significantly reduce your grocery bill. This simple DIY trick unlocks a hidden culinary treasure, turning what was once considered waste into a star ingredient.
Why is this a must-try? Because it’s more than just a recipe; it’s a statement. It’s a statement about reducing food waste, about appreciating the full potential of every ingredient, and about saving money without sacrificing flavor or nutrition. In a world increasingly conscious of its environmental impact, finding ways to minimize waste and maximize resources is paramount. This winged bean cost savings method allows you to actively participate in a more sustainable food system, one delicious bite at a time.
But the beauty of this DIY trick lies not only in its practicality but also in its versatility. Feel free to experiment with different flavor profiles. Add a touch of chili flakes for a spicy kick, incorporate ginger and garlic for an Asian-inspired stir-fry, or blend the cooked pods into a creamy soup. The possibilities are truly endless. Consider adding other vegetables like carrots, bell peppers, or onions to create a more substantial and colorful dish. You could even use the cooked winged bean pods as a filling for dumplings or spring rolls.
Don’t be afraid to get creative with your seasonings as well. A dash of soy sauce, a squeeze of lemon juice, or a sprinkle of sesame seeds can all elevate the flavor of your winged bean dish. For a richer flavor, try sautéing the pods in coconut oil or adding a dollop of coconut milk towards the end of cooking.
We encourage you to embark on this culinary adventure and discover the hidden potential of winged beans. It’s a rewarding experience that will not only tantalize your taste buds but also leave you feeling good about your contribution to a more sustainable world.
We’re confident that once you try this DIY trick, you’ll be amazed at how easy and delicious it is. So, gather your winged bean pods, put on your apron, and get ready to transform them into a culinary masterpiece.
And most importantly, we want to hear about your experience! Share your photos, recipes, and tips with us in the comments below. Let’s create a community of winged bean enthusiasts and inspire others to embrace this sustainable and cost-effective cooking method. Your feedback is invaluable, and we can’t wait to see what delicious creations you come up with. Let’s all work together to maximize winged bean cost savings and minimize food waste!
Frequently Asked Questions (FAQ)
What part of the winged bean can I actually eat?
The entire winged bean plant is edible, including the pods, leaves, flowers, seeds, and roots. However, this DIY trick focuses specifically on utilizing the mature pods, which are often discarded. The young, tender pods are commonly eaten whole, but the mature pods, while tougher, can be prepared using this method to make them palatable and delicious.
Are there any safety concerns with eating mature winged bean pods?
Yes, mature winged bean pods contain higher levels of trypsin inhibitors and hemagglutinins, which can interfere with nutrient absorption and potentially cause digestive discomfort if consumed raw or undercooked. However, these compounds are effectively deactivated by thorough cooking, such as boiling or steaming. It’s crucial to cook the pods properly before consumption to ensure they are safe to eat. Always err on the side of caution and cook them until they are tender.
How do I know when the winged bean pods are mature enough for this DIY trick?
Mature winged bean pods are typically larger, tougher, and have a more fibrous texture compared to young, tender pods. They may also have a slightly yellowish or brownish hue. If you’re unsure, try snapping a pod in half. If it’s difficult to snap and the inside is filled with mature beans, it’s likely a mature pod suitable for this DIY trick.
Can I freeze the cooked winged bean pods for later use?
Absolutely! Freezing is a great way to preserve cooked winged bean pods and enjoy them at your convenience. After cooking, allow the pods to cool completely. Then, portion them into freezer-safe bags or containers, removing as much air as possible to prevent freezer burn. They can be stored in the freezer for up to 2-3 months. When ready to use, simply thaw them in the refrigerator or microwave and add them to your favorite recipes.
What are some other ways to use the cooked winged bean pods besides stir-fries?
The possibilities are endless! You can add the cooked pods to soups, stews, curries, or salads. They can also be pureed into dips or sauces. Try adding them to omelets or frittatas for a nutritious boost. You can even use them as a filling for dumplings, spring rolls, or empanadas. Get creative and experiment with different flavor combinations to discover your favorite ways to enjoy this versatile ingredient.
How can I make this recipe vegan or vegetarian?
This recipe is naturally vegan and vegetarian-friendly! Simply ensure that any additional ingredients you use, such as sauces or seasonings, are also vegan or vegetarian. For example, use vegetable broth instead of chicken broth, and opt for soy sauce or tamari instead of fish sauce.
Where can I find winged beans?
Winged beans are not as widely available as other common vegetables, but you may be able to find them at Asian markets, farmers’ markets, or specialty grocery stores. You can also try growing your own winged bean plants if you have a garden. Seeds are available online and at some garden centers.
What if I don’t have access to fresh winged beans? Can I use frozen ones?
While fresh winged beans are ideal, you may be able to find frozen winged beans at some Asian markets. If using frozen winged beans, follow the same cooking instructions as for fresh pods, but reduce the cooking time slightly as they may cook faster.
How does this DIY trick contribute to winged bean cost savings?
This trick allows you to utilize the mature winged bean pods, which are often discarded, effectively turning what would be waste into a valuable food source. By using the entire plant, you reduce food waste and maximize your investment in the winged bean plant, leading to significant cost savings over time. Instead of buying other vegetables, you are utilizing what you already have, making it a budget-friendly option.


Leave a Comment