

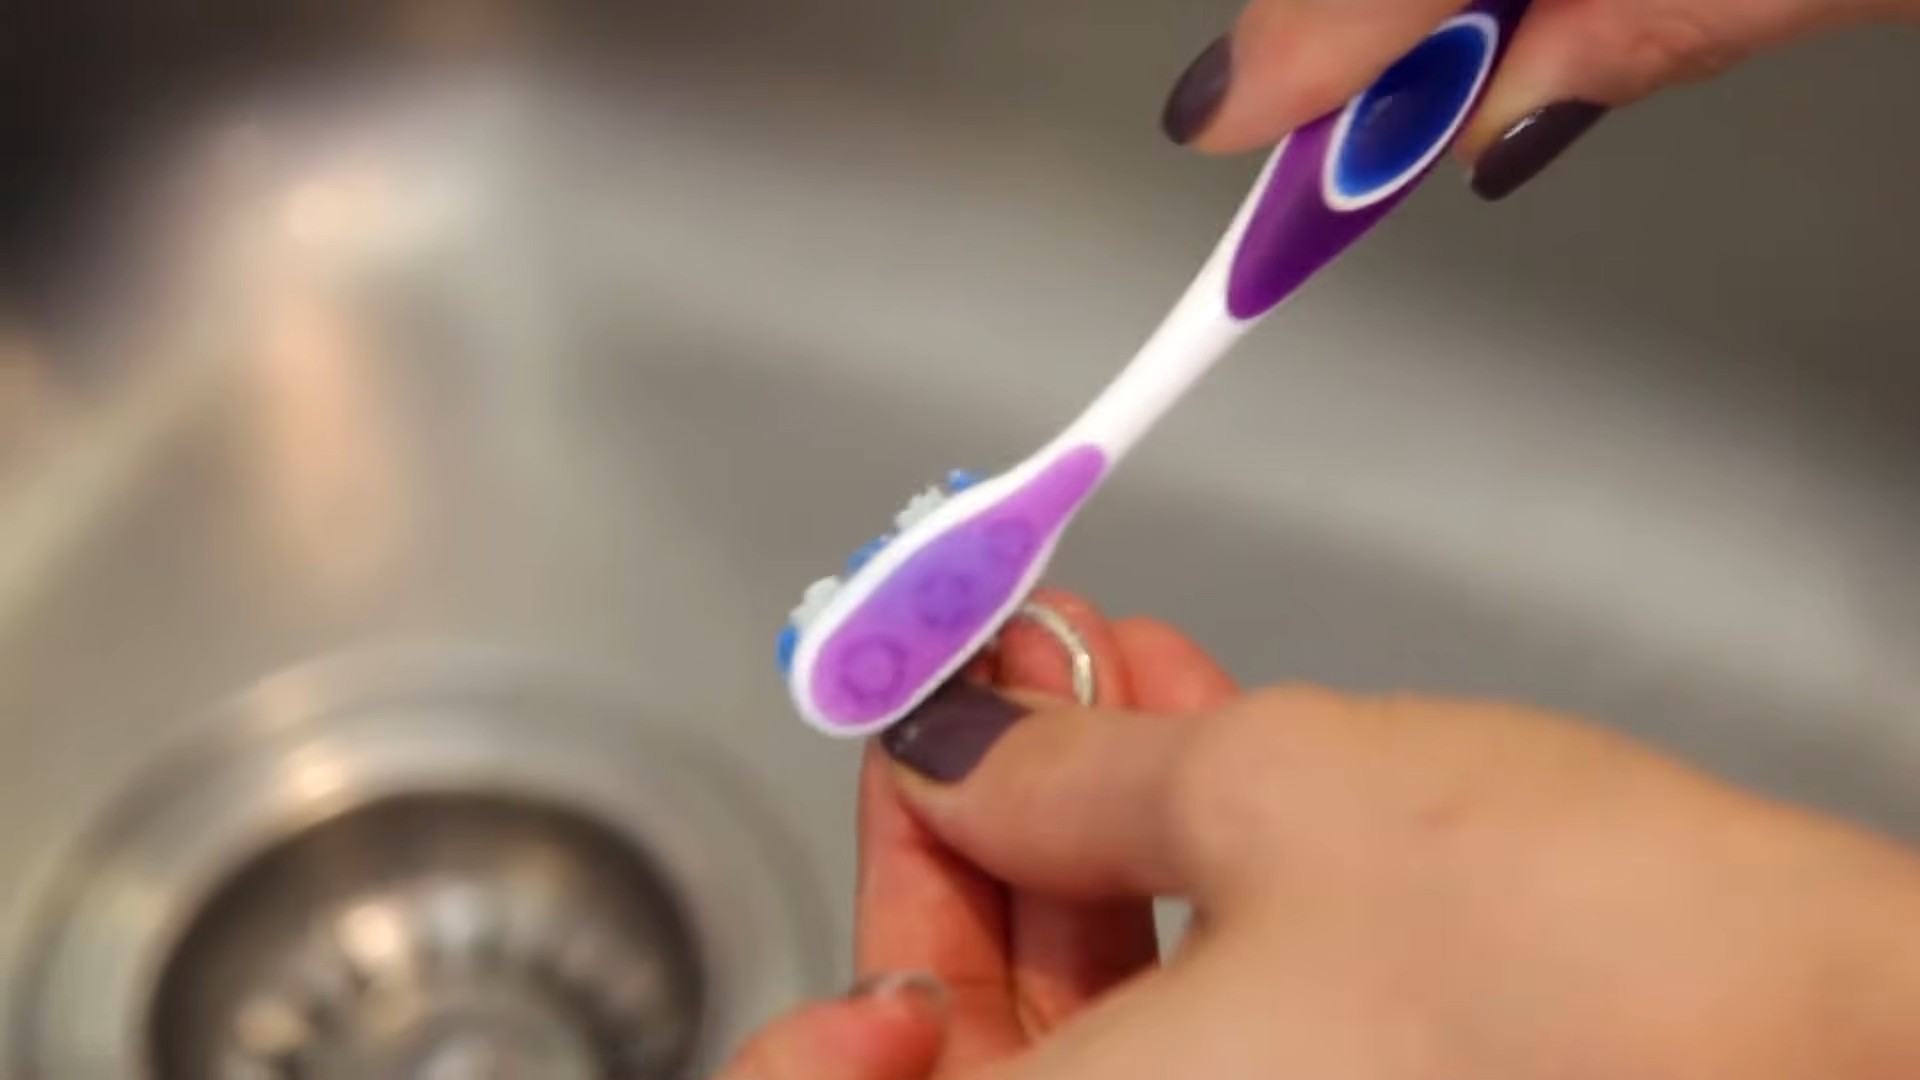
Toothbrush cleaning small spaces – it’s a game-changer, trust me! Are you tired of those stubborn nooks and crannies in your home that seem impossible to reach? The ones where dust bunnies gather, grime accumulates, and your regular cleaning tools just can’t cut it? I know I was! For generations, people have struggled with this very problem, relying on makeshift solutions that were often more frustrating than effective. Think about it – our grandmothers probably used the corner of a cloth or a toothpick, methods that were time-consuming and rarely yielded truly satisfying results.
But now, we have a secret weapon: the humble toothbrush! This isn’t just about repurposing an old brush; it’s about unlocking a whole new level of clean in your home. Why do you need this DIY trick? Because life’s too short to spend hours battling dirt in hard-to-reach places! From cleaning grout lines in your bathroom to scrubbing around faucets and fixtures, toothbrush cleaning small spaces offers a simple, effective, and surprisingly satisfying solution. I’m going to show you how to transform your cleaning routine and achieve a sparkling home with this simple, yet powerful tool. Get ready to say goodbye to grime and hello to a cleaner, happier you!
DIY Deep Cleaning with a Toothbrush: Reaching the Unreachable!
Okay, let’s face it: some cleaning tasks are just plain annoying. You know, those tiny crevices, tight corners, and intricate details that seem to laugh in the face of your regular cleaning supplies. But fear not, my friends! I’m here to show you how to wield the humble toothbrush as a mighty weapon in your cleaning arsenal. This isn’t just about scrubbing your teeth anymore; it’s about conquering grime and achieving sparkling cleanliness in those hard-to-reach places.
Why a Toothbrush?
Before we dive in, let’s talk about why a toothbrush is so darn effective.
* Small Size, Big Impact: Its compact head allows you to navigate tight spaces with ease.
* Bristle Power: The bristles provide just the right amount of abrasion to loosen dirt and grime without scratching delicate surfaces.
* Ergonomic Design: The handle is comfortable to grip, giving you precise control.
* Cost-Effective: Let’s be real, you probably have a few old toothbrushes lying around just waiting for a new purpose!
Gather Your Supplies
To get started, you’ll need a few essential items:
* Old Toothbrushes: The star of the show! Keep a stash of old toothbrushes specifically for cleaning. You can even designate different colors for different tasks (e.g., blue for bathrooms, green for kitchens).
* Cleaning Solutions: This will vary depending on what you’re cleaning. Some common options include:
* All-purpose cleaner
* Dish soap
* Baking soda paste (for tougher grime)
* Vinegar (for descaling and disinfecting)
* Hydrogen peroxide (for stain removal)
* Water: For rinsing and diluting cleaning solutions.
* Microfiber Cloths: For wiping away dirt and grime.
* Small Bowl or Container: For holding your cleaning solution.
* Gloves (Optional): To protect your hands, especially when using harsh chemicals.
* Safety Glasses (Optional): To protect your eyes from splashes.
* Q-tips (Optional): For even more precise cleaning in super tiny areas.
Cleaning Around Faucets and Sinks
Faucets and sinks are notorious for accumulating grime, soap scum, and hard water stains. Here’s how to tackle them with a toothbrush:
1. Prepare Your Cleaning Solution: In a small bowl, mix equal parts white vinegar and water. For tougher stains, you can use undiluted vinegar.
2. Apply the Solution: Dip your toothbrush into the vinegar solution and gently scrub around the base of the faucet, the handles, and any other areas with visible grime. Pay special attention to the seams and crevices.
3. Scrub, Scrub, Scrub: Use small, circular motions to loosen the dirt and grime. Don’t be afraid to apply a little pressure, but be careful not to scratch the finish.
4. Rinse Thoroughly: Rinse the area with clean water to remove the vinegar solution and loosened debris.
5. Dry and Polish: Use a clean microfiber cloth to dry the faucet and sink. Buff the surface to a shine.
6. Tackle Hard Water Stains: For stubborn hard water stains, create a paste of baking soda and water. Apply the paste to the affected areas, let it sit for a few minutes, and then scrub with your toothbrush. Rinse and dry as before.
Cleaning Tile Grout
Grout can be a breeding ground for mold and mildew, making it look dingy and discolored. A toothbrush is perfect for getting into those narrow grout lines.
1. Choose Your Weapon: For light cleaning, a mixture of dish soap and water will suffice. For tougher stains and mold, use a solution of bleach and water (always wear gloves and eye protection when working with bleach!). You can also use a commercial grout cleaner.
2. Apply the Solution: Dip your toothbrush into the cleaning solution and scrub the grout lines thoroughly.
3. Let it Sit (If Necessary): If you’re using bleach or a commercial grout cleaner, let the solution sit on the grout for a few minutes to allow it to penetrate and kill any mold or mildew.
4. Scrub Again: After letting the solution sit, scrub the grout lines again to loosen any remaining dirt and grime.
5. Rinse Thoroughly: Rinse the area with clean water to remove the cleaning solution and loosened debris.
6. Dry and Admire: Use a clean microfiber cloth to dry the tiles and grout. You should see a noticeable difference in the appearance of your grout!
Cleaning Window Tracks and Sliding Door Tracks
Window and sliding door tracks are notorious for collecting dust, dirt, and dead bugs. Yuck! A toothbrush can help you get into those narrow tracks and remove all the gunk.
1. Vacuum First: Before you start scrubbing, use a vacuum cleaner with a crevice tool to remove any loose debris from the tracks.
2. Prepare Your Solution: Mix a solution of warm water and dish soap.
3. Apply the Solution: Dip your toothbrush into the soapy water and scrub the tracks thoroughly. Pay special attention to the corners and any areas with built-up grime.
4. Wipe Away the Gunk: Use a damp microfiber cloth to wipe away the loosened dirt and grime. You may need to rinse the cloth frequently.
5. Dry the Tracks: Use a dry microfiber cloth to dry the tracks completely. This will help prevent mold and mildew growth.
6. Stubborn Spots: For really stubborn spots, try using a baking soda paste or a specialized track cleaner.
Cleaning Kitchen Appliances
Your kitchen appliances, like your stove, oven, and refrigerator, can also benefit from a toothbrush cleaning.
1. Stovetop Burners: Remove the burner grates and soak them in hot, soapy water. While they’re soaking, use a toothbrush to scrub around the burner area on the stovetop. Pay special attention to any spills or splatters that have hardened. Rinse and dry thoroughly.
2. Oven Door: Use a toothbrush to scrub around the edges of the oven door, where grease and grime tend to accumulate. You can use a mixture of baking soda and water or a commercial oven cleaner. Be sure to follow the instructions on the oven cleaner carefully.
3. Refrigerator Door Seals: The rubber seals around your refrigerator door can get dirty and moldy over time. Use a toothbrush to scrub the seals with a mixture of warm water and dish soap. Rinse and dry thoroughly.
4. Microwave: After steaming your microwave, use a toothbrush to scrub away any loosened food particles.
Cleaning Electronics
Believe it or not, a toothbrush can even be used to clean your electronics! Just be sure to use a dry toothbrush and be very gentle.
1. Computer Keyboard: Use a dry toothbrush to gently brush away dust and crumbs from between the keys on your computer keyboard.
2. Phone Speaker and Charging Port: Use a dry toothbrush to gently clean the speaker and charging port on your phone. Be careful not to insert the toothbrush too far into the charging port.
3. Remote Controls: Use a dry toothbrush to clean the buttons and crevices on your remote controls.
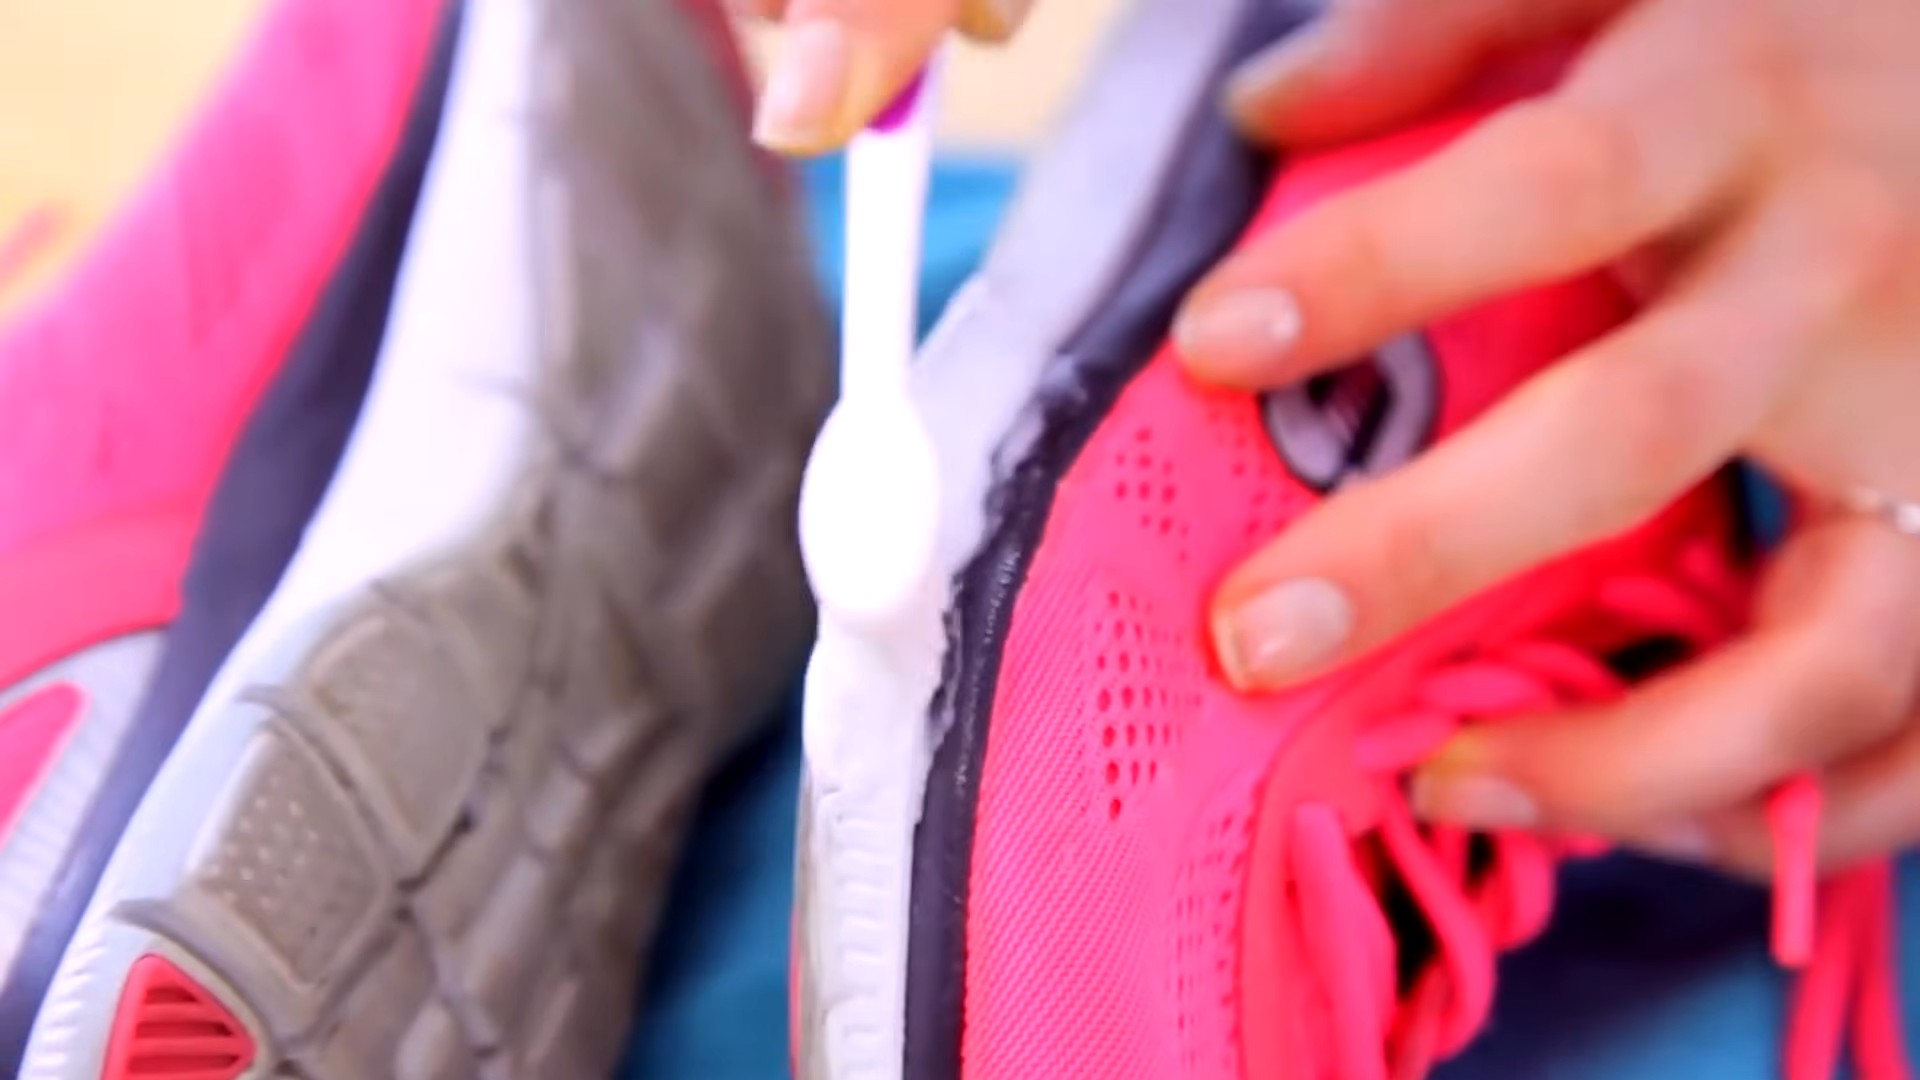
Cleaning Car Interiors
Your car’s interior can also benefit from the precision cleaning power of a toothbrush.
1. Dashboard Vents: Use a dry toothbrush to remove dust and debris from the dashboard vents.
2. Center Console: Use a toothbrush to clean around the gear shift, cup holders, and other areas of the center console.
3. Door Panels: Use a toothbrush to clean the crevices and seams on the door panels.
4. Upholstery Seams: Use a toothbrush to gently scrub the seams of your car seats to remove dirt and grime.
Tips and Tricks for Toothbrush Cleaning
* Use Different Toothbrushes for Different Tasks: As I mentioned earlier, it’s a good idea to designate different toothbrushes for different cleaning tasks. This will help prevent cross-contamination and ensure that you’re using the right tool for the job.
* Soften the Bristles: If you’re cleaning a delicate surface, you can soften the bristles of your toothbrush by soaking it in hot water for a few minutes.
* Cut the Bristles: For even more precise cleaning, you can cut the bristles of your toothbrush at an angle. This will allow you to reach into even tighter spaces.
* Don’t Forget to Clean Your Toothbrush: After each use, rinse your toothbrush thoroughly with water and allow it to air dry. You can also disinfect your toothbrush by soaking it in a solution of hydrogen peroxide or vinegar.
* Replace Your Toothbrushes Regularly: Just like your regular toothbrush, your cleaning toothbrushes will eventually wear out. Replace them every few months or when the bristles become frayed or worn.
Safety First!
Conclusion
So, there you have it! This simple yet incredibly effective DIY trick using a toothbrush to clean small spaces is a game-changer for anyone who values a spotless home. Forget struggling with bulky tools or resigning yourself to perpetually dusty corners. This method is not only budget-friendly, utilizing a tool you likely already have on hand, but it’s also surprisingly satisfying. The feeling of finally reaching those previously inaccessible areas and banishing grime is truly rewarding.
Why is this a must-try? Because it’s efficient, economical, and empowers you to achieve a level of cleanliness you might not have thought possible. Think about the build-up of dust and debris in the crevices of your window frames, the stubborn grime around your faucet bases, or the hard-to-reach areas behind your toilet. These are all breeding grounds for allergens and bacteria, and this toothbrush cleaning method tackles them head-on.
But the beauty of this trick lies in its versatility. While a standard toothbrush works wonders, don’t be afraid to experiment! For particularly stubborn grime, try dipping the toothbrush in a solution of baking soda and water, or a diluted vinegar solution. For delicate surfaces, opt for a soft-bristled toothbrush and a gentle cleaning agent. You can even use an old electric toothbrush head (without the handle, of course!) for a little extra scrubbing power. Consider using different colored toothbrushes for different cleaning tasks to avoid cross-contamination. Dedicate one color for bathroom cleaning, another for kitchen cleaning, and so on. This simple color-coding system can make your cleaning routine more organized and hygienic.
Beyond the typical household applications, consider using this technique for cleaning your car’s interior, detailing intricate craft projects, or even cleaning jewelry. The possibilities are endless!
We wholeheartedly encourage you to give this DIY toothbrush cleaning trick a try. It’s a small change that can make a big difference in the overall cleanliness and hygiene of your home. And more importantly, we want to hear about your experience! Did you discover a new and innovative use for this technique? Did you find a particular cleaning solution that worked exceptionally well? Share your tips, tricks, and before-and-after photos in the comments below. Let’s create a community of clean-home enthusiasts and learn from each other’s experiences. Your feedback is invaluable and can help others discover the joy of a truly clean home, one small space at a time. Embrace the power of the toothbrush and unlock a new level of cleanliness in your life!
Frequently Asked Questions
What kind of toothbrush should I use?
The best type of toothbrush depends on the surface you’re cleaning and the type of grime you’re tackling. For general cleaning, a standard toothbrush with medium bristles is a good starting point. However, for delicate surfaces like polished metal or painted wood, a soft-bristled toothbrush is recommended to avoid scratching. For particularly stubborn grime, you might consider using a toothbrush with firmer bristles, but always test it in an inconspicuous area first to ensure it doesn’t damage the surface. An old electric toothbrush head (detached from the handle) can also be very effective for scrubbing, especially in tight spaces. Remember to replace your cleaning toothbrushes regularly, just as you would your regular toothbrush.
What cleaning solutions can I use with the toothbrush?
The options are vast! For general cleaning, a simple solution of warm water and dish soap is often sufficient. For tougher grime, consider using a mixture of baking soda and water to form a paste. This is particularly effective for cleaning grout and removing hard water stains. Diluted vinegar is another excellent option for disinfecting and removing mildew. For greasy areas, a degreasing cleaner specifically designed for the task is recommended. Always test any cleaning solution in an inconspicuous area first to ensure it doesn’t damage the surface. Avoid using abrasive cleaners on delicate surfaces, as they can cause scratches. When cleaning electronics, always use a dry toothbrush or a specialized electronic cleaning solution.
How do I clean the toothbrush after using it for cleaning?
Properly cleaning your cleaning toothbrush is essential to prevent the spread of bacteria and ensure its longevity. After each use, rinse the toothbrush thoroughly under hot running water to remove any debris or cleaning solution residue. You can also soak the toothbrush in a solution of antibacterial soap and water for a few minutes to disinfect it. For a deeper clean, consider soaking the toothbrush in a diluted bleach solution (1 part bleach to 10 parts water) for a few minutes, but be sure to rinse it thoroughly afterward to remove any traces of bleach. Allow the toothbrush to air dry completely before storing it. Replace the toothbrush regularly, especially if the bristles become frayed or worn.
Can I use this technique on all surfaces?
While this toothbrush cleaning technique is versatile, it’s not suitable for all surfaces. Avoid using it on surfaces that are easily scratched, such as delicate fabrics, soft plastics, or highly polished surfaces. Always test the technique in an inconspicuous area first to ensure it doesn’t damage the surface. Be particularly cautious when cleaning electronics, as moisture can cause damage. Use a dry toothbrush or a specialized electronic cleaning solution for these items. When cleaning painted surfaces, use a soft-bristled toothbrush and a gentle cleaning solution to avoid removing the paint.
What are some other creative uses for this toothbrush cleaning trick?
Beyond the typical household cleaning tasks, this technique can be used for a variety of other purposes. It’s excellent for cleaning jewelry, removing dirt and grime from intricate designs. It’s also useful for detailing car interiors, reaching those hard-to-reach areas around vents and dashboards. Crafters can use it to clean up glue residue and other messes from their projects. Gardeners can use it to clean plant pots and tools. The possibilities are truly endless! The key is to think creatively and adapt the technique to your specific needs.
How often should I clean these small spaces?
The frequency of cleaning depends on the specific area and how often it’s used. High-traffic areas like kitchen counters and bathroom sinks should be cleaned more frequently, perhaps once a week. Less frequently used areas, such as window frames and baseboards, can be cleaned less often, perhaps once a month or as needed. Pay attention to areas that tend to accumulate dust or grime quickly and adjust your cleaning schedule accordingly. Regular cleaning will prevent the build-up of stubborn grime and make your cleaning tasks easier in the long run.
Is it safe to use a toothbrush that I’ve used for cleaning on my teeth afterward?
Absolutely not! Never use a toothbrush that you’ve used for cleaning on your teeth. This is a major hygiene risk, as the toothbrush will be contaminated with bacteria and cleaning chemicals. Always use a separate toothbrush specifically for cleaning purposes, and clearly label it to avoid any confusion.
What if I don’t have a toothbrush? Are there any alternatives?
While a toothbrush is the ideal tool for this cleaning trick, there are a few alternatives you can use in a pinch. A cotton swab can be used for very small and delicate areas. A small scrub brush with stiff bristles can be used for larger areas or for tackling tougher grime. A toothpick or skewer can be used to dislodge debris from tight crevices. However, a toothbrush is generally the most effective and versatile option, so it’s worth having a few on hand specifically for cleaning purposes.
Leave a Comment