

Tomato sack gardening: Ever dreamed of harvesting juicy, sun-ripened tomatoes right outside your doorstep, even if you’re short on space? I know I have! Forget sprawling gardens and back-breaking weeding – there’s a simpler, more ingenious way to cultivate these flavorful fruits. This DIY guide will unlock the secrets to growing a bountiful tomato harvest using just a sack, some soil, and a little bit of know-how.
The concept of container gardening, including sack gardening, has roots stretching back centuries. From the hanging gardens of Babylon to the resourceful use of limited space in urban environments throughout history, people have always found creative ways to grow their own food. Today, with increasing urbanization and a renewed focus on sustainable living, the appeal of tomato sack gardening is stronger than ever.
Why should you try this DIY trick? Well, imagine enjoying fresh, organic tomatoes all season long, knowing exactly where they came from and how they were grown. Plus, sack gardening is incredibly space-efficient, making it perfect for balconies, patios, or even small yards. It’s also a fantastic way to control soil quality and prevent common garden pests. So, ditch the store-bought tomatoes and get ready to embark on a rewarding and delicious gardening adventure! I’m excited to show you how easy it is.
DIY Tomato Sack Gardening: Grow a Bumper Crop in a Bag!
Hey there, fellow gardening enthusiasts! I’m so excited to share one of my favorite gardening hacks with you: tomato sack gardening! It’s a fantastic way to grow delicious, juicy tomatoes, especially if you’re short on space or dealing with poor soil. Trust me, once you try this, you’ll be hooked! It’s surprisingly easy, budget-friendly, and yields an impressive harvest. Let’s dive in!
What You’ll Need
Before we get started, let’s gather all the necessary materials. This will make the whole process smoother and more enjoyable.
* Burlap or Heavy-Duty Woven Polypropylene Bag: This is your “sack.” Look for a bag that’s at least 24 inches wide and 36 inches tall. Burlap is a great natural option, but a woven polypropylene bag (like the kind used for animal feed or fertilizer) will last longer and retain moisture better. Just make sure it’s clean!
* Potting Mix: This is crucial! Don’t use garden soil directly in the bag; it’s too heavy and doesn’t drain well. Opt for a high-quality potting mix specifically formulated for containers. I like to use a mix that includes peat moss, perlite, and vermiculite for optimal drainage and aeration.
* Compost: Compost is the black gold of gardening! It adds essential nutrients and improves soil structure. Use well-rotted compost from your own compost bin or purchase a bag from your local garden center.
* Slow-Release Fertilizer: Tomatoes are heavy feeders, so a slow-release fertilizer will provide them with a steady supply of nutrients throughout the growing season. Choose a fertilizer specifically formulated for tomatoes, with a balanced NPK ratio (nitrogen, phosphorus, and potassium).
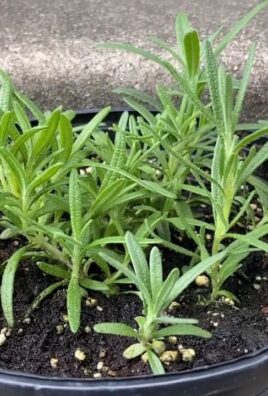
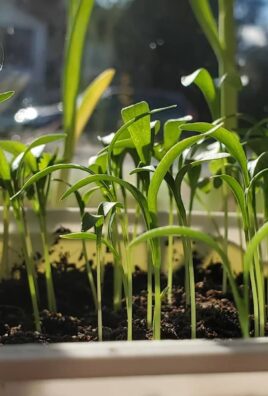
* Tomato Seedlings: Select healthy, vigorous tomato seedlings from a reputable nursery or start your own from seed. Choose varieties that are well-suited to your climate and growing conditions. Determinate (bush) varieties are often a good choice for sack gardening, but indeterminate (vining) varieties can also work with proper support.
* Watering Can or Hose: You’ll need a way to water your tomato plants regularly.
* Scissors or Utility Knife: For making drainage holes and planting holes.
* Stakes or Tomato Cages (Optional): Depending on the tomato variety you choose, you may need stakes or cages to support the plants as they grow.
* Gloves: To keep your hands clean and protected.
* Measuring Cup or Scoop: For measuring fertilizer and compost.
Step-by-Step Instructions: Creating Your Tomato Sack Garden
Okay, let’s get our hands dirty! Follow these steps to create your very own tomato sack garden:
1. Prepare the Bag:
* First, if you’re using a burlap bag, consider lining the inside with a plastic garbage bag (poke holes in the bottom for drainage) to help retain moisture and prevent the burlap from rotting too quickly. This step isn’t necessary, but it can extend the life of your bag.
* Next, create drainage holes in the bottom of the bag. Use scissors or a utility knife to poke several holes (about ½ inch in diameter) spaced a few inches apart. This is essential to prevent waterlogging, which can lead to root rot.
2. Add the Soil Mixture:
* Now, it’s time to fill the bag with your soil mixture. Start by adding a layer of potting mix to the bottom of the bag, about 6-8 inches deep.
* Next, mix in a generous amount of compost (about 1/3 of the total volume) with the potting mix. This will enrich the soil and provide essential nutrients for your tomato plants.
* Sprinkle in the slow-release fertilizer according to the package instructions. Be careful not to over-fertilize, as this can damage the plants.
* Continue adding layers of potting mix, compost, and fertilizer until the bag is about ¾ full. Leave some space at the top for watering.
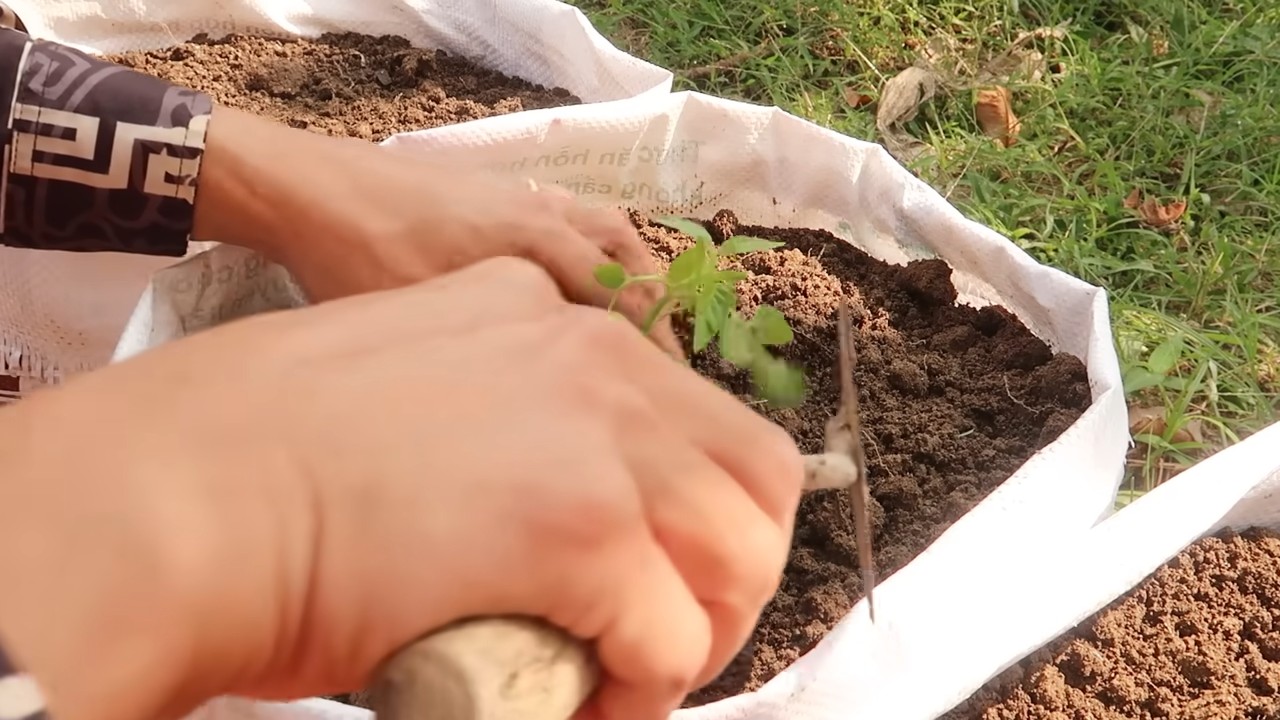
3. Plant the Tomato Seedlings:
* Carefully remove the tomato seedlings from their containers. Gently loosen the roots with your fingers to encourage them to spread out.
* Make a hole in the soil mixture large enough to accommodate the root ball of each seedling.
* Plant the seedlings at the same depth they were growing in their original containers.
* Space the seedlings evenly around the top of the bag, leaving enough room for them to grow. I usually plant 2-3 seedlings per bag, depending on the size of the bag and the tomato variety.
* Gently backfill the holes with the soil mixture and firm the soil around the base of the plants.
4. Water Thoroughly:
* After planting, water the tomato seedlings thoroughly until the water drains out of the drainage holes at the bottom of the bag. This will help settle the soil and ensure that the roots are well-hydrated.
5. Choose a Sunny Location:
* Tomatoes need at least 6-8 hours of sunlight per day to thrive. Choose a sunny location for your tomato sack garden, preferably one that receives morning sun and afternoon shade.
6. Provide Support (Optional):
* If you’re growing indeterminate (vining) tomato varieties, you’ll need to provide support for the plants as they grow. You can use stakes, tomato cages, or even a trellis. Insert the stakes or cages into the bag near the base of the plants and tie the stems to the supports as they grow.
7. Water Regularly:
* Tomatoes need consistent moisture, especially during hot weather. Water your tomato sack garden regularly, checking the soil moisture level daily. The soil should be moist but not soggy. Water deeply, allowing the water to penetrate the entire root zone.
8. Fertilize as Needed:
* Even with slow-release fertilizer, your tomato plants may need additional feeding during the growing season. Monitor the plants for signs of nutrient deficiencies, such as yellowing leaves or stunted growth. If necessary, supplement with a liquid fertilizer specifically formulated for tomatoes, following the package instructions.
9. Prune and Pinch:
* Pruning and pinching can help improve air circulation and encourage fruit production. Remove any suckers (small shoots that grow between the main stem and the branches) to direct the plant’s energy towards fruit development. You can also pinch off the tips of the branches to encourage bushier growth.
10. Protect from Pests and Diseases:
* Keep an eye out for common tomato pests and diseases, such as aphids, whiteflies, tomato hornworms, and early blight. Take action promptly to control any infestations or diseases. You can use organic pest control methods, such as insecticidal soap or neem oil, or choose disease-resistant tomato varieties.
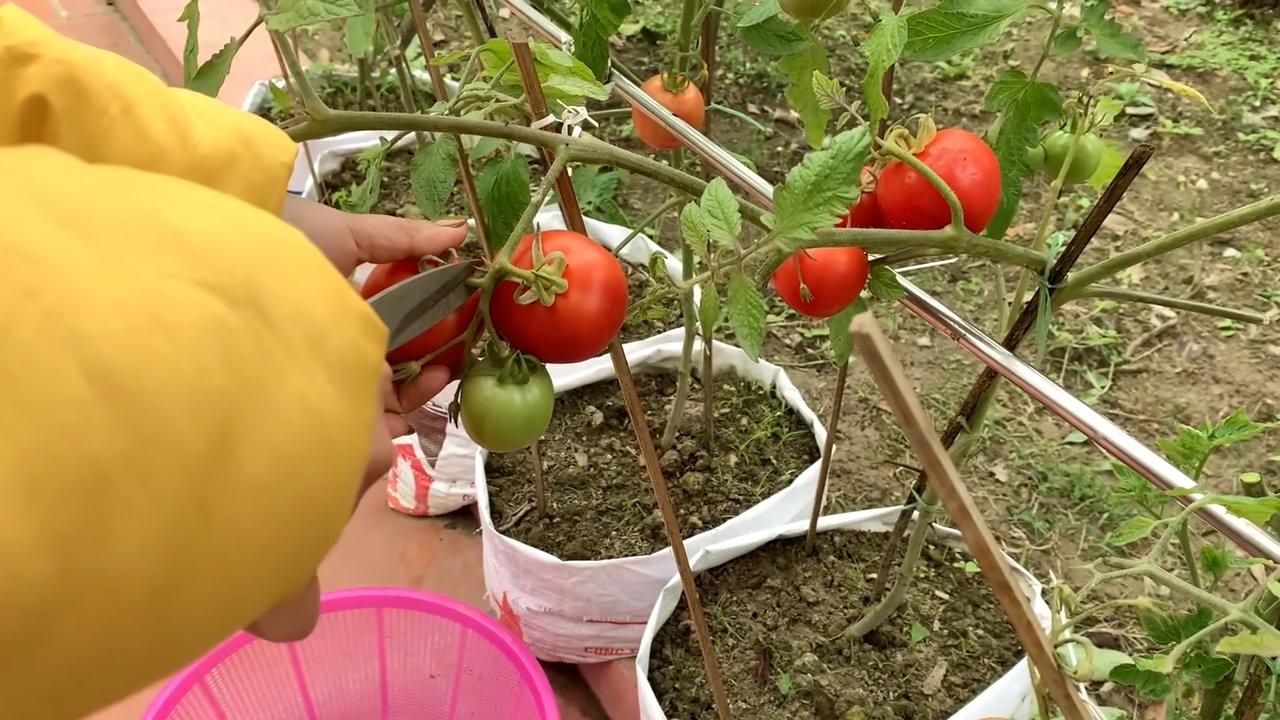
11. Harvest Your Tomatoes:
* The best part! Your tomatoes will be ready to harvest when they are fully colored and slightly soft to the touch. Gently twist the tomatoes off the vine, being careful not to damage the plant. Enjoy your homegrown tomatoes in salads, sauces, sandwiches, or simply eat them fresh off the vine!
Troubleshooting Tips
Even with the best planning, sometimes things don’t go exactly as expected. Here are a few common issues you might encounter and how to address them:
* Yellowing Leaves: This could indicate a nutrient deficiency, overwatering, or underwatering. Check the soil moisture level and fertilize if necessary.
* Blossom End Rot: This is caused by a calcium deficiency and is characterized by a dark, sunken spot on the bottom of the tomato. Ensure consistent watering and consider adding calcium to the soil.
* Pests: Regularly inspect your plants for pests and take action promptly to control any infestations.
* Diseases: Choose disease-resistant tomato varieties and provide good air circulation to prevent diseases.
Choosing the Right Tomato Variety
Selecting the right tomato variety is crucial for success. Here’s a quick guide:
* Determinate Varieties: These are bush-type tomatoes that grow to a certain size and then stop. They are a good choice for sack gardening because they don’t require as much support. Examples include Roma, Celebrity, and Better Bush.
* Indeterminate Varieties: These are vining tomatoes that continue to grow and produce fruit throughout the growing season. They require more support but can yield a larger harvest. Examples include Beefsteak, Brandywine, and Cherry tomatoes.
* Consider your climate: Choose varieties that are well-suited to your climate and growing conditions. Look for varieties that are heat-tolerant, disease-resistant, or early-maturing, depending on your needs.
Maintaining Your Tomato Sack Garden
Once your tomato plants are established, it’s important to maintain your sack garden to ensure a bountiful harvest. Here are a few tips:
* Water deeply and regularly: Tomatoes need consistent moisture, especially during hot weather.
Conclusion
So, there you have it! Tomato sack gardening isn’t just a quirky gardening trend; it’s a genuinely effective and rewarding way to cultivate delicious, homegrown tomatoes, even if you’re short on space or gardening experience. We’ve walked you through the simple steps, highlighted the benefits, and hopefully, inspired you to give it a try.
Why is this a must-try? Because it democratizes gardening. It removes the barriers of needing a large plot of land, specialized equipment, or years of horticultural knowledge. With a simple sack, some soil, a few tomato seedlings, and a sunny spot, you can be well on your way to enjoying the unparalleled taste of vine-ripened tomatoes. Think about it: fresh Caprese salads, vibrant homemade sauces, juicy tomato sandwiches – all grown by you, right outside your door.
But the beauty of tomato sack gardening lies not only in its simplicity but also in its adaptability. Feel free to experiment with different varieties of tomatoes. Cherry tomatoes thrive in sacks, cascading down the sides in a beautiful display. Heirloom varieties, with their unique flavors and colors, can add a touch of gourmet flair to your sack garden. You can even try companion planting by adding herbs like basil or marigolds to the top of the sack to deter pests and enhance the flavor of your tomatoes.
Consider the type of sack you use. While a burlap sack offers a rustic charm, a heavy-duty plastic sack can provide better moisture retention, especially in hotter climates. Just be sure to add drainage holes! You can also explore using grow bags specifically designed for vertical gardening, which often come with built-in drainage and support.
Don’t be afraid to get creative with your setup. If you don’t have a fence to lean the sack against, consider building a simple A-frame support or using a sturdy tomato cage to provide additional stability. The possibilities are endless!
The most important thing is to jump in and give it a go. Tomato sack gardening is a forgiving and rewarding experience. You’ll learn as you go, and even if you encounter a few challenges along the way, the satisfaction of harvesting your own tomatoes will make it all worthwhile.
We are confident that you will find this method of gardening to be both fun and productive. We encourage you to embrace the simplicity and efficiency of tomato sack gardening and experience the joy of growing your own food.
So, grab a sack, some soil, and a few tomato seedlings, and get ready to embark on a gardening adventure. And most importantly, we want to hear about your experience! Share your photos, tips, and challenges with us in the comments below. Let’s build a community of tomato sack gardening enthusiasts and learn from each other. Happy gardening!
Frequently Asked Questions (FAQ)
What kind of tomatoes are best for tomato sack gardening?
The great thing about tomato sack gardening is its versatility. You can grow almost any type of tomato in a sack, but some varieties tend to perform better than others. Determinate varieties, which are bushier and more compact, are often a good choice because they don’t require as much staking or pruning. Cherry tomatoes and other small-fruited varieties also thrive in sacks, as their smaller size makes them less prone to weighing down the plant. Indeterminate varieties, which are vining and continue to grow throughout the season, can also be grown in sacks, but they will require more support and pruning. Consider the size of your sack and the amount of sunlight it receives when choosing your tomato variety. Experimenting with different varieties is part of the fun!
How often should I water my tomato sack garden?
Watering frequency depends on several factors, including the weather, the type of sack you’re using, and the size of your tomato plants. In general, you’ll need to water your tomato sack garden more frequently than you would a traditional garden bed, as the sack can dry out quickly, especially in hot, sunny weather. Check the soil moisture regularly by sticking your finger a few inches into the soil. If it feels dry, it’s time to water. Aim to keep the soil consistently moist but not waterlogged. Overwatering can lead to root rot, so be sure to provide adequate drainage. During hot summer months, you may need to water your tomato sack garden daily, or even twice a day.
What kind of soil should I use for tomato sack gardening?
The quality of your soil is crucial for the success of your tomato sack garden. Use a well-draining potting mix that is rich in organic matter. Avoid using garden soil, as it can be too heavy and compact, which can restrict root growth and drainage. A good potting mix will provide the necessary nutrients and aeration for your tomato plants to thrive. You can also amend your potting mix with compost or other organic materials to further improve its fertility and drainage. Consider adding a slow-release fertilizer to provide your tomato plants with a steady supply of nutrients throughout the growing season.
How do I fertilize my tomato sack garden?
Tomatoes are heavy feeders, so regular fertilization is essential for optimal growth and fruit production. You can use a variety of fertilizers, including organic and synthetic options. A balanced fertilizer with an NPK ratio of 10-10-10 or 14-14-14 is a good starting point. Follow the instructions on the fertilizer package carefully, and avoid over-fertilizing, as this can damage your plants. You can also use liquid fertilizers or compost tea to provide your tomato plants with a quick boost of nutrients. Apply fertilizer every 2-3 weeks, or as needed, based on the appearance of your plants. Yellowing leaves can indicate a nutrient deficiency.
How do I prevent pests and diseases in my tomato sack garden?
Prevention is key when it comes to pests and diseases in your tomato sack garden. Start by choosing disease-resistant tomato varieties. Inspect your plants regularly for signs of pests or diseases, such as aphids, whiteflies, or tomato hornworms. Hand-picking pests is often the most effective way to control them. You can also use insecticidal soap or neem oil to control pests. To prevent diseases, ensure good air circulation around your plants and avoid overhead watering, which can create a humid environment that promotes fungal growth. Remove any diseased leaves or stems promptly to prevent the spread of disease. Companion planting with herbs like basil or marigolds can also help to deter pests and diseases.
What do I do if my tomato plants get too tall for the sack?
If your tomato plants start to outgrow the sack, you’ll need to provide additional support. You can use tomato cages, stakes, or trellises to support the plants and prevent them from falling over. Prune your tomato plants regularly to remove suckers (the small shoots that grow between the main stem and the branches) to encourage air circulation and fruit production. You can also pinch off the top of the plant to limit its growth and encourage it to focus on producing fruit.
Can I reuse the soil from my tomato sack garden next year?
While you can technically reuse the soil from your tomato sack garden, it’s generally recommended to replace it with fresh soil each year. Tomato plants deplete the soil of nutrients, and reusing the soil can increase the risk of pests and diseases. If you do choose to reuse the soil, be sure to amend it with plenty of compost or other organic matter to replenish the nutrients. You can also sterilize the soil by baking it in the oven or solarizing it in the sun to kill any pests or diseases. However, replacing the soil is the easiest and most effective way to ensure a healthy and productive tomato sack garden.
What if I don’t have a sunny spot for my tomato sack garden?
Tomatoes need at least 6-8 hours of sunlight per day to thrive. If you don’t have a sunny spot in your yard, you can try using grow lights to supplement the sunlight. Place your tomato sack garden under the grow lights for at least 8 hours per day. You can also try moving your tomato sack garden to different locations throughout the day to maximize its exposure to sunlight. However, if you consistently lack sufficient sunlight, you may want to consider growing other vegetables that are more shade-tolerant.
Leave a Comment