

Strange kitchen tricks – sounds intriguing, right? I bet you’re picturing some mad scientist concoctions or maybe a culinary magic show. Well, you’re not entirely wrong! For centuries, resourceful cooks and homemakers have been passing down quirky, unconventional methods to solve everyday kitchen dilemmas. Think of it as a secret society of culinary ninjas, armed with baking soda and vinegar instead of swords.
These aren’t your grandma’s cooking tips (well, maybe some are!). We’re diving deep into the world of strange kitchen tricks that can save you time, money, and a whole lot of frustration. From reviving stale bread with a simple water trick to using dental floss for perfectly slicing cakes, these hacks are designed to make your life easier and your kitchen adventures more enjoyable.
Why do you need these DIY tricks? Because let’s face it, we all have those moments in the kitchen where we feel utterly defeated. The cake sticks to the pan, the avocado refuses to ripen, and the garlic cloves mock us with their stubborn skins. These are the times when a little bit of kitchen wizardry can turn a disaster into a triumph. So, grab your apron, sharpen your curiosity, and let’s unlock the secrets of these amazing kitchen hacks together!

Unlock Kitchen Magic: Weird Tricks That Actually Work!
Hey there, fellow kitchen adventurers! I’m always on the lookout for ways to make cooking and cleaning easier, faster, and, let’s be honest, a little more fun. I’ve stumbled upon some seriously strange kitchen tricks that sound totally bonkers, but trust me, they actually work! Get ready to have your mind blown and your kitchen game elevated.
Tackling Stubborn Jar Lids
We’ve all been there: wrestling with a jar lid that just won’t budge. Before you resort to brute force (and potentially a broken jar), try these tricks:
* The Rubber Band Grip: Wrap a thick rubber band around the edge of the jar lid. This provides extra grip and leverage, making it easier to twist open.
* The Spoon Tap: Gently tap the edge of the lid all the way around with a metal spoon. This can help break the seal.
* The Hot Water Trick: Run hot water over the lid for about 30 seconds. The heat expands the metal, making it easier to open. (Be careful not to get water inside the jar!)
* The Hair Dryer Method: Use a hair dryer on a low setting to gently heat the lid. Again, the heat will help expand the metal.
Step-by-Step: The Rubber Band Grip
1. Find a thick rubber band. The wider, the better.
2. Wrap the rubber band tightly around the edge of the jar lid. Make sure it’s secure.
3. Grip the jar firmly with one hand and the lid with the rubber band-covered hand.
4. Twist the lid counterclockwise. You should feel it give way more easily.
Step-by-Step: The Spoon Tap
1. Grab a sturdy metal spoon.
2. Hold the jar firmly on a stable surface.
3. Gently tap the edge of the lid all the way around with the spoon. Don’t hit it too hard, just enough to create a slight vibration.
4. Try twisting the lid open.
Step-by-Step: The Hot Water Trick
1. Turn on your hot water tap until the water is hot but not scalding.
2. Hold the jar upside down under the running hot water, focusing on the lid.
3. Let the hot water run over the lid for about 30 seconds.
4. Dry the jar and lid thoroughly.
5. Try twisting the lid open.
Step-by-Step: The Hair Dryer Method
1. Plug in your hair dryer and set it to a low heat setting.
2. Hold the hair dryer a few inches away from the lid.
3. Move the hair dryer around the lid, heating it evenly for about 30 seconds.
4. Try twisting the lid open.
Preventing Avocado Browning
Avocados are delicious, but they brown so quickly! Here are a few weird ways to keep them green:
* The Onion Trick: Store cut avocado in an airtight container with a chunk of red onion. The sulfur compounds in the onion help prevent oxidation.
* The Lemon Juice Bath: Brush the cut surface of the avocado with lemon or lime juice. The citric acid acts as an antioxidant.
* The Water Submersion: Submerge the cut avocado in a container of water. Make sure the water covers the entire cut surface.
* The Olive Oil Seal: Brush the cut surface of the avocado with a thin layer of olive oil. This creates a barrier against the air.
Step-by-Step: The Onion Trick
1. Cut your avocado as needed.
2. Place the remaining avocado half (or slices) in an airtight container.
3. Place a chunk of red onion (about 1/4 of an onion) in the container with the avocado.
4. Seal the container tightly and store it in the refrigerator.
Step-by-Step: The Lemon Juice Bath
1. Cut your avocado as needed.
2. Squeeze a small amount of lemon or lime juice onto the cut surface of the avocado.
3. Use a brush or your fingers to spread the juice evenly over the surface.
4. Wrap the avocado tightly in plastic wrap or store it in an airtight container.
Step-by-Step: The Water Submersion
1. Cut your avocado as needed.
2. Place the remaining avocado half (or slices) in a container.
3. Fill the container with enough water to completely cover the cut surface of the avocado.
4. Cover the container and store it in the refrigerator.
5. When you’re ready to use the avocado, drain the water and pat it dry.
Step-by-Step: The Olive Oil Seal
1. Cut your avocado as needed.
2. Brush the cut surface of the avocado with a thin layer of olive oil.
3. Wrap the avocado tightly in plastic wrap or store it in an airtight container.
Reviving Stale Bread
Don’t toss that stale bread! You can bring it back to life with these simple tricks:
* The Water Spray: Lightly spray the bread with water and bake it in a preheated oven.
* The Steamer Method: Steam the bread over a pot of boiling water.
Step-by-Step: The Water Spray
1. Preheat your oven to 350°F (175°C).
2. Lightly spray the stale bread with water. Don’t soak it, just dampen the surface.
3. Wrap the bread in aluminum foil.
4. Bake the bread in the preheated oven for 5-10 minutes, or until it’s soft and warm.
Step-by-Step: The Steamer Method
1. Fill a pot with about an inch of water and bring it to a boil.
2. Place a steamer basket over the pot.
3. Place the stale bread in the steamer basket.
4. Cover the pot and steam the bread for 5-10 minutes, or until it’s soft and warm.
Peeling Hard-Boiled Eggs Easily
Peeling hard-boiled eggs can be a frustrating experience. Here’s how to make it a breeze:
* The Ice Bath: Immediately after boiling, transfer the eggs to an ice bath.
* The Baking Soda Trick: Add baking soda to the boiling water.
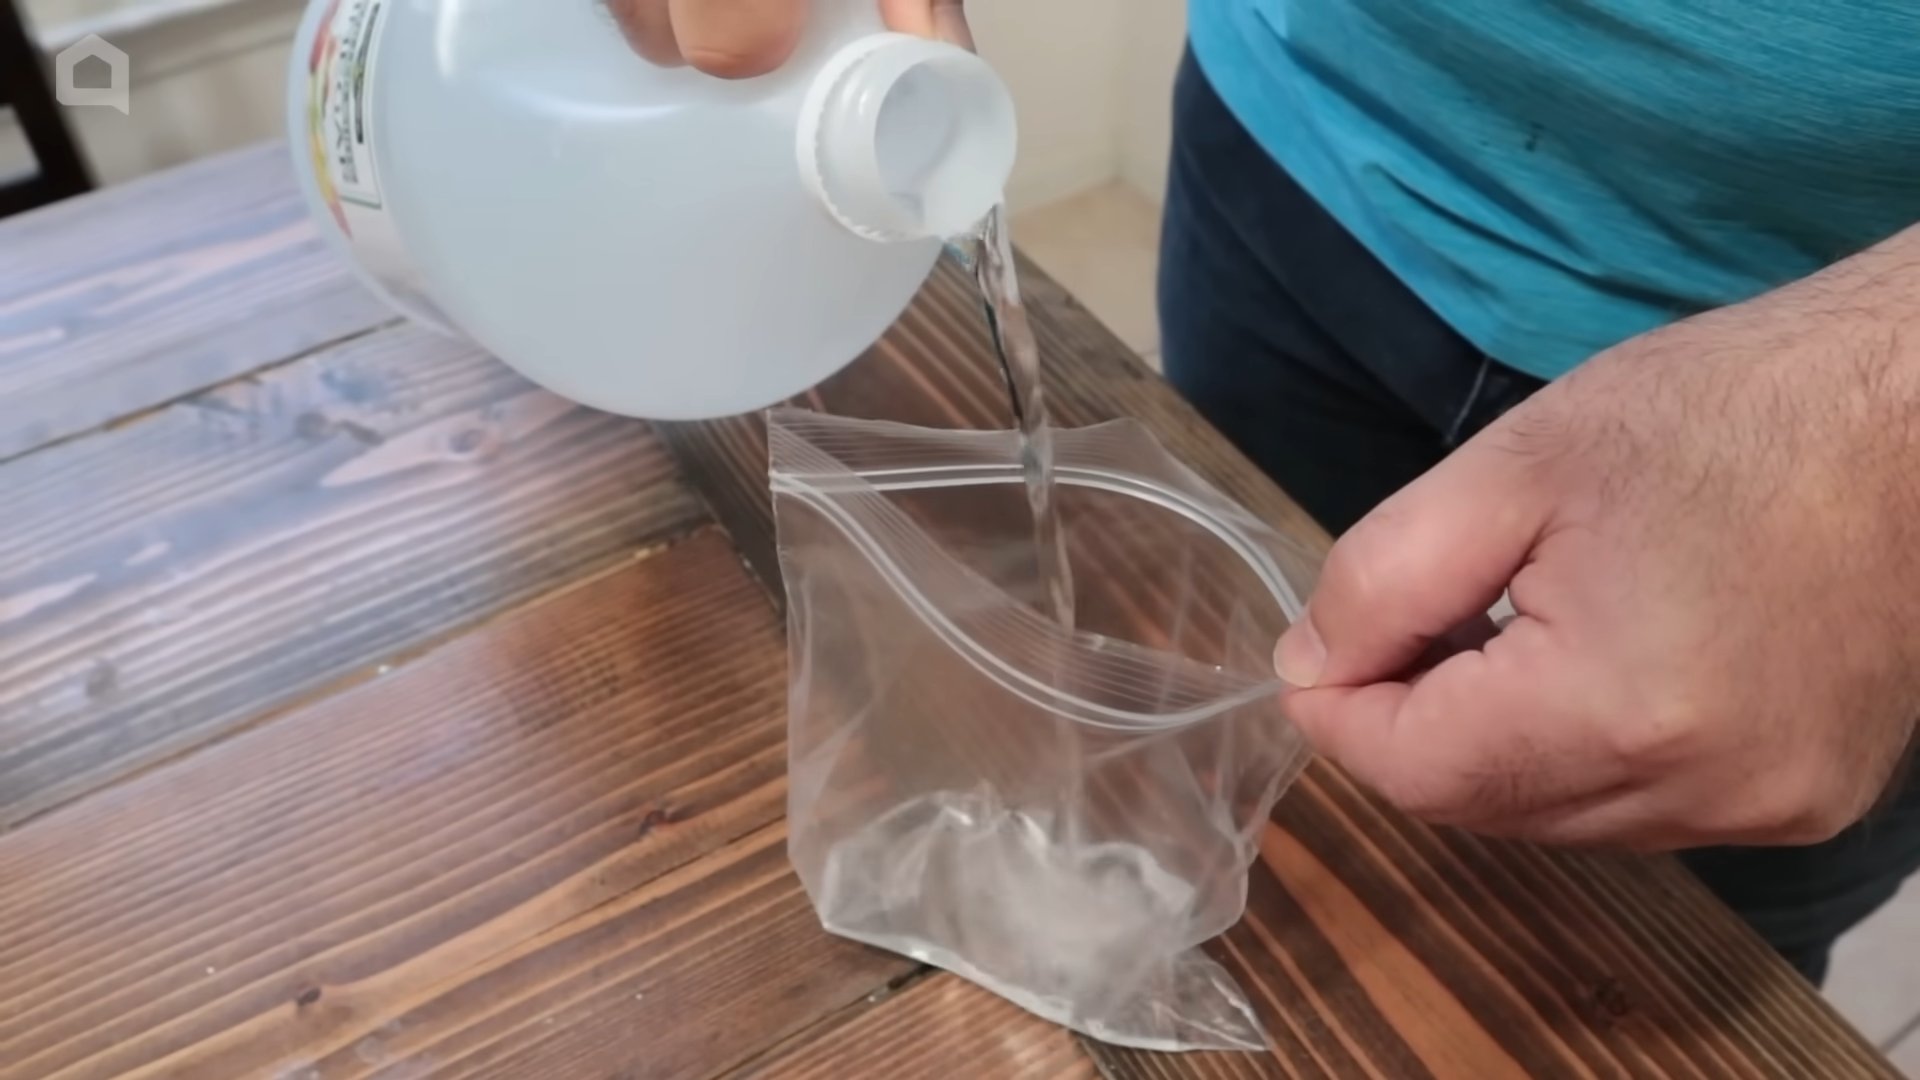
* The Shake It Up Method: Place the cooked egg in a container with a little water, seal it, and shake vigorously.
Step-by-Step: The Ice Bath
1. Boil your eggs as usual.
2. Prepare an ice bath by filling a bowl with ice and water.
3. As soon as the eggs are done boiling, transfer them directly to the ice bath.
4. Let the eggs sit in the ice bath for at least 5 minutes.
5. Peel the eggs under cold running water.
Step-by-Step: The Baking Soda Trick
1. Fill a pot with water and bring it to a boil.
2. Add about 1/2 teaspoon of baking soda to the boiling water.
3. Gently place the eggs in the boiling water.
4. Boil the eggs for your desired time.
5. Transfer the eggs to an ice bath after boiling.
6. Peel the eggs under cold running water.
Step-by-Step: The Shake It Up Method
1. Boil your eggs as usual and let them cool slightly.
2. Place one cooked egg in a container (like a small Tupperware or a glass) with about 1/4 cup of water.
3. Seal the container tightly.
4. Shake the container vigorously for about 10-15 seconds.
5. Carefully remove the egg and peel it. The shell should come off easily.
Keeping Herbs Fresh Longer
Fresh herbs add so much flavor to dishes, but they wilt quickly. Try these tricks to extend their lifespan:
* The Flower Bouquet Method: Trim the stems of the herbs and place them in a glass of water, like a bouquet of flowers.
* The Damp Paper Towel Wrap: Wrap the herbs in a damp paper towel and store them in a plastic bag in the refrigerator.
Step-by-Step: The Flower Bouquet Method
1. Trim the stems of the herbs, removing any wilted or damaged leaves.
2. Fill a glass or jar with about an inch of water.
Hey there, fellow kitchen adventurers! I’m always on the lookout for ways to make cooking and cleaning easier, faster, and, let’s be honest, a little more fun. I’ve stumbled upon some seriously strange kitchen tricks that sound totally bonkers, but trust me, they actually work! Get ready to have your mind blown and your kitchen game elevated.
Tackling Stubborn Jar Lids
We’ve all been there: wrestling with a jar lid that just won’t budge. Before you resort to brute force (and potentially a broken jar), try these tricks:
* The Rubber Band Grip: Wrap a thick rubber band around the edge of the jar lid. This provides extra grip and leverage, making it easier to twist open.
* The Spoon Tap: Gently tap the edge of the lid all the way around with a metal spoon. This can help break the seal.
* The Hot Water Trick: Run hot water over the lid for about 30 seconds. The heat expands the metal, making it easier to open. (Be careful not to get water inside the jar!)
* The Hair Dryer Method: Use a hair dryer on a low setting to gently heat the lid. Again, the heat will help expand the metal.
Step-by-Step: The Rubber Band Grip
1. Find a thick rubber band. The wider, the better.
2. Wrap the rubber band tightly around the edge of the jar lid. Make sure it’s secure.
3. Grip the jar firmly with one hand and the lid with the rubber band-covered hand.
4. Twist the lid counterclockwise. You should feel it give way more easily.
Step-by-Step: The Spoon Tap
1. Grab a sturdy metal spoon.
2. Hold the jar firmly on a stable surface.
3. Gently tap the edge of the lid all the way around with the spoon. Don’t hit it too hard, just enough to create a slight vibration.
4. Try twisting the lid open.
Step-by-Step: The Hot Water Trick
1. Turn on your hot water tap until the water is hot but not scalding.
2. Hold the jar upside down under the running hot water, focusing on the lid.
3. Let the hot water run over the lid for about 30 seconds.
4. Dry the jar and lid thoroughly.
5. Try twisting the lid open.
Step-by-Step: The Hair Dryer Method
1. Plug in your hair dryer and set it to a low heat setting.
2. Hold the hair dryer a few inches away from the lid.
3. Move the hair dryer around the lid, heating it evenly for about 30 seconds.
4. Try twisting the lid open.
Preventing Avocado Browning
Avocados are delicious, but they brown so quickly! Here are a few weird ways to keep them green:
* The Onion Trick: Store cut avocado in an airtight container with a chunk of red onion. The sulfur compounds in the onion help prevent oxidation.
* The Lemon Juice Bath: Brush the cut surface of the avocado with lemon or lime juice. The citric acid acts as an antioxidant.
* The Water Submersion: Submerge the cut avocado in a container of water. Make sure the water covers the entire cut surface.
* The Olive Oil Seal: Brush the cut surface of the avocado with a thin layer of olive oil. This creates a barrier against the air.
Step-by-Step: The Onion Trick
1. Cut your avocado as needed.
2. Place the remaining avocado half (or slices) in an airtight container.
3. Place a chunk of red onion (about 1/4 of an onion) in the container with the avocado.
4. Seal the container tightly and store it in the refrigerator.
Step-by-Step: The Lemon Juice Bath
1. Cut your avocado as needed.
2. Squeeze a small amount of lemon or lime juice onto the cut surface of the avocado.
3. Use a brush or your fingers to spread the juice evenly over the surface.
4. Wrap the avocado tightly in plastic wrap or store it in an airtight container.
Step-by-Step: The Water Submersion
1. Cut your avocado as needed.
2. Place the remaining avocado half (or slices) in a container.
3. Fill the container with enough water to completely cover the cut surface of the avocado.
4. Cover the container and store it in the refrigerator.
5. When you’re ready to use the avocado, drain the water and pat it dry.
Step-by-Step: The Olive Oil Seal
1. Cut your avocado as needed.
2. Brush the cut surface of the avocado with a thin layer of olive oil.
3. Wrap the avocado tightly in plastic wrap or store it in an airtight container.
Reviving Stale Bread
Don’t toss that stale bread! You can bring it back to life with these simple tricks:
* The Water Spray: Lightly spray the bread with water and bake it in a preheated oven.
* The Steamer Method: Steam the bread over a pot of boiling water.
Step-by-Step: The Water Spray
1. Preheat your oven to 350°F (175°C).
2. Lightly spray the stale bread with water. Don’t soak it, just dampen the surface.
3. Wrap the bread in aluminum foil.
4. Bake the bread in the preheated oven for 5-10 minutes, or until it’s soft and warm.
Step-by-Step: The Steamer Method
1. Fill a pot with about an inch of water and bring it to a boil.
2. Place a steamer basket over the pot.
3. Place the stale bread in the steamer basket.
4. Cover the pot and steam the bread for 5-10 minutes, or until it’s soft and warm.
Peeling Hard-Boiled Eggs Easily
Peeling hard-boiled eggs can be a frustrating experience. Here’s how to make it a breeze:
* The Ice Bath: Immediately after boiling, transfer the eggs to an ice bath.
* The Baking Soda Trick: Add baking soda to the boiling water.
* The Shake It Up Method: Place the cooked egg in a container with a little water, seal it, and shake vigorously.
Step-by-Step: The Ice Bath
1. Boil your eggs as usual.
2. Prepare an ice bath by filling a bowl with ice and water.
3. As soon as the eggs are done boiling, transfer them directly to the ice bath.
4. Let the eggs sit in the ice bath for at least 5 minutes.
5. Peel the eggs under cold running water.
Step-by-Step: The Baking Soda Trick
1. Fill a pot with water and bring it to a boil.
2. Add about 1/2 teaspoon of baking soda to the boiling water.
3. Gently place the eggs in the boiling water.
4. Boil the eggs for your desired time.
5. Transfer the eggs to an ice bath after boiling.
6. Peel the eggs under cold running water.
Step-by-Step: The Shake It Up Method
1. Boil your eggs as usual and let them cool slightly.
2. Place one cooked egg in a container (like a small Tupperware or a glass) with about 1/4 cup of water.
3. Seal the container tightly.
4. Shake the container vigorously for about 10-15 seconds.
5. Carefully remove the egg and peel it. The shell should come off easily.
Keeping Herbs Fresh Longer
Fresh herbs add so much flavor to dishes, but they wilt quickly. Try these tricks to extend their lifespan:
* The Flower Bouquet Method: Trim the stems of the herbs and place them in a glass of water, like a bouquet of flowers.
* The Damp Paper Towel Wrap: Wrap the herbs in a damp paper towel and store them in a plastic bag in the refrigerator.
Step-by-Step: The Flower Bouquet Method
1. Trim the stems of the herbs, removing any wilted or damaged leaves.
2. Fill a glass or jar with about an inch of water.
3. Place the herbs in the water, making sure the stems are submerged.
4. Cover the herbs loosely with a plastic bag.
5. Store the herbs in the refrigerator.
6. Change the water every 1-2 days.
Step-by-Step: The Damp Paper Towel Wrap
1. Rinse
Conclusion
So, there you have it! This seemingly strange kitchen trick, transforming ordinary ingredients into something extraordinary, is more than just a novelty; it’s a game-changer. We’ve explored how a simple tweak in your preparation can unlock a whole new level of flavor and texture, elevating your everyday cooking to gourmet status. The beauty of this method lies not only in its simplicity but also in its versatility. It’s a technique that can be adapted and personalized to suit your own tastes and preferences.
Why is this a must-try? Because it’s efficient, cost-effective, and, most importantly, it delivers exceptional results. Imagine impressing your friends and family with dishes that taste like they came straight from a professional kitchen, all thanks to this one simple secret. It’s about maximizing flavor with minimal effort, a concept that resonates with anyone who loves to cook but doesn’t always have hours to spend in the kitchen.
But the real magic happens when you start experimenting. Think about the possibilities! You could try infusing different herbs and spices into your base ingredient, creating unique flavor profiles that complement your favorite dishes. Perhaps you’re a fan of spicy food? Add a pinch of chili flakes or a dash of hot sauce to the mix. Or maybe you prefer a more subtle, aromatic flavor? A sprig of rosemary or a few cloves of garlic could do the trick.
The variations are endless, limited only by your imagination. Consider using different types of oils or vinegars to create unique marinades or dressings. You could even try applying this technique to other ingredients, such as fruits or vegetables, to create unexpected and delicious flavor combinations. The key is to be adventurous and don’t be afraid to experiment.
We’re confident that once you try this strange kitchen trick, you’ll be amazed by the results. It’s a simple yet effective way to enhance the flavor and texture of your food, making your meals more enjoyable and satisfying. So, go ahead, give it a try! We encourage you to step outside your comfort zone and embrace this unconventional approach to cooking.
And don’t forget to share your experiences with us! We’d love to hear about your successes, your failures, and any creative variations you come up with. Share your photos, your recipes, and your stories in the comments section below. Let’s create a community of adventurous cooks who are passionate about exploring new and exciting ways to elevate their culinary creations. After all, cooking is about sharing, learning, and inspiring each other. So, let’s get cooking!
Frequently Asked Questions (FAQ)
What exactly *is* this “strange kitchen trick” and what ingredients does it work best with?
The “strange kitchen trick” we’re referring to is a method of pre-treating ingredients, often involving a specific combination of soaking, marinating, or even a unique cooking technique, to drastically improve their flavor and texture. While the specific trick varies depending on the article’s focus, the principle remains the same: a small change in preparation yields significant results.
This trick often works wonders with ingredients like beans (reducing cooking time and improving digestibility), meats (tenderizing and infusing flavor), and even vegetables (enhancing sweetness and reducing bitterness). The best ingredients are those that tend to be bland or tough on their own, as the trick helps to unlock their hidden potential.
Is this trick safe? Are there any potential health concerns?
Safety is always paramount. The specific safety considerations depend on the ingredients and the method used in the trick. Generally, as long as you’re using fresh, high-quality ingredients and following proper food handling procedures, the trick should be perfectly safe.
However, it’s crucial to be aware of potential allergens or sensitivities. For example, if the trick involves marinating meat in a citrus-based marinade, individuals with citrus allergies should avoid it. Similarly, if the trick involves soaking beans, be sure to discard the soaking water to remove any potentially harmful compounds.
Always research the specific ingredients and techniques involved in the trick to ensure they are safe for you and your family. If you have any concerns, consult with a healthcare professional or a registered dietitian.
How long does this trick take to perform? Is it time-consuming?
One of the great things about this trick is that it doesn’t have to be time-consuming. While some steps, like marinating, may require a few hours, the actual hands-on time is usually minimal. Most of the work is done passively, allowing you to focus on other tasks while the ingredients are being pre-treated.
The total time required will vary depending on the specific trick and the ingredients involved. However, in most cases, the extra time is well worth it, as the improved flavor and texture will elevate your dishes to a whole new level.
Can I adapt this trick to suit my dietary restrictions or preferences?
Absolutely! The beauty of this trick is its versatility. It can be easily adapted to suit a wide range of dietary restrictions and preferences. For example, if you’re vegetarian or vegan, you can apply the trick to plant-based proteins like tofu or tempeh. If you’re gluten-free, you can use gluten-free marinades or sauces.
You can also adjust the ingredients and techniques to suit your own taste preferences. If you prefer a spicier flavor, add more chili flakes or hot sauce. If you prefer a sweeter flavor, add a touch of honey or maple syrup. The possibilities are endless!
What if the trick doesn’t work for me? What could I be doing wrong?
If you’re not seeing the desired results, don’t give up! There are a few things you can check to troubleshoot the problem.
First, make sure you’re using the correct ingredients and following the instructions carefully. Even a small deviation from the recipe can affect the outcome.
Second, consider the quality of your ingredients. Using fresh, high-quality ingredients will always yield better results.
Third, pay attention to the timing. Marinating for too long or too short can both negatively impact the flavor and texture of your food.
Finally, don’t be afraid to experiment. Cooking is a process of trial and error. If something doesn’t work the first time, try tweaking the recipe or technique until you find what works best for you.
How does this “strange kitchen trick” compare to other similar methods? What makes it unique?
While there may be other methods that achieve similar results, this “strange kitchen trick” often stands out due to its simplicity and effectiveness. It’s a technique that can be easily incorporated into your everyday cooking routine, without requiring any special equipment or ingredients.
What makes it unique is often the specific combination of ingredients and techniques used. It’s a carefully crafted method that has been designed to maximize flavor and texture, while minimizing effort.
Can I use this trick for meal prepping?
Yes, absolutely! This trick is perfect for meal prepping. By pre-treating your ingredients ahead of time, you can save time and effort during the week. For example, you can marinate your meat or soak your beans on the weekend, and then simply cook them when you’re ready to eat. This is a great way to ensure that you always have delicious and healthy meals on hand.
How do I store ingredients after applying this trick?
Proper storage is essential to maintain the quality and safety of your food. In general, you should store pre-treated ingredients in the refrigerator in airtight containers. Be sure to label the containers with the date and contents.
The storage time will vary depending on the ingredients and the method used. However, as a general rule, you should consume pre-treated ingredients within a few days.
Where can I find more information about this “strange kitchen trick” and other similar techniques?
There are many resources available online and in libraries that can provide you with more information about this trick and other similar techniques. You can search for recipes, articles, and videos that demonstrate the trick in action. You can also consult with cookbooks and culinary experts to learn more about the science behind cooking.
Don’t be afraid to explore and experiment. The more you learn about cooking, the more confident and creative you’ll become in the kitchen.


Leave a Comment