

Prolong Pumpkin Harvest: Ever feel that pang of sadness when your beautiful pumpkins start to soften and decay just as the autumn chill sets in? I know I have! After all that hard work nurturing those vibrant orange globes, it’s disheartening to see them fade before their time. But don’t despair, fellow garden enthusiasts! This isn’t just about saving a few pumpkins; it’s about extending the joy of the season and maximizing the fruits (or rather, vegetables!) of your labor.
Pumpkins have a rich history, deeply intertwined with harvest festivals and traditions around the world. From ancient indigenous cultures using them as a vital food source to the modern-day jack-o’-lanterns that adorn our porches, pumpkins hold a special place in our hearts. But beyond the sentimental value, a bountiful pumpkin harvest can be incredibly rewarding, providing delicious ingredients for pies, soups, and countless other culinary creations.
That’s why I’m so excited to share these simple yet effective DIY tricks to prolong pumpkin harvest. Whether you’re a seasoned gardener or just starting out, these hacks will help you keep your pumpkins looking their best for weeks, even months, longer. Imagine enjoying your homegrown pumpkins well into the holiday season! We’ll cover everything from proper harvesting techniques to storage solutions, ensuring your pumpkins stay firm, vibrant, and ready for carving, cooking, or simply adding a touch of autumnal charm to your home. Let’s get started and make this pumpkin season last!
Prolonging Your Pumpkin Harvest: A DIY Guide to Keeping Your Pumpkins Fresh Longer
Hey there, pumpkin enthusiasts! I know how disappointing it can be to see your hard-earned pumpkins start to rot before you even get a chance to carve them or bake that delicious pie. But don’t worry, I’m here to share my tried-and-true methods for prolonging your pumpkin harvest and keeping those gourds looking their best for weeks, even months!
This guide will walk you through everything from harvesting techniques to storage solutions, ensuring your pumpkins stay vibrant and ready for all your autumnal adventures. Let’s get started!
Harvesting Your Pumpkins for Longevity
The key to a long-lasting pumpkin starts way before you even think about storage. Proper harvesting is crucial!
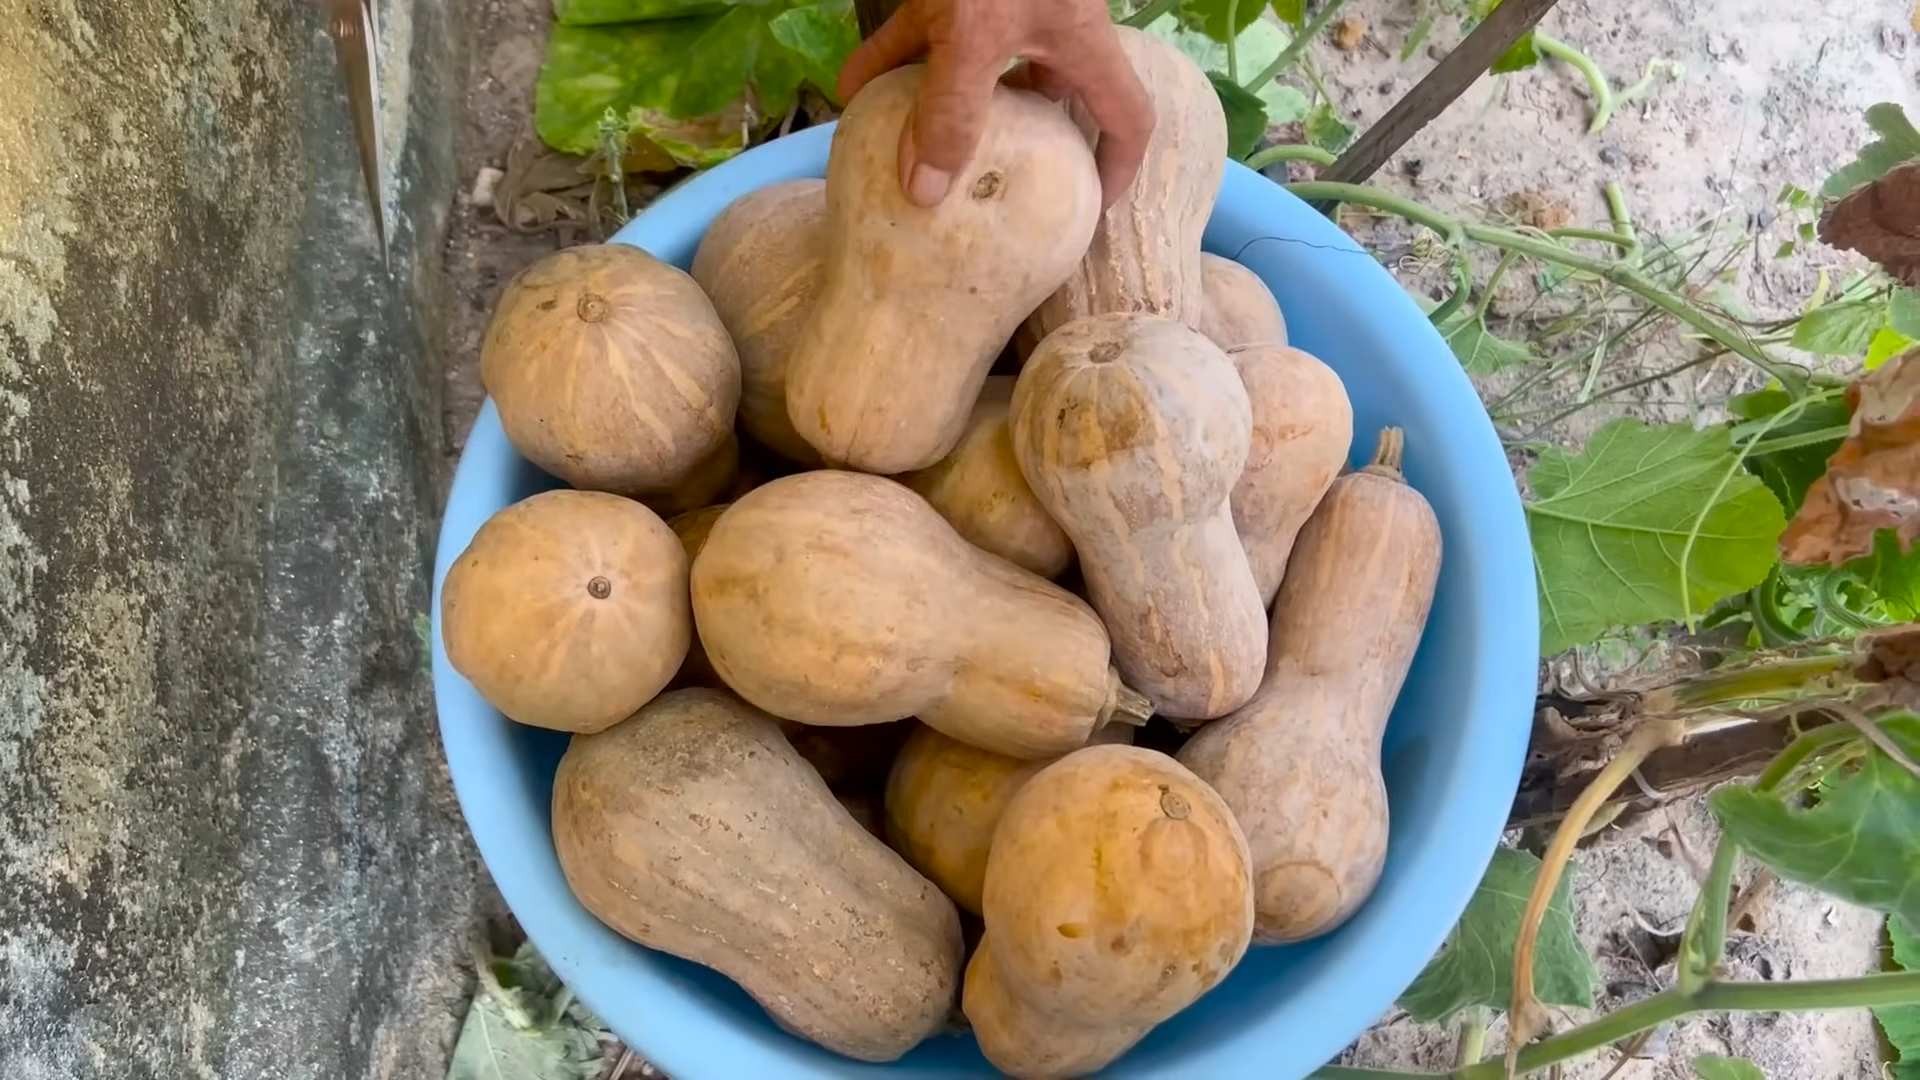
* Timing is Everything: Don’t rush the process! Wait until your pumpkins are fully mature. This means the skin should be hard and resistant to scratching with your fingernail. The stem should also be dry and starting to turn brown.
* Handle with Care: Pumpkins bruise easily, so treat them like delicate babies. Avoid dropping them or tossing them around.
* Leave the Stem: This is super important! Always cut the pumpkin from the vine, leaving at least 3-4 inches of stem attached. The stem acts as a barrier against bacteria and fungi, preventing rot.
* Harvest on a Dry Day: Avoid harvesting after rain or when the pumpkins are wet. Moisture is the enemy!
* Inspect for Damage: Before bringing your pumpkins inside, give them a thorough inspection. Look for any cuts, bruises, soft spots, or signs of insect damage. Damaged pumpkins are more likely to rot quickly and should be used first.
Step-by-Step Harvesting Instructions
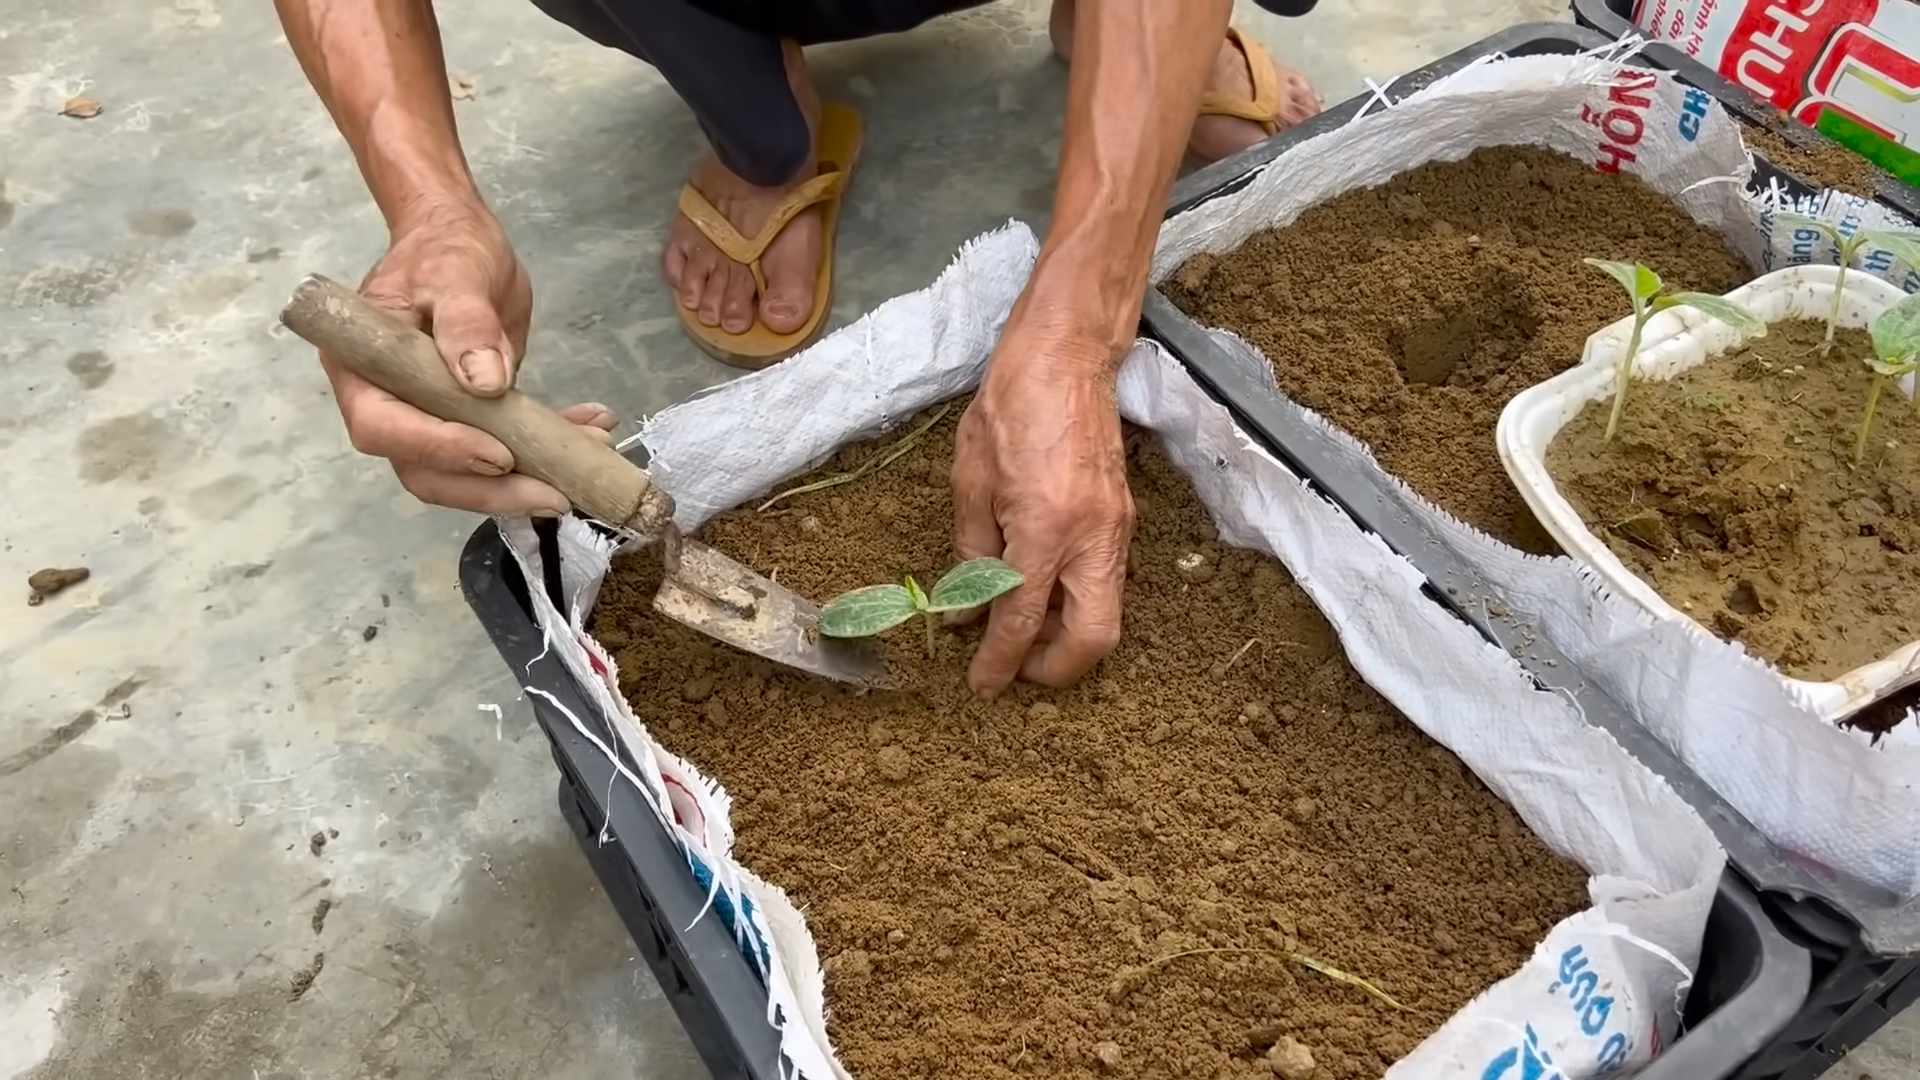
1. Gather Your Supplies: You’ll need a sharp knife or pruning shears, gloves (optional but recommended), and a clean tarp or blanket to place your pumpkins on.
2. Choose Your Pumpkin: Select a pumpkin that meets the maturity criteria mentioned above – hard skin, dry stem, and vibrant color.
3. Cut the Stem: Using your knife or shears, carefully cut the stem, leaving at least 3-4 inches attached to the pumpkin. Make a clean cut to avoid jagged edges.
4. Gently Lift and Place: Carefully lift the pumpkin by its base (not the stem!) and gently place it on your tarp or blanket.
5. Inspect and Clean: Give the pumpkin a final inspection for any damage. If it’s dirty, gently wipe it clean with a dry cloth. Avoid using water unless absolutely necessary.
6. Repeat: Repeat steps 2-5 for all your mature pumpkins.
Curing Your Pumpkins: The Secret to Long-Term Storage
Curing is a process that hardens the pumpkin’s skin and helps to heal any minor scratches or abrasions. It’s like giving your pumpkins a protective shield!
* Why Cure?: Curing significantly extends the shelf life of your pumpkins by reducing moisture loss and preventing fungal infections.
* Ideal Conditions: The best conditions for curing are warm, dry, and well-ventilated. Aim for temperatures between 80-85°F (27-29°C) and a humidity level of around 50-75%.
* Sunlight is Key: Expose your pumpkins to direct sunlight during the curing process. This helps to harden the skin and kill any surface pathogens.
* Duration: Cure your pumpkins for 10-14 days.
Step-by-Step Curing Instructions
1. Choose a Location: Find a sunny, well-ventilated spot outdoors. A patio, deck, or even a driveway can work well.
2. Prepare the Surface: Place a tarp or blanket on the ground to protect your pumpkins from direct contact with the surface.
3. Arrange the Pumpkins: Arrange your pumpkins in a single layer, making sure they don’t touch each other. This allows for good air circulation.
4. Sun Exposure: Expose the pumpkins to direct sunlight for at least 6-8 hours per day.
5. Turning (Optional): If possible, turn your pumpkins every few days to ensure even sun exposure on all sides.
6. Monitor the Weather: If rain is expected, cover your pumpkins with a tarp to protect them from excess moisture.
7. Check for Rot: Regularly inspect your pumpkins for any signs of rot or mold. Remove any affected pumpkins immediately to prevent the spread of disease.
8. Completion: After 10-14 days, your pumpkins should be cured. The skin will be noticeably harder and more resistant to scratching.
Storing Your Cured Pumpkins: Creating the Perfect Environment
Now that your pumpkins are harvested and cured, it’s time to store them properly. The goal is to create an environment that is cool, dry, and well-ventilated.
* Ideal Storage Conditions: The ideal storage temperature for pumpkins is between 50-60°F (10-15°C) with a humidity level of around 50-75%.
* Avoid Freezing: Never store pumpkins in freezing temperatures, as this will damage the flesh and cause them to rot quickly.
* Ventilation is Crucial: Good air circulation is essential to prevent the growth of mold and mildew.
* Elevate Your Pumpkins: Store your pumpkins on shelves or pallets to allow for air circulation underneath.
* Single Layer Storage: Avoid stacking pumpkins on top of each other, as this can cause bruising and restrict airflow.
* Regular Inspection: Check your pumpkins regularly for any signs of rot or mold. Remove any affected pumpkins immediately.
Step-by-Step Storage Instructions
1. Choose a Storage Location: Select a cool, dry, and well-ventilated location. A basement, garage, or shed can work well. Avoid storing pumpkins in direct sunlight or near sources of heat.
2. Prepare the Storage Area: Clean the storage area thoroughly to remove any dirt, debris, or potential sources of mold.
3. Elevate the Pumpkins: Place shelves or pallets in the storage area to elevate the pumpkins off the ground.
4. Arrange the Pumpkins: Arrange the pumpkins in a single layer on the shelves or pallets, making sure they don’t touch each other.
5. Ventilation: Ensure good air circulation in the storage area. You can use a fan to improve airflow if necessary.
6. Monitor Temperature and Humidity: Use a thermometer and hygrometer to monitor the temperature and humidity in the storage area. Adjust as needed to maintain the ideal conditions.
7. Regular Inspection: Check your pumpkins regularly for any signs of rot or mold. Remove any affected pumpkins immediately.
8. Rotation (Optional): If you have a large number of pumpkins, consider rotating them periodically to ensure even exposure to air and prevent pressure spots.
Extra Tips and Tricks for Pumpkin Preservation
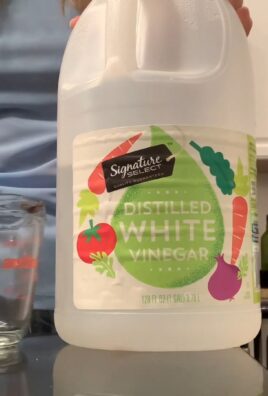
* Vinegar Wash: Before curing, you can wash your pumpkins with a diluted vinegar solution (1 part vinegar to 10 parts water) to kill any surface bacteria or fungi.
* Bleach Solution (Use with Caution): Some people recommend washing pumpkins with a diluted bleach solution (1 tablespoon of bleach per gallon of water). However, use this method with caution, as bleach can be harmful to the environment and potentially damage the pumpkin’s skin. Always rinse thoroughly with clean water after using bleach. I personally prefer the vinegar method.
* Petroleum Jelly on the Stem: Applying a thin layer of petroleum jelly to the cut end of the stem can help to seal it and prevent moisture loss.
* Avoid Handling the Stems: Try to avoid handling the stems of your pumpkins, as this can introduce bacteria and increase the risk of rot.
* Use Damaged Pumpkins First: If you have any pumpkins with minor damage, use them first to prevent them from spoiling and affecting the other pumpkins.
* Consider Variety: Some pumpkin varieties are naturally better keepers than others. Look for varieties like ‘Long Island Cheese’, ‘Jarrahdale’, or ‘Lakota’.
* Don’t Store Near Apples or Pears: Apples and pears release ethylene gas, which can accelerate the ripening process and shorten the shelf life of your pumpkins.
* Know When to Say Goodbye: Even with the best care, pumpkins will eventually start to deteriorate. If you notice significant softening, mold growth, or an unpleasant odor, it’s time to compost the pumpkin.
Troubleshooting Common Pumpkin Storage Problems
* Soft Spots: Soft spots are usually a sign of rot. Remove the affected pumpkin immediately to prevent the spread of disease.
* Mold Growth: Mold growth indicates high humidity or poor ventilation. Improve airflow and reduce humidity in the storage area.
* Insect Damage: Insect damage can create entry points for bacteria and fungi. Inspect your pumpkins carefully before storing them and remove any affected pumpkins.
*
Conclusion
So, there you have it! Extending the life of your precious pumpkins doesn’t require magic, just a little know-how and some simple steps. We’ve explored the key factors that contribute to pumpkin spoilage and armed you with practical strategies to combat them. From proper harvesting techniques to creating the ideal storage environment, you’re now equipped to keep your pumpkins looking their best for weeks, even months, longer.
Why is this DIY trick a must-try? Because it saves you money, reduces waste, and allows you to enjoy the beauty and bounty of your pumpkins for an extended period. Imagine having perfectly preserved pumpkins for fall decorations that last well into the holiday season, or being able to bake delicious pumpkin pies and treats long after the first frost. This isn’t just about aesthetics; it’s about maximizing the value of your harvest and embracing a more sustainable lifestyle.
But don’t stop there! Feel free to experiment with variations on these techniques. For example, if you live in a particularly humid climate, consider using a dehumidifier in your storage area to further reduce the risk of mold and rot. You could also try different types of antifungal sprays, always ensuring they are food-safe if you plan to consume the pumpkin later. Another variation is to use a diluted bleach solution (following safety guidelines carefully) to wipe down the pumpkins before storage, providing an extra layer of protection against surface bacteria.
Consider the size and type of your pumpkins when adapting these methods. Smaller pumpkins, like pie pumpkins, may require slightly different storage conditions than larger carving pumpkins. And remember, regular inspection is key. Check your pumpkins every few days for any signs of spoilage, and promptly remove any that are starting to deteriorate to prevent the spread of rot to the others.
Ultimately, the best way to learn is by doing. We strongly encourage you to try these methods to **prolong pumpkin harvest** and see the amazing results for yourself. Don’t be afraid to experiment and find what works best for your specific pumpkins and environment.
We’re confident that with a little effort, you can significantly extend the life of your pumpkins and enjoy their beauty and flavor for much longer. So go ahead, give it a try! And most importantly, we want to hear about your experiences. Share your tips, tricks, and successes in the comments below. Let’s build a community of pumpkin preservation experts and help each other make the most of this wonderful fall harvest. We can’t wait to see your pumpkin preservation stories!
FAQ
Frequently Asked Questions About Prolonging Your Pumpkin Harvest
How long can I realistically expect to store my pumpkins using these methods?
The storage life of a pumpkin depends on several factors, including the variety of pumpkin, its initial condition at harvest, and the storage environment. Generally, with proper harvesting and storage techniques, you can expect to store pumpkins for 2-3 months, and sometimes even longer. Some varieties, like ‘Long Island Cheese’ pumpkins, are known for their excellent storage capabilities. However, always monitor your pumpkins regularly for signs of spoilage.
What are the signs of a pumpkin starting to go bad?
Be on the lookout for soft spots, bruises, mold growth (especially around the stem), and any signs of insect infestation. A pumpkin that feels unusually light for its size may also be starting to dry out and decompose. If you notice any of these signs, remove the affected pumpkin immediately to prevent the spread of spoilage to other pumpkins.
Is it safe to eat a pumpkin that has been stored for a long time?
If the pumpkin shows no signs of spoilage (soft spots, mold, etc.) and smells fresh, it is generally safe to eat. However, always thoroughly inspect the pumpkin before cooking. Cut it open and check for any discoloration or unusual odors inside. If you have any doubts, it’s best to err on the side of caution and discard the pumpkin.
What is the ideal temperature and humidity for storing pumpkins?
The ideal storage temperature for pumpkins is between 50-60°F (10-15°C) with a relative humidity of 50-75%. A cool, dry, and well-ventilated space is crucial. Avoid storing pumpkins in areas that are too warm or humid, as this will accelerate spoilage. Basements, garages, or sheds are often good options, provided they meet these conditions.
Can I store pumpkins outside?
While it’s possible to store pumpkins outside in some climates, it’s generally not recommended for long-term storage. Exposure to direct sunlight, rain, and fluctuating temperatures can significantly shorten their lifespan. If you must store pumpkins outside, choose a sheltered location that is protected from the elements and elevate them off the ground to prevent moisture buildup.
What is the best way to clean pumpkins before storing them?
Gently wipe down the pumpkins with a clean, dry cloth to remove any dirt or debris. You can also use a diluted bleach solution (1 part bleach to 10 parts water) to wipe down the pumpkins, but be sure to rinse them thoroughly with clean water and allow them to dry completely before storing them. This will help to kill any surface bacteria or fungi that could cause spoilage.
Should I remove the stem from the pumpkin before storing it?
No, do not remove the stem from the pumpkin. The stem acts as a seal, preventing bacteria and fungi from entering the pumpkin. A broken or missing stem significantly increases the risk of spoilage. Handle pumpkins carefully to avoid damaging the stem.
Can I store pumpkins in the refrigerator?
While you can store cut pumpkin pieces in the refrigerator for a few days, it’s not recommended for storing whole pumpkins. The refrigerator is too cold and humid for long-term pumpkin storage.
What if I don’t have a cool, dry place to store my pumpkins?
If you don’t have an ideal storage environment, you can still try to **prolong pumpkin harvest** by choosing pumpkins that are fully mature and free from blemishes. Store them in the coolest, driest place you can find, and monitor them closely for signs of spoilage. You may also consider using a dehumidifier in your storage area to reduce humidity levels.
Are there any specific pumpkin varieties that store better than others?
Yes, some pumpkin varieties are known for their excellent storage capabilities. These include ‘Long Island Cheese’, ‘Jarrahdale’, ‘Lakota’, and ‘Queensland Blue’. When selecting pumpkins for long-term storage, consider choosing one of these varieties.
Leave a Comment