

Planting Potatoes in Grow Bags: Imagine harvesting a bounty of homegrown potatoes right from your patio or balcony! No sprawling garden needed. I’m so excited to share this incredibly simple and rewarding DIY project with you. For centuries, potatoes have been a staple food around the world, originating in the Andes Mountains and becoming a cornerstone of diets across continents. But you don’t need acres of farmland to enjoy fresh, delicious potatoes.
In today’s world, space is often a luxury. Many of us dream of growing our own food but feel limited by small yards or apartment living. That’s where the magic of grow bags comes in! Planting potatoes in grow bags offers a fantastic solution, allowing you to cultivate these versatile vegetables in a compact and manageable way. This DIY trick not only saves space but also provides better drainage and aeration for your potato plants, leading to healthier growth and a more abundant harvest. Plus, the ease of moving the bags means you can chase the sun or protect your precious potatoes from unexpected frost. Get ready to ditch the store-bought spuds and embark on a fun, fulfilling gardening adventure!
DIY Potato Grow Bags: A Bumper Crop in Small Spaces!
Hey there, fellow gardening enthusiasts! Are you dreaming of fresh, homegrown potatoes but short on garden space? Well, I’ve got the perfect solution for you: potato grow bags! They’re easy to make, super effective, and a fantastic way to enjoy a bountiful potato harvest, even on a balcony or patio. I’ve been using this method for years, and I’m excited to share my secrets with you. Let’s get digging!
What You’ll Need: The Potato Grow Bag Arsenal
Before we get our hands dirty, let’s gather our supplies. This is what you’ll need to create your very own potato grow bags:
* Heavy-Duty Woven Polypropylene Bags: These are the workhorses of our operation. Look for bags that are at least 24 inches in diameter and 24 inches tall. The woven material allows for good drainage and aeration, which is crucial for healthy potato growth. You can often find these at garden centers, feed stores, or online. Burlap sacks can also work, but they will decompose faster.
* Potting Mix: Don’t skimp on the potting mix! A high-quality, well-draining mix is essential. I like to use a blend of compost, peat moss (or coco coir as a sustainable alternative), and perlite or vermiculite. This combination provides the nutrients potatoes need while ensuring good drainage.
* Seed Potatoes: These aren’t your regular grocery store potatoes! Seed potatoes are specifically grown for planting and are certified disease-free. You can find them at garden centers in early spring. Choose varieties that are suited to your climate and personal taste. I personally love Yukon Gold for their creamy texture and all-purpose use.
* Sharp Knife or Pruning Shears: For cutting the seed potatoes (if necessary).
* Watering Can or Hose: For keeping your potato plants hydrated.
* Fertilizer (Optional): A balanced, slow-release fertilizer can give your potatoes an extra boost. Look for one specifically formulated for vegetables.
* Gardening Gloves: To keep your hands clean and protected.
Preparing Your Seed Potatoes: Getting Ready to Grow
This step is crucial for maximizing your potato yield. You want to encourage those little “eyes” on the potatoes to sprout before planting.
1. Chitting (Sprouting) Your Seed Potatoes: A few weeks before planting, place your seed potatoes in a cool, bright location (but not in direct sunlight). An egg carton or a shallow tray works well. The “eyes” on the potatoes will start to sprout, forming small, green shoots. This process is called “chitting.”
2. Cutting Large Seed Potatoes (Optional): If your seed potatoes are large (bigger than an egg), you can cut them into smaller pieces, ensuring that each piece has at least one or two “eyes.” Let the cut pieces air dry for a day or two to callous over. This helps prevent rotting when you plant them.
Creating Your Potato Grow Bags: The Step-by-Step Guide
Now for the fun part! Let’s assemble our potato grow bags.
1. Prepare the Bags: If your bags are new, give them a good shake to remove any dust or debris. You might also want to fold down the top edge of the bag a few inches to make it easier to add soil later.
2. Add the Initial Layer of Soil: Fill the bag with about 4-6 inches of your potting mix. This will be the foundation for your potato plants.
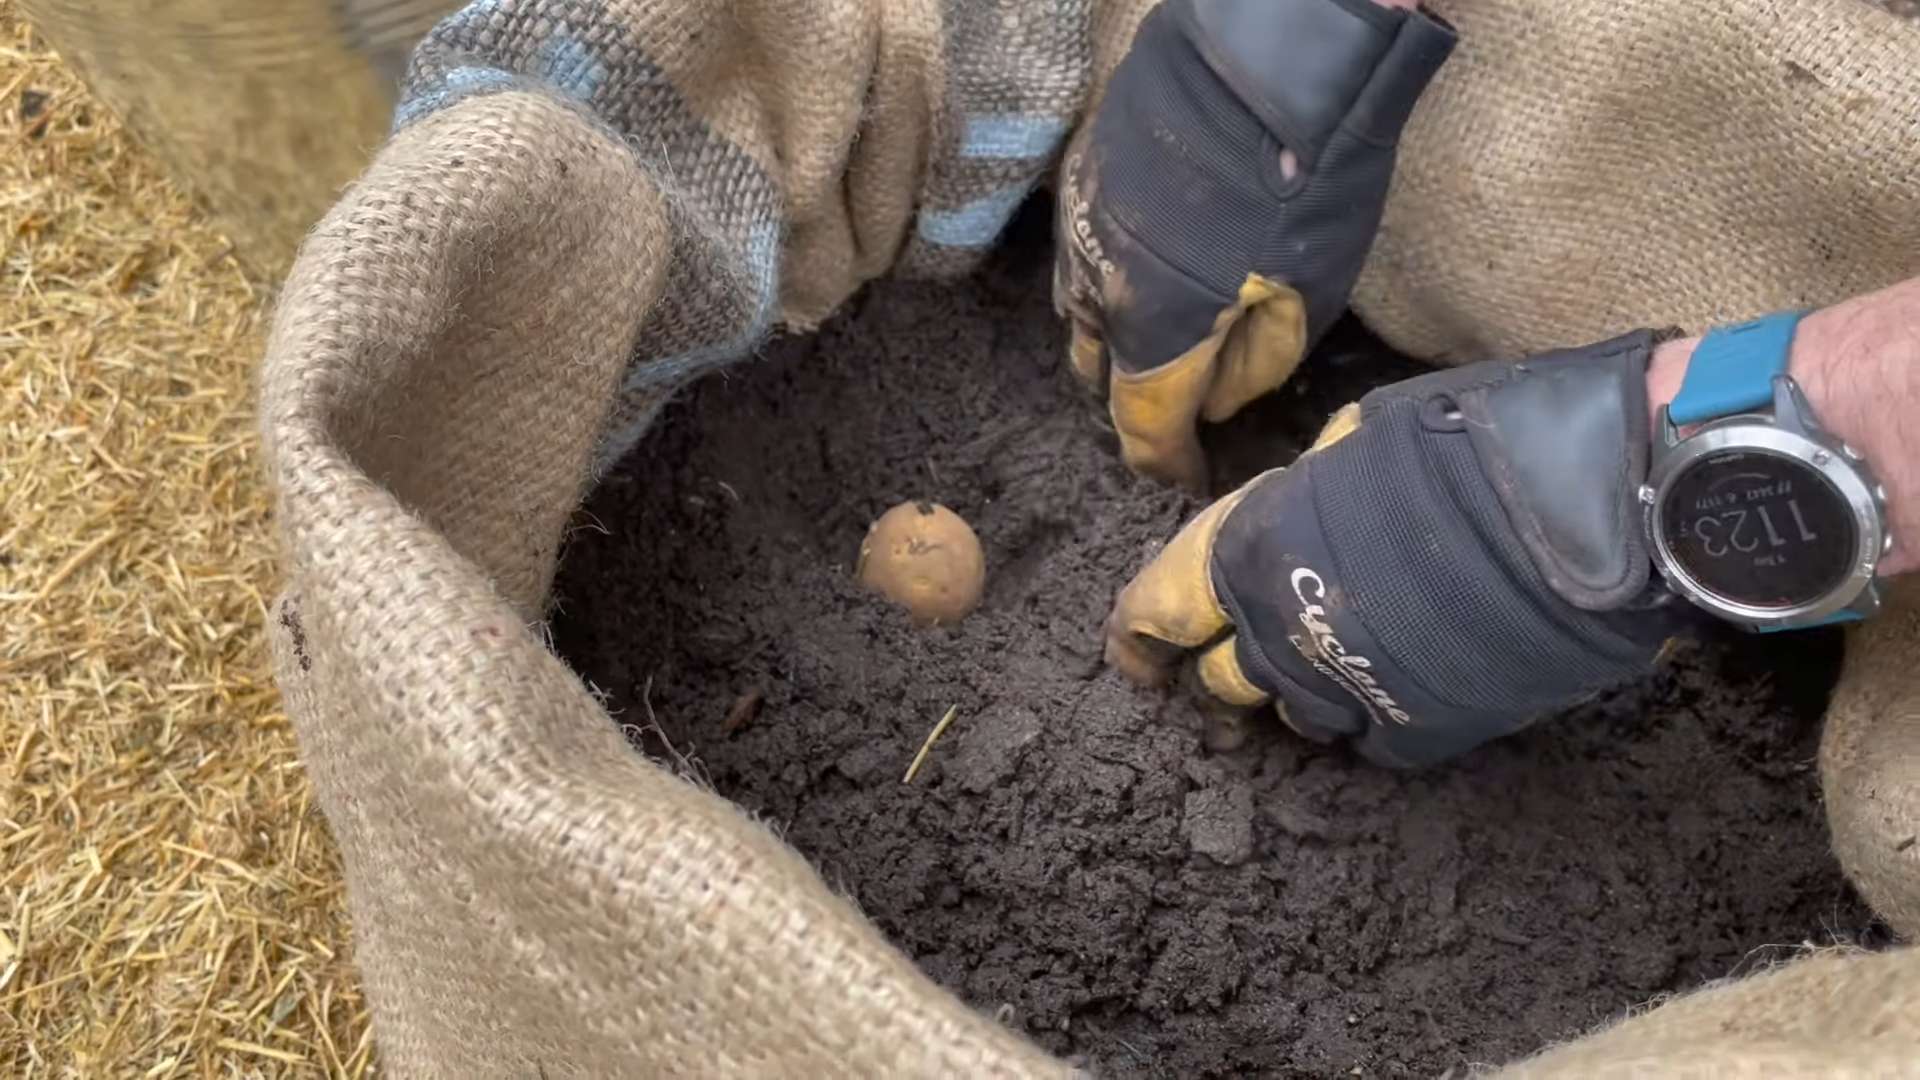
3. Plant the Seed Potatoes: Place your seed potatoes (sprouts facing up) on top of the soil, spacing them evenly. If you’re using multiple seed potatoes per bag, give them about 8-10 inches of space between each other.
4. Cover the Seed Potatoes: Cover the seed potatoes with another 4-6 inches of potting mix. Gently water the soil to moisten it.
5. Watering and Sunlight: Place your potato grow bags in a sunny location that receives at least 6-8 hours of sunlight per day. Water regularly, keeping the soil consistently moist but not waterlogged.
The “Hilling” Process: Encouraging More Potatoes
This is where the magic happens! As your potato plants grow, you’ll need to add more soil to encourage them to produce more potatoes along the stems.
1. Observe Your Plants: Once your potato plants have grown about 6-8 inches tall, it’s time to “hill” them.
2. Add More Soil: Add another 4-6 inches of potting mix to the bag, covering the lower part of the stems, leaving only the top few inches of the plant exposed.
3. Repeat the Process: Continue this “hilling” process every few weeks as the plants grow taller, until the bag is almost full. This encourages the plants to produce more potatoes along the buried stems.
4. Water Regularly: Remember to water regularly, especially during hot weather. Potatoes need consistent moisture to thrive.
Fertilizing Your Potato Plants: Giving Them a Boost
While a good potting mix provides initial nutrients, you might want to give your potato plants an extra boost with fertilizer.
1. Choose a Fertilizer: Use a balanced, slow-release fertilizer specifically formulated for vegetables. Follow the instructions on the fertilizer package for application rates.
2. Apply the Fertilizer: You can either mix the fertilizer into the soil when you’re “hilling” the plants or apply it as a side dressing around the base of the plants.
3. Water After Fertilizing: Water thoroughly after applying fertilizer to help it dissolve and reach the roots.
Pest and Disease Control: Keeping Your Potatoes Healthy
Potatoes can be susceptible to certain pests and diseases. Here’s how to keep them healthy:
1. Monitor Your Plants: Regularly inspect your plants for signs of pests or diseases, such as aphids, potato beetles, or blight.
2. Handpick Pests: If you find any pests, handpick them off the plants and dispose of them.
3. Use Organic Pest Control: For larger infestations, consider using organic pest control methods, such as insecticidal soap or neem oil.
4. Prevent Blight: To prevent blight, ensure good air circulation around your plants and avoid overhead watering. If blight does occur, remove affected leaves immediately.
Harvesting Your Potatoes: The Grand Finale!
The moment you’ve been waiting for! Harvesting your homegrown potatoes is incredibly rewarding.
1. When to Harvest: Potatoes are typically ready to harvest about 80-100 days after planting, depending on the variety. The foliage will start to turn yellow and die back.
2. Stop Watering: A week or two before harvesting, stop watering the plants to allow the potatoes to dry out slightly.
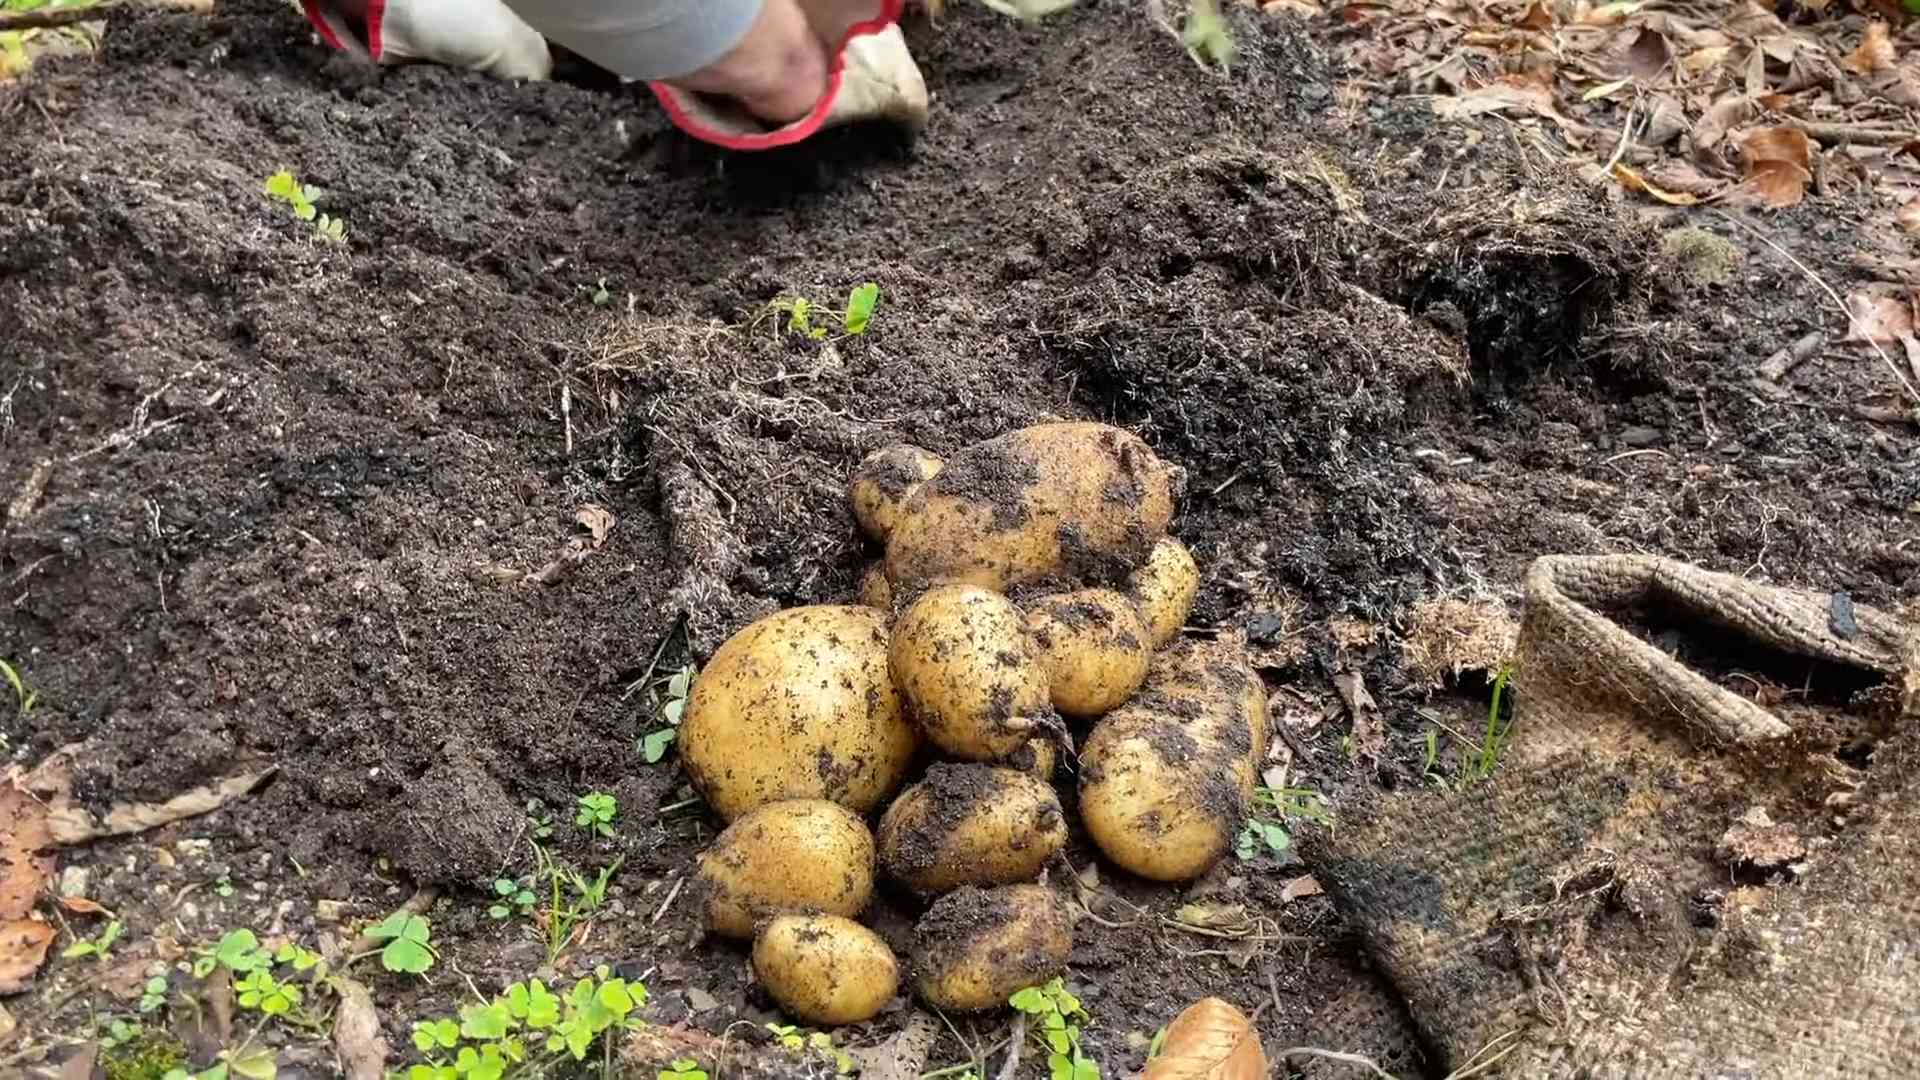
3. Harvesting: The easiest way to harvest potatoes from grow bags is to simply tip the bag over and sift through the soil. You can also carefully reach into the bag and pull out the potatoes.
4. Curing (Optional): After harvesting, you can cure your potatoes by placing them in a cool, dark, and well-ventilated place for a week or two. This helps them develop a thicker skin and improves their storage life.
Tips and Tricks for Potato Grow Bag Success: My Personal Insights
Here are a few extra tips and tricks I’ve learned over the years that can help you maximize your potato harvest:
* Choose the Right Potato Variety: Some potato varieties are better suited for container growing than others. Look for varieties that are compact and early-maturing.
* Don’t Overwater: Overwatering can lead to root rot and other problems. Make sure your grow bags have good drainage and only water when the soil is dry to the touch.
* Rotate Your Crops: Avoid planting potatoes in the same grow bags year after year. This can help prevent the buildup of soilborne diseases.
* Use Companion Planting: Plant companion plants, such as marigolds or basil, around your potato plants to deter pests.
* Be Patient: Growing potatoes takes time and patience. Don’t get discouraged if you don’t see results immediately. Just keep watering, fertilizing, and “hilling” your plants, and you’ll be rewarded with a bountiful harvest.
* Reusing the Soil: After harvesting, you can reuse the soil from your grow bags in other parts of your garden or compost it. Just be sure to remove any remaining potato pieces to prevent them from sprouting.
* Experiment with Different Bag Sizes: While I recommend 24-inch bags, feel free to experiment with different sizes to see what works best for you. Smaller bags might be suitable for smaller potato varieties.
* Consider Using Multiple Bags: If you have the space, consider using multiple grow bags to increase your potato yield.
* Protect from Frost: If you live in an area with late frosts, be sure to
Conclusion
So, there you have it! Ditching the traditional garden bed and embracing potato grow bags is more than just a gardening trend; it’s a game-changer. We’ve explored how these convenient containers offer superior drainage, temperature control, and ease of harvesting, all contributing to a bountiful potato harvest, even in limited spaces. Forget back-breaking digging and the frustration of accidentally slicing into your precious spuds – with grow bags, harvesting is as simple as tipping the bag and collecting your treasure.
But the benefits extend beyond just ease of use. The improved aeration within the grow bag environment fosters healthier root development, leading to larger, more uniform potatoes. Plus, the portability of these bags allows you to chase the sun, ensuring your plants receive optimal sunlight exposure throughout the growing season. This is especially crucial for those living in areas with unpredictable weather patterns.
Ready to take your potato growing to the next level? Consider these variations to personalize your grow bag experience:
* Experiment with different potato varieties: From Yukon Golds to Russets to fingerling potatoes, each variety will thrive differently in the grow bag environment. Document your results to discover your personal favorite.
* Companion planting: Maximize your grow bag space by planting compatible herbs like basil or thyme around the base of your potato plants. These herbs can help deter pests and improve the overall health of your potato crop.
* Amend your soil: While a good quality potting mix is essential, consider adding amendments like compost or worm castings to further enrich the soil and provide your potatoes with the nutrients they need to flourish.
* Vertical Gardening: If space is truly limited, consider using tiered grow bags or stacking multiple bags to create a vertical potato garden. This is a fantastic way to maximize your yield in a small area.
* Fabric Choice: Experiment with different fabric weights and colors. Darker bags absorb more heat, which can be beneficial in cooler climates, while lighter bags reflect heat, which is ideal for warmer regions.
Ultimately, the beauty of using potato grow bags lies in their versatility and adaptability. They empower gardeners of all skill levels to cultivate a thriving potato crop, regardless of their space constraints or gardening experience. The ease of use and the potential for a substantial harvest make this DIY trick a must-try for anyone looking to enjoy fresh, homegrown potatoes.
Don’t just take our word for it – give it a try yourself! We’re confident that you’ll be amazed by the results. Once you’ve experienced the joy of harvesting your own homegrown potatoes from grow bags, we encourage you to share your experiences with us. Tell us about your favorite potato varieties, your unique grow bag setups, and any tips or tricks you’ve discovered along the way. Let’s build a community of grow bag enthusiasts and inspire others to embrace this innovative gardening technique. Share your photos and stories on social media using #PotatoGrowBags and let’s celebrate the bounty of homegrown potatoes together!
Frequently Asked Questions (FAQ)
What exactly are potato grow bags, and why should I use them?
Potato grow bags are fabric containers, typically made from durable, breathable materials like felt or woven polyethylene, designed specifically for growing potatoes. Unlike traditional gardening methods, grow bags offer several advantages. They provide excellent drainage, preventing waterlogging and root rot. The breathable fabric allows for air pruning, which encourages the development of a denser, more fibrous root system, leading to healthier and more productive plants. Furthermore, grow bags are portable, allowing you to move your potato plants to optimal locations for sunlight and temperature. The biggest advantage is the ease of harvesting; simply tip the bag over to collect your potatoes, eliminating the need for digging.
What size grow bag is best for potatoes?
The ideal size for a potato grow bag depends on the variety of potato you’re growing and the number of seed potatoes you plan to plant in each bag. Generally, a 10-gallon grow bag is a good starting point for most potato varieties. However, larger varieties like Russets may benefit from a 15-gallon or even a 20-gallon bag to allow for ample root development. If you’re planting multiple seed potatoes in a single bag, opt for a larger size to ensure each plant has enough space to thrive. Remember, it’s always better to err on the side of too large than too small.
What type of soil should I use in my potato grow bags?
Potatoes thrive in well-draining, slightly acidic soil. A good quality potting mix is essential for success in grow bags. Avoid using garden soil, as it can be too heavy and compact, hindering drainage and root growth. Amend your potting mix with compost or other organic matter to improve fertility and water retention. You can also add perlite or vermiculite to enhance drainage. A soil pH between 6.0 and 6.5 is ideal for potatoes.
How many seed potatoes can I plant in one grow bag?
The number of seed potatoes you can plant in a single grow bag depends on the size of the bag and the variety of potato. As a general rule, you can plant one to three seed potatoes in a 10-gallon grow bag. For larger bags, you can increase the number of seed potatoes accordingly. Ensure that each seed potato has enough space to develop roots and tubers without overcrowding. Overcrowding can lead to smaller potatoes and reduced yields.
How often should I water my potato grow bags?
Watering frequency depends on several factors, including the weather, the size of the grow bag, and the type of soil you’re using. Generally, you’ll need to water your potato grow bags more frequently than you would in a traditional garden bed, as the fabric allows for faster evaporation. Check the soil moisture regularly by sticking your finger into the soil. If the top inch or two feels dry, it’s time to water. Water deeply until water drains out of the bottom of the bag. Avoid overwatering, as this can lead to root rot.
How do I “hill” potatoes in grow bags?
“Hilling” is the process of covering the potato stems with soil as they grow. This encourages the development of more tubers along the buried stems. In grow bags, hilling is even easier than in a traditional garden. As the potato plants grow, simply add more soil to the bag, covering the lower portion of the stems. Continue this process until the bag is nearly full. This technique maximizes your potato yield.
When is the best time to harvest potatoes from grow bags?
The timing of your potato harvest depends on the variety of potato you’re growing and your desired use. “New potatoes,” which are small and tender, can be harvested as early as 7-8 weeks after planting. For mature potatoes, wait until the foliage begins to yellow and die back, typically around 12-14 weeks after planting. To harvest, simply tip the grow bag over and collect your potatoes.
Can I reuse potato grow bags?
Yes, potato grow bags are reusable. After harvesting your potatoes, empty the bag and remove any remaining plant debris. Wash the bag with soap and water to remove any dirt or pathogens. Allow the bag to dry completely before storing it for future use. With proper care, your potato grow bags can last for several seasons.
Are there any specific potato varieties that are best suited for grow bags?
While most potato varieties can be grown successfully in grow bags, some varieties tend to perform particularly well. These include Yukon Gold, Red Pontiac, and fingerling potatoes. These varieties are known for their adaptability and their ability to produce a good yield in a confined space. However, don’t be afraid to experiment with other varieties to find your personal favorites.
What are some common problems I might encounter when growing potatoes in grow bags, and how can I prevent them?
Some common problems include pests like potato beetles and aphids, diseases like early blight and late blight, and nutrient deficiencies. To prevent these problems, start with healthy seed potatoes, use a good quality potting mix, and provide adequate water and sunlight. Monitor your plants regularly for signs of pests or diseases and take action promptly if you notice any problems. You can use organic pest control methods like insecticidal soap or neem oil to control pests. Ensure proper drainage to prevent root rot and other moisture-related diseases. Fertilize your plants regularly with a balanced fertilizer to prevent nutrient deficiencies.

Leave a Comment