

Oven Cleaning Baking Soda Vinegar: Sounds like a science experiment, right? Well, in a way, it is! But trust me, this isn’t your average volcano project. It’s your secret weapon to a sparkling clean oven, and I’m here to show you how to wield it like a pro. For generations, resourceful homemakers have relied on simple, natural ingredients to tackle tough cleaning tasks. Before the age of harsh chemicals and expensive cleaning products, baking soda and vinegar were the go-to dynamic duo for everything from deodorizing refrigerators to scrubbing bathtubs.
Why should you ditch the elbow grease and embrace this DIY oven cleaning hack? Because let’s face it, nobody enjoys cleaning the oven! It’s a messy, time-consuming chore that often involves breathing in fumes from harsh chemicals. But with this simple method using oven cleaning baking soda vinegar, you can achieve a spotless oven without the toxic smells or the aching arms. Plus, it’s incredibly budget-friendly and environmentally conscious. I’m going to guide you through each step, ensuring you get the best results with minimal effort. Get ready to say goodbye to baked-on grime and hello to a gleaming oven, the natural way!
DIY Oven Cleaning with Baking Soda and Vinegar: A Sparkling Clean Oven Awaits!
Okay, let’s face it, cleaning the oven is probably on everyone’s list of least favorite chores. But a clean oven is a happy oven (and makes for better-tasting food!), so let’s tackle this together. I’m going to show you how to clean your oven using just baking soda and vinegar – two ingredients you probably already have in your pantry! This method is not only effective but also avoids harsh chemicals, making it a safer and more eco-friendly option.
What You’ll Need:
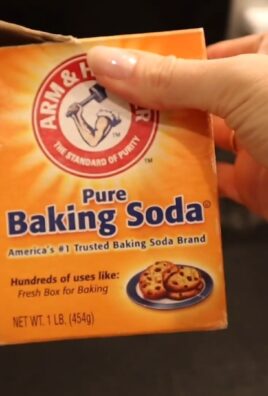
* Baking Soda
* White Vinegar
* Water
* Spray Bottle
* Spatula or Scraper
* Rubber Gloves (optional, but recommended)
* Sponge or Cloth
* Old Towels or Rags
The Baking Soda Paste Phase
This is where we create our cleaning powerhouse! We’re aiming for a paste that’s thick enough to stick to the oven walls but spreadable enough to cover everything.
1. Prepare the Oven: First things first, remove the oven racks. You can soak these in hot, soapy water in your sink or bathtub while you’re working on the oven itself. This will help loosen any baked-on grime. Also, remove any large pieces of food debris from the oven floor. A quick sweep with a brush or a paper towel will do the trick.
2. Mix the Baking Soda Paste: In a bowl, mix ½ cup of baking soda with a few tablespoons of water. Add water gradually until you form a spreadable paste. You want it to be thick, like frosting. Don’t add too much water at once, or it will become too runny.
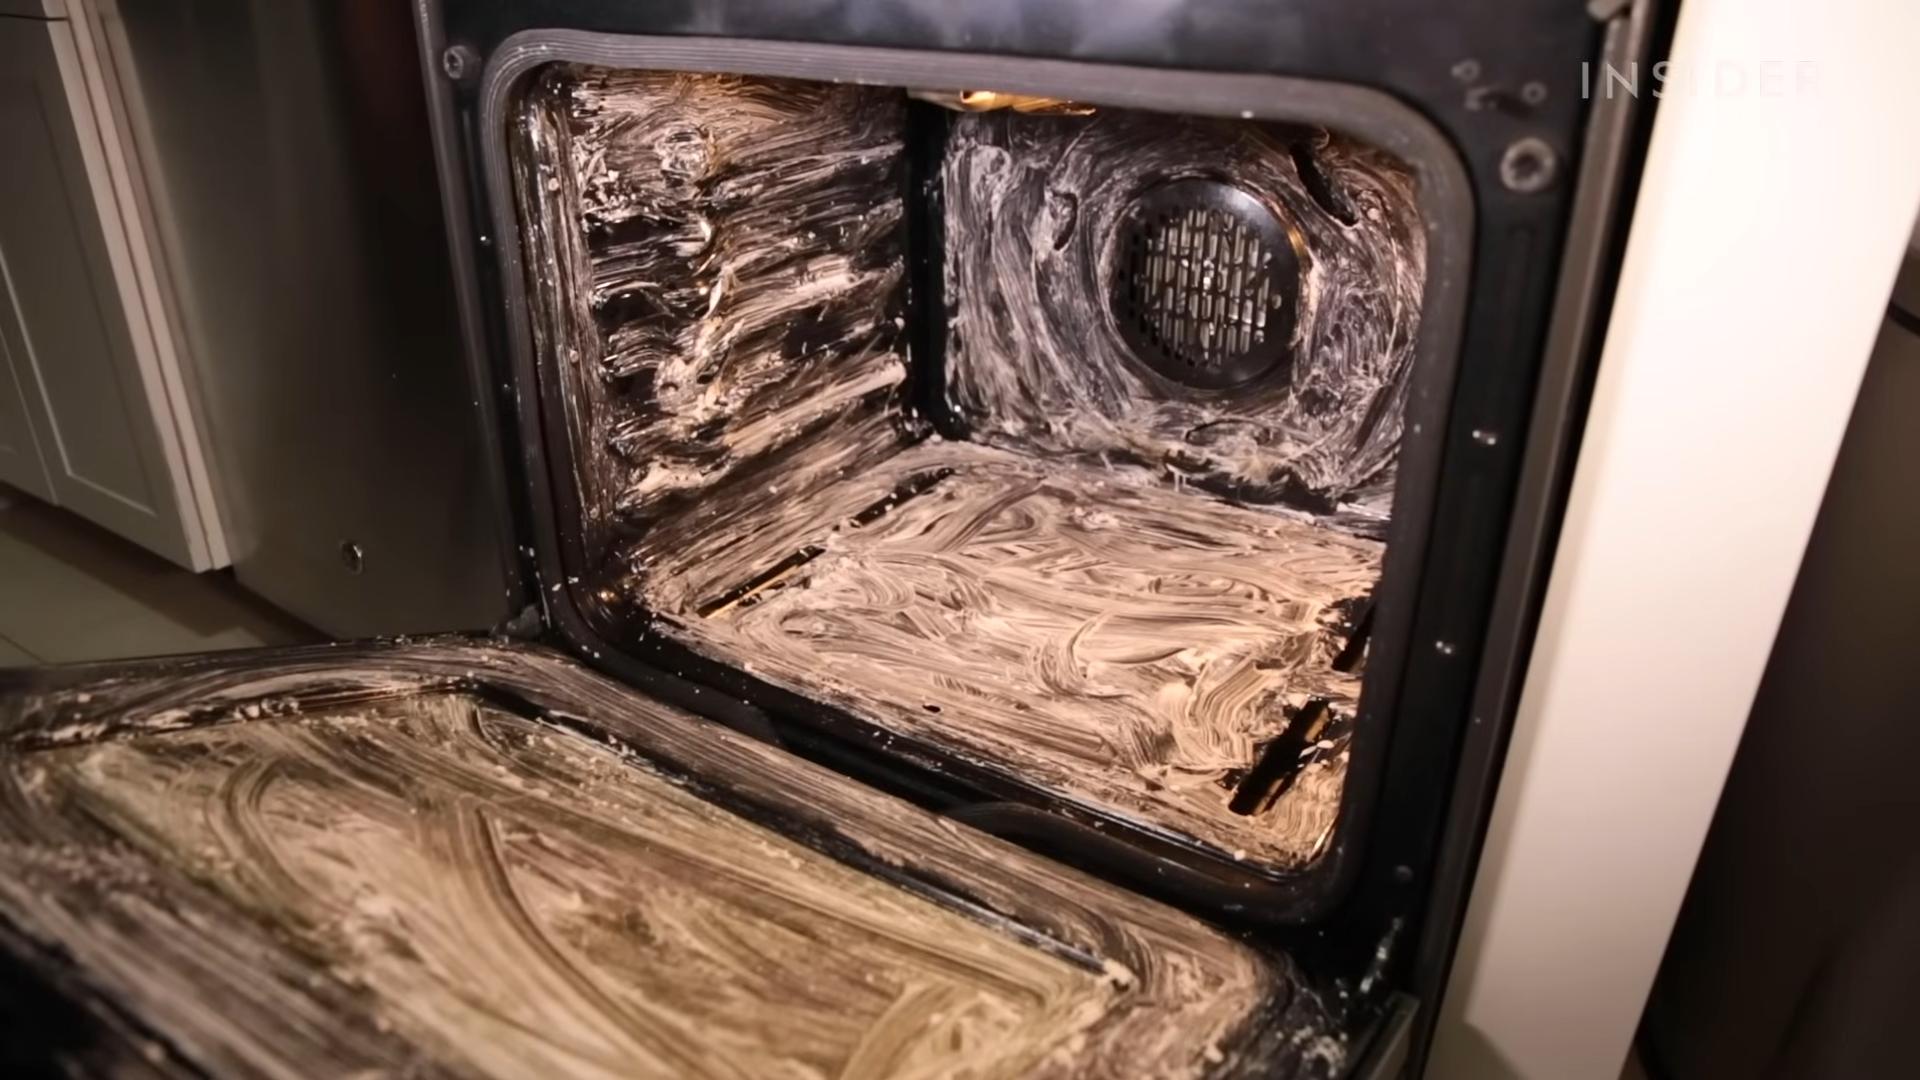
3. Apply the Paste: Using your hands (with gloves on, if you prefer) or a spatula, spread the baking soda paste all over the inside surfaces of your oven. This includes the back, sides, top, bottom, and door. Avoid the heating elements! You don’t want to get the paste on them. Be generous with the application, especially on areas with stubborn stains.
4. Let it Sit (and Work its Magic!): This is the crucial part! Leave the baking soda paste on for at least 12 hours, or even better, overnight. The longer it sits, the more time it has to loosen the baked-on grease and grime. I usually apply it before I go to bed and let it work its magic while I sleep.
The Vinegar Power-Up Phase
Now, it’s time to unleash the power of vinegar! The vinegar will react with the baking soda, creating a fizzing action that helps to lift away the loosened grime.
1. Prepare the Vinegar Solution: Pour some white vinegar into a spray bottle. You don’t need to dilute it; straight vinegar works best.
2. Spray the Vinegar: After the baking soda paste has sat for at least 12 hours, spray the vinegar all over the baking soda paste inside the oven. You’ll notice it will start to fizz and bubble. This is exactly what you want! The fizzing action helps to break down the remaining grime.
3. Let it Fizz: Let the vinegar and baking soda react for a few minutes. This will give the vinegar time to further loosen the grime.
The Scrubbing and Wiping Phase
Time to get those elbows working! This is where we remove the loosened grime and reveal a sparkling clean oven.
1. Scrub Away the Grime: Using a sponge or cloth, start scrubbing the inside of the oven. You may need to use a little elbow grease, especially on areas with stubborn stains. A spatula or scraper can be helpful for removing thicker patches of grime.
2. Wipe Clean: As you scrub, wipe away the loosened grime with a damp sponge or cloth. Rinse the sponge or cloth frequently to remove the dirty residue. You’ll probably need to rinse it several times.
3. Repeat as Needed: If you still see some stubborn stains, repeat the spraying and scrubbing process. You might need to apply a fresh layer of baking soda paste to particularly difficult areas and let it sit for a shorter period.
4. Rinse Thoroughly: Once you’ve removed all the baking soda paste and grime, rinse the inside of the oven thoroughly with a clean, damp sponge or cloth. Make sure to remove all traces of baking soda, as it can leave a white residue if not rinsed properly.
5. Dry the Oven: Use clean towels or rags to dry the inside of the oven. This will help prevent any water spots from forming.
The Rack Cleaning Phase
Don’t forget about those oven racks! They’ve been soaking, so they should be easier to clean.
1. Scrub the Racks: After soaking, scrub the oven racks with a sponge or brush to remove any remaining grime. You can use dish soap or a baking soda paste for extra cleaning power.
2. Rinse the Racks: Rinse the racks thoroughly with clean water to remove all traces of soap or baking soda.
3. Dry the Racks: Dry the racks with a clean towel before placing them back in the oven.
The Final Touches Phase
Almost there! Just a few more steps to ensure a perfectly clean oven.
1. Reassemble the Oven: Place the clean oven racks back into the oven.
2. Optional: Vinegar Wipe Down: For an extra shine, you can wipe down the inside of the oven with a clean cloth dampened with vinegar. This will help remove any lingering odors and leave your oven sparkling.
3. Run the Oven (Briefly): Turn on the oven to a low temperature (around 200 degrees Fahrenheit) for about 15-20 minutes. This will help dry out any remaining moisture and eliminate any lingering vinegar smell. Keep an eye on it and make sure nothing is smoking.
Important Considerations and Tips:
* Ventilation is Key: Make sure your kitchen is well-ventilated while you’re cleaning the oven. Open windows and turn on the exhaust fan to help dissipate any fumes.
* Stubborn Stains: For really stubborn stains, you can try making a thicker baking soda paste and letting it sit for even longer. You can also try using a more abrasive scrubbing tool, like a scouring pad, but be careful not to scratch the oven’s surface.
* Self-Cleaning Ovens: While this method is great for regular cleaning, it’s not a substitute for the self-cleaning cycle on your oven. However, using this method regularly can help reduce the need for the self-cleaning cycle, which can be harsh on your oven.
* Preventative Measures: To keep your oven cleaner for longer, try placing a baking sheet on the rack below whatever you’re cooking to catch any drips or spills.
* Test in an Inconspicuous Area: Before applying the baking soda paste to the entire oven, test it in a small, inconspicuous area to make sure it doesn’t damage the surface.
* Don’t Forget the Door: Pay special attention to the oven door, as it often accumulates grease and grime. You may need to scrub it a little harder to remove stubborn stains.
* Safety First: Always wear gloves when cleaning the oven to protect your hands from the baking soda and vinegar. Avoid getting the baking soda paste on the heating elements or the oven door seal.
* Frequency: How often you clean your oven depends on how often you use it. I recommend cleaning it every few months, or more often if you notice a lot of spills or buildup.
* Alternative to Spray Bottle: If you don’t have a spray bottle, you can simply pour the vinegar into a bowl and use a sponge or cloth to apply it to the baking soda paste.
* Patience is a Virtue: Cleaning the oven with baking soda and vinegar takes time and effort, but the results are worth it. Be patient and persistent, and you’ll be rewarded with a sparkling clean oven.
And there you have it! A sparkling clean oven, achieved with just baking soda and vinegar. It might take a little elbow grease, but it’s a safe, effective, and eco-friendly way to keep your oven looking its best. Happy cleaning!

Conclusion
So, there you have it! This simple yet incredibly effective DIY oven cleaning baking soda vinegar method is a game-changer for anyone who dreads tackling that greasy, grimy oven. Forget harsh chemicals, overpowering fumes, and expensive cleaning products. With just two readily available ingredients – baking soda and vinegar – you can achieve a sparkling clean oven without breaking a sweat (or the bank!).
Why is this a must-try? Because it’s safe, effective, and environmentally friendly. The combination of baking soda’s gentle abrasive power and vinegar’s natural acidity works wonders to loosen baked-on food and grease, making it easy to wipe away. Plus, you’re avoiding the potentially harmful chemicals found in many commercial oven cleaners, making it a safer option for your family and pets.
But the beauty of this method lies in its adaptability. Feel free to experiment with variations to suit your specific needs and preferences. For instance, if you have particularly stubborn stains, you can let the baking soda paste sit overnight for maximum effectiveness. You can also add a few drops of your favorite essential oil, like lemon or lavender, to the vinegar solution for a fresh, clean scent. Another variation is to use a slightly damp sponge with baking soda directly on the stains after the vinegar has fizzed and settled, this can help to scrub away the tougher spots.
This DIY oven cleaning baking soda vinegar solution is a true testament to the power of simple, natural ingredients. It’s a cost-effective, eco-friendly, and surprisingly effective way to keep your oven looking its best.
We wholeheartedly encourage you to give this DIY oven cleaning baking soda vinegar trick a try. You’ll be amazed at the results! And more importantly, we want to hear about your experience. Did you find it as effective as we did? Did you try any variations? Share your tips, tricks, and before-and-after photos in the comments below. Let’s build a community of clean oven enthusiasts! Your insights could help others discover the joy of a sparkling clean oven without the hassle and expense of traditional methods. Let us know if you have any questions, we are here to help!
Frequently Asked Questions (FAQ)
1. Is baking soda and vinegar safe for all types of ovens?
Generally, yes, baking soda and vinegar are safe for most ovens, including self-cleaning ovens. However, it’s always a good idea to consult your oven’s manual before using any cleaning method, especially if it’s a newer model with specific cleaning recommendations. Avoid getting the baking soda paste on the heating elements directly, as it can be difficult to remove completely. If you have a convection oven, ensure all baking soda residue is removed from the fan area to prevent any issues.
2. How long should I leave the baking soda paste on the oven?
For best results, leave the baking soda paste on for at least 12 hours, or overnight. This allows the baking soda to penetrate and loosen the baked-on food and grease. If you’re short on time, you can try leaving it on for a minimum of 3 hours, but the longer, the better. For particularly stubborn stains, you might even consider applying a second layer of paste after the initial application has been scraped off.
3. What if the baking soda paste is too dry or too runny?
The ideal consistency of the baking soda paste is similar to that of frosting – spreadable but not too runny. If your paste is too dry, add a little more water, a teaspoon at a time, until you reach the desired consistency. If it’s too runny, add a bit more baking soda. Remember, you want a paste that will adhere to the oven surfaces without dripping.
4. Can I use this method on the oven door glass?
Yes, you can absolutely use this method on the oven door glass. In fact, it’s a great way to remove baked-on splatters and grime. Apply the baking soda paste to the glass, let it sit for the recommended time, and then wipe it clean with a damp cloth or sponge. For extra stubborn spots, you can use a plastic scraper to gently remove the residue. Be careful not to scratch the glass.
5. What if the vinegar doesn’t fizz when I spray it on the baking soda?
The fizzing action is a key part of the cleaning process, as it helps to loosen the grime. If the vinegar doesn’t fizz, it could be due to a few reasons. First, make sure you’re using white vinegar, as other types of vinegar may not react as effectively. Second, ensure the baking soda paste is still slightly damp. If it has dried out completely, lightly dampen it with a spray bottle before applying the vinegar. Third, the baking soda may have lost its potency if it’s been open for a long time. Try using a fresh box of baking soda.
6. How do I remove the baking soda residue completely?
Removing all the baking soda residue is crucial to prevent any lingering taste or odor in your oven. After scraping off the majority of the paste, use a damp cloth or sponge to wipe down all surfaces thoroughly. Rinse the cloth or sponge frequently with clean water. You may need to repeat this process several times to remove all traces of baking soda. A final wipe-down with a clean, dry cloth will help to prevent water spots.
7. Can I use this method to clean the oven racks?
Yes, you can use this method to clean the oven racks. One effective way is to soak the racks in a bathtub filled with hot water, baking soda, and a bit of dish soap. Let them soak for several hours or overnight, then scrub them clean with a brush or sponge. Alternatively, you can apply the baking soda paste directly to the racks, let it sit, and then scrub them clean. Rinse thoroughly with water.
8. How often should I clean my oven using this method?
The frequency of cleaning depends on how often you use your oven and how much it tends to get dirty. As a general guideline, cleaning your oven every 3-6 months is a good practice. However, if you notice a lot of splatters and grime building up, you may want to clean it more frequently. Regular cleaning will prevent the buildup of stubborn stains and make the cleaning process easier in the long run.
9. What if I have a self-cleaning oven? Should I still use this method?
Even if you have a self-cleaning oven, this DIY method can still be beneficial. Self-cleaning cycles can produce strong odors and high heat, which some people prefer to avoid. Using the baking soda and vinegar method allows you to clean your oven without these drawbacks. You can use this method for regular maintenance cleaning, and reserve the self-cleaning cycle for occasional deep cleaning if needed.
10. Can I add dish soap to the baking soda paste for extra cleaning power?
While baking soda and vinegar are effective on their own, you can add a small amount of dish soap to the baking soda paste for extra cleaning power, especially if you have particularly greasy stains. Just be sure to rinse thoroughly to remove all traces of soap residue. A few drops of lemon juice can also be added to the vinegar spray for a fresh scent and added cleaning boost.

Leave a Comment