

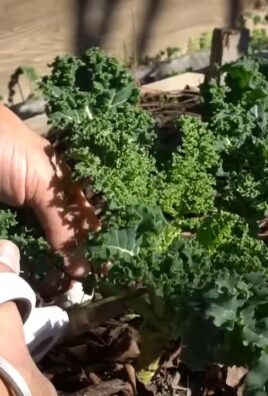
Mushroom Bucket Growing DIY: Ever dreamt of harvesting your own delicious, gourmet mushrooms right in your backyard, or even on your balcony? I know I have! Forget those expensive grocery store prices and the mystery of where your fungi friends actually came from. This isn’t just about saving money; it’s about connecting with nature and experiencing the incredible satisfaction of growing your own food.
For centuries, cultivating mushrooms has been a revered practice in many cultures. From ancient Chinese medicinal traditions to European culinary delights, mushrooms have held a special place. Now, you can tap into that rich history with a modern, accessible twist: the mushroom bucket.
Why a bucket, you ask? Well, it’s simple, space-saving, and surprisingly effective! In this article, I’m going to walk you through a step-by-step Mushroom Bucket Growing DIY project that’s perfect for beginners. Whether you’re a seasoned gardener or just starting out, this method is a fantastic way to produce a consistent supply of fresh, flavorful mushrooms. Imagine adding them to your pasta, omelets, or even grilling them up for a delicious side dish. I’ll show you how to create the perfect environment for your mushrooms to thrive, troubleshoot common problems, and ultimately, enjoy the fruits (or should I say, fungi?) of your labor. Let’s get growing!
DIY Mushroom Bucket: A Beginner’s Guide to Growing Your Own Fungi Feast!
Okay, mushroom lovers, gather ’round! I’m going to walk you through a super fun and rewarding project: growing mushrooms in a bucket! It’s easier than you think, and the satisfaction of harvesting your own delicious fungi is unbeatable. This guide focuses on oyster mushrooms, as they’re relatively easy to grow and quite forgiving for beginners. Let’s get started!
What You’ll Need: The Mushroom Growing Arsenal
Before we dive in, let’s make sure you have everything you need. This is crucial for a successful mushroom growing adventure!
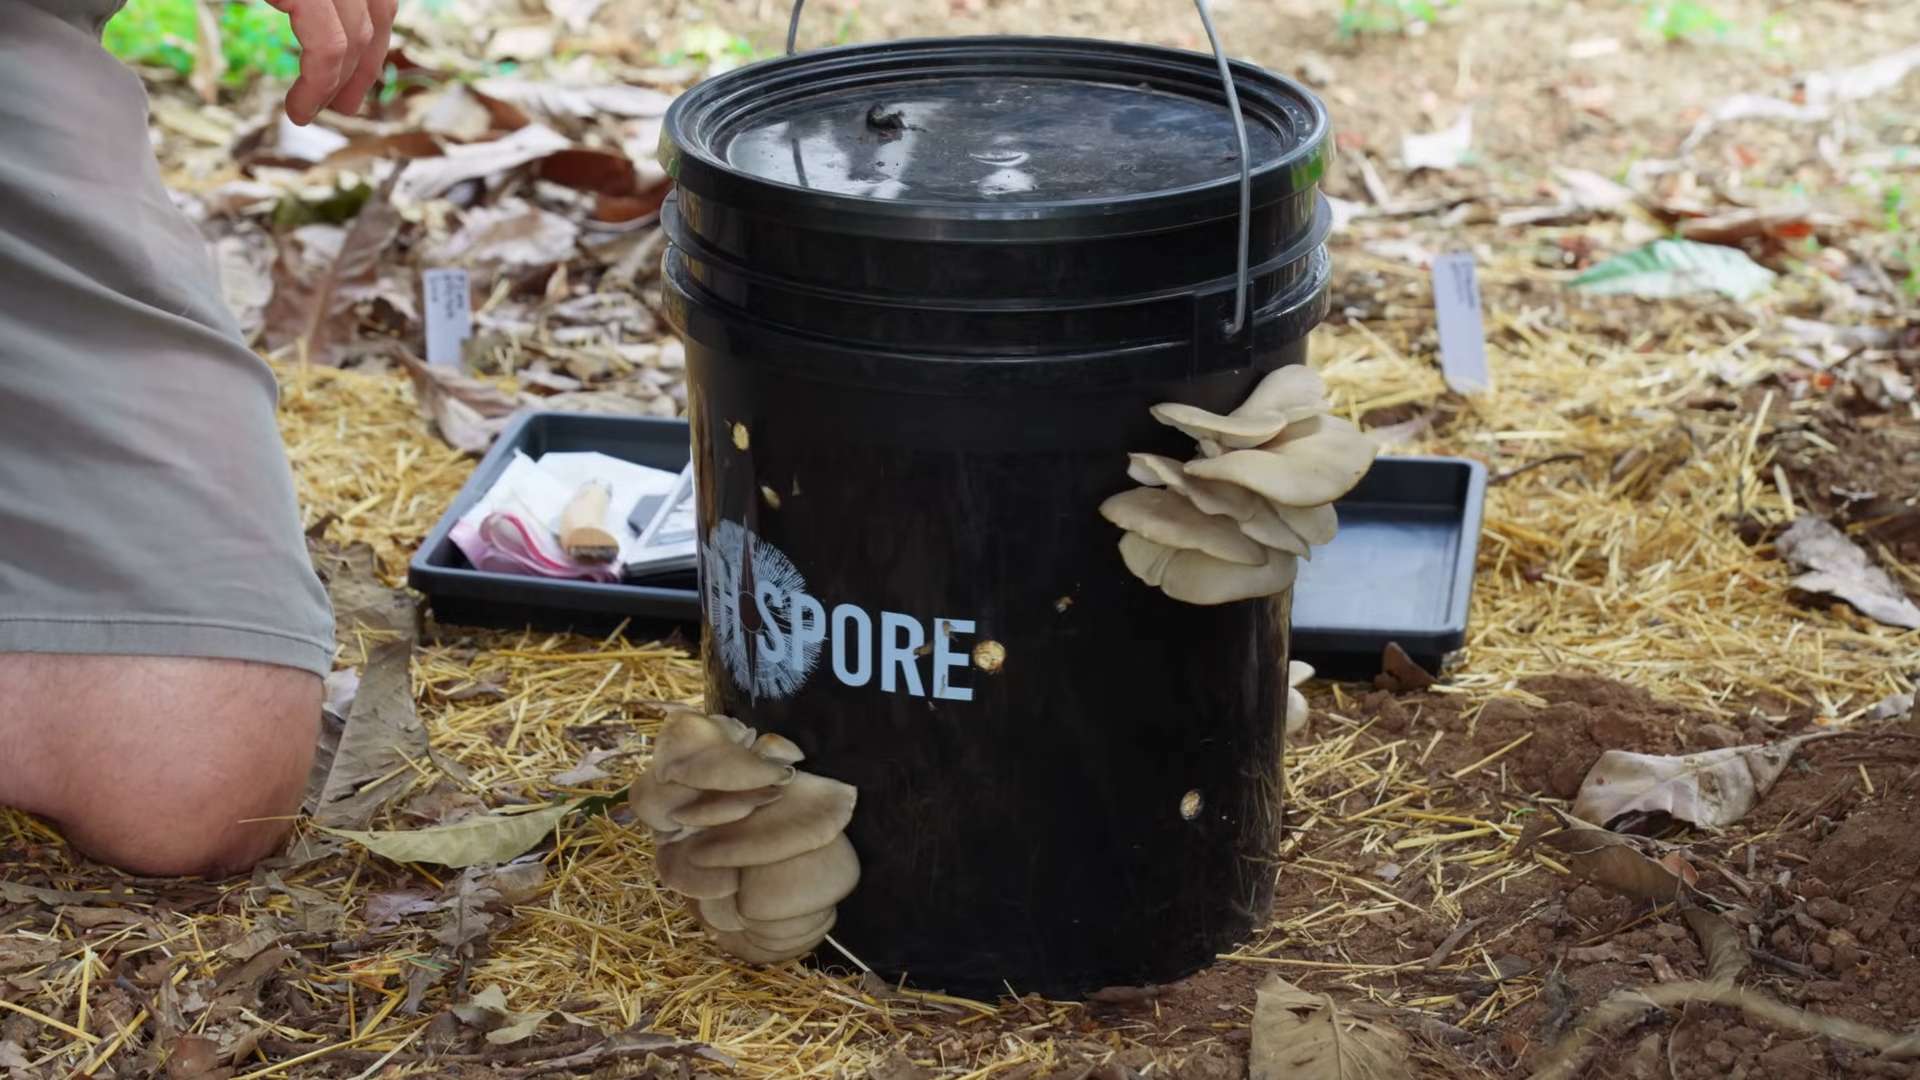
* A 5-Gallon Bucket: A clean, food-grade bucket is essential. Make sure it’s thoroughly washed and sanitized.
* Oyster Mushroom Spawn: This is the “seed” of your mushrooms. You can buy it online or from a local mushroom supplier. Look for a reputable source to ensure quality. I usually get mine online; it’s just easier!
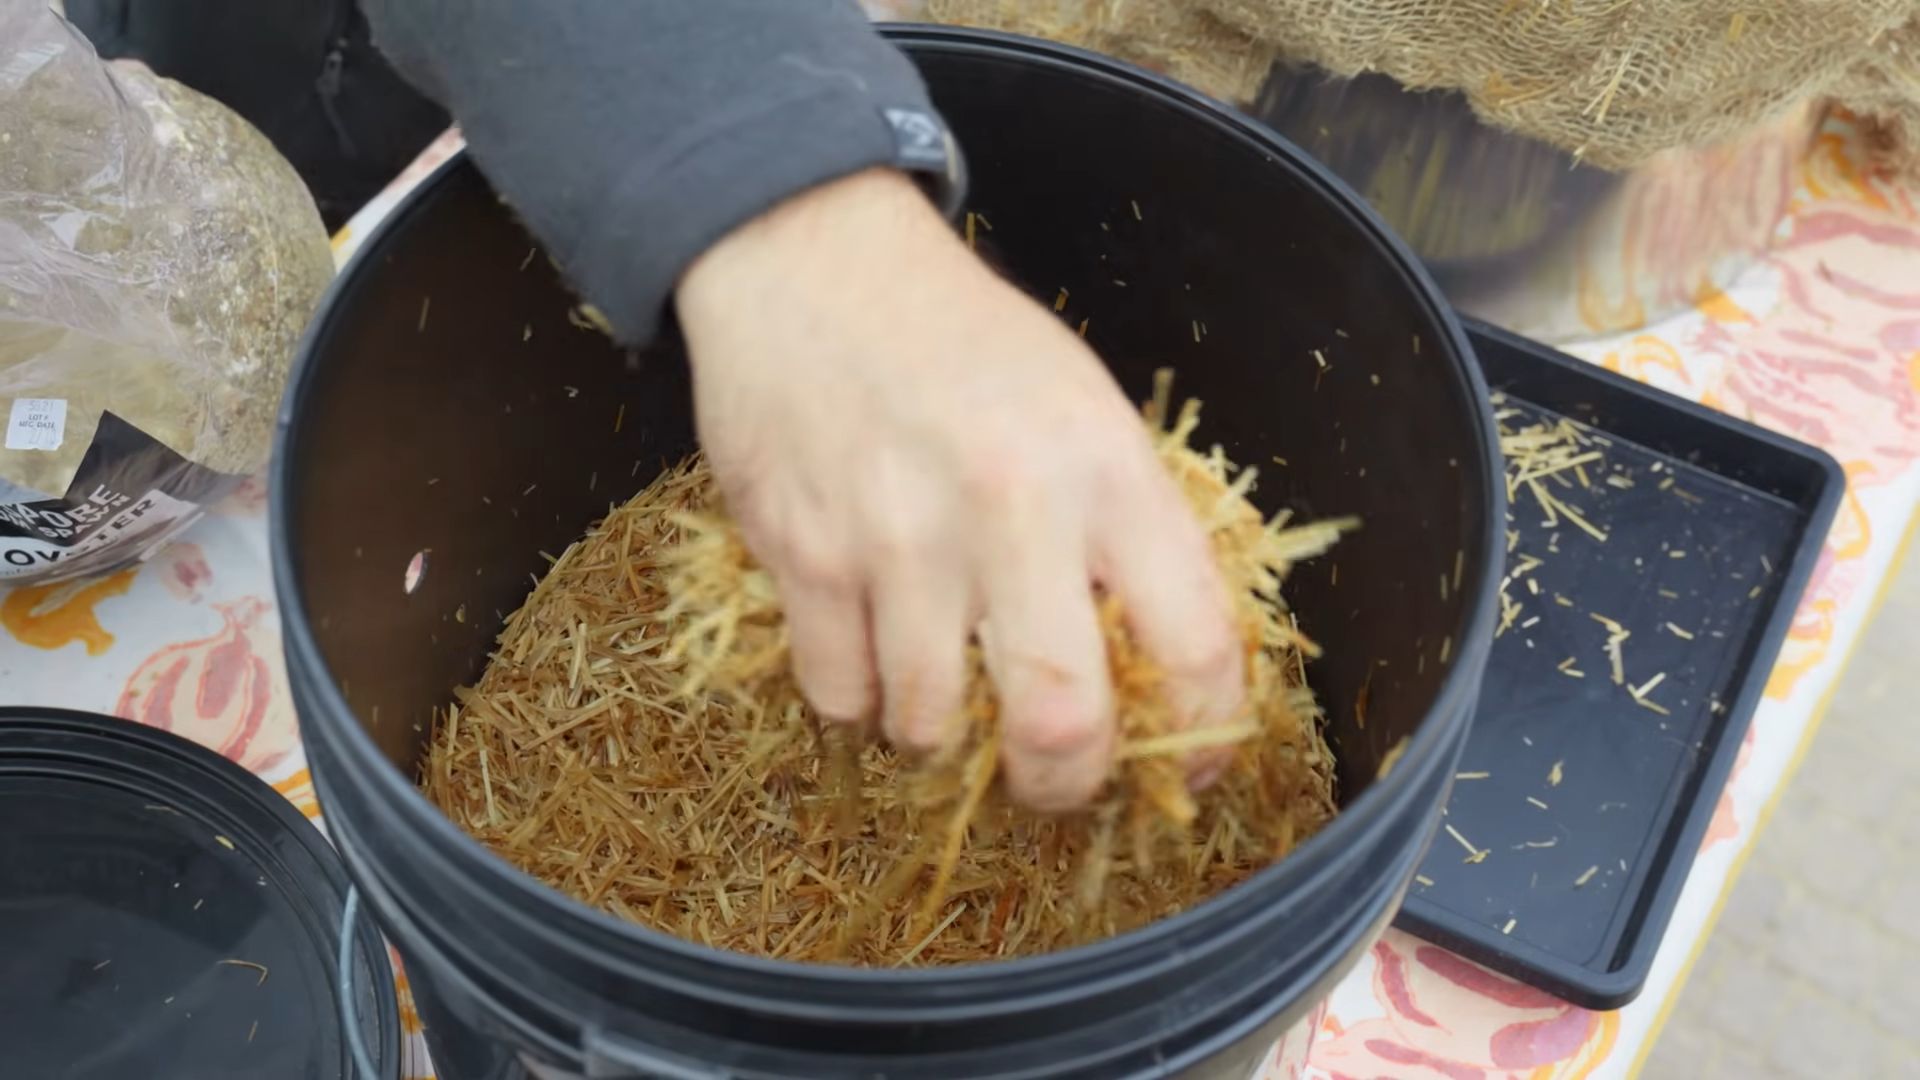
* Straw: This will be our substrate, the food source for the mushrooms. Wheat straw is ideal, but other types of straw can work too. Make sure it’s clean and free from mold.
* Boiling Water: We’ll use this to pasteurize the straw, killing off any unwanted organisms that could compete with our mushrooms.
* Large Container or Tub: Big enough to submerge the straw in boiling water. A large plastic storage bin works great.
* Drill with a 1/4-inch Drill Bit: For creating holes in the bucket for the mushrooms to grow out of.
* Spray Bottle with Water: To keep the humidity up.
* Gloves: To keep everything clean and prevent contamination.
* Optional: Duct tape (for covering holes if needed), a thermometer to check the water temperature.
Preparing the Straw: The Foundation of Your Fungi Farm
This is a crucial step! We need to pasteurize the straw to eliminate competing organisms. Think of it as clearing the land before planting your crops.
1. Chop the Straw: Cut the straw into smaller pieces, about 2-4 inches long. This makes it easier to pack into the bucket and allows the mushroom mycelium to colonize it more effectively. I usually use garden shears for this.
2. Heat the Water: Bring a large pot of water to a rolling boil. You’ll need enough water to completely submerge the straw.
3. Pasteurize the Straw: Place the chopped straw into your large container or tub. Carefully pour the boiling water over the straw, ensuring it’s completely submerged. Weigh it down with a brick or a heavy object to keep it underwater.
4. Soak the Straw: Let the straw soak in the hot water for at least 1-2 hours. This will kill off most of the unwanted bacteria and fungi.
5. Drain the Straw: After soaking, carefully drain the hot water from the straw. Let the straw cool down until it’s cool enough to handle. You want it to be damp, but not soaking wet. Squeeze out any excess water. The straw should feel like a wrung-out sponge.
Preparing the Bucket: Creating the Mushroom Home
Now, let’s get the bucket ready for its new inhabitants!
1. Drill the Holes: Using your drill and 1/4-inch drill bit, drill holes around the sides of the bucket. Space the holes about 4-6 inches apart, in a staggered pattern. Start a few inches from the bottom and continue up to the top. These holes are where the mushrooms will eventually grow out.
2. Clean the Bucket: Even though you cleaned it before, give the bucket another quick wipe down with a damp cloth to remove any dust or debris from drilling.
Inoculating the Bucket: Planting the Mushroom Seeds
This is where the magic happens! We’re introducing the mushroom spawn to the straw, allowing it to colonize and eventually produce mushrooms.
1. Layering Time: Now, it’s time to layer the straw and mushroom spawn in the bucket. Start with a layer of straw at the bottom of the bucket, about 2-3 inches thick.
2. Add Spawn: Sprinkle a generous layer of mushroom spawn over the straw. Aim for about a handful of spawn per layer.
3. Repeat: Continue layering straw and spawn, pressing down gently as you go. Make sure the spawn is evenly distributed throughout the straw.
4. Top Layer: Finish with a final layer of straw on top.
5. Don’t Overpack: Avoid packing the straw too tightly, as this can restrict airflow and hinder mushroom growth.
Incubation: The Waiting Game
This is the hardest part – waiting! During this phase, the mushroom mycelium will spread throughout the straw, colonizing it and preparing to fruit.
1. Find a Suitable Location: Place the inoculated bucket in a dark, humid location with good airflow. A basement, garage, or closet works well. The ideal temperature is between 65-75°F (18-24°C).
2. Maintain Humidity: Keep the humidity high by misting the inside of the bucket with water 1-2 times a day. You can also place a plastic bag loosely over the bucket to help retain moisture, but make sure there’s still some airflow.
3. Patience is Key: It will take about 2-3 weeks for the mycelium to fully colonize the straw. You’ll know it’s ready when the straw is covered in a white, fuzzy growth.
Fruiting: The Mushroom Bloom
Finally! The moment we’ve been waiting for!
1. Introduce Light: Once the straw is fully colonized, move the bucket to a location with indirect light. Direct sunlight can dry out the mushrooms.
2. Increase Humidity: Continue to mist the bucket regularly to maintain high humidity. You may need to mist more frequently now that the mushrooms are starting to grow.
3. Watch for Pins: Small mushroom “pins” will start to form around the holes in the bucket. These are the baby mushrooms!
4. Harvest Time: The mushrooms will grow rapidly. Harvest them when the caps are fully formed but before they start to drop spores. This is usually when the edges of the caps start to flatten out or curl upwards.
5. Harvesting Technique: To harvest, gently twist and pull the mushrooms from the bucket. Avoid cutting them, as this can leave behind a stump that can rot.
Post-Harvest: Keeping the Fungi Party Going
The fun doesn’t have to end after the first harvest!
1. Second Flush: After harvesting, the bucket will often produce a second flush of mushrooms. Continue to mist the bucket and maintain high humidity.
2. Rest Period: After the second flush, give the bucket a rest period of about a week. During this time, reduce watering slightly.
3. Repeat: You may be able to get several flushes of mushrooms from a single bucket. The yield will typically decrease with each flush.
4. Composting: Once the bucket stops producing mushrooms, the spent straw can be composted. It makes excellent fertilizer for your garden!
Troubleshooting: When Things Go Wrong (and How to Fix Them)
Even with the best planning, things can sometimes go awry. Here are some common problems and how to address them:
* Contamination: If you see green, black, or other colored molds growing in the bucket, it’s likely contaminated. Unfortunately, there’s not much you can do at this point except discard the bucket and start over. Make sure to thoroughly sanitize your equipment and use clean straw to prevent contamination.
* Slow Colonization: If the mycelium is slow to colonize the straw, it could be due to low temperatures, low humidity, or poor spawn quality. Make sure the bucket is in a warm, humid location and that you’re using fresh, high-quality spawn.
* Dry Mushrooms: If the mushrooms are dry and cracked, it’s likely due to low humidity. Mist the bucket more frequently and consider placing a plastic bag loosely over the bucket to help retain moisture.
* Small Mushrooms: If the mushrooms are small, it could be due to lack of nutrients or insufficient light. Try adding a small amount of coffee grounds to the straw when you inoculate the bucket. Also, make sure the bucket is in a location with indirect light.
* No Mushrooms: If you don’t get any mushrooms at all, it could be due to a number of factors, including contamination, poor spawn quality, or incorrect environmental conditions. Review your process and make sure you’re following all the steps correctly.
Tips and Tricks: Level Up Your Mushroom Game
Here are a few extra tips to help you become a mushroom growing pro:
* Experiment with Different Substrates: While straw is a good starting point, you
Conclusion
So, there you have it! Transforming a simple bucket into a thriving mushroom farm is not just a fun project; it’s a gateway to fresh, delicious, and sustainable food right in your own home. We’ve walked you through the process, highlighting the ease and affordability of this incredible DIY trick. Forget those expensive store-bought mushrooms that often lack flavor and freshness. With a little effort and some readily available materials, you can cultivate a constant supply of your favorite fungi.
But why is this Mushroom Bucket Growing DIY a must-try? It’s more than just a cost-effective way to enjoy mushrooms. It’s about connecting with your food source, understanding the fascinating life cycle of fungi, and reducing your environmental footprint. Think about it: no more plastic packaging from the grocery store, no more long-distance transportation of produce. You’re actively participating in a more sustainable food system, one delicious mushroom at a time.
The possibilities are endless when it comes to variations. Experiment with different mushroom species to discover your favorites. Oyster mushrooms are a great starting point due to their resilience and rapid growth, but don’t be afraid to branch out into shiitake, lion’s mane, or even wine cap mushrooms once you’ve mastered the basics. Consider adding different substrates to your mix. Coffee grounds, straw, and even shredded cardboard can all contribute to a nutrient-rich environment for your mushrooms. You can also explore different bucket sizes and configurations. A larger bucket will yield more mushrooms, while multiple smaller buckets allow for staggered harvests.
Furthermore, think about the location of your mushroom bucket. While a dark, humid environment is ideal, you can adapt your setup to suit your specific climate. In drier climates, consider misting your bucket more frequently or placing it inside a larger container with a damp cloth to maintain humidity. In colder climates, you might need to provide some insulation to protect your mushrooms from freezing temperatures.
This Mushroom Bucket Growing DIY project is also a fantastic educational opportunity for children. It’s a hands-on way to teach them about biology, sustainability, and the importance of healthy eating. Imagine the excitement on their faces as they watch their mushrooms sprout and grow!
We are confident that you’ll find this DIY project rewarding and enjoyable. It’s a simple, affordable, and sustainable way to bring fresh, delicious mushrooms into your life. So, gather your materials, follow our instructions, and get ready to embark on your mushroom-growing adventure.
We can’t wait to hear about your experiences! Share your photos, tips, and questions in the comments below. Let’s build a community of mushroom enthusiasts and learn from each other. What worked well for you? What challenges did you encounter? What unique variations did you try? Your feedback will help us improve this guide and inspire others to give it a try. Happy growing!
Frequently Asked Questions (FAQ)
What type of mushrooms are best for bucket growing?
Oyster mushrooms are generally considered the easiest and most forgiving for beginners. They are fast-growing, relatively resistant to contamination, and produce abundant yields. Shiitake mushrooms are another popular choice, but they require a bit more patience and attention to detail. Lion’s mane mushrooms are also gaining popularity, known for their unique texture and health benefits. Ultimately, the best type of mushroom for you will depend on your personal preferences and the availability of spawn or cultures in your area. Research the specific requirements of each species before you begin.
What is the best substrate to use for mushroom bucket growing?
A mixture of straw, coffee grounds, and hardwood sawdust is a great starting point. Straw provides bulk and aeration, coffee grounds add nitrogen, and sawdust provides a carbon source. You can also experiment with other materials like shredded cardboard, coconut coir, or even spent grain from brewing. The key is to ensure that your substrate is properly pasteurized or sterilized to eliminate competing organisms. Pasteurization involves heating the substrate to a temperature that kills harmful bacteria and fungi without destroying beneficial microbes. Sterilization involves heating the substrate to a higher temperature to kill all living organisms. The choice between pasteurization and sterilization will depend on the specific mushroom species you are growing and the level of contamination risk.
How do I pasteurize or sterilize my substrate?
Pasteurization can be achieved by soaking your substrate in hot water (around 160-180°F) for 1-2 hours. You can use a large pot on the stove or a heat-resistant container with a lid. Make sure the water completely covers the substrate. Sterilization requires a pressure cooker or autoclave. Place the substrate in jars or bags and pressure cook at 15 PSI for 90 minutes. Allow the substrate to cool completely before inoculating it with mushroom spawn. Always follow safety precautions when working with hot water and pressure cookers.
How do I inoculate the substrate with mushroom spawn?
Once your substrate has cooled to room temperature, it’s time to inoculate it with mushroom spawn. Spawn is essentially mushroom “seeds” that contain the mycelium, the vegetative part of the fungus. Mix the spawn thoroughly with the substrate, ensuring that it is evenly distributed throughout the bucket. The amount of spawn you need will depend on the size of your bucket and the type of mushroom you are growing. A general rule of thumb is to use about 5-10% spawn by weight.
What are the ideal environmental conditions for mushroom bucket growing?
Mushrooms thrive in dark, humid environments with good air circulation. Aim for a temperature range of 60-75°F and a humidity level of 80-90%. You can maintain humidity by misting the bucket regularly with water or by placing it inside a larger container with a damp cloth. Good air circulation is essential to prevent the buildup of carbon dioxide, which can inhibit mushroom growth. You can provide air circulation by opening the bucket periodically or by using a small fan.
How long does it take for mushrooms to grow in a bucket?
The time it takes for mushrooms to grow will vary depending on the species, the substrate, and the environmental conditions. Oyster mushrooms typically fruit within 1-2 weeks of inoculation, while shiitake mushrooms may take several months. Be patient and monitor your bucket regularly. Look for signs of mycelial growth, such as white, fuzzy patches on the substrate. Once the mycelium has fully colonized the substrate, you should start to see small mushroom pins forming.
How do I harvest my mushrooms?
Harvest your mushrooms when the caps are fully developed but before they start to drop spores. Gently twist or cut the mushrooms off the substrate at the base of the stem. Avoid pulling the mushrooms, as this can damage the mycelium and reduce future yields.
How many flushes can I expect from a mushroom bucket?
You can typically expect to get several flushes of mushrooms from a single bucket. After each harvest, allow the substrate to rest for a few days and then rehydrate it by misting it with water. You may need to add more nutrients to the substrate after a few flushes to maintain yields.
What are some common problems with mushroom bucket growing and how can I fix them?
Contamination is a common problem in mushroom cultivation. Look for signs of mold or other unwanted fungi growing in your bucket. If you suspect contamination, remove the affected area immediately and disinfect the surrounding area. Poor environmental conditions can also lead to problems. If your mushrooms are not growing properly, check the temperature, humidity, and air circulation. Pests, such as fungus gnats, can also be a nuisance. You can control pests by using sticky traps or by introducing beneficial insects.
Is mushroom bucket growing sustainable?
Yes, mushroom bucket growing is a very sustainable practice. It utilizes waste products like coffee grounds and straw, reduces the need for transportation and packaging, and provides a healthy and nutritious food source. By growing your own mushrooms, you can reduce your environmental footprint and contribute to a more sustainable food system.
Leave a Comment