

Indoor Sprout Growing Beginners, listen up! Have you ever dreamt of having fresh, vibrant greens at your fingertips, even when the snow is falling outside? Imagine adding a burst of homegrown flavor to your salads, sandwiches, and smoothies, all thanks to your own little indoor garden. Well, stop dreaming and start sprouting! This DIY guide is your passport to the wonderful world of indoor sprout growing, and trust me, it’s easier than you think.
Sprouting has a rich history, dating back thousands of years to ancient China, where sprouts were valued for their nutritional benefits and medicinal properties. Today, this ancient practice is experiencing a modern-day revival as more and more people discover the joy and convenience of growing their own food.
Why should you jump on the indoor sprout growing bandwagon? Because it’s a game-changer! In today’s busy world, finding time for gardening can be a challenge. But with indoor sprouts, you can enjoy fresh, nutrient-packed greens in just a few days, without the need for a large garden, fancy equipment, or even a green thumb. Plus, it’s a fantastic way to reduce your grocery bill and minimize your environmental impact. So, let’s dive in and unlock the secrets to successful indoor sprout growing beginners!
Indoor Sprossen ziehen für Anfänger: Dein einfacher Leitfaden
Hallo liebe Gartenfreunde! Habt ihr Lust, euch auch im Winter mit frischen, knackigen Sprossen zu versorgen? Das ist einfacher als ihr denkt und macht richtig Spaß! Ich zeige euch, wie ihr ganz ohne grünen Daumen eure eigenen kleinen Vitaminbomben zu Hause ziehen könnt. Los geht’s!
Was du brauchst:
* Sprossengläser oder Keimschalen: Es gibt spezielle Sprossengläser mit Siebdeckel, die super praktisch sind. Keimschalen sind flache Schalen mit Löchern im Boden. Ihr könnt aber auch einfach ein großes Einmachglas und ein Stück Gaze oder ein feines Sieb verwenden.
* Sprossensamen: Achtet darauf, dass ihr spezielle Sprossensamen kauft, die für den Verzehr geeignet sind. Im Supermarkt oder Bioladen gibt es eine große Auswahl: Alfalfa, Radieschen, Brokkoli, Linsen, Mungbohnen, Kresse und viele mehr.
* Frisches Wasser: Am besten gefiltertes Wasser oder abgekochtes, abgekühltes Leitungswasser.
* Ein dunkler, warmer Ort: Die Sprossen keimen am besten an einem dunklen Ort, aber nicht komplett finster. Ein Küchenschrank oder eine Ecke auf der Arbeitsfläche, die nicht direktem Sonnenlicht ausgesetzt ist, ist ideal.
* Geduld: Sprossen brauchen Zeit zum Wachsen, aber es lohnt sich!
Die Vorbereitung:
* Samen auswählen: Entscheidet euch für eine Sorte Sprossen, die euch schmeckt. Fangt am besten mit einer Sorte an, um den Prozess kennenzulernen.
* Samenmenge bestimmen: Die Menge der Samen hängt von der Größe eures Sprossenglases oder eurer Keimschale ab. Als Faustregel gilt: Bedeckt den Boden des Gefäßes mit einer dünnen Schicht Samen. Sie quellen noch auf!
* Samen einweichen: Gebt die Samen in eine Schüssel und bedeckt sie mit reichlich Wasser. Die Einweichzeit variiert je nach Sorte. Alfalfa und Radieschen brauchen etwa 4-6 Stunden, Mungbohnen und Linsen 8-12 Stunden. Lest die Angaben auf der Samenpackung.
Der Keimprozess: Schritt für Schritt
1. Samen abspülen: Nach dem Einweichen gießt ihr das Wasser ab und spült die Samen gründlich unter fließendem Wasser ab. Das ist wichtig, um Keime zu entfernen.
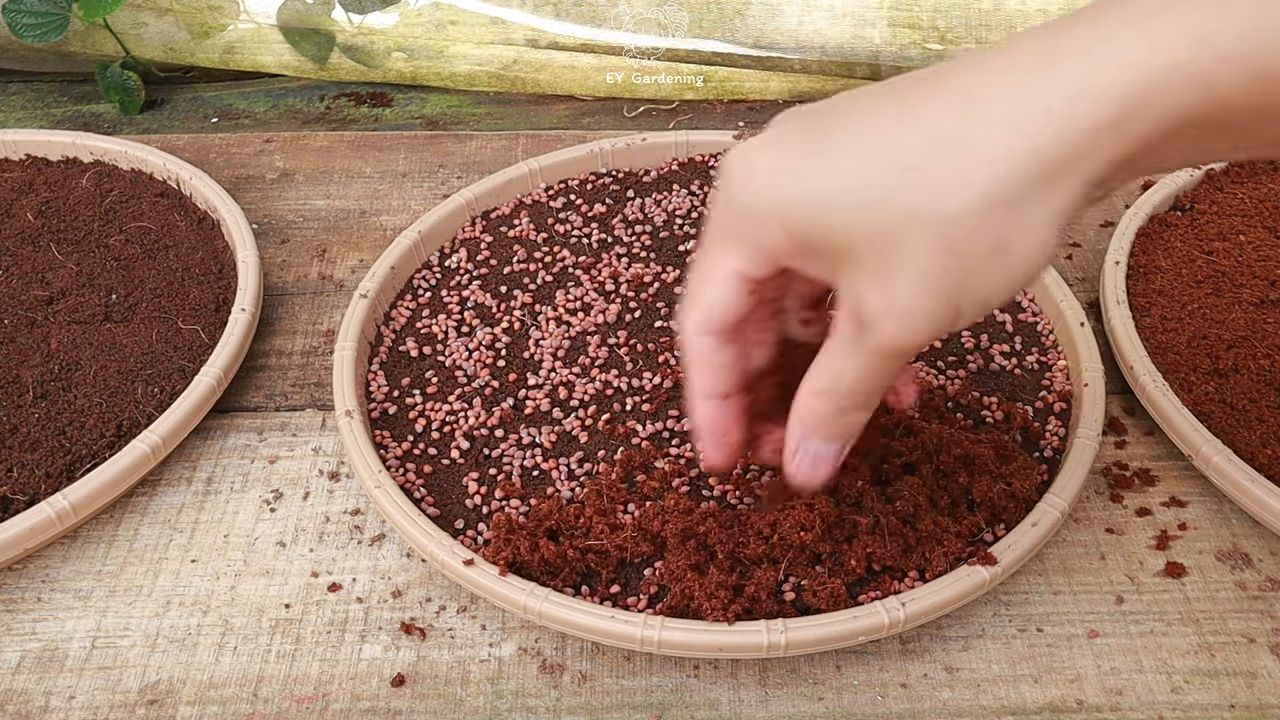
2. Samen ins Sprossenglas oder die Keimschale geben: Verteilt die Samen gleichmäßig im Sprossenglas oder in der Keimschale.
3. Sprossen spülen: Das ist der wichtigste Schritt! Spült die Sprossen 2-3 Mal täglich mit frischem Wasser. Das verhindert Schimmelbildung und hält die Sprossen feucht. Bei Sprossengläsern könnt ihr das Wasser einfach durch den Siebdeckel gießen. Bei Keimschalen müsst ihr darauf achten, dass das Wasser gut abläuft.
4. Sprossen lagern: Stellt das Sprossenglas oder die Keimschale an einen dunklen, warmen Ort. Achtet darauf, dass die Sprossen nicht direktem Sonnenlicht ausgesetzt sind.
5. Warten und beobachten: Nach ein paar Tagen beginnen die Samen zu keimen. Ihr werdet kleine Wurzeln und Blättchen sehen.
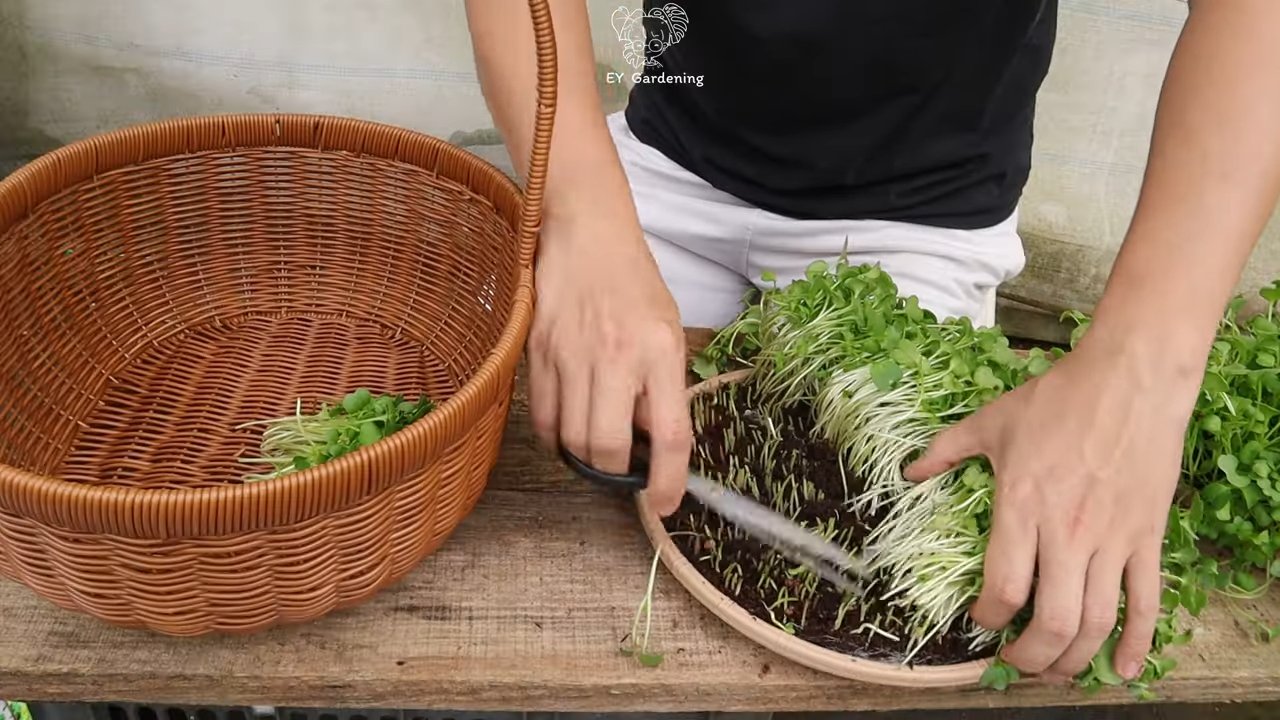
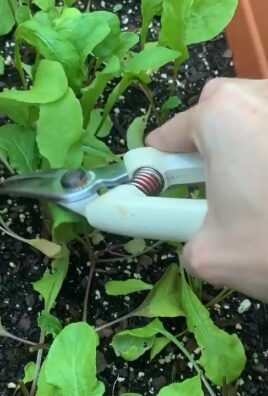
6. Sprossen ernten: Die Erntezeit hängt von der Sorte ab. Alfalfa und Radieschen sind nach etwa 5-7 Tagen erntereif, Mungbohnen nach 3-5 Tagen. Die Sprossen sind fertig, wenn sie die gewünschte Größe und den gewünschten Geschmack haben.
7. Sprossen abspülen und lagern: Vor dem Verzehr spült ihr die Sprossen noch einmal gründlich ab. Lagert sie im Kühlschrank in einem luftdichten Behälter. Dort halten sie sich etwa 3-5 Tage.
Häufige Probleme und Lösungen:
* Schimmelbildung: Schimmelbildung ist das häufigste Problem beim Sprossen ziehen. Das passiert, wenn die Sprossen nicht ausreichend gespült werden oder wenn die Luftzirkulation schlecht ist. Achtet darauf, die Sprossen regelmäßig zu spülen und für eine gute Belüftung zu sorgen. Wenn ihr Schimmel entdeckt, solltet ihr die betroffenen Sprossen entsorgen.
* Faule Sprossen: Faule Sprossen sind ein Zeichen dafür, dass die Samen nicht keimfähig waren oder dass die Sprossen zu feucht sind. Achtet darauf, hochwertige Sprossensamen zu verwenden und die Sprossen nicht zu überwässern.
* Langsames Wachstum: Langsames Wachstum kann verschiedene Ursachen haben. Möglicherweise ist die Temperatur zu niedrig oder die Sprossen bekommen nicht genug Feuchtigkeit. Stellt die Sprossen an einen wärmeren Ort und spült sie häufiger.
Tipps und Tricks für noch mehr Erfolg:
* Verschiedene Sorten mischen: Probiert verschiedene Sorten Sprossen zu mischen, um einen abwechslungsreichen Geschmack zu erhalten.
* Sprossen im Salat, Smoothie oder auf dem Brot: Sprossen sind vielseitig einsetzbar. Sie schmecken lecker im Salat, im Smoothie oder einfach auf dem Brot.
* Sprossen als Dekoration: Sprossen sind nicht nur gesund, sondern auch eine tolle Dekoration für eure Gerichte.
* Sprossen für Tiere: Auch eure Haustiere freuen sich über frische Sprossen. Gebt ihnen eine kleine Menge als gesunden Snack.
* Sprossen im Winter: Gerade im Winter, wenn es wenig frisches Gemüse gibt, sind Sprossen eine tolle Möglichkeit, sich mit Vitaminen und Mineralstoffen zu versorgen.
* Sprossen im Sommer: Auch im Sommer sind Sprossen eine willkommene Abwechslung. Sie sind leicht verdaulich und erfrischend.
* Sprossen mit Kindern: Das Sprossen ziehen ist eine tolle Aktivität für Kinder. Sie lernen, woher ihr Essen kommt und wie Pflanzen wachsen.
* Sprossen als Geschenk: Selbstgezogene Sprossen sind ein originelles und gesundes Geschenk.
Reinigung der Sprossengläser und Keimschalen:
* Nach jeder Ernte reinigen: Nach jeder Ernte solltet ihr die Sprossengläser oder Keimschalen gründlich reinigen, um Bakterien und Schimmelbildung vorzubeugen.
* Heißes Wasser und Spülmittel: Reinigt die Gefäße mit heißem Wasser und Spülmittel.
* Essig oder Zitronensäure: Bei hartnäckigen Verschmutzungen könnt ihr Essig oder Zitronensäure verwenden.
* Gut trocknen lassen: Lasst die Gefäße nach der Reinigung gut trocknen, bevor ihr sie wieder verwendet.
Spezielle Sprossenarten und ihre Besonderheiten:
Alfalfa Sprossen
Alfalfa Sprossen sind reich an Vitaminen, Mineralstoffen und Proteinen. Sie haben einen milden, leicht nussigen Geschmack und sind vielseitig einsetzbar. Sie sind relativ einfach zu ziehen und daher gut für Anfänger geeignet. Die Einweichzeit beträgt ca. 4-6 Stunden, die Keimdauer 5-7 Tage.
Radieschen Sprossen
Radieschen Sprossen haben einen würzigen, leicht scharfen Geschmack. Sie sind reich an Vitamin C und Senfölglykosiden, die entzündungshemmend wirken. Sie sind ebenfalls relativ einfach zu ziehen. Die Einweichzeit beträgt ca. 4-6 Stunden, die Keimdauer 5-7 Tage.
Brokkoli Sprossen
Brokkoli Sprossen sind besonders reich an Sulforaphan, einem sekundären Pflanzenstoff, der als krebsvorbeugend gilt. Sie haben einen milden, leicht kohlartigen Geschmack. Sie sind etwas anspruchsvoller in der Anzucht, da sie empfindlicher auf Schimmelbildung reagieren. Die Einweichzeit beträgt ca. 4-6 Stunden, die Keimdauer 5-7 Tage.
Mungbohnen Sprossen
Mungbohnen Sprossen sind reich an Proteinen und Ballaststoffen. Sie haben einen milden, leicht süßlichen Geschmack und sind besonders in der asiatischen Küche beliebt. Sie sind relativ einfach zu ziehen. Die Einweichzeit beträgt ca. 8-12 Stunden, die Keimdauer 3-5 Tage.
Linsen Sprossen
Linsen Sprossen sind ebenfalls reich an Proteinen und Ballaststoffen. Sie haben einen milden, leicht erdigen Geschmack. Sie sind relativ einfach zu ziehen. Die Einweichzeit beträgt ca
Conclusion
So, there you have it! Embracing the world of indoor sprout growing is not just a fun project; it’s a gateway to fresher, healthier, and more sustainable eating. We’ve walked you through a simple, beginner-friendly method that transforms humble seeds into vibrant, nutrient-packed sprouts right in your own kitchen. Why is this DIY trick a must-try? Because it puts you in control of your food source, offering unparalleled freshness and flavor that you simply can’t find in store-bought sprouts. Imagine adding a burst of peppery radish sprouts to your salad, a handful of crunchy alfalfa sprouts to your sandwich, or a sprinkle of delicate broccoli sprouts to your morning smoothie – all grown with your own two hands.
Beyond the taste and freshness, growing your own sprouts is incredibly economical and environmentally friendly. You’re reducing your reliance on commercially grown produce, minimizing transportation costs, and cutting down on plastic packaging. Plus, it’s a fantastic way to connect with nature, even in the heart of the city.
But the beauty of indoor sprout growing lies in its adaptability. Feel free to experiment with different types of seeds. Sunflower seeds offer a nutty flavor and satisfying crunch, while mung beans are perfect for Asian-inspired dishes. You can even create your own sprout mixes, combining different seeds for a unique blend of flavors and textures. Consider adding a touch of spice by including mustard seeds or fenugreek seeds in your mix. For a milder flavor, try clover or lentil sprouts.
Don’t be afraid to adjust the sprouting time to suit your preferences. Some people prefer their sprouts to be shorter and more delicate, while others like them to be longer and more robust. The key is to monitor your sprouts closely and harvest them when they reach your desired stage of growth.
Ready to take the plunge? We wholeheartedly encourage you to give this DIY indoor sprout growing method a try. It’s easier than you think, and the rewards are well worth the effort. Once you’ve experienced the joy of harvesting your own fresh sprouts, you’ll never look at store-bought sprouts the same way again.
We’re confident that you’ll find this method to be a simple and rewarding way to add more nutrients and flavor to your diet. But the real magic happens when you share your experiences with others. We invite you to share your sprout growing journey with us! Post photos of your sprouts on social media, tag us in your posts, and let us know what you think. We’re eager to hear your tips, tricks, and variations on this method. Together, we can spread the word about the joys of indoor sprout growing and inspire others to embrace a healthier, more sustainable way of eating. So, grab your seeds, your jar, and your enthusiasm, and get ready to embark on a sprouting adventure! Happy sprouting!
Frequently Asked Questions (FAQ)
What types of seeds are best for indoor sprout growing?
The possibilities are vast! Some of the most popular and beginner-friendly seeds for indoor sprout growing include alfalfa, broccoli, radish, clover, mung beans, lentils, and sunflower seeds. Each type offers a unique flavor and texture profile. Alfalfa sprouts are mild and slightly sweet, while radish sprouts have a peppery kick. Broccoli sprouts are known for their high concentration of antioxidants, and mung beans are a staple in Asian cuisine. Lentils provide a hearty, earthy flavor, and sunflower seeds offer a nutty crunch. Experiment with different types to find your favorites! Just be sure to use seeds specifically intended for sprouting, as seeds intended for planting may be treated with chemicals.
How long does it take for sprouts to grow?
Sprouting time varies depending on the type of seed and the environmental conditions. Generally, most sprouts will be ready to harvest in 3 to 7 days. Alfalfa sprouts typically take 5 to 6 days, while radish sprouts can be ready in as little as 3 days. Mung beans may take 4 to 5 days, and broccoli sprouts usually take 5 to 7 days. Keep in mind that warmer temperatures can accelerate sprouting, while cooler temperatures can slow it down. The best way to determine when your sprouts are ready is to monitor their growth and harvest them when they reach your desired size and flavor.
How often should I rinse my sprouts?
Rinsing your sprouts is crucial for preventing mold and bacteria growth. You should rinse your sprouts at least twice a day, preferably in the morning and evening. Use cool, clean water and make sure to drain the sprouts thoroughly after rinsing. This helps to remove any excess moisture and prevent the sprouts from becoming soggy. In warmer climates or during humid weather, you may need to rinse your sprouts more frequently.
How do I prevent mold growth on my sprouts?
Mold growth is a common concern when growing sprouts, but it can be easily prevented with proper care. The key is to ensure good air circulation and adequate drainage. Make sure your sprouting jar is well-ventilated and that the sprouts are not overcrowded. Rinse the sprouts thoroughly at least twice a day and drain them well after rinsing. Avoid using tap water that may contain chlorine, as this can inhibit sprouting and promote mold growth. If you notice any signs of mold, discard the affected sprouts immediately.
How do I store my sprouts after harvesting?
Once your sprouts are ready to harvest, rinse them thoroughly and drain them well. Pat them dry with a clean paper towel to remove any excess moisture. Store the sprouts in an airtight container in the refrigerator. They should stay fresh for up to a week. Be sure to check the sprouts regularly for any signs of spoilage and discard them if they start to smell or look slimy.
Can I grow sprouts without a sprouting jar?
Yes, you can! While a sprouting jar is a convenient option, you can also grow sprouts using other methods. One popular alternative is to use a sprouting bag, which is a mesh bag that allows for good air circulation and drainage. You can also use a colander or a shallow dish lined with a damp paper towel. The key is to provide a moist environment and ensure good air circulation to prevent mold growth.
Are there any seeds I should avoid sprouting?
Yes, there are certain seeds that should be avoided for sprouting due to potential toxicity. These include kidney beans, lima beans, and other beans that contain high levels of phytohemagglutinin, a toxic compound that can cause nausea, vomiting, and diarrhea. These beans must be cooked thoroughly to destroy the toxin. Also, avoid sprouting seeds that are labeled as “treated” or “coated,” as these may contain chemicals that are harmful to consume. Always use seeds specifically intended for sprouting.
My sprouts are not growing. What could be the problem?
There are several reasons why your sprouts may not be growing. First, make sure you are using fresh, viable seeds. Old or damaged seeds may not germinate properly. Second, ensure that the sprouts are receiving adequate moisture. They should be rinsed at least twice a day and kept consistently moist. Third, check the temperature. Sprouts prefer a warm, but not hot, environment. Extremely cold or hot temperatures can inhibit growth. Finally, make sure the sprouts are getting enough air circulation. Overcrowding can also hinder growth.
Can I grow sprouts in direct sunlight?
No, sprouts should not be grown in direct sunlight. Direct sunlight can overheat the sprouts and cause them to dry out or even cook. Sprouts prefer a cool, dark environment. Place your sprouting jar or container in a location that receives indirect sunlight or artificial light.
Is indoor sprout growing safe?
Yes, indoor sprout growing is generally safe, but it’s important to follow proper hygiene practices to prevent the growth of harmful bacteria. Always use clean water and equipment, rinse the sprouts thoroughly, and store them properly. If you have any concerns about food safety, consult with a healthcare professional.
Leave a Comment