

Growing Strawberries Indoors might seem like a far-fetched dream, especially if you don’t have a sprawling garden. But guess what? It’s totally achievable, and I’m here to show you how! Forget those bland, store-bought berries – imagine plucking juicy, sun-kissed (well, grow-light-kissed!) strawberries right from your own home.
For centuries, strawberries have been prized for their delicious flavor and vibrant color. From ancient Roman gardens to medieval feasts, these little red gems have always held a special place in our hearts (and stomachs!). Now, you don’t need acres of land to enjoy this sweet treat.
Why should you learn these DIY tricks for growing strawberries indoors? Well, think about it: you’ll have fresh, organic strawberries year-round, regardless of the weather outside. Plus, it’s a fantastic way to add a touch of green to your living space and impress your friends with your green thumb. Who wouldn’t want a taste of summer, even in the dead of winter? Let’s dive in and discover the secrets to a bountiful indoor strawberry harvest!
Growing Strawberries Indoors: Your DIY Guide for a Sweet Harvest
Hey Strawberry Lovers! Have you ever dreamed of picking fresh, juicy strawberries in the middle of winter? Well, listen up, because I’m going to show you how to turn that dream into a reality! Growing strawberries indoors is not only possible but also incredibly rewarding. It’s a great project to bring some green into your home while enjoying delicious fruit at the same time. Let’s get started!
What You Need: Your Shopping List
Before we start planting, we need to make sure we have everything necessary on hand. Here is a list of the things you’ll need:
- Strawberry starters: Choose remontant (everbearing) varieties that produce fruit several times a year. Popular options include ‘Albion’, ‘Seascape’, or ‘Eversweet’. These varieties are ideal for indoor growing.
- Pots/Containers: Pots with good drainage are crucial. I recommend pots with a diameter of at least 15 cm (6 inches). You can also use hanging baskets to save space.
- High-quality potting soil: Use a well-draining potting soil that is rich in organic matter. A mix of peat moss, perlite, and vermiculite is ideal.
- Grow light: Strawberries need a lot of light, especially in winter. An LED grow light is energy-efficient and provides the necessary spectrum.
- Liquid fertilizer: A balanced liquid fertilizer (e.g., 10-10-10) is important to supply your strawberries with the necessary nutrients.
- Spray bottle: For moistening the leaves and increasing humidity.
- Garden shears: For removing dead leaves and runners.
- A small brush or paintbrush: For pollinating the flowers (more on that later).
Step-by-Step Guide: Planting and Caring for Strawberries
Now that we have everything, we can begin the actual growing process. Follow these steps to successfully grow your strawberries indoors:
1. Preparing the Pots
- Clean the pots: Make sure your pots are clean to prevent diseases. Rinse them with warm, soapy water and dry them thoroughly.
- Ensure drainage: Place a layer of pottery shards or pebbles at the bottom of the pot to ensure good drainage. This prevents waterlogging, which can lead to root rot.
- Fill the pots with soil: Fill the pots with the prepared potting soil. Leave about 2-3 cm (1 inch) of space to the rim of the pot.
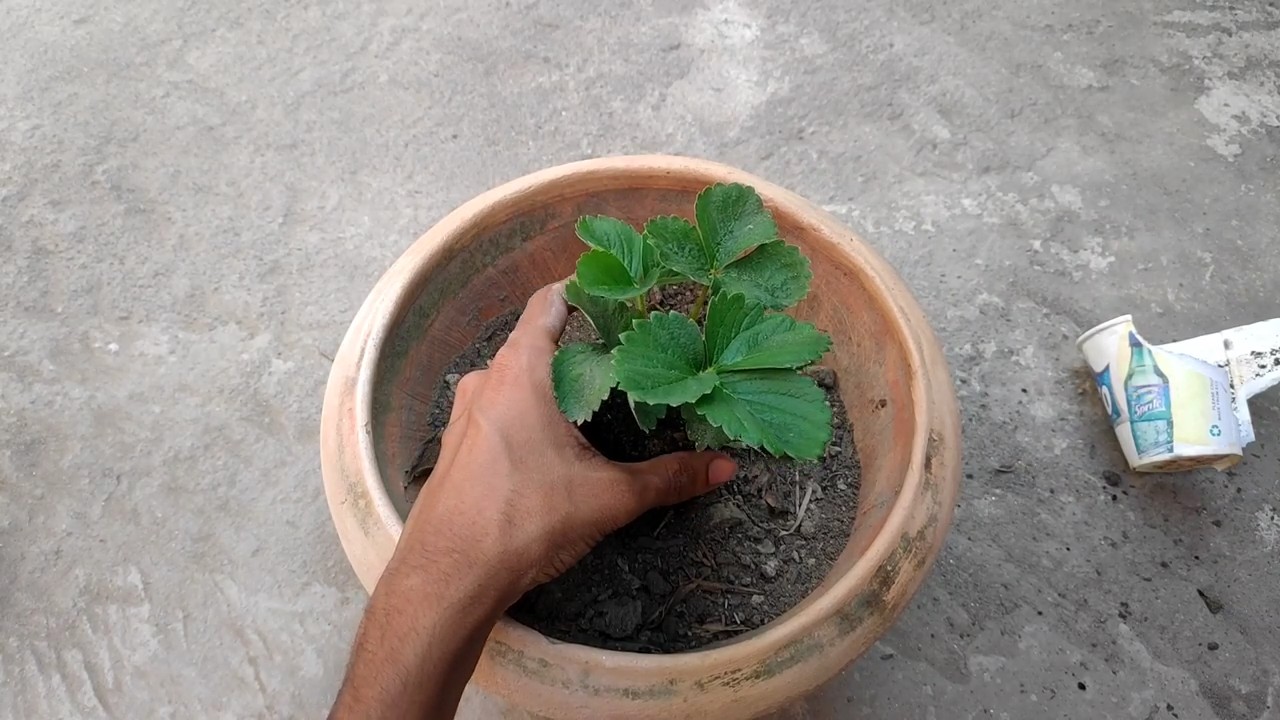
2. Planting the Strawberry Starters
- Prepare the starters: Carefully remove the strawberry starters from their containers. Gently loosen the roots to encourage growth.
- Plant the starters: Dig a small hole in the soil large enough to accommodate the starter’s roots. Place the starter so that the crown (the point where the leaves grow out of the root) is just above the soil surface.
- Fill the hole: Fill the hole with soil and press it down lightly. Make sure the roots are well-covered.
- Water the starters: Water the starters thoroughly until water runs out of the drainage holes. This helps to settle the soil and moisten the roots.
3. The Right Location and Lighting
- Choose a sunny location: Strawberries need at least 6-8 hours of sunlight per day. If you don’t have a sunny spot, use a grow light.
- Position the grow light: Place the grow light about 30-45 cm (12-18 inches) above the plants. Make sure the light covers all the foliage.
- Turn on the light: Turn on the grow light for 12-14 hours per day. Use a timer to automate the lighting cycle.
4. Proper Watering and Fertilizing
- Watering: Water your strawberries regularly, but avoid waterlogging. The soil should be moist, but not wet. Check the soil’s moisture by sticking your finger about 2-3 cm (1 inch) deep into it. If the soil feels dry, it’s time to water.
- Fertilizing: Fertilize your strawberries every 2-3 weeks with a balanced liquid fertilizer. Follow the instructions on the packaging. During the flowering period, you can use a fertilizer with a higher phosphorus content to promote fruit formation.
- Humidity: Strawberries prefer high humidity. Spray the leaves regularly with water to increase humidity. You can also place a tray of water near the plants.
5. Pollinating the Flowers
- Why pollination is important: Strawberries are self-fertile, but pollination helps to improve fruit development. Outdoors, bees and other insects do this job. Indoors, we have to lend a hand.
- Manual pollination: Use a small brush or paintbrush to transfer pollen from one flower to another. Gently dab the stamens (the small stalks in the center of the flower) and transfer the pollen to the stigma (the sticky part in the center of the flower).
- Repeat the pollination: Repeat the pollination every few days to ensure all flowers are pollinated.
6. Caring for the Plants
- Remove dead leaves: Regularly remove dead or yellow leaves to prevent diseases and improve air circulation.
- Remove runners: Strawberries form runners (long shoots that produce new plants). Remove these runners to focus the plant’s energy on fruit production. However, you can also let the runners root to grow new plants.
- Pests and diseases: Watch out for pests like aphids or spider mites. If infested, you can spray the plants with a mild soap solution. Also, watch for signs of diseases like powdery mildew. Ensure good air circulation and avoid excessive moisture to prevent diseases.
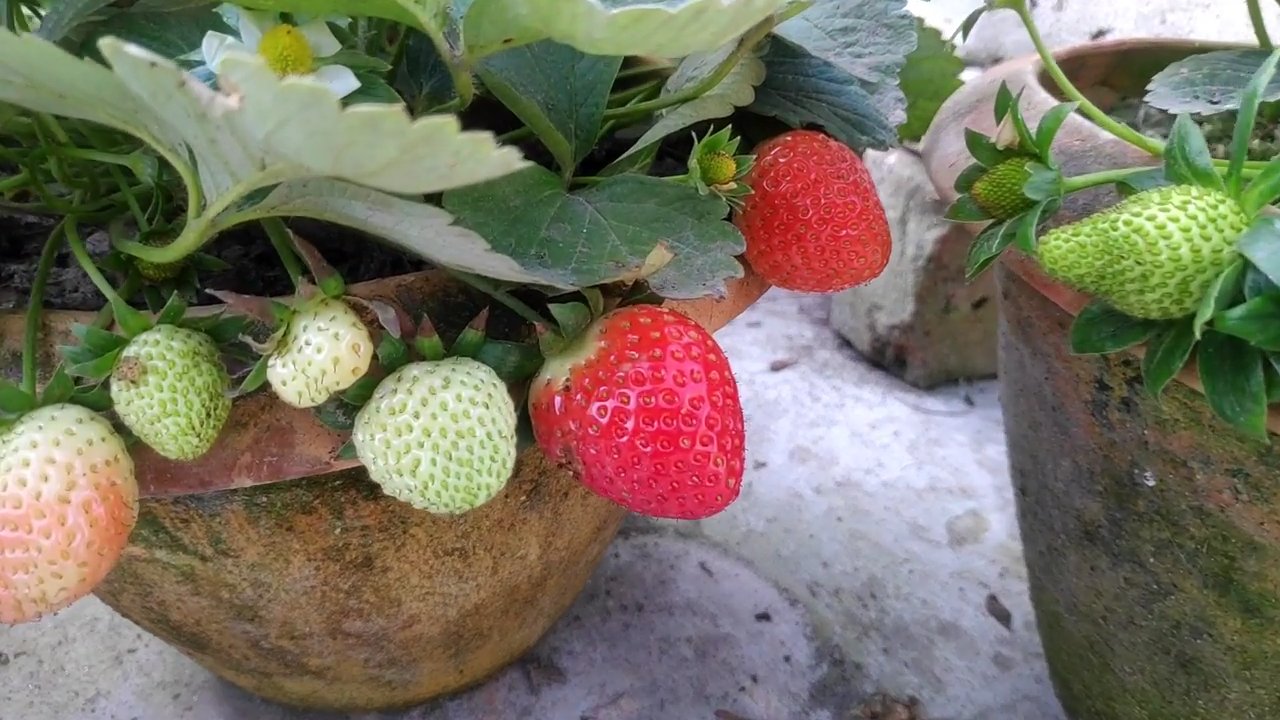
7. The Harvest
- When to harvest: Strawberries are ripe when they have a deep red color and are easily detached from the stem.
- How to harvest: Pick the strawberries gently to avoid damaging the plant. Cut the stem just above the fruit.
- Enjoy your harvest: Enjoy your freshly picked strawberries! They taste best when eaten straight from the plant. You can also use them for desserts, jam, or smoothies.
Common Problems and Solutions
Problems can also arise when growing strawberries indoors. Here are some common issues and how to solve them:
Yellow leaves: This can indicate overwatering, a nutrient deficiency, or a pest infestation.
No fruit: This could be due to insufficient pollination or too little light. Make sure you are pollinating the flowers regularly and that the plants are getting enough light.
Conclusion
So, there you have it! Growing strawberries indoors is not only possible, but with this simple DIY trick, it becomes surprisingly accessible and rewarding, even for those without a green thumb or ample outdoor space. We’ve demystified the process, breaking it down into manageable steps that anyone can follow. Forget the expensive store-bought berries that lack that sun-ripened sweetness; imagine plucking your own juicy, vibrant strawberries right from your windowsill, all year round!
This isn’t just about saving money; it’s about connecting with nature, experiencing the joy of nurturing life, and enjoying the unparalleled flavor of homegrown produce. The satisfaction of watching those tiny seeds sprout, the anticipation as the blossoms appear, and the ultimate reward of biting into a perfectly ripe strawberry you cultivated yourself is an experience that’s hard to beat.
But the beauty of this DIY strawberry growing method lies in its adaptability. Feel free to experiment with different strawberry varieties to find your personal favorite. Everbearing varieties are particularly well-suited for indoor growing, as they produce fruit throughout the season. Consider using different types of containers – hanging baskets can add a touch of whimsy, while vertical planters are perfect for maximizing space in smaller apartments. You can even get creative with your lighting setup, supplementing natural light with grow lights to ensure optimal growth, especially during the darker winter months.
Don’t be afraid to tweak the soil mixture to suit your specific needs. Adding a bit of compost or worm castings can provide an extra boost of nutrients. And remember, consistent watering and proper drainage are key to success. Overwatering can lead to root rot, so be sure to let the soil dry out slightly between waterings.
We understand that embarking on a new gardening adventure can be a little daunting, but we’re confident that with a little patience and attention, you’ll be enjoying a bountiful harvest of delicious strawberries in no time. This DIY trick for growing strawberries indoors is a game-changer, offering a sustainable and enjoyable way to bring a taste of summer into your home, regardless of the season.
So, what are you waiting for? Gather your supplies, follow our simple steps, and prepare to be amazed by the abundance you can create. We encourage you to try this DIY trick and share your experiences with us! Post photos of your strawberry plants on social media using #IndoorStrawberries and let us know how it’s going. We can’t wait to see your success stories and learn from your unique experiences. Happy growing!
Frequently Asked Questions (FAQ)
Q: What type of strawberries are best for growing indoors?
A: Everbearing varieties are generally recommended for indoor growing because they produce fruit throughout the growing season, rather than just once a year. Some popular everbearing varieties include ‘Seascape,’ ‘Albion,’ and ‘Ozark Beauty.’ Day-neutral varieties, which are less sensitive to day length, also perform well indoors. Avoid June-bearing varieties, as they require specific day length conditions that are difficult to replicate indoors. Consider the size of the plant as well; smaller, more compact varieties may be better suited for limited indoor spaces. Researching the specific needs of each variety will help you choose the best option for your indoor environment.
Q: How much sunlight do indoor strawberries need?
A: Strawberries need at least 6-8 hours of direct sunlight per day to thrive. If you don’t have a sunny windowsill, you’ll need to supplement with grow lights. LED grow lights are a good option because they are energy-efficient and don’t produce excessive heat. Position the grow lights about 6-12 inches above the plants and keep them on for 12-16 hours per day. Monitor your plants closely and adjust the lighting as needed. Signs of insufficient light include leggy growth, pale leaves, and a lack of flowering.
Q: What kind of soil should I use for growing strawberries indoors?
A: Strawberries prefer well-draining, slightly acidic soil with a pH between 5.5 and 6.5. A good potting mix for indoor strawberries is a combination of peat moss, perlite, and vermiculite. You can also add some compost or aged manure to provide extra nutrients. Avoid using garden soil, as it can be too heavy and may contain pests or diseases. Ensure your containers have drainage holes to prevent waterlogging, which can lead to root rot.
Q: How often should I water my indoor strawberry plants?
A: Water your strawberry plants when the top inch of soil feels dry to the touch. Water thoroughly until water drains out of the drainage holes. Avoid overwatering, as this can lead to root rot. During the growing season, you may need to water more frequently, especially if the plants are in a sunny location. Reduce watering during the dormant season. Monitor the moisture level of the soil regularly and adjust your watering schedule accordingly.
Q: How do I pollinate my indoor strawberry plants?
A: Strawberries are self-pollinating, but they still need help from wind or insects to transfer pollen. Since you’re growing them indoors, you’ll need to hand-pollinate them. Use a small, soft brush to gently brush the pollen from one flower to another. You can also use a cotton swab or even your finger. Repeat this process every few days, especially when the plants are in bloom. Alternatively, you can use a small fan to create a gentle breeze that will help to distribute the pollen.
Q: How do I fertilize my indoor strawberry plants?
A: Feed your strawberry plants with a balanced liquid fertilizer every 2-3 weeks during the growing season. Look for a fertilizer that is specifically formulated for strawberries or other fruiting plants. Follow the instructions on the fertilizer label carefully. Avoid over-fertilizing, as this can burn the roots. You can also add some compost or worm castings to the soil to provide a slow-release source of nutrients.
Q: How long does it take for strawberries to grow indoors?
A: From planting to harvest, it typically takes about 3-4 months to grow strawberries indoors. The exact time will depend on the variety of strawberry, the growing conditions, and the size of the plant. Be patient and provide your plants with the proper care, and you’ll be rewarded with a bountiful harvest of delicious strawberries.
Q: What are some common problems when growing strawberries indoors and how can I fix them?
A: Some common problems include pests (like aphids or spider mites), diseases (like powdery mildew), and nutrient deficiencies. Inspect your plants regularly for signs of pests or diseases. If you find any, treat them promptly with an appropriate insecticide or fungicide. Ensure your plants are getting enough light, water, and nutrients. Yellowing leaves can indicate a nutrient deficiency, while wilting leaves can indicate overwatering or underwatering. Adjust your care routine as needed to address any problems.
Q: Can I grow strawberries indoors year-round?
A: Yes, with proper care and attention, you can grow strawberries indoors year-round. Provide your plants with adequate light, water, and nutrients, and they will continue to produce fruit throughout the year. You may need to adjust your care routine during the dormant season, but with a little effort, you can enjoy fresh, homegrown strawberries all year long.

Leave a Comment