

Growing Rosemary Without Soil might sound like something out of a sci-fi movie, but trust me, it’s a totally achievable and surprisingly simple way to cultivate this fragrant herb! Forget messy soil and complicated gardening setups; we’re diving into the world of hydroponics and other soil-less methods that will have you harvesting fresh rosemary in no time.
Rosemary, with its rich history stretching back to ancient Mediterranean civilizations, has always been prized for its culinary and medicinal properties. The ancient Greeks and Romans revered it as a symbol of remembrance and fidelity. But you don’t need to be a seasoned gardener or have acres of land to enjoy its benefits. In fact, I’ve found that growing rosemary without soil is perfect for apartment dwellers, busy bees, or anyone looking for a low-maintenance gardening solution.
Why should you consider ditching the dirt? Well, soil-less gardening can be incredibly efficient, using less water and often resulting in faster growth. Plus, it eliminates many of the common soil-borne pests and diseases that can plague traditional gardens. Imagine having a thriving rosemary plant on your kitchen counter, ready to add a burst of flavor to your next meal. This DIY guide will walk you through the easiest and most effective techniques for cultivating rosemary without soil, so you can enjoy fresh herbs year-round, no matter where you live. Let’s get started!
Growing Rosemary Without Soil: A DIY Hydroponic Adventure!
Hey there, fellow plant enthusiasts! Ever dreamt of having fresh rosemary at your fingertips, without the mess of soil? Well, you’re in the right place! Today, I’m going to walk you through a super fun DIY project: growing rosemary hydroponically. It’s easier than you think, and the results are incredibly rewarding. Get ready to ditch the dirt and embrace the future of gardening!
What is Hydroponics, Anyway?
Before we dive in, let’s quickly cover what hydroponics actually is. Simply put, it’s growing plants without soil, using water and nutrient solutions to deliver everything they need. This method allows for faster growth, less water waste, and fewer pests. Plus, it’s a fantastic way to garden in small spaces!
Why Rosemary?
Rosemary is a fantastic herb to grow hydroponically. It’s relatively low-maintenance, drought-tolerant (even in water!), and adds a wonderful aroma to your kitchen. Plus, fresh rosemary is a game-changer in cooking!
Materials You’ll Need
Okay, let’s gather our supplies. Here’s what you’ll need to create your own hydroponic rosemary setup:
* Rosemary Cuttings: You can either take cuttings from an existing rosemary plant (about 4-6 inches long) or purchase them from a nursery. Make sure they’re healthy and free from disease.
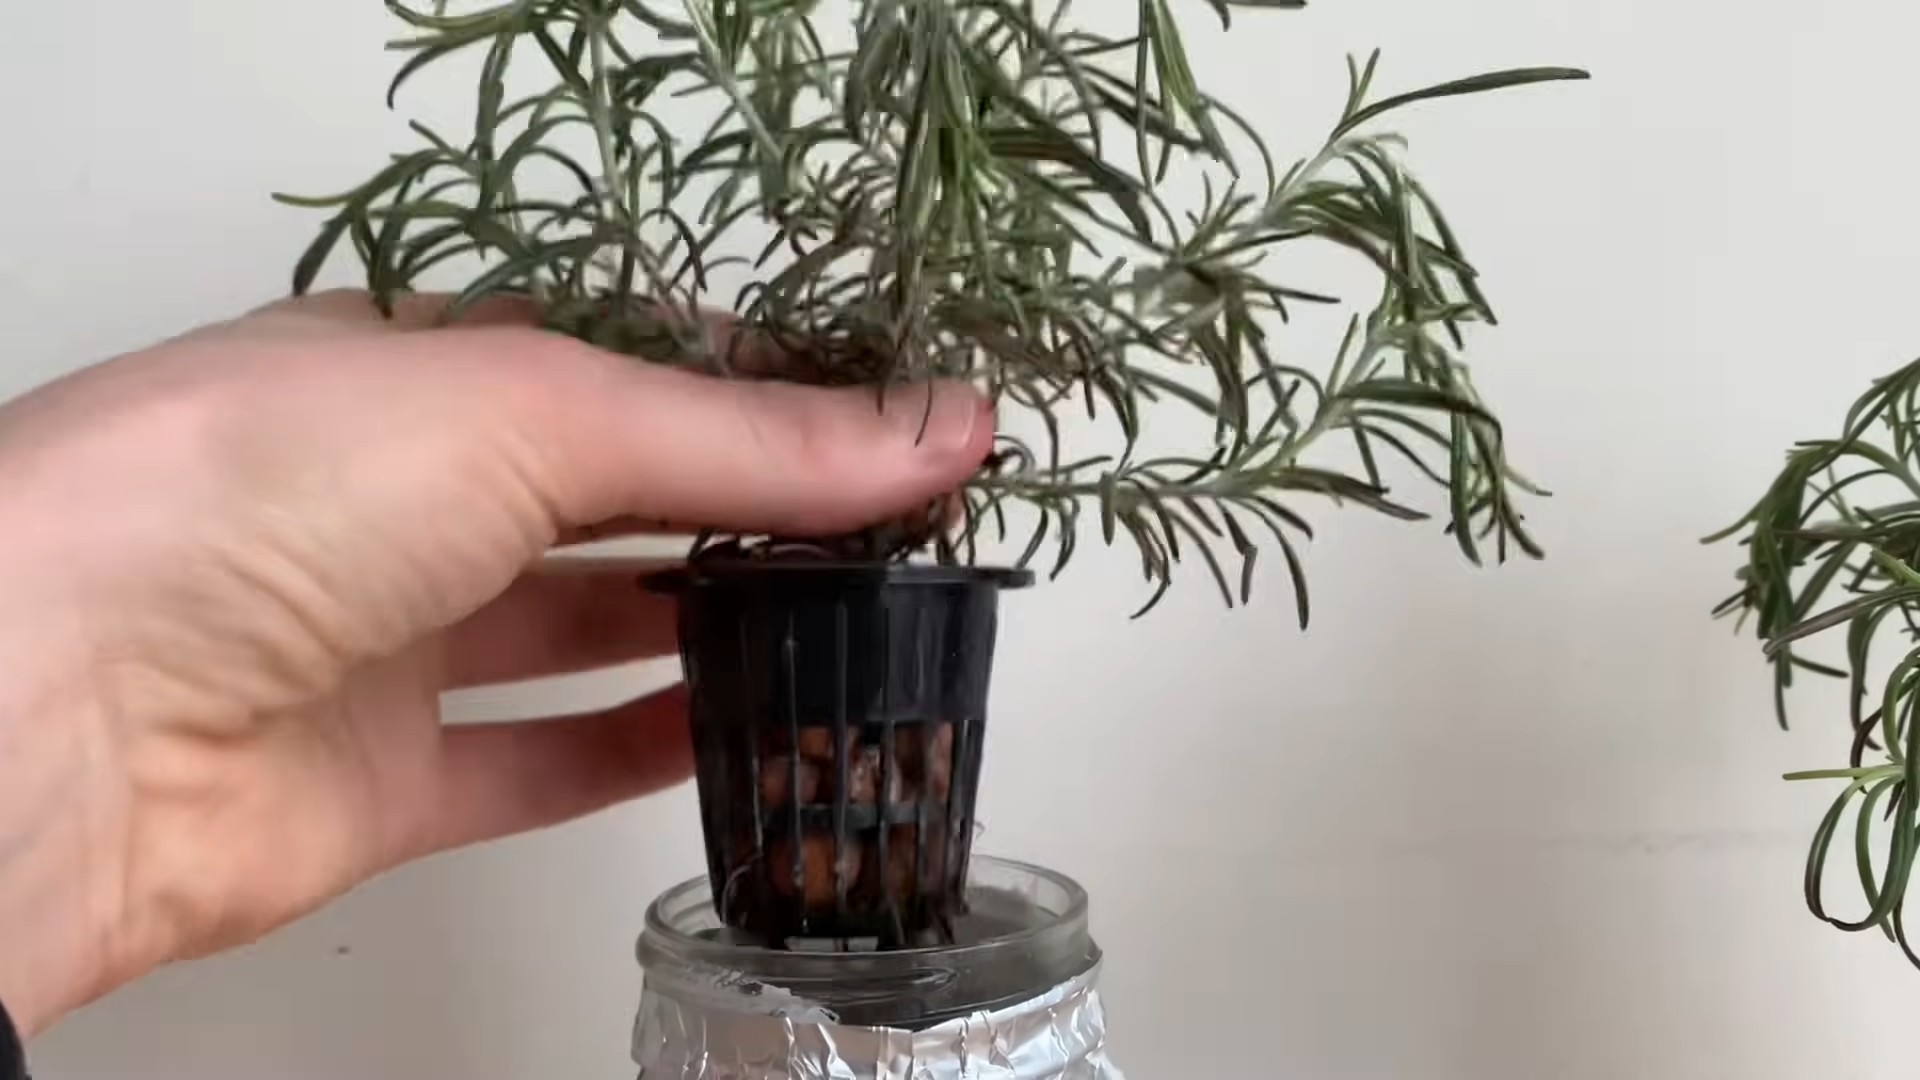
* Net Pots: These are small, plastic pots with holes that allow the roots to access the nutrient solution. 2-3 inch net pots are ideal.
* Hydroponic Growing Medium: This provides support for the plant and helps retain moisture. I recommend using rockwool cubes, coco coir, or clay pebbles (LECA). Rockwool is great for starting cuttings, while coco coir and LECA are excellent for long-term growth.
* Hydroponic Nutrient Solution: This is the food for your rosemary! You’ll need a balanced nutrient solution specifically formulated for herbs or leafy greens. Look for a solution that contains nitrogen, phosphorus, potassium, and micronutrients.
* A Container: This will hold the nutrient solution and the net pots. A dark-colored plastic tub or bucket works well. The size will depend on how many rosemary plants you want to grow.
* Air Pump and Air Stone: These are essential for oxygenating the nutrient solution. Rosemary roots need oxygen to thrive!
* pH Meter or pH Test Kit: Maintaining the correct pH level is crucial for nutrient absorption.
* Grow Lights (Optional): If you don’t have a sunny spot, you’ll need grow lights to provide adequate light for your rosemary. LED grow lights are energy-efficient and work great.
* Measuring Cups and Spoons: For accurately measuring the nutrient solution.
* Scissors or Pruning Shears: For taking rosemary cuttings.
* Rooting Hormone (Optional): This can help speed up the rooting process, but it’s not essential.
Taking Rosemary Cuttings (If Needed)
If you’re starting from cuttings, here’s how to do it:
1. Choose Healthy Stems: Select healthy, non-flowering stems from a mature rosemary plant.
2. Cut the Stems: Using clean scissors or pruning shears, cut the stems at a 45-degree angle, about 4-6 inches long.
3. Remove Lower Leaves: Strip off the leaves from the bottom inch or two of the stem. This is where the roots will emerge.
4. Apply Rooting Hormone (Optional): Dip the cut end of the stem into rooting hormone powder or liquid.
5. Place in Water: Put the cuttings in a glass of water, making sure the leaves are above the water line. Place the glass in a bright, indirect light location. Change the water every 2-3 days.
6. Wait for Roots: In a few weeks, you should see roots starting to grow. Once the roots are about an inch long, you’re ready to move on to the next step.
Setting Up Your Hydroponic System
Now for the fun part! Let’s assemble your hydroponic rosemary garden.
1. Prepare the Container: Clean your container thoroughly with soap and water. This will help prevent algae growth.
2. Drill Holes (If Necessary): If your container doesn’t have pre-made holes for the net pots, you’ll need to drill some. The holes should be slightly smaller than the diameter of the net pots so they fit snugly.
3. Prepare the Growing Medium:
* Rockwool: Soak the rockwool cubes in pH-balanced water (pH 5.5-6.5) for several hours before use. This helps remove any alkaline residue.
* Coco Coir: Rinse the coco coir thoroughly with water to remove any excess salts.
* Clay Pebbles (LECA): Rinse the clay pebbles thoroughly to remove any dust or debris.
4. Place the Growing Medium in the Net Pots: Fill the net pots with your chosen growing medium.
5. Transplant the Rosemary Cuttings (or Seedlings):
* From Water: Gently remove the rosemary cuttings from the water and carefully place them in the net pots, making sure the roots are surrounded by the growing medium.
* From Soil (Seedlings): If you’re using rosemary seedlings grown in soil, gently remove them from their pots and rinse off as much soil as possible. Then, carefully place them in the net pots, surrounded by the growing medium.
6. Position the Net Pots in the Container: Place the net pots in the holes you drilled in the container lid (or directly into the container if you don’t have a lid).
7. Prepare the Nutrient Solution: Follow the instructions on the nutrient solution label to mix the correct concentration. Use measuring cups and spoons to ensure accuracy.
8. Fill the Container with Nutrient Solution: Pour the nutrient solution into the container, making sure the bottom of the net pots are submerged in the solution. The water level should be about an inch below the top of the growing medium.
9. Install the Air Pump and Air Stone: Place the air stone at the bottom of the container and connect it to the air pump with tubing. Plug in the air pump. The air stone will create bubbles that oxygenate the nutrient solution.
10. Check and Adjust the pH: Use a pH meter or pH test kit to check the pH of the nutrient solution. The ideal pH for rosemary is between 5.5 and 6.5. If the pH is too high, add a pH-down solution. If it’s too low, add a pH-up solution.
11. Position the Grow Lights (If Needed): If you’re using grow lights, position them about 12-18 inches above the rosemary plants.
Maintaining Your Hydroponic Rosemary Garden
Congratulations! You’ve successfully set up your hydroponic rosemary garden. Now, here’s how to keep it thriving:
* Monitor the Nutrient Solution: Check the nutrient solution level regularly and add more as needed. Replace the entire solution every 1-2 weeks to prevent nutrient imbalances.
* Check and Adjust the pH: Check the pH of the nutrient solution every few days and adjust as needed to maintain the ideal range of 5.5-6.5.
* Provide Adequate Light: Rosemary needs at least 6 hours of sunlight per day. If you’re using grow lights, keep them on for 14-16 hours per day.
* Prune Regularly: Prune your rosemary plants regularly to encourage bushier growth and prevent them from becoming leggy.
* Monitor for Pests and Diseases: While hydroponics reduces the risk of pests and diseases, it’s still important to keep an eye out for any problems. If you notice any pests, such as aphids or spider mites, treat them with an appropriate organic insecticide.
* Maintain Air Circulation: Good air circulation helps prevent fungal diseases. You can use a small fan to circulate the air around your plants.
* Clean the System Regularly: Clean the container and net pots every few months to prevent algae growth and buildup of mineral deposits.
Troubleshooting Tips
Even with the best care, you might encounter some challenges along the way. Here are a few troubleshooting tips:
* Yellowing Leaves: This could be a sign of nutrient deficiency. Make sure you’re using a balanced nutrient solution and that the pH is within the ideal range.
* Slow Growth: This could be due to insufficient light, incorrect pH, or nutrient deficiency. Check all of these factors and adjust as needed.
* Root Rot: This is caused by a lack of oxygen in the nutrient solution. Make sure your air pump and air stone are working properly. You can also add hydrogen peroxide to the nutrient solution to help kill bacteria.

Conclusion
So, there you have it! Growing rosemary without soil, using the simple yet effective water propagation method, is more than just a gardening experiment; it’s a gateway to fresh, aromatic rosemary right at your fingertips. This DIY trick is a must-try for several compelling reasons. First, it’s incredibly cost-effective. Forget expensive potting mixes and specialized containers. All you need are rosemary cuttings, water, and a little patience. Second, it’s a fantastic way to propagate rosemary from existing plants, essentially cloning your favorite variety and expanding your herb garden for free. Third, it’s a visually appealing process. Watching the roots emerge and develop in water is a rewarding experience, adding a touch of natural beauty to your kitchen windowsill or any bright indoor space.
But the real magic lies in the freshness. Imagine snipping off sprigs of vibrant, home-grown rosemary to infuse your olive oil, season your roasted chicken, or add a fragrant touch to your homemade bread. The flavor and aroma are simply unmatched by store-bought dried rosemary. Plus, you’ll know exactly where your rosemary comes from and how it was grown, ensuring a pesticide-free and organically nurtured herb.
Why is this method so appealing? It’s the simplicity and the success rate. While traditional soil propagation can be tricky, water propagation often yields faster and more reliable results, especially for beginners. You can visually monitor the root development, ensuring that your rosemary cuttings are thriving before transplanting them to soil (if you choose to do so).
Looking for variations? Absolutely! You can experiment with different types of containers. Glass jars, vases, even repurposed plastic bottles can work perfectly well. Just make sure they are clean and allow enough light to reach the water. You can also try adding a rooting hormone to the water to further encourage root growth, although it’s often not necessary. Another fun variation is to create a rosemary “bouquet” by grouping several cuttings together in a single container, creating a visually stunning and fragrant centerpiece.
Consider using rainwater or filtered water for optimal results, as tap water can sometimes contain chemicals that inhibit root growth. Change the water every few days to keep it fresh and prevent the growth of algae or bacteria. And remember, patience is key. It may take a few weeks for roots to appear, but the wait is well worth it.
We wholeheartedly encourage you to try this DIY trick for growing rosemary without soil. It’s a fun, rewarding, and sustainable way to enjoy fresh herbs year-round. Once you’ve successfully propagated your rosemary, we’d love to hear about your experience! Share your photos, tips, and any variations you’ve tried in the comments below. Let’s build a community of rosemary enthusiasts and spread the joy of home-grown herbs! Don’t be afraid to experiment and adapt the method to suit your own environment and preferences. Happy growing!
Frequently Asked Questions (FAQ)
What kind of rosemary cuttings should I use?
The best rosemary cuttings are those taken from healthy, actively growing stems. Look for stems that are about 4-6 inches long and have several sets of leaves. Avoid using woody or very old stems, as they are less likely to root successfully. Ideally, take your cuttings in the spring or early summer when the rosemary plant is actively growing. Use clean, sharp pruning shears or scissors to make a clean cut just below a leaf node (the point where leaves grow from the stem). Remove the leaves from the bottom inch or two of the cutting to prevent them from rotting in the water.
How long does it take for rosemary cuttings to root in water?
The time it takes for rosemary cuttings to root in water can vary depending on several factors, including the variety of rosemary, the temperature, and the amount of light. Generally, you can expect to see roots emerge within 2-4 weeks. However, it may take longer in cooler temperatures or with less light. Be patient and continue to change the water regularly. Once the roots are about an inch long, you can either continue to grow the rosemary in water or transplant it to soil.
Can I grow rosemary in water permanently?
Yes, you can grow rosemary in water permanently, although it may not grow as vigorously as it would in soil. If you choose to grow rosemary in water long-term, you’ll need to provide it with regular nutrients. You can use a diluted liquid fertilizer specifically formulated for hydroponics or herbs. Be sure to follow the instructions on the fertilizer label carefully to avoid over-fertilizing, which can damage the plant. Change the water and add fertilizer every 2-4 weeks, depending on the plant’s needs. Also, ensure the container is opaque or covered to prevent algae growth, which can compete with the rosemary for nutrients.
What kind of water should I use for propagating rosemary?
The best type of water to use for propagating rosemary is rainwater or filtered water. Tap water can sometimes contain chemicals, such as chlorine and fluoride, that can inhibit root growth. If you must use tap water, let it sit out for 24 hours to allow the chlorine to evaporate. Avoid using distilled water, as it lacks the minerals that plants need to thrive.
How often should I change the water?
You should change the water every 2-3 days to keep it fresh and prevent the growth of algae or bacteria. Algae and bacteria can compete with the rosemary cuttings for nutrients and oxygen, hindering root development. When you change the water, gently rinse the container to remove any algae or debris.
What kind of light does rosemary need when propagating in water?
Rosemary cuttings need bright, indirect light to root successfully. Avoid placing them in direct sunlight, as this can scorch the leaves. A windowsill that receives morning sun or a spot near a bright window is ideal. If you don’t have access to natural light, you can use a grow light to provide supplemental lighting.
What do I do if my rosemary cuttings start to turn yellow or brown?
If your rosemary cuttings start to turn yellow or brown, it could be a sign of several problems. The most common causes are overwatering, underwatering, or lack of light. Make sure you are changing the water regularly and that the cuttings are receiving enough light. If the leaves are turning yellow and mushy, it could be a sign of root rot. In this case, remove the affected leaves and change the water immediately. If the leaves are turning brown and crispy, it could be a sign of underwatering. Make sure the cuttings are always submerged in water.
Can I propagate rosemary from cuttings taken from store-bought rosemary?
Yes, you can propagate rosemary from cuttings taken from store-bought rosemary, but the success rate may be lower than with cuttings taken from established plants. Store-bought rosemary is often treated with chemicals to prolong its shelf life, which can inhibit root growth. To increase your chances of success, choose fresh, healthy-looking rosemary with firm stems and vibrant green leaves. Soak the cuttings in water for a few hours before placing them in a propagation container.
When should I transplant my rooted rosemary cuttings to soil?
You can transplant your rooted rosemary cuttings to soil once the roots are about an inch long. Choose a well-draining potting mix and a pot that is slightly larger than the root ball. Gently remove the cuttings from the water and plant them in the soil, being careful not to damage the roots. Water thoroughly after planting and keep the soil moist but not soggy. Place the pot in a sunny location and fertilize regularly.
What are some common problems when growing rosemary in water?
Some common problems when growing rosemary in water include root rot, algae growth, and nutrient deficiencies. Root rot can occur if the water is not changed regularly or if the cuttings are overwatered. Algae growth can occur if the container is exposed to too much light. Nutrient deficiencies can occur if the rosemary is not provided with enough nutrients. To prevent these problems, change the water regularly, provide adequate light, and fertilize as needed.


Leave a Comment