

Growing radishes indoors might sound like a quirky experiment, but trust me, it’s a surprisingly rewarding way to bring a little bit of the garden inside! Forget those bland, store-bought radishes – imagine popping a crisp, peppery radish, bursting with flavor, straight from your windowsill. For centuries, people have cultivated small gardens in their homes, from ancient Egyptians growing herbs in pots to Victorian-era conservatories overflowing with exotic plants. This tradition of indoor gardening speaks to our innate connection with nature and our desire to nurture life, even within the confines of our homes.
But why should you consider growing radishes indoors? Well, for starters, it’s a fantastic way to enjoy fresh produce year-round, regardless of the weather outside. Plus, it’s incredibly satisfying to watch those tiny seeds sprout and transform into vibrant, edible roots. And let’s be honest, who doesn’t love a good DIY project? This guide will walk you through every step, from choosing the right container to harvesting your delicious, homegrown radishes. Get ready to unleash your inner gardener and discover the joy of growing your own food, right in your own home!

Growing Radishes Indoors: A Beginner’s Guide
Hey there, fellow gardening enthusiasts! Are you craving that peppery crunch of fresh radishes but don’t have a sprawling outdoor garden? No problem! You can absolutely grow radishes indoors, and I’m here to walk you through the entire process. It’s easier than you might think, and the reward of harvesting your own homegrown radishes is totally worth it.
Why Grow Radishes Indoors?
Before we dive in, let’s talk about why growing radishes indoors is a fantastic idea:
* Year-Round Harvest: Forget seasonal limitations! With indoor gardening, you can enjoy fresh radishes any time of the year.
* Space-Saving: Radishes don’t need a ton of space, making them perfect for apartments, condos, or homes with limited outdoor areas.
* Pest Control: Growing indoors significantly reduces the risk of pests and diseases that can plague outdoor gardens.
* Quick Results: Radishes are known for their rapid growth. You can expect to harvest them in as little as 3-4 weeks!
* Fun and Educational: It’s a great project for kids and adults alike, teaching about plant life cycles and the joy of growing your own food.
What You’ll Need
Alright, let’s gather our supplies. Here’s what you’ll need to get started:
* Radish Seeds: Choose varieties specifically suited for container gardening, such as Cherry Belle, French Breakfast, or Easter Egg. These tend to be smaller and mature quickly.
* Containers: Select containers that are at least 6 inches deep and have drainage holes. Plastic pots, terracotta pots, or even repurposed containers like yogurt tubs (with drainage holes added) will work.
* Potting Mix: Use a high-quality, well-draining potting mix. Avoid using garden soil, as it can compact and hinder root growth.
* Grow Lights (Optional but Recommended): While radishes can grow indoors with natural light, grow lights will ensure they receive adequate light for optimal growth, especially during winter months or in dimly lit spaces.
* Watering Can or Spray Bottle: For gentle and even watering.
* Fertilizer (Optional): A balanced liquid fertilizer can boost growth, but it’s not essential.
* Small Hand Trowel or Spoon: For planting seeds.
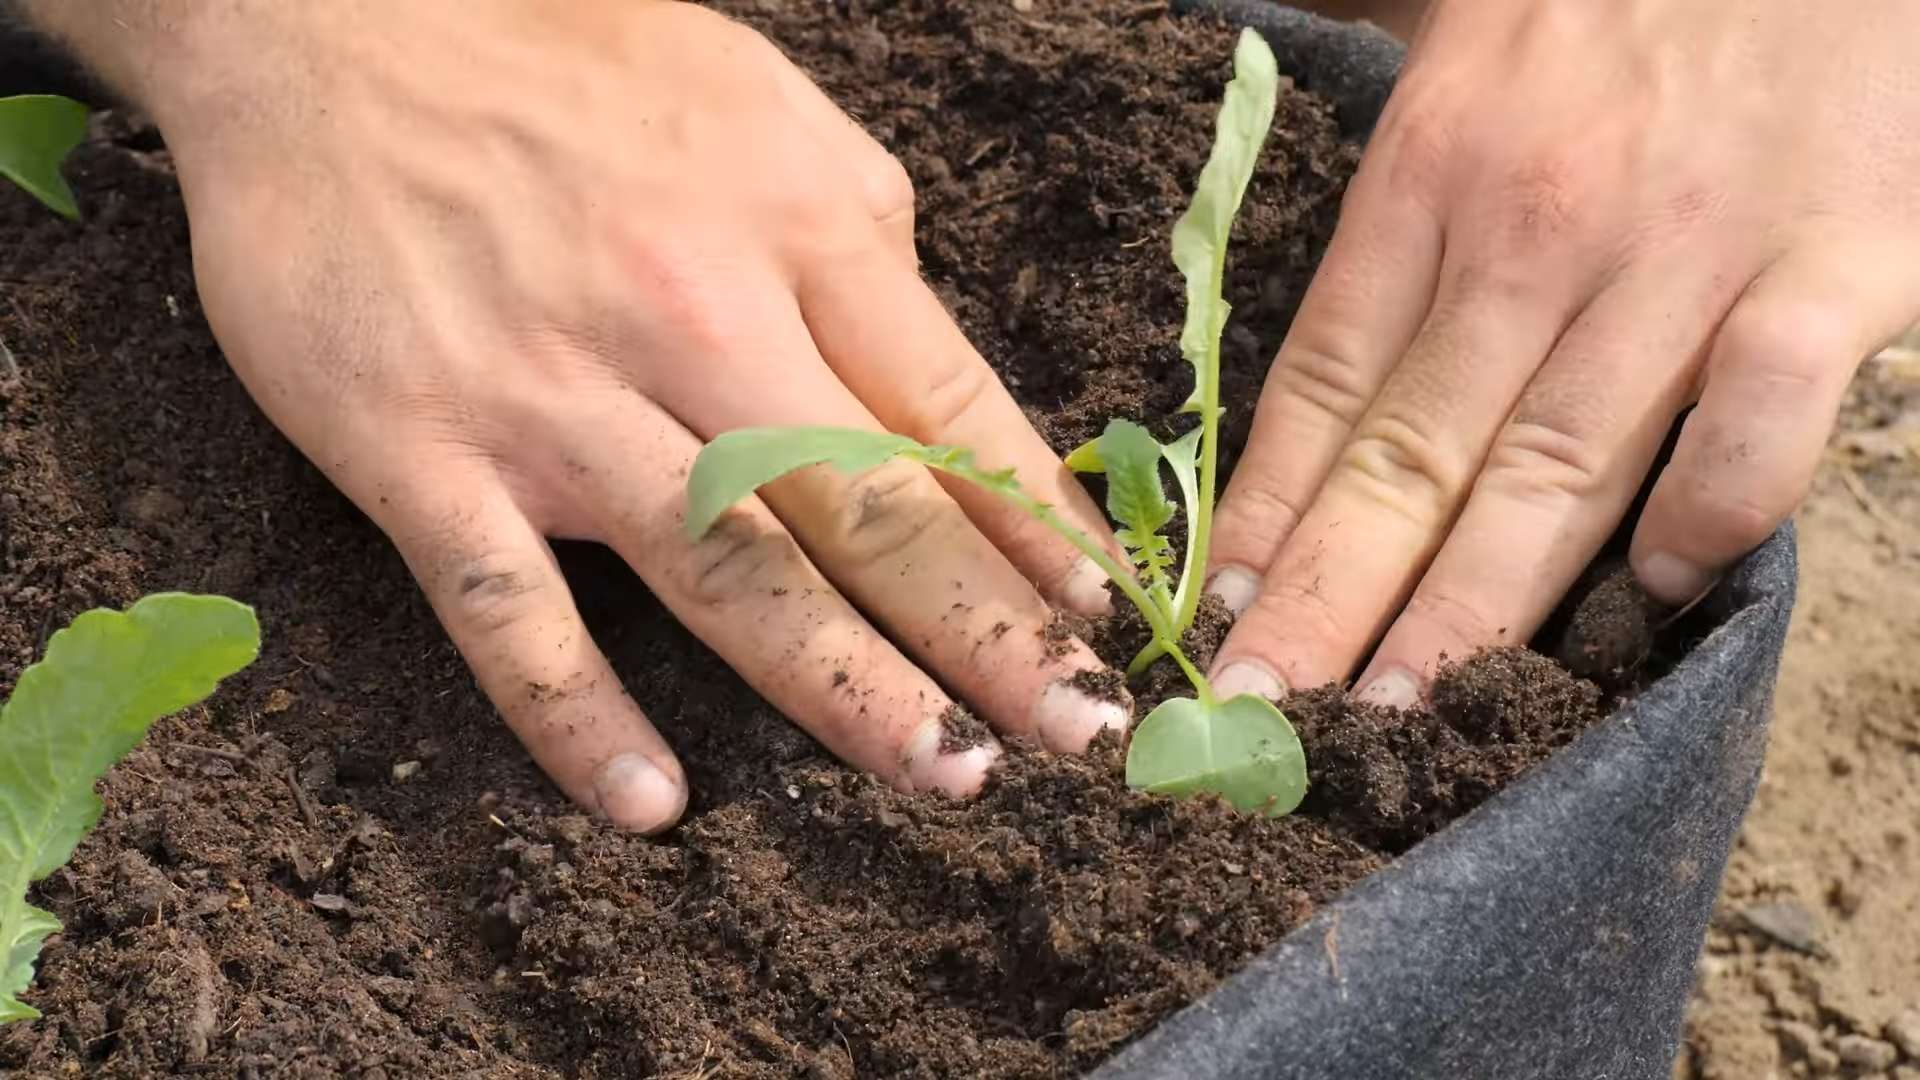
Step-by-Step Instructions: Planting Your Radishes
Now for the fun part! Let’s get those radish seeds in the soil.
1. Prepare Your Containers: Fill your chosen containers with potting mix, leaving about an inch of space at the top. Gently pat down the soil to remove any large air pockets.
2. Sow the Seeds: Radish seeds are small, so handle them carefully. Sow the seeds about ½ inch deep and 1 inch apart. You can plant multiple seeds per container, but be sure to thin them out later if they become overcrowded.
3. Cover the Seeds: Lightly cover the seeds with potting mix.
4. Water Thoroughly: Gently water the soil until it’s evenly moist but not soggy. You can use a watering can with a rose head or a spray bottle to avoid disturbing the seeds.
5. Provide Light: Place your containers in a location that receives at least 6 hours of direct sunlight per day. If you’re using grow lights, position them about 6-12 inches above the soil surface and keep them on for 12-16 hours per day.
6. Maintain Moisture: Keep the soil consistently moist but not waterlogged. Check the soil moisture daily by sticking your finger about an inch into the soil. If it feels dry, it’s time to water.
Caring for Your Radishes
Once your radishes have sprouted, it’s important to provide them with the right care to ensure healthy growth and a bountiful harvest.
1. Thinning: Once the seedlings have developed their first true leaves (the leaves that appear after the initial seed leaves), thin them out so that they are about 1-2 inches apart. This will give them enough space to grow and prevent overcrowding. Simply snip off the unwanted seedlings at the soil line with scissors.
2. Watering: Continue to water regularly, keeping the soil consistently moist. Avoid overwatering, as this can lead to root rot.
3. Fertilizing (Optional): If you choose to fertilize, use a balanced liquid fertilizer diluted to half strength. Apply it every 2-3 weeks.
4. Temperature: Radishes prefer cool temperatures, ideally between 50°F and 70°F (10°C and 21°C). Avoid placing them in areas that are too hot or too cold.
5. Pest Control: Keep an eye out for any signs of pests, such as aphids or flea beetles. If you spot any, you can try washing them off with a strong stream of water or using an insecticidal soap.
Harvesting Your Radishes
The moment we’ve all been waiting for! Radishes are typically ready to harvest in 3-4 weeks, depending on the variety and growing conditions.
1. Check for Maturity: Gently brush away some of the soil around the base of the radish to check its size. Radishes are usually ready to harvest when they are about 1 inch in diameter.
2. Harvest Carefully: Gently pull the radishes from the soil, being careful not to damage the roots. If they are difficult to pull, you can loosen the soil around them with a small trowel.
3. Wash and Enjoy: Wash the radishes thoroughly to remove any dirt. You can eat them raw in salads, slice them for sandwiches, or roast them for a more mellow flavor. The greens are also edible and can be used in salads or stir-fries.
Troubleshooting
Even with the best care, you might encounter a few challenges along the way. Here are some common problems and how to address them:
* Leggy Seedlings: If your seedlings are tall and spindly, they’re likely not getting enough light. Move them to a brighter location or provide supplemental light with grow lights.
* Cracked Radishes: This is usually caused by inconsistent watering. Make sure to keep the soil consistently moist but not waterlogged.
* Bitter Radishes: Bitter radishes can be caused by hot weather or letting them grow too large. Harvest them when they are still relatively small and avoid growing them during the hottest months of the year.
* No Radish Bulbs: This can be caused by overcrowding, poor soil, or lack of sunlight. Thin out the seedlings, use a high-quality potting mix, and ensure they receive adequate light.
Choosing the Right Radish Variety
Not all radishes are created equal, especially when it comes to indoor growing. Here are a few varieties that tend to thrive in containers:
* Cherry Belle: A classic, round, bright red radish that matures quickly.
* French Breakfast: An elongated, mild-flavored radish with a red top and white bottom.
* Easter Egg: A colorful mix of red, pink, purple, and white radishes.
* Sparkler: A round, red radish with a white tip.
* White Icicle: A long, white radish with a mild flavor.
When selecting seeds, look for varieties that are specifically labeled as “container-friendly” or “early maturing.” These varieties are more likely to thrive in the limited space and shorter growing season of an indoor environment.
Optimizing Your Indoor Radish Garden
Want to take your indoor radish growing to the next level? Here are a few tips to help you maximize your harvest:
* Succession Planting: Plant a new batch of radish seeds every 1-2 weeks to ensure a continuous supply of fresh radishes.
* Rotate Your Crops: After harvesting a batch of radishes, consider rotating your crops to prevent nutrient depletion in the soil. You can plant other fast-growing vegetables like lettuce or spinach.
* Use Reflective Surfaces: Place reflective surfaces, such as aluminum foil or white paint, around your plants to maximize light exposure.
* Monitor Soil pH: Radishes prefer a slightly acidic soil pH of around 6.0 to 6.5. You can test your soil pH with a soil testing kit and adjust it if necessary.
* Provide Air Circulation: Good air circulation helps prevent fungal diseases. You can use a small fan to circulate air around your plants.
Creative Ways to Use Your Homegrown Radishes
Now that you’ve harvested your delicious homegrown radishes, it’s time to get creative in the kitchen! Here are a few ideas to inspire you:
* Radish Salad: Slice radishes thinly and toss them with mixed greens, a light vinaigrette, and some crumbled feta cheese.
* Radish and Butter Sandwiches: Spread butter on slices of baguette and top with thinly sliced
Conclusion
So, there you have it! Growing radishes indoors is not only possible, but it’s also surprisingly simple and incredibly rewarding. Forget those bland, store-bought radishes that lack that peppery punch. With just a few basic supplies and a little bit of attention, you can cultivate a continuous supply of crisp, flavorful radishes right in your own home, regardless of the season. This DIY trick is a must-try for anyone who appreciates fresh, homegrown produce and wants to add a vibrant touch to their salads, snacks, and meals.
Why is this a must-try? Because it puts you in control. You control the soil, the light, and the water, ensuring the best possible growing conditions for your radishes. You avoid the pesticides and herbicides that are often used in commercial farming. And you get to experience the satisfaction of nurturing a plant from seed to harvest. Plus, let’s be honest, there’s something undeniably cool about growing your own food indoors!
Looking for variations? Absolutely! Experiment with different radish varieties. ‘Cherry Belle’ is a classic choice, but ‘French Breakfast’ offers a milder flavor and elongated shape. ‘Easter Egg’ radishes provide a colorful mix of red, pink, purple, and white. You can also try succession planting, sowing a new batch of seeds every week or two, to ensure a continuous harvest. Consider using different types of containers, from traditional pots to repurposed containers like yogurt tubs or plastic bottles. Just make sure they have adequate drainage. You can even add companion plants like carrots or lettuce to your indoor garden for a more diverse harvest.
Don’t be intimidated if you’ve never grown anything before. Growing radishes indoors is a great way to start. It’s a forgiving process, and radishes are relatively quick to mature, so you’ll see results in just a few weeks. The key is to provide them with enough light, water, and well-draining soil.
We wholeheartedly encourage you to give this DIY trick a try. It’s a fun, educational, and delicious way to connect with nature and enjoy fresh, homegrown radishes all year round. Once you’ve harvested your first batch, we’d love to hear about your experience! Share your tips, tricks, and photos in the comments below. Let’s build a community of indoor radish growers and inspire others to embrace the joy of homegrown produce. Happy growing!
Frequently Asked Questions (FAQs)
What kind of soil is best for growing radishes indoors?
The best soil for growing radishes indoors is a well-draining potting mix. Avoid using garden soil, as it can be too heavy and compact, which can hinder root development. Look for a potting mix that contains ingredients like peat moss, perlite, and vermiculite. These ingredients help to improve drainage and aeration, which are essential for healthy radish growth. You can also amend your potting mix with compost to add nutrients and improve its overall quality. A slightly acidic to neutral pH (around 6.0 to 7.0) is ideal.
How much light do radishes need when grown indoors?
Radishes need at least 6 hours of direct sunlight per day to thrive. If you don’t have a sunny windowsill, you can supplement with artificial light. Fluorescent grow lights or LED grow lights are excellent options. Place the lights a few inches above the plants and keep them on for 12-14 hours per day. Insufficient light can result in leggy plants with small, underdeveloped radishes. Rotate your plants regularly to ensure that all sides receive adequate light.
How often should I water my indoor radishes?
Water your radishes regularly, keeping the soil consistently moist but not waterlogged. Overwatering can lead to root rot, while underwatering can cause the radishes to become tough and bitter. Check the soil moisture by sticking your finger about an inch into the soil. If it feels dry, it’s time to water. Water deeply, allowing the excess water to drain out of the bottom of the pot. Reduce watering slightly during cooler periods.
How long does it take for radishes to mature indoors?
Radishes are one of the fastest-growing vegetables, and they typically mature in just 3-4 weeks. The exact time will depend on the variety and growing conditions. Check the seed packet for specific information. You can start harvesting radishes when they reach about 1 inch in diameter. Don’t let them get too large, as they can become pithy and lose their flavor.
What are some common problems when growing radishes indoors, and how can I prevent them?
Some common problems include:
* **Leggy plants:** This is usually caused by insufficient light. Provide more light or move the plants to a sunnier location.
* **Root rot:** This is caused by overwatering. Ensure that your pots have adequate drainage and avoid overwatering.
* **Pests:** Aphids and flea beetles can sometimes attack radishes. Inspect your plants regularly and treat any infestations promptly with insecticidal soap or neem oil.
* **Bitter radishes:** This can be caused by underwatering, overcrowding, or harvesting too late. Ensure that your plants receive adequate water and thin them out if they are too crowded. Harvest radishes when they are the right size.
Can I grow radishes in containers? What size container is best?
Yes, radishes are well-suited for container gardening. Choose a container that is at least 6 inches deep and wide. This will provide enough room for the roots to develop. Make sure the container has drainage holes to prevent waterlogging. You can grow several radishes in a single container, but be sure to space them properly to avoid overcrowding.
Do I need to fertilize my indoor radishes?
Radishes don’t require heavy fertilization, but a light feeding can help to promote healthy growth. Use a balanced liquid fertilizer diluted to half strength every 2-3 weeks. Avoid over-fertilizing, as this can lead to excessive foliage growth at the expense of root development.
How do I harvest radishes?
Harvest radishes when they reach about 1 inch in diameter. Gently pull them from the soil, holding them by the base of the leaves. Wash them thoroughly and trim off the leaves and root tips. Radish greens are also edible and can be used in salads or stir-fries.
Can I regrow radish tops?
While you can’t regrow a whole radish from the top, you can sprout the tops to get radish microgreens. Place the radish tops in a shallow dish of water, making sure the cut end is submerged. Place the dish in a bright location and change the water daily. In a few days, you’ll see tiny roots and shoots emerging. You can then sprinkle these microgreens on salads, sandwiches, or soups for a peppery flavor boost.
What are some creative ways to use my homegrown radishes?
Beyond salads, radishes can be used in a variety of dishes. Try roasting them with other root vegetables, pickling them for a tangy condiment, or adding them to tacos for a crunchy bite. You can also use radish greens in pesto or sauté them with garlic and olive oil. Get creative and experiment with different ways to incorporate your homegrown radishes into your meals!

Leave a Comment