

Growing potatoes in containers might sound like something only seasoned gardeners can achieve, but trust me, it’s easier than you think! Have you ever dreamed of harvesting your own fresh, flavorful potatoes right from your patio or balcony? Imagine the satisfaction of digging into a pot and unearthing a bounty of homegrown goodness. This isn’t just a gardening project; it’s a culinary adventure waiting to happen!
The practice of cultivating potatoes dates back thousands of years, with roots in the Andes Mountains of South America. Over time, this humble tuber has become a staple in cuisines worldwide. While traditionally grown in sprawling fields, the beauty of container gardening allows even those with limited space to partake in this rewarding experience.
In today’s fast-paced world, knowing where your food comes from is more important than ever. Growing potatoes in containers offers a fantastic way to connect with nature, reduce your reliance on store-bought produce, and enjoy the unparalleled taste of freshly harvested potatoes. Plus, it’s a fun and educational activity for the whole family! So, ditch the grocery store spuds and let’s get our hands dirty – I’m going to show you some simple DIY tricks and hacks to make your container potato growing a resounding success!
Growing Potatoes in Containers: A Bumper Crop on Your Patio!
Hey there, fellow garden enthusiasts! I’m so excited to share my tried-and-true method for growing potatoes in containers. Forget needing acres of land; with this guide, you can enjoy fresh, homegrown potatoes even if you only have a small balcony or patio. Trust me, it’s easier than you think, and the reward of digging up your own spuds is incredibly satisfying. Let’s get started!
Choosing the Right Container and Seed Potatoes
First things first, we need to gather our supplies. This is crucial for setting ourselves up for success.
* Container Size: Opt for a container that’s at least 15 gallons in size. The bigger, the better, as potatoes need room to grow downwards. I personally prefer using large plastic tubs or even fabric grow bags. Fabric grow bags have the added benefit of allowing for better drainage and aeration.
* Drainage: Make sure your container has adequate drainage holes. Potatoes don’t like sitting in soggy soil. If your container doesn’t have enough holes, drill a few more.
* Seed Potatoes: Don’t just grab any potato from the grocery store! You need seed potatoes, which are potatoes specifically grown for planting. You can find these at your local garden center or online. Look for certified disease-free seed potatoes.
* Variety: Choose a potato variety that suits your taste and climate. Some popular choices for container growing include ‘Yukon Gold,’ ‘Red Pontiac,’ and ‘Fingerling’ varieties. I’ve had great success with ‘Yukon Gold’ – they’re so creamy and delicious!
* Soil: Use a well-draining potting mix. Avoid using garden soil, as it can become compacted in containers. I like to mix equal parts potting mix, compost, and perlite for optimal drainage and nutrients.
* Optional: Consider adding a slow-release fertilizer to your potting mix to provide your potatoes with a steady supply of nutrients throughout the growing season.
Preparing Your Seed Potatoes
This step is important for getting a head start on growth.
* Chitting (Optional but Recommended): Chitting, or sprouting, your seed potatoes before planting can give them a head start. About 2-3 weeks before planting, place your seed potatoes in a cool, bright location (but not direct sunlight). You’ll notice small sprouts, called “eyes,” starting to grow.
* Cutting (If Necessary): If your seed potatoes are large (bigger than an egg), you can cut them into smaller pieces. Make sure each piece has at least 2-3 “eyes.” Let the cut pieces dry for a day or two to callous over. This helps prevent rotting. I usually only cut mine if they’re really big.
Planting Your Seed Potatoes
Now for the fun part – getting those potatoes in the ground (or, in this case, the container!).
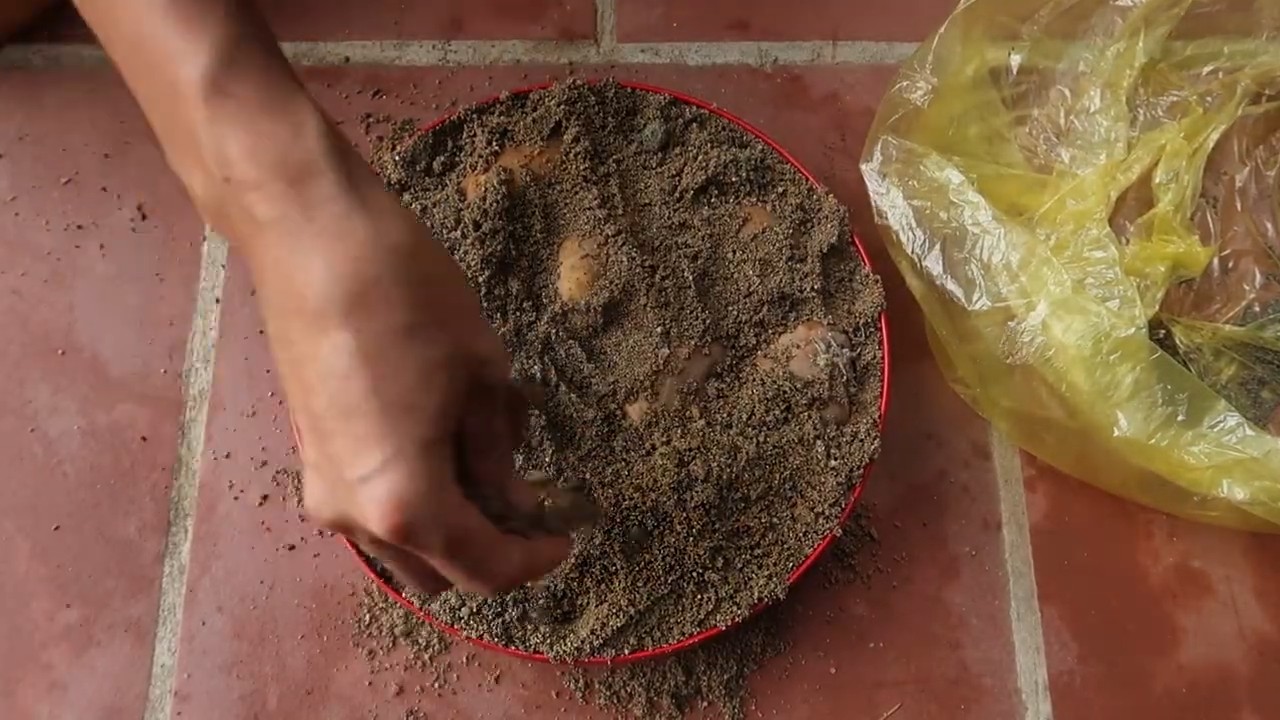
1. Fill the Container: Start by filling your container with about 4-6 inches of your potting mix.
2. Plant the Seed Potatoes: Place your seed potatoes (or potato pieces) on top of the soil, with the “eyes” facing upwards. Space them about 8-10 inches apart if you’re planting multiple pieces in the same container.
3. Cover with Soil: Cover the seed potatoes with another 4-6 inches of potting mix.
4. Water Thoroughly: Water the container thoroughly until water drains out of the bottom.
Hilling Your Potatoes
This is where the magic happens! Hilling encourages the potatoes to produce more tubers along the stem.
1. Wait for Growth: As your potato plants grow, they’ll start to emerge from the soil. Wait until the stems are about 6-8 inches tall.
2. Add More Soil: Once the stems reach that height, add more potting mix to the container, covering the stems up to about halfway. This is called “hilling.”
3. Repeat: Continue hilling every 2-3 weeks as the plants grow, until you reach the top of the container. The goal is to keep covering the stems, encouraging more potato production. I usually end up hilling about 3-4 times throughout the growing season.
Caring for Your Potato Plants
Consistent care is key to a bountiful harvest.
* Watering: Potatoes need consistent moisture, especially during tuber formation. Water deeply whenever the top inch of soil feels dry. Avoid overwatering, as this can lead to rot.
* Sunlight: Potatoes need at least 6-8 hours of sunlight per day. Place your container in a sunny location.
* Fertilizing: If you didn’t add slow-release fertilizer to your potting mix, you’ll need to fertilize your potato plants regularly. Use a balanced fertilizer (e.g., 10-10-10) every 2-3 weeks. Follow the instructions on the fertilizer package.
* Pest Control: Keep an eye out for pests like aphids, potato beetles, and flea beetles. Handpick them off the plants or use an organic insecticide if necessary. I’ve found that neem oil is effective against many common garden pests.
* Disease Prevention: Proper watering and good air circulation can help prevent diseases. Avoid overhead watering, as this can promote fungal growth.
Harvesting Your Potatoes
The moment we’ve all been waiting for!
1. Timing: Potatoes are typically ready to harvest about 70-90 days after planting, depending on the variety. You’ll know they’re ready when the foliage starts to turn yellow and die back.
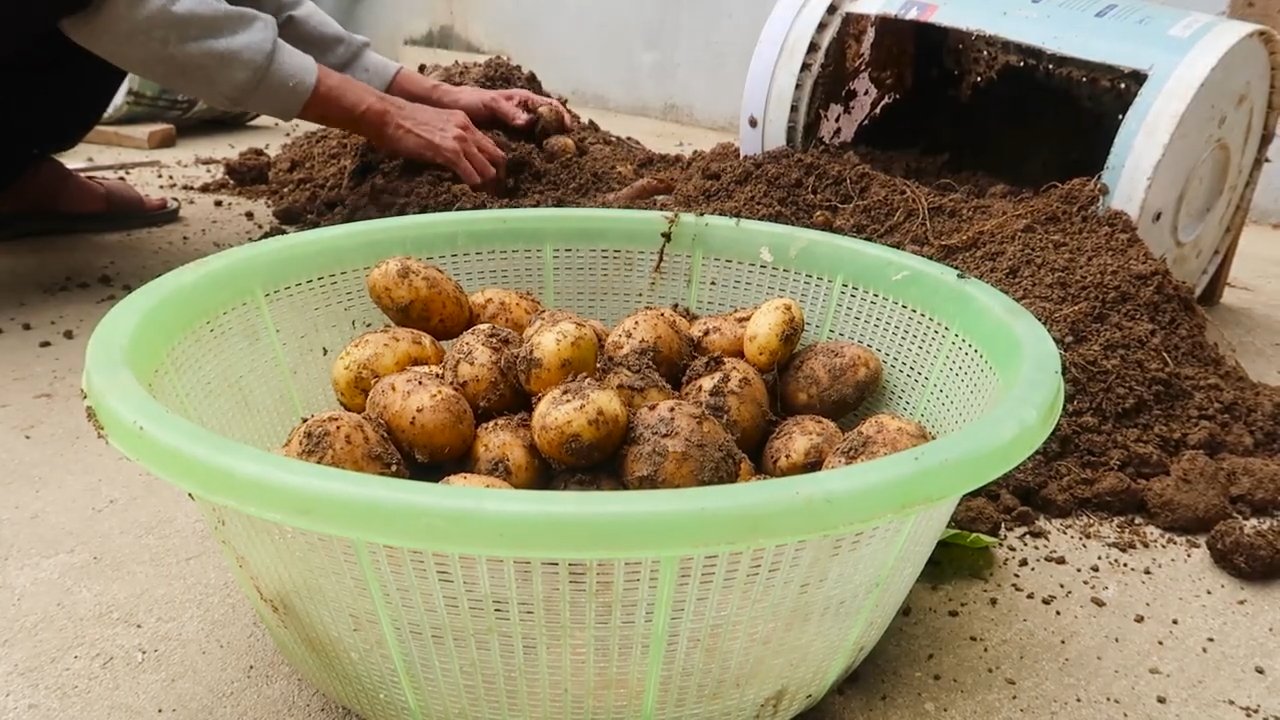
2. Gentle Digging: Stop watering a week or two before harvest. Carefully dig around the base of the plant with your hands or a small trowel. Be gentle to avoid damaging the potatoes.
3. Harvesting from Grow Bags: If you’re using a grow bag, you can simply tip the bag over and dump out the soil. Then, pick out your potatoes! This is my favorite method – it’s so easy!
4. Curing (Optional): After harvesting, you can cure your potatoes to help them store longer. To cure, spread the potatoes out in a cool, dark, and well-ventilated place for about a week. This allows the skins to harden and any minor cuts to heal.
5. Storage: Store your potatoes in a cool, dark, and dry place. A root cellar is ideal, but a cool basement or garage will also work. Avoid storing potatoes near apples or onions, as they can cause them to spoil faster.
Troubleshooting
Even with the best planning, sometimes things don’t go exactly as expected. Here are a few common issues and how to address them:
* No Potatoes: If your plants are growing well but you’re not getting any potatoes, it could be due to a few factors:
* Not enough sunlight: Make sure your plants are getting at least 6-8 hours of sunlight per day.
* Poor soil: Use a well-draining potting mix and fertilize regularly.
* Overwatering: Avoid overwatering, as this can lead to rot.
* Too much nitrogen: Excessive nitrogen can promote foliage growth at the expense of tuber production. Use a balanced fertilizer.
* Small Potatoes: Small potatoes can be caused by:
* Insufficient hilling: Make sure you’re hilling your plants regularly to encourage more tuber production.
* Overcrowding: If you’re planting multiple seed potatoes in the same container, make sure they’re spaced far enough apart.
* Lack of water: Potatoes need consistent moisture, especially during tuber formation.
* Potato Blight: Potato blight is a fungal disease that can cause brown spots on the leaves and tubers. To prevent blight:
* Use disease-free seed potatoes.
* Provide good air circulation.
* Avoid overhead watering.
* Apply a fungicide if necessary.
Enjoying Your Homegrown Potatoes
Congratulations! You’ve successfully grown potatoes in containers. Now it’s time to enjoy the fruits (or, rather, the tubers) of your labor. There’s nothing quite like the taste of freshly harvested, homegrown potatoes. Roast them, mash them, fry them, or use them in your favorite potato recipes. The possibilities are endless! I love making homemade potato salad with mine.
Growing potatoes in containers is a rewarding and fun experience. With a little bit of care and attention, you can enjoy a bountiful harvest of delicious potatoes right on your patio or balcony. Happy gardening!
Conclusion
So, there you have it! Growing potatoes in containers is not just a gardening trend; it’s a game-changer for anyone, regardless of space or experience. We’ve walked through the simple steps, highlighted the benefits, and hopefully, inspired you to ditch the grocery store spuds (at least some of the time!) and embrace the joy of harvesting your own homegrown potatoes.
Why is this DIY trick a must-try? Because it puts fresh, flavorful potatoes right at your fingertips. Imagine the satisfaction of digging into a container and unearthing a treasure trove of earthy goodness. Think of the delicious meals you can create, knowing exactly where your ingredients came from and how they were grown. And let’s not forget the sheer fun of it all! Gardening is therapeutic, and growing potatoes in containers offers a unique and rewarding experience.
But the beauty of this method lies in its adaptability. Feel free to experiment with different potato varieties. Russets are fantastic for baking and frying, while Yukon Golds offer a creamy texture perfect for mashed potatoes. Red potatoes hold their shape well in salads and stews. Don’t be afraid to try a mix of varieties in separate containers to discover your favorites.
Consider adding companion plants to your potato containers. Marigolds can help deter pests, while herbs like basil and thyme can enhance the flavor of your potatoes and attract beneficial insects. You can also adjust the size of your containers to suit your space and needs. Smaller containers are great for patios and balconies, while larger containers can accommodate more plants and yield a bigger harvest.
Growing potatoes in containers is also a fantastic way to involve children in gardening. It’s a hands-on learning experience that teaches them about where their food comes from and the importance of sustainable practices. Plus, they’ll love the excitement of digging up their own potatoes!
Ultimately, this DIY project is about more than just growing potatoes. It’s about connecting with nature, embracing a sustainable lifestyle, and enjoying the simple pleasures of homegrown food. It’s about taking control of your food supply and knowing that you can create something amazing with your own two hands.
We wholeheartedly encourage you to give growing potatoes in containers a try. It’s easier than you think, and the rewards are well worth the effort. Once you’ve experienced the taste of freshly harvested, homegrown potatoes, you’ll never look at store-bought spuds the same way again.
So, grab some seed potatoes, gather your containers, and get ready to embark on a gardening adventure. And most importantly, don’t forget to share your experience with us! We’d love to hear about your successes, your challenges, and any tips or tricks you discover along the way. Share your photos and stories on social media using #ContainerPotatoes and let’s inspire others to join the fun. Happy growing!
Frequently Asked Questions (FAQ)
What kind of container is best for growing potatoes?
The ideal container for growing potatoes should be at least 15 gallons in size, but larger is generally better. This allows ample room for the potato plants to develop a healthy root system and produce a good yield. Choose a container made of durable material such as plastic, metal, or wood. Ensure the container has drainage holes to prevent waterlogging, which can lead to root rot. Fabric grow bags are also an excellent option as they provide good aeration and drainage.
How many seed potatoes can I plant in one container?
The number of seed potatoes you can plant in one container depends on the size of the container. For a 15-gallon container, planting one to two seed potatoes is generally recommended. If you’re using a larger container, such as a 20-gallon or larger, you can plant up to three seed potatoes. Make sure to space the seed potatoes evenly within the container to allow each plant enough room to grow and develop. Overcrowding can lead to smaller potatoes and reduced yields.
What type of soil should I use for growing potatoes in containers?
Potatoes thrive in well-draining, slightly acidic soil. A good potting mix specifically formulated for vegetables is ideal. You can also create your own mix by combining equal parts of compost, peat moss (or coconut coir), and perlite or vermiculite. Compost provides essential nutrients, peat moss (or coconut coir) helps retain moisture, and perlite or vermiculite improves drainage. Avoid using garden soil, as it can be too heavy and compact, hindering root growth.
How often should I water my potato plants in containers?
Water your potato plants regularly, especially during hot and dry weather. The soil should be kept consistently moist but not waterlogged. Check the soil moisture by sticking your finger about an inch deep. If the soil feels dry, it’s time to water. Water deeply, allowing the water to drain out of the drainage holes. Avoid overhead watering, as this can promote fungal diseases. Instead, water at the base of the plants.
How do I know when my potatoes are ready to harvest?
The timing of harvest depends on the potato variety and your personal preference. “New potatoes,” which are small and tender, can be harvested as early as 7-8 weeks after planting. For mature potatoes, wait until the foliage begins to yellow and die back, typically around 10-12 weeks after planting. To harvest, gently tip the container over and carefully remove the potatoes from the soil.
What are some common pests and diseases that affect potatoes in containers?
Common pests that can affect potatoes include aphids, potato beetles, and flea beetles. Regularly inspect your plants for signs of infestation and take appropriate action, such as hand-picking pests, using insecticidal soap, or applying neem oil. Common diseases include early blight, late blight, and potato scab. To prevent diseases, ensure good air circulation, avoid overhead watering, and use disease-resistant potato varieties.
Can I grow potatoes in containers indoors?
While it’s possible to grow potatoes in containers indoors, it requires a significant amount of light. Potatoes need at least 6-8 hours of direct sunlight per day. If you don’t have a sunny window, you’ll need to supplement with grow lights. Indoor growing can also be more challenging due to temperature fluctuations and humidity levels. Outdoor growing is generally recommended for best results.
How do I “hill” potatoes in containers?
“Hilling” is the process of adding more soil to the container as the potato plants grow. This encourages the development of more potatoes along the stem. When the potato plants are about 6-8 inches tall, add a few inches of soil to the container, covering the lower part of the stems. Repeat this process every few weeks until the container is nearly full.
Can I reuse the soil from my potato containers?
It’s generally not recommended to reuse the soil from your potato containers for growing potatoes again, as it may harbor pests or diseases. However, you can reuse the soil for other plants, such as flowers or vegetables that are not susceptible to the same pests and diseases. Before reusing the soil, amend it with fresh compost and fertilizer to replenish nutrients.
What are some good companion plants for potatoes in containers?
Several plants can benefit potatoes when grown together in containers. Marigolds deter nematodes and other pests. Basil repels potato beetles and attracts beneficial insects. Thyme also repels pests and improves the flavor of potatoes. Other good companion plants include garlic, onions, and beans. Avoid planting potatoes near tomatoes, as they are susceptible to similar diseases.


Leave a Comment