

Growing peas indoors might sound like a whimsical dream, conjuring images of sprawling vines in sun-drenched fields. But guess what? It’s totally achievable, even if you don’t have a sprawling garden! For centuries, humans have cultivated peas, tracing their origins back to the Near East. They were a staple food, providing essential nutrients and a taste of spring after long winters. Now, you can bring that same sense of renewal and self-sufficiency right into your home.
Are you tired of bland, store-bought peas that lack that fresh, sweet flavor? Do you crave the satisfaction of nurturing your own food from seed to table? Or perhaps you’re simply looking for a fun and rewarding indoor gardening project? Whatever your reason, learning how to start growing peas indoors opens up a world of possibilities.
This DIY guide is your passport to a thriving indoor pea patch. We’ll walk you through every step, from selecting the right varieties to providing the perfect growing conditions. Get ready to enjoy the delicious taste of homegrown peas, even when the weather outside is frightful!
Growing Peas Indoors: A Step-by-Step Guide to Fresh, Homegrown Goodness!
Okay, so you want to grow peas indoors? Awesome! I’m here to tell you it’s totally doable, and honestly, there’s nothing quite like snacking on fresh, sweet peas you’ve grown yourself, especially when the weather outside is less than ideal. This guide will walk you through everything you need to know to get started, from choosing the right variety to harvesting your bounty. Let’s get our hands dirty (figuratively, for now!).
Choosing the Right Pea Variety
Not all peas are created equal, especially when it comes to indoor growing. You’ll want to choose varieties that are compact and don’t require a ton of space to climb. Here’s what I recommend:
* Dwarf Varieties: These are your best bet. Look for varieties like ‘Little Marvel,’ ‘Tom Thumb,’ or ‘Sugar Ann.’ They stay relatively small and are perfect for containers.
* Bush Varieties: These are also a good option, as they don’t need as much support as vining varieties. ‘Oregon Sugar Pod II’ is a popular choice.
* Avoid Vining Varieties: While you *can* grow vining varieties indoors, they require a lot more space and support, which can be a hassle. If you’re a beginner, stick with dwarf or bush types.
Gathering Your Supplies
Before we dive into planting, let’s make sure you have everything you need. Here’s a checklist:
* Pea Seeds: Obviously! Choose your variety based on the recommendations above.
* Containers: You’ll need pots that are at least 6 inches deep and wide. I prefer using containers that are 8-12 inches deep to give the roots plenty of room to grow. Make sure they have drainage holes!
* Potting Mix: Use a high-quality potting mix that’s well-draining. Avoid using garden soil, as it can compact and not drain properly in containers.
* Watering Can or Spray Bottle: For gentle watering.
* Grow Lights (Optional but Recommended): If you don’t have a sunny spot, grow lights are essential.
* Trellis or Support (Optional): Even dwarf varieties might appreciate a little support, especially as they start to produce peas. Small bamboo stakes or a mini trellis work great.
* Seed Starting Tray (Optional): You can start your seeds in a tray and then transplant them, or sow them directly into your containers.
Planting Your Pea Seeds
Now for the fun part! Here’s how to plant your pea seeds:
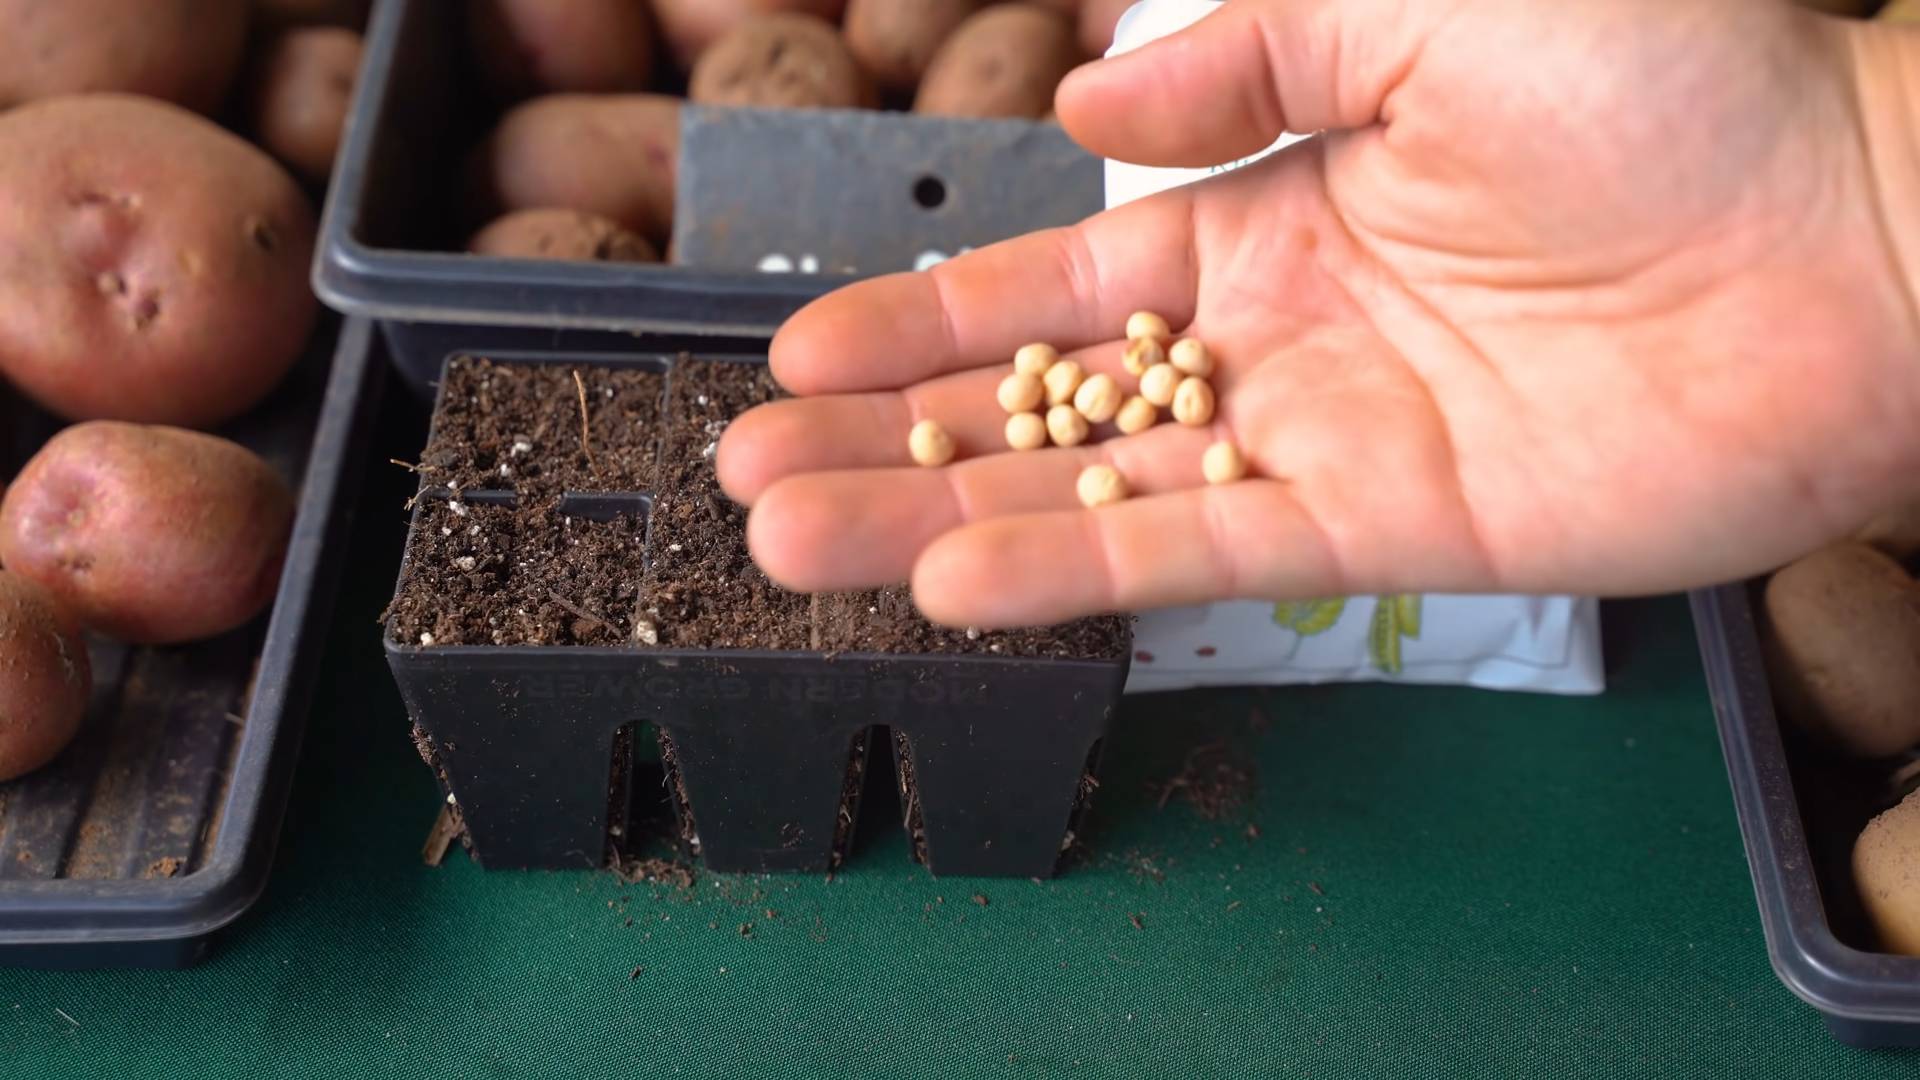
1. Soak the Seeds (Optional): Soaking your pea seeds in water for 12-24 hours before planting can help speed up germination. Just don’t soak them for longer than 24 hours, or they might rot.
2. Fill Your Containers: Fill your containers with potting mix, leaving about an inch of space at the top.
3. Sow the Seeds: Make small holes about 1 inch deep and 2 inches apart. Place one or two seeds in each hole. If you’re using a seed starting tray, follow the instructions on the seed packet.
4. Cover the Seeds: Gently cover the seeds with potting mix and lightly pat it down.
5. Water Thoroughly: Water the soil gently until it’s evenly moist but not soggy.
6. Provide Light: Place your containers in a sunny spot that gets at least 6 hours of direct sunlight per day. If you don’t have enough natural light, use grow lights. Position the lights a few inches above the seedlings.
Caring for Your Pea Plants
Once your pea seeds have sprouted, it’s important to provide them with the right care to ensure they thrive.
1. Watering: Keep the soil consistently moist but not waterlogged. Water when the top inch of soil feels dry to the touch. Avoid overwatering, as this can lead to root rot.
2. Fertilizing: Peas are relatively light feeders, but they’ll still benefit from occasional fertilization. Use a balanced liquid fertilizer diluted to half strength every 2-3 weeks.
3. Providing Support: Even dwarf varieties can benefit from a little support. Insert small bamboo stakes or a mini trellis into the container to give the plants something to climb on. This will help keep the peas off the soil and prevent them from rotting.
4. Pest Control: Keep an eye out for common pests like aphids and spider mites. If you spot any pests, you can try spraying them with insecticidal soap or neem oil.
5. Temperature: Peas prefer cooler temperatures, ideally between 60-70°F (15-21°C). Avoid placing them in areas that are too hot or drafty.
6. Air Circulation: Good air circulation is important to prevent fungal diseases. Make sure your plants have enough space between them and that the area is well-ventilated.
Pollination
Peas are self-pollinating, which means they don’t need bees or other insects to pollinate them. However, you can help the process along by gently shaking the plants every few days once they start to flower. This will help release the pollen and ensure that the flowers are properly pollinated.
Harvesting Your Peas
This is the moment you’ve been waiting for! Here’s how to harvest your peas:
1. Timing: The timing of your harvest will depend on the variety of peas you’re growing. Generally, you can start harvesting peas about 60-70 days after planting.
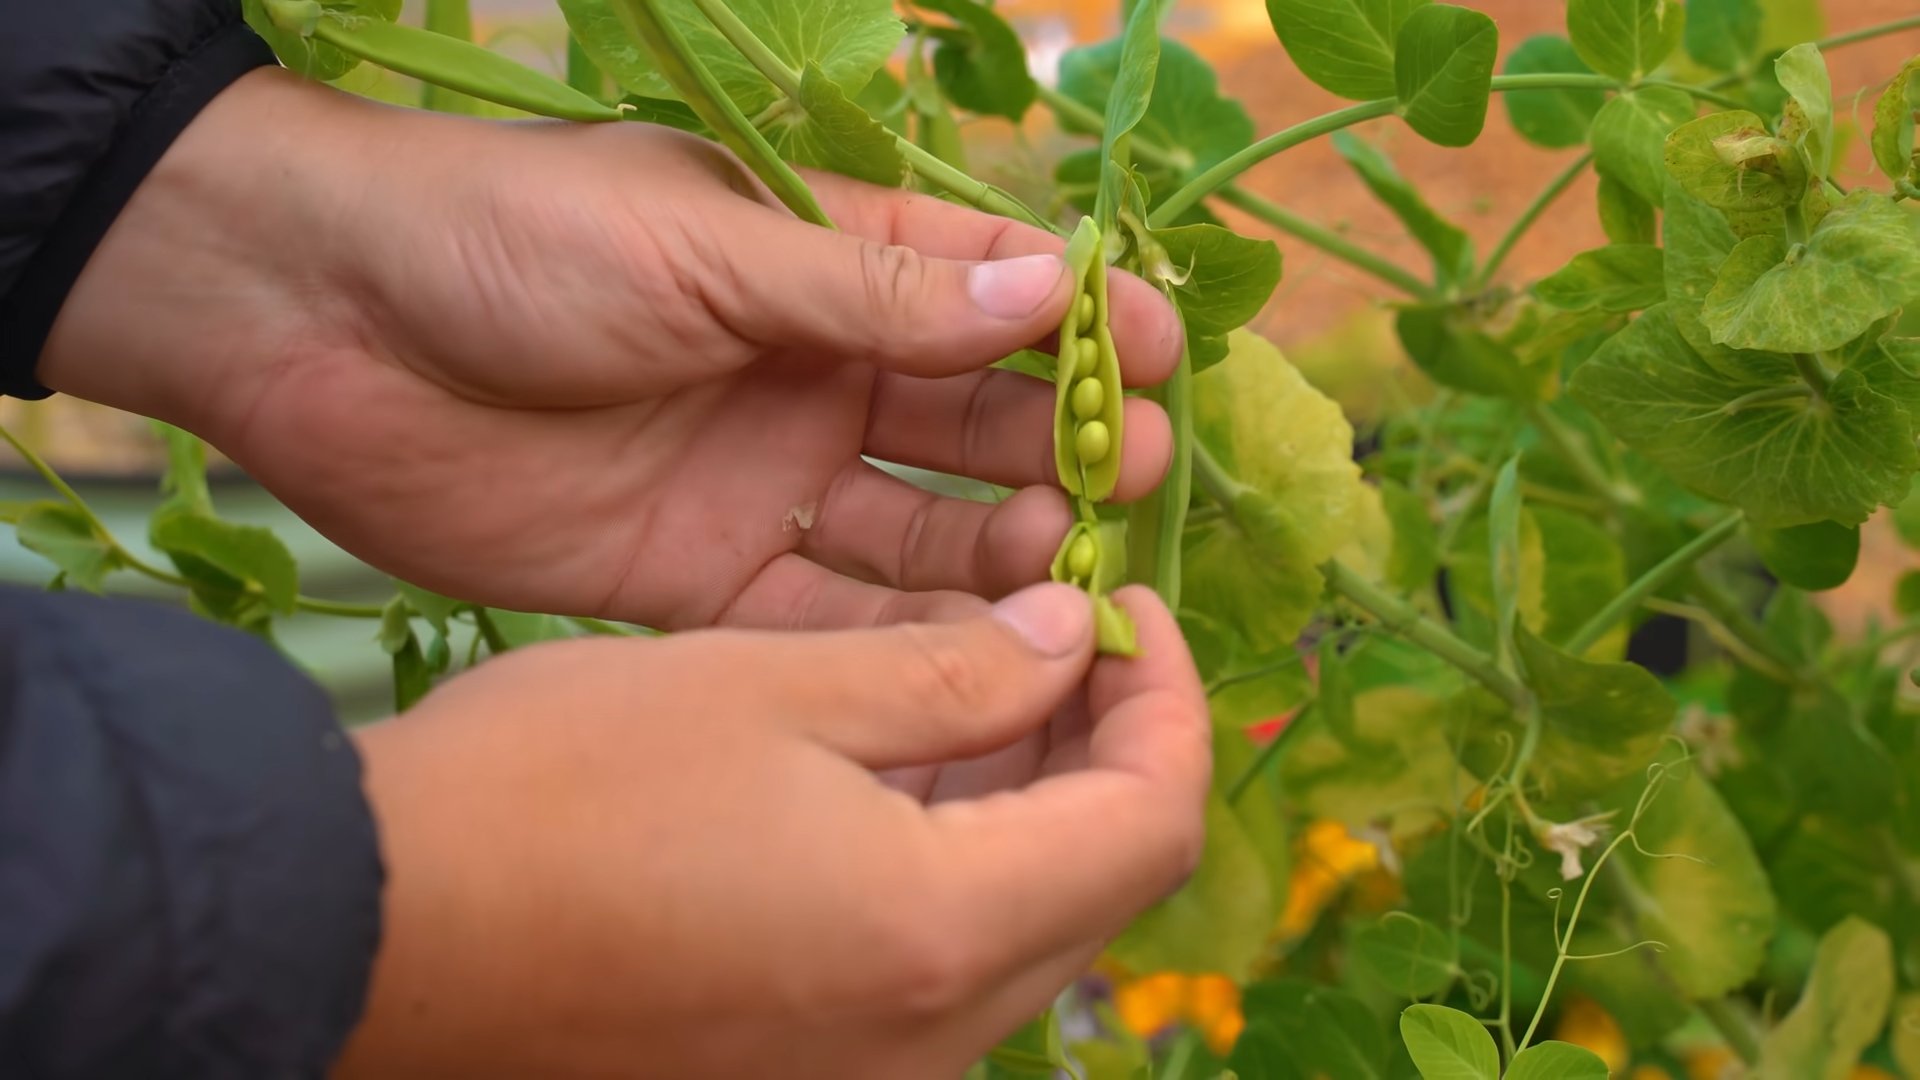
2. Sugar Snap Peas: Harvest sugar snap peas when the pods are plump and the peas inside are still small. The pods should be crisp and tender.
3. Shelling Peas: Harvest shelling peas when the pods are full and the peas inside are large and well-developed. The pods should be firm and slightly rounded.
4. Snow Peas: Harvest snow peas when the pods are flat and tender. The peas inside should be very small.
5. Harvesting Technique: Gently snap the pea pods off the plant. Avoid pulling or tugging, as this can damage the plant.
6. Regular Harvesting: Harvest your peas regularly to encourage the plant to produce more pods. The more you harvest, the more you’ll get!
Troubleshooting
Even with the best care, you might encounter some problems along the way. Here are a few common issues and how to fix them:
* Yellowing Leaves: This could be a sign of overwatering, underwatering, or nutrient deficiency. Check the soil moisture and adjust your watering accordingly. If the soil is dry, water thoroughly. If the soil is soggy, let it dry out before watering again. You can also try fertilizing with a balanced liquid fertilizer.
* Lack of Flowers: This could be due to insufficient light, high temperatures, or nutrient deficiency. Make sure your plants are getting enough light and that the temperature is within the ideal range. You can also try fertilizing with a fertilizer that’s high in phosphorus.
* Pests: Keep an eye out for common pests like aphids and spider mites. If you spot any pests, you can try spraying them with insecticidal soap or neem oil.
* Powdery Mildew: This is a fungal disease that can affect pea plants. It appears as a white, powdery coating on the leaves. To prevent powdery mildew, make sure your plants have good air circulation and avoid overhead watering. If you see signs of powdery mildew, you can try spraying the plants with a fungicide.
Enjoying Your Harvest
Now that you’ve harvested your peas, it’s time to enjoy them! Freshly picked peas are delicious eaten raw, but you can also cook them in a variety of ways. Here are a few ideas:
* Eat them raw: Sugar snap peas and snow peas are delicious eaten raw as a snack or added to salads.
* Steam them: Steaming peas is a quick and easy way to cook them. Simply steam them for a few minutes until they’re tender-crisp.
* Sauté them: Sauté peas in a little butter or olive oil with some garlic and herbs.
* Add them to soups and stews: Peas are a great addition to soups and stews. Add them towards the end of cooking so they don’t get mushy.
* Freeze them: If you have more peas than you can eat, you can freeze them for later. Blanch them in boiling water for a few minutes, then transfer them to an ice bath to stop the cooking process. Drain them well and freeze them in a single layer on a baking sheet. Once they’re frozen, transfer them to a freezer bag or container.
Section: Maximizing Your Indoor Pea Harvest
Okay, so you’ve got the basics down. Now let’s talk about how to really maximize your indoor pea harvest. These are some extra tips and tricks I
Conclusion
So, there you have it! Growing peas indoors is not only possible, but it’s also a remarkably rewarding experience, especially when you consider the fresh, sweet taste of homegrown peas gracing your table long before the outdoor season even begins. This DIY trick transforms your windowsill into a miniature garden, offering a delightful connection to nature and a sustainable source of delicious produce.
Why is this a must-try? Because it’s accessible, affordable, and incredibly satisfying. Forget relying solely on store-bought peas, which can often lack the vibrant flavor and freshness of homegrown varieties. With just a few simple supplies – a container, some soil, pea seeds, and a sunny spot – you can embark on this green adventure. It’s a fantastic project for families, a therapeutic activity for individuals, and a conversation starter for anyone interested in sustainable living.
But the beauty of growing peas indoors lies not just in its simplicity, but also in its adaptability. Feel free to experiment with different pea varieties. Bush peas, like ‘Little Marvel’ or ‘Tom Thumb,’ are particularly well-suited for indoor growing due to their compact size. You can also try snow peas or snap peas for a delightful variation in texture and flavor. Consider using different types of containers, from repurposed yogurt containers to stylish terracotta pots, to match your aesthetic preferences.
For an extra boost, try adding a diluted liquid fertilizer, like fish emulsion or seaweed extract, every few weeks to provide your pea plants with essential nutrients. Remember to monitor the moisture levels in the soil and adjust your watering schedule accordingly. Overwatering can lead to root rot, while underwatering can stunt growth.
Don’t be afraid to get creative with your support structures. While bamboo stakes or trellises work perfectly well, you can also use twigs, string, or even repurposed household items to provide your pea plants with the support they need to climb. The possibilities are endless!
We wholeheartedly encourage you to try this DIY trick for growing peas indoors. It’s a simple yet profound way to connect with nature, cultivate your own food, and enjoy the unparalleled taste of fresh, homegrown produce. And most importantly, we want to hear about your experience! Share your photos, tips, and stories with us in the comments below. Let’s create a community of indoor pea growers and inspire others to embrace the joy of homegrown goodness. What are you waiting for? Grab your seeds and get growing! Let’s make this winter a season of fresh, delicious, and homegrown peas.
Frequently Asked Questions (FAQ)
What kind of peas are best for growing indoors?
Bush pea varieties, such as ‘Little Marvel,’ ‘Tom Thumb,’ or ‘Sugar Ann,’ are generally the best choice for indoor growing due to their compact size and shorter vines. These varieties don’t require as much vertical space as vining peas, making them ideal for containers. However, you can also grow vining peas indoors, but you’ll need to provide them with a taller trellis or support structure. Snow peas and snap peas are also excellent options for indoor cultivation, offering a delightful variation in texture and flavor.
How much sunlight do indoor pea plants need?
Pea plants need at least 6-8 hours of direct sunlight per day to thrive. Place your containers in a south-facing window or under grow lights if natural sunlight is limited. If you’re using grow lights, position them a few inches above the plants and provide them with 14-16 hours of light per day. Rotate your plants regularly to ensure even light exposure on all sides. Insufficient sunlight can lead to leggy growth and reduced pea production.
What type of soil should I use for growing peas indoors?
Use a well-draining potting mix that is rich in organic matter. Avoid using garden soil, as it can be too heavy and compact for container growing. A good potting mix will provide adequate drainage and aeration, preventing root rot and promoting healthy growth. You can also amend your potting mix with compost or other organic materials to improve its fertility and water retention.
How often should I water my indoor pea plants?
Water your pea plants regularly, keeping the soil consistently moist but not waterlogged. Check the soil moisture level daily by sticking your finger into the soil. If the top inch feels dry, it’s time to water. Avoid overwatering, as this can lead to root rot. Water deeply, allowing excess water to drain out of the bottom of the container. Adjust your watering schedule based on the temperature and humidity levels in your home.
Do I need to fertilize my indoor pea plants?
Yes, fertilizing your pea plants can help promote healthy growth and increase pea production. Use a diluted liquid fertilizer, such as fish emulsion or seaweed extract, every few weeks. Follow the instructions on the fertilizer label carefully to avoid over-fertilizing. You can also add compost or other organic materials to the soil to provide a slow-release source of nutrients.
How do I support my indoor pea plants?
Pea plants need support to climb and grow properly. You can use bamboo stakes, trellises, or even repurposed household items to provide support. Insert the stakes or trellis into the container before planting the seeds to avoid disturbing the roots later. As the pea plants grow, gently guide their tendrils onto the support structure.
When can I harvest my indoor peas?
The time it takes to harvest your indoor peas will depend on the variety you’re growing. Generally, peas are ready to harvest when the pods are plump and filled with peas. Snow peas are harvested when the pods are flat and tender, while snap peas are harvested when the pods are plump and crisp. Harvest your peas regularly to encourage continued production.
Can I grow peas indoors year-round?
Yes, you can grow peas indoors year-round, provided you have adequate light and temperature control. In the winter, you may need to supplement natural sunlight with grow lights. Keep the temperature consistent and avoid exposing your plants to drafts or extreme temperature fluctuations.
What are some common problems when growing peas indoors?
Some common problems when growing peas indoors include aphids, powdery mildew, and root rot. Aphids can be controlled with insecticidal soap or neem oil. Powdery mildew can be prevented by providing good air circulation and avoiding overhead watering. Root rot can be prevented by using well-draining soil and avoiding overwatering.
How do I encourage more pea production?
To encourage more pea production, make sure your plants are getting enough sunlight, water, and nutrients. Harvest your peas regularly to encourage continued production. You can also try pinching off the tips of the vines to encourage branching and more flower production.
Leave a Comment