

Growing onions at home can seem daunting, but trust me, it’s more rewarding than you might think! Imagine stepping into your backyard and harvesting plump, flavorful onions that you nurtured from tiny seedlings. Forget those bland, store-bought onions – we’re talking about homegrown goodness bursting with taste!
For centuries, onions have been a staple in cuisines worldwide, dating back to ancient civilizations. From the Egyptians who revered them to the Romans who carried them on their conquests, onions have always been valued for their culinary and medicinal properties. They’re not just a flavor enhancer; they’re a piece of history!
But why should you bother growing onions at home? Well, for starters, it’s incredibly satisfying to cultivate your own food. Plus, you have complete control over what goes into your onions – no harmful pesticides or chemicals. And let’s be honest, fresh, homegrown onions taste infinitely better than anything you can buy at the supermarket. In this article, I’m going to share some simple, yet effective DIY tricks and hacks that will make growing onions at home a breeze, even if you’re a complete beginner. Get ready to unleash your inner gardener and enjoy the delicious rewards!
Growing Onions at Home: A Beginner’s Guide
Okay, so you want to grow onions at home? Awesome! It’s surprisingly easy and rewarding. Nothing beats the taste of a freshly harvested onion from your own garden. I’m going to walk you through everything you need to know, from choosing the right type of onion to harvesting your bounty. Let’s get started!
Choosing Your Onions: Sets, Seeds, or Transplants?
Before we get our hands dirty, let’s talk about how you can actually *start* growing onions. You have three main options: sets, seeds, and transplants. Each has its pros and cons, so let’s break them down:
* **Onion Sets:** These are basically baby onions that were started last year and then dried. They’re the easiest and fastest way to get a harvest. You just pop them in the ground, and they’re off to the races! I usually recommend sets for beginners because they’re the most forgiving.
* **Onion Seeds:** Starting from seed gives you the widest variety of onion types to choose from. However, it requires more patience and a longer growing season. You’ll need to start the seeds indoors several weeks before the last frost.
* **Onion Transplants:** These are young onion plants that have already been started for you. They offer a good balance between the ease of sets and the variety of seeds. You can usually find them at your local garden center in the spring.
For this guide, I’m going to focus on growing from **onion sets**, as it’s the simplest method for beginners.
Preparing Your Garden Bed
Onions need a sunny spot and well-drained soil. They’re heavy feeders, so you’ll also want to amend the soil with plenty of organic matter. Here’s how I prepare my onion bed:
* **Sunlight:** Onions need at least 6-8 hours of direct sunlight per day. Choose a location in your garden that gets plenty of sun.
* **Soil Drainage:** Onions hate wet feet! Make sure your soil drains well. If you have heavy clay soil, amend it with compost, aged manure, or other organic matter to improve drainage.
* **Soil pH:** Onions prefer a slightly acidic to neutral soil pH, around 6.0 to 7.0. You can test your soil pH with a soil testing kit from your local garden center.
* **Amending the Soil:** This is the most important step! Before planting, work in a generous amount of compost or aged manure into the top 6-8 inches of soil. I also like to add a slow-release organic fertilizer formulated for vegetables.
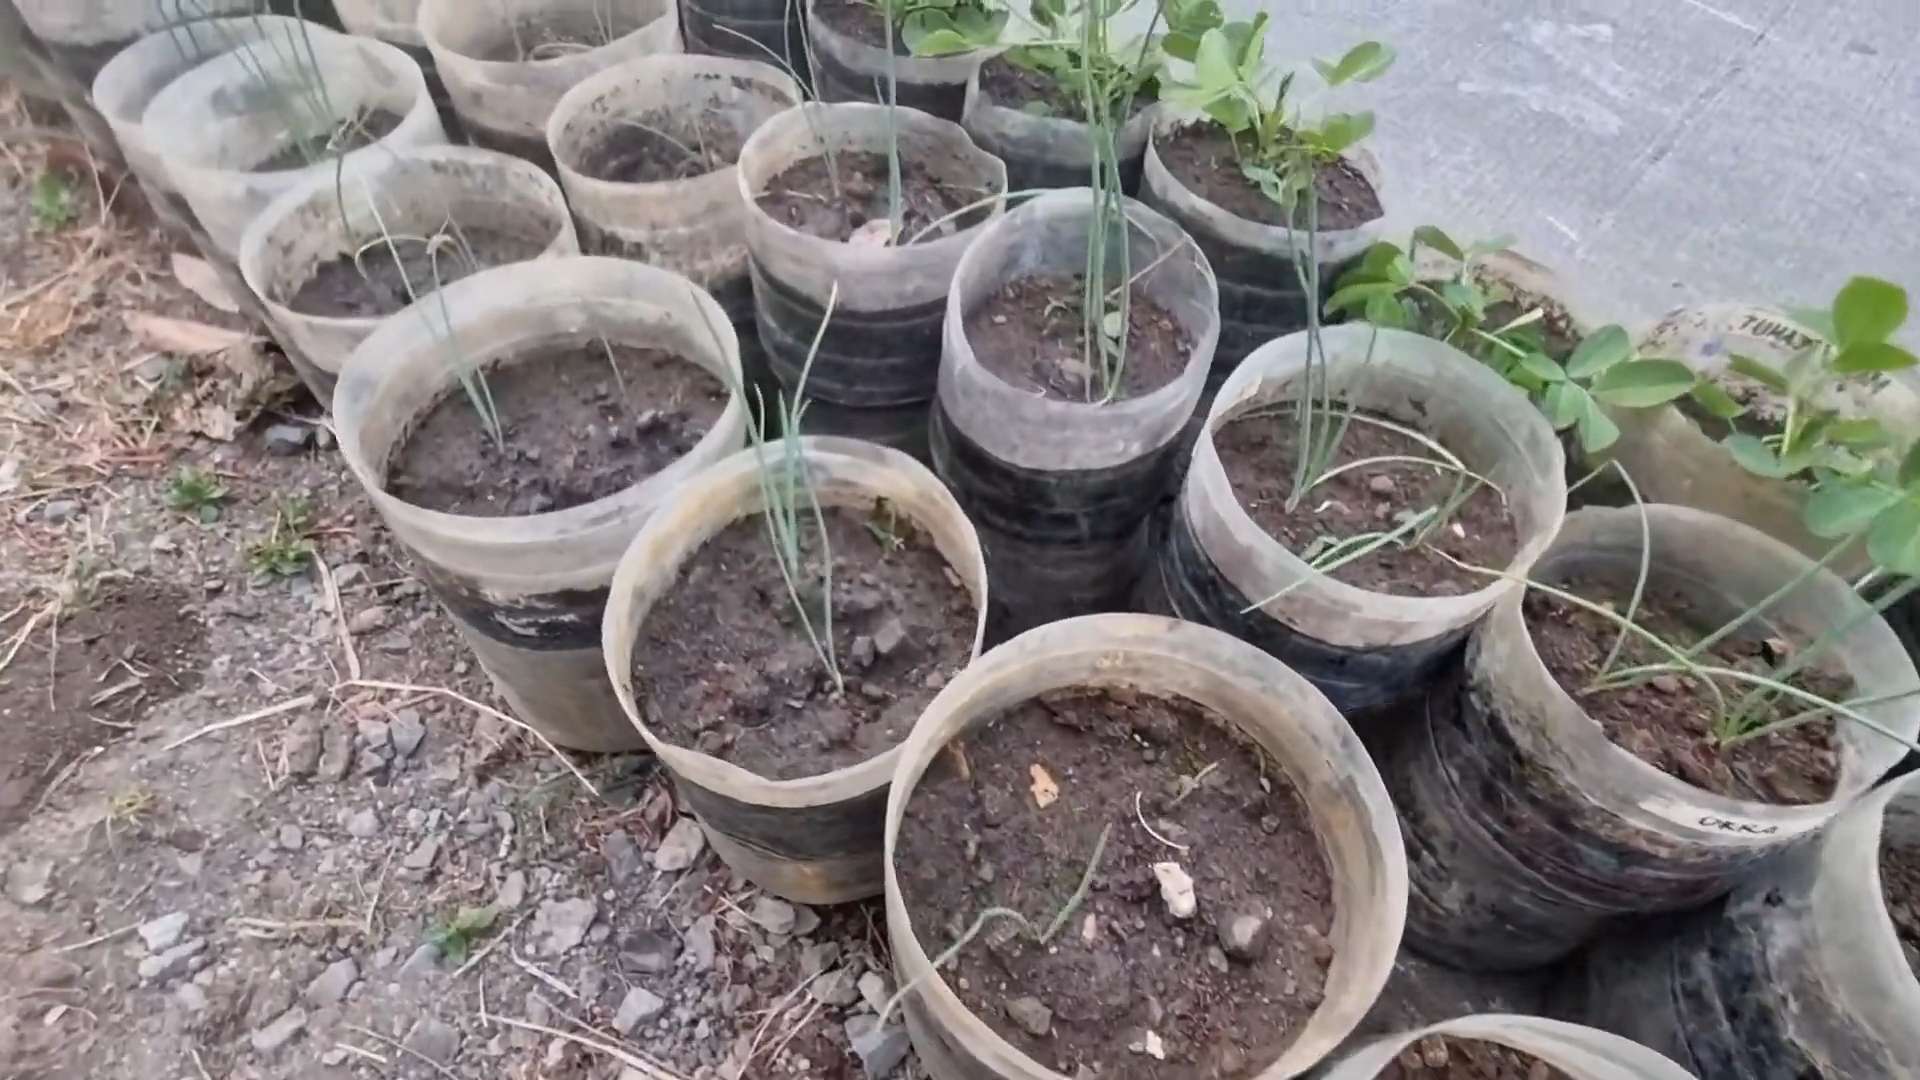
Planting Your Onion Sets
Now for the fun part! Planting your onion sets is super easy. Here’s what you need to do:
1. **Choose Your Sets:** Select firm, healthy onion sets that are about the size of a dime. Avoid any sets that are soft, shriveled, or showing signs of mold.
2. **Spacing:** Plant your onion sets about 4-6 inches apart in rows that are 12-18 inches apart. This gives them enough room to grow without overcrowding.
3. **Planting Depth:** Make a small hole in the soil and place the onion set in the hole, pointy side up. Cover the set with about 1 inch of soil. You want the top of the set to be just barely covered.
4. **Watering:** Water the newly planted sets thoroughly. This will help them settle in and get established.
5. **Mulching:** Apply a layer of mulch around the onion plants. Mulch helps to retain moisture, suppress weeds, and regulate soil temperature. I like to use straw, shredded leaves, or wood chips.
Caring for Your Onions
Once your onions are planted, it’s important to give them the care they need to thrive. Here’s what you need to do:
* **Watering:** Onions need consistent moisture, especially during bulb formation. Water deeply whenever the top inch of soil feels dry. Avoid overwatering, as this can lead to rot.
* **Weeding:** Keep your onion bed free of weeds. Weeds compete with onions for nutrients and water. Hand-pull weeds carefully to avoid disturbing the onion roots.
* **Fertilizing:** Onions are heavy feeders, so you’ll need to fertilize them regularly. I like to use a liquid fertilizer diluted to half strength every 2-3 weeks. You can also side-dress with compost or aged manure.
* **Pest and Disease Control:** Onions are relatively pest-resistant, but they can be susceptible to certain pests and diseases. Keep an eye out for onion maggots, thrips, and fungal diseases. If you notice any problems, treat them promptly with an appropriate organic pesticide or fungicide.
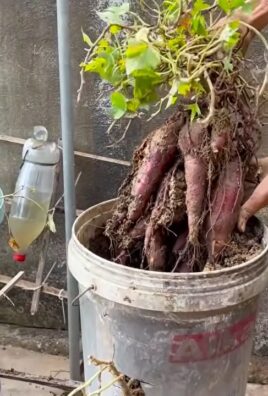
Harvesting Your Onions
The moment you’ve been waiting for! Harvesting your onions is the most rewarding part of the process. Here’s how to know when your onions are ready to harvest:
* **When to Harvest:** Onions are typically ready to harvest when the tops start to fall over and turn brown. This usually happens in late summer or early fall, depending on your climate and the variety of onion you’re growing.
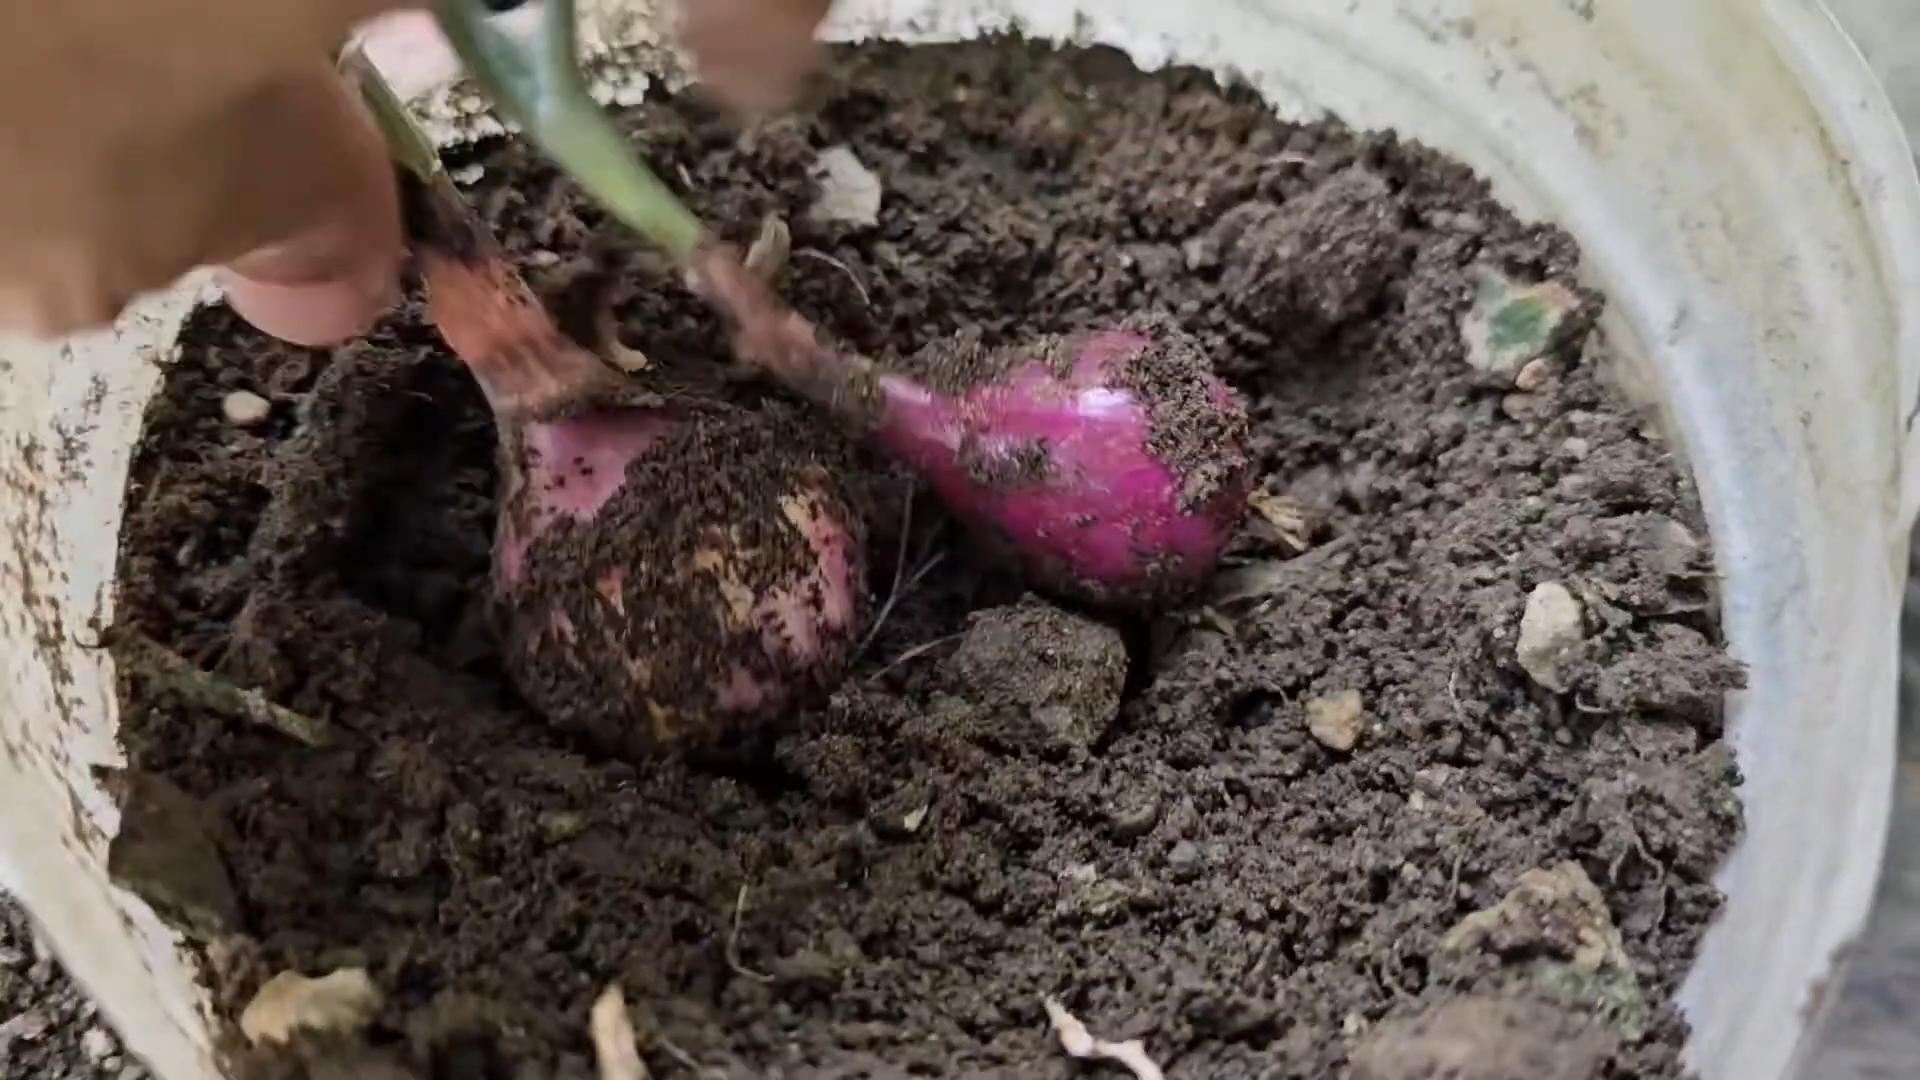
* **How to Harvest:** Gently loosen the soil around the onion bulb with a garden fork or trowel. Then, carefully pull the onion out of the ground.
* **Curing Your Onions:** Curing is essential for long-term storage. After harvesting, spread the onions out in a single layer in a warm, dry, well-ventilated place for 2-3 weeks. This allows the outer layers of the onion to dry and toughen up, which helps to prevent rot. I usually cure mine in my garage or shed.
* **Storing Your Onions:** Once the onions are cured, you can store them in a cool, dry, dark place. I like to store mine in mesh bags or old pantyhose. They should last for several months if stored properly.
Troubleshooting Common Onion Problems
Even with the best care, you might encounter some problems along the way. Here are a few common issues and how to address them:
* **Small Bulbs:** If your onions are producing small bulbs, it could be due to several factors, including lack of sunlight, poor soil, insufficient watering, or overcrowding. Make sure your onions are getting enough sun, water, and nutrients, and that they’re spaced properly.
* **Bolting:** Bolting is when an onion plant sends up a flower stalk. This usually happens when the plant experiences a period of cold weather followed by warm weather. Once an onion bolts, the bulb will stop growing and become tough and bitter. To prevent bolting, choose onion varieties that are suited to your climate and avoid planting too early in the spring.
* **Onion Maggots:** Onion maggots are small, white larvae that feed on the roots of onion plants. They can cause the plants to wilt and die. To prevent onion maggots, rotate your crops, use row covers, and apply beneficial nematodes to the soil.
* **Fungal Diseases:** Onions are susceptible to several fungal diseases, including downy mildew, purple blotch, and botrytis neck rot. These diseases can cause the leaves to turn yellow or brown and the bulbs to rot. To prevent fungal diseases, provide good air circulation, avoid overhead watering, and apply an organic fungicide if necessary.
Choosing the Right Onion Variety
The type of onion you choose to grow will depend on your climate and your personal preferences. Here are a few popular varieties to consider:
* **Yellow Onions:** These are the most common type of onion. They have a strong, pungent flavor and are good for cooking and storage. Some popular yellow onion varieties include Yellow Globe, Spanish Onion, and Walla Walla Sweet.
* **White Onions:** White onions have a milder flavor than yellow onions. They’re good for salads, salsas, and other dishes where you want a less intense onion flavor. Some popular white onion varieties include White Sweet Spanish and White Lisbon.
* **Red Onions:** Red onions have a beautiful purple color and a slightly sweet flavor. They’re good for salads, sandwiches, and grilling. Some popular red onion varieties include Red Burgundy and Red Creole.
* **Sweet Onions:** Sweet onions have a mild, sweet flavor and are good for eating raw or grilling. They don’t store as well as other types of onions. Some popular sweet onion varieties include Vidalia, Maui, and Texas Sweet.
Extra Tips for Onion Growing Success
Here are a few extra tips to help you grow the best onions possible:
* **Rotate Your Crops:** Don’t plant onions in the same spot year after year. Rotate your crops to help prevent pests and diseases.
* **Use Row Covers:** Row covers can protect your onion plants from pests and diseases, as well as provide some frost protection.
* **Water Deeply:** Water your onions deeply and infrequently, rather than shallowly and frequently. This encourages deep root growth.
* **Side-Dress with Compost:** Side-dress your onions with compost or aged manure every few weeks to provide them with extra nutrients.
* **Don’t Overfertilize
Conclusion
So, there you have it! Growing onions at home, from humble scraps no less, is not just a fun gardening experiment; it’s a genuinely rewarding way to reduce food waste, save money, and enjoy the unparalleled flavor of freshly grown produce. Forget those bland, store-bought onions that have traveled miles – imagine the satisfaction of snipping vibrant green onion tops or harvesting plump bulbs, knowing you nurtured them from discarded roots.
This DIY trick is a must-try for several reasons. First, it’s incredibly simple. Even if you’re a complete beginner with a brown thumb, you can successfully regrow onions. The process requires minimal effort and resources, making it an accessible project for everyone. Second, it’s sustainable. By utilizing onion scraps, you’re actively participating in reducing food waste and promoting a more eco-friendly lifestyle. Third, it’s cost-effective. Think of all the onions you buy each year – this method allows you to significantly cut down on your grocery bill. Finally, and perhaps most importantly, it’s incredibly satisfying to witness the magic of regrowth and enjoy the fruits (or rather, vegetables) of your labor.
But don’t stop there! Experiment with different varieties of onions. Try regrowing shallots, scallions, or even garlic using similar techniques. Consider planting your regrown onions in different types of soil or containers to see how it affects their growth and flavor. You can also explore different growing locations – a sunny windowsill, a balcony garden, or even a dedicated raised bed.
For a spicier kick, try regrowing red onions. Their vibrant color and sharp flavor will add a delightful zest to your dishes. If you prefer a milder taste, white onions are an excellent choice. And for those who enjoy a touch of sweetness, yellow onions are the way to go.
Remember, the key to successful onion regrowth is patience and consistent care. Keep the soil moist but not waterlogged, provide ample sunlight, and watch for any signs of pests or diseases. With a little attention, you’ll be amazed at how quickly your onion scraps transform into thriving plants.
We wholeheartedly encourage you to try this DIY trick for growing onions at home. It’s a simple, sustainable, and satisfying way to enhance your cooking and connect with nature. Once you’ve given it a go, we’d love to hear about your experience! Share your tips, tricks, and photos in the comments below. Let’s build a community of home gardeners and inspire others to embrace the joy of growing their own food. Happy gardening!
Frequently Asked Questions (FAQ)
Q: How long does it take to regrow an onion from scraps?
A: The time it takes to regrow an onion from scraps can vary depending on several factors, including the variety of onion, the growing conditions, and the size of the initial scrap. Generally, you can expect to see new green shoots emerging within a week or two. To harvest mature bulbs, it can take several months, typically around 90-120 days. However, you can start harvesting the green onion tops much sooner, as soon as they reach a usable size. Remember that growing onions at home requires patience, but the reward is well worth the wait.
Q: What part of the onion do I need to regrow it?
A: The most important part of the onion for regrowth is the root end, also known as the onion base. This is the part of the onion that typically gets discarded after you’ve used the rest of the bulb. Make sure to leave about an inch or two of the onion attached to the root end. This will provide the plant with the necessary energy and nutrients to start growing.
Q: Can I regrow onions in water only?
A: Yes, you can initially regrow onions in water. Place the root end of the onion in a shallow dish or glass filled with water, ensuring that only the roots are submerged. Change the water every day or two to prevent bacterial growth. Once the roots have developed and new green shoots have emerged, you can transplant the onion into soil for continued growth. While water propagation is a good starting point, soil provides the necessary nutrients for the onion to develop into a mature bulb.
Q: What kind of soil is best for growing regrown onions?
A: Onions thrive in well-draining, fertile soil that is rich in organic matter. A loamy soil is ideal, as it provides a good balance of drainage and water retention. Before planting, amend the soil with compost or well-rotted manure to improve its fertility and drainage. Avoid heavy clay soils, as they can become waterlogged and inhibit root growth. A slightly acidic to neutral soil pH (around 6.0 to 7.0) is also optimal for onion growth.
Q: How much sunlight do regrown onions need?
A: Onions require plenty of sunlight to thrive. Aim for at least 6-8 hours of direct sunlight per day. If you’re growing onions indoors, place them near a sunny window or use a grow light to supplement natural light. Insufficient sunlight can result in weak, leggy growth and reduced bulb size.
Q: How often should I water my regrown onions?
A: Water your regrown onions regularly, keeping the soil consistently moist but not waterlogged. The frequency of watering will depend on the weather conditions and the type of soil. In general, water deeply whenever the top inch of soil feels dry to the touch. Avoid overwatering, as this can lead to root rot.
Q: Can I use fertilizer on my regrown onions?
A: Yes, fertilizing your regrown onions can help promote healthy growth and larger bulb size. Use a balanced fertilizer with equal amounts of nitrogen, phosphorus, and potassium. Apply the fertilizer according to the package instructions, typically every few weeks during the growing season. You can also use organic fertilizers, such as compost tea or fish emulsion, to provide essential nutrients to your onions.
Q: What are some common pests and diseases that affect onions?
A: Onions can be susceptible to various pests and diseases, including onion maggots, thrips, and fungal diseases like downy mildew and onion rot. To prevent pest and disease problems, practice good garden hygiene, such as removing weeds and debris from around your plants. You can also use organic pest control methods, such as insecticidal soap or neem oil, to control pests. If you notice signs of disease, remove the affected plants immediately to prevent the spread of infection.
Q: Can I regrow different types of onions using this method?
A: Yes, you can regrow different types of onions using this method, including yellow onions, white onions, red onions, shallots, and scallions. The process is generally the same for all types of onions, although the growth rate and bulb size may vary depending on the variety. Experiment with different types of onions to see which ones grow best in your area and which ones you prefer to use in your cooking.
Q: What if my regrown onion doesn’t form a bulb?
A: If your regrown onion doesn’t form a bulb, it could be due to several factors, such as insufficient sunlight, poor soil fertility, or inadequate watering. Make sure your onions are receiving at least 6-8 hours of direct sunlight per day, and amend the soil with compost or fertilizer to provide essential nutrients. Water regularly, keeping the soil consistently moist but not waterlogged. Also, consider the variety of onion you’re growing. Some varieties are better suited for bulb formation than others. Even if you don’t get a large bulb, you can still enjoy the flavorful green onion tops.
Leave a Comment