

Growing Okra at Home can feel like a daunting task, especially if you’re new to gardening. But trust me, with a few simple tricks and a little know-how, you can be harvesting delicious, nutritious okra right from your own backyard! Forget those bland, slimy okra pods you find at the grocery store. Imagine the satisfaction of serving up fresh, vibrant okra that you nurtured from seed to table.
Okra, also known as “lady’s fingers,” has a rich history, tracing back to ancient Ethiopia. From there, it spread throughout North Africa, the Middle East, and eventually made its way to the Americas with the transatlantic slave trade. It’s a resilient plant, deeply ingrained in the culinary traditions of the South, and a staple in dishes like gumbo and jambalaya.
But why should you bother with the effort of growing your own? Well, for starters, homegrown okra tastes infinitely better! Plus, you have complete control over what goes into your garden, ensuring you’re eating healthy, pesticide-free produce. And let’s be honest, there’s something incredibly rewarding about nurturing a plant from seed to harvest. This DIY guide will provide you with the essential tips and tricks to successfully growing okra at home, even if you have limited space or experience. I’m here to help you unlock the secrets to a bountiful okra harvest, so let’s get started!
Growing Okra: Your Guide for a Bountiful Harvest in Your Own Garden
Hello garden friends! I’m so excited to show you today how you can easily grow okra (also known as lady’s finger) at home. Okra is not only delicious but also incredibly healthy and versatile in the kitchen. And the best part: with a few simple tips and tricks, even beginners can successfully grow it. So, let’s roll up our sleeves and get started!
What you need for growing okra:
- Okra seeds: Choose a variety that is suitable for your climate. There are different varieties that differ in size, color, and ripening time.
- Garden soil: Okra loves nutrient-rich, well-draining soil.
- Compost or organic fertilizer: For an extra nutrient boost.
- Pots (optional): If you want to grow okra in a pot.
- Watering can or garden hose: For regular watering.
- Garden tools: Spade, rake, possibly a small trowel.
- Mulch (optional): To retain moisture in the soil and suppress weeds.
- Plant stakes (optional): For varieties that grow very tall.
Preparation is Everything: The Right Location and Soil Preparation
Okra is a sun worshipper! It needs at least 6-8 hours of direct sunlight per day to grow optimally and produce many fruits. So, find a sunny spot in your garden.
- Soil Preparation: Before you start planting, you should thoroughly prepare the soil. Loosen the soil with a spade and remove stones and weeds.
- Soil Improvement: Okra prefers slightly acidic to neutral soil (pH between 6.0 and 7.0). If your soil is very clayey or sandy, you can improve it with compost or other organic matter. This improves drainage and nutrient supply. I always generously mix in compost, it makes all the difference!
- Fertilizing: Work an organic fertilizer into the soil before planting. This gives the young okra plants a good start.
Sowing: How to Get the Seeds in the Ground
Okra is heat-loving and should only be sown after the last frost. The soil temperature should ideally be above 20°C (68°F).
- Direct Sowing or Starting Indoors? You can either sow okra directly into the bed or start the seeds in pots. Starting them indoors has the advantage that the plants get a head start and you can transplant them into the bed later. I prefer direct sowing, as okra can be sensitive to transplanting.
- Direct Sowing: Sow the seeds about 2-3 cm deep and with a spacing of 30-45 cm between plants. I always sow a few extra seeds to ensure enough plants germinate.
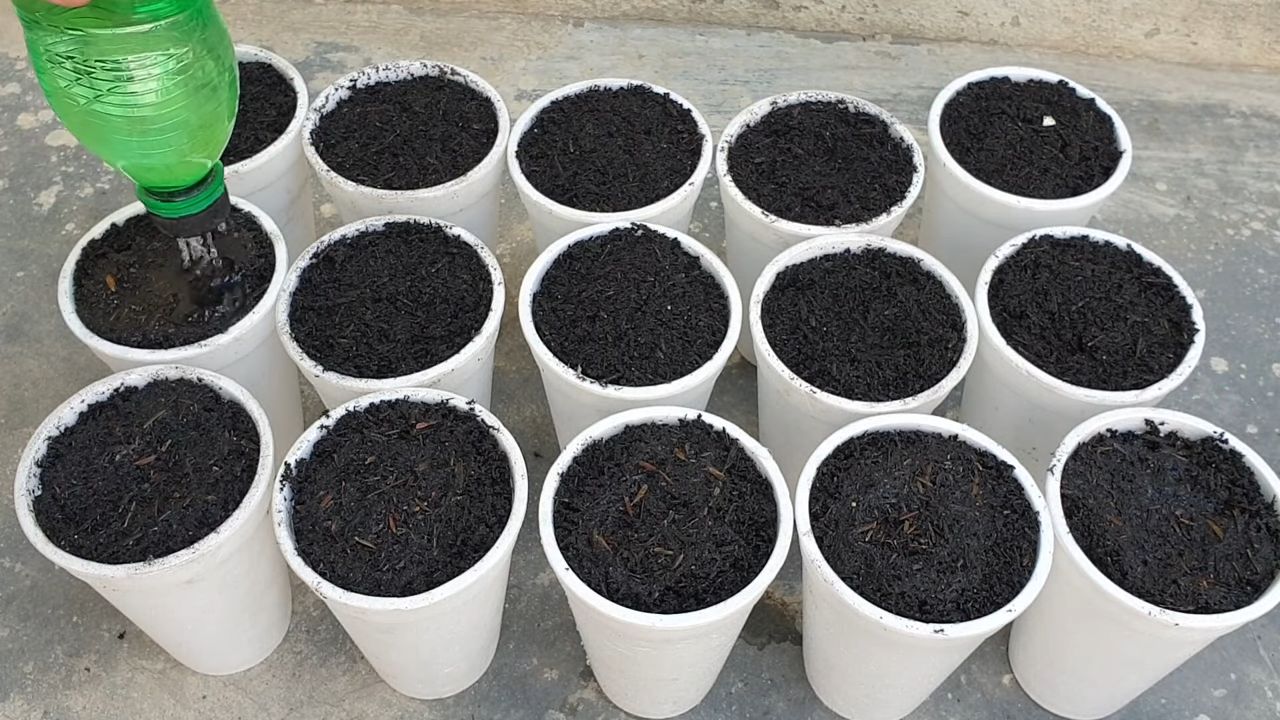
- Starting Indoors: Fill small pots with seed starting mix and sow the seeds about 1 cm deep. Keep the soil moist and place the pots in a warm, bright place. Germination usually takes 7-14 days.
- Watering: Water the seeds gently after sowing. Make sure the soil is moist but not wet.
Planting: When the Little Okras Can Go into the Bed
If you started the okra seeds indoors, it’s time to transplant the small seedlings into the garden bed.
- Preparation: Dig holes that are slightly larger than the root balls of the plants.
- Transplanting: Carefully place the plants in the holes and fill them with soil. Make sure the root balls are completely covered.
- Watering: Water the plants thoroughly after transplanting.
- Spacing: Maintain a spacing of 30-45 cm between plants and 60-90 cm between rows.
Care: How to Ensure a Bountiful Harvest
Okra is relatively low-maintenance, but you should keep a few things in mind to achieve a rich harvest.
- Watering: Okra needs regular watering, especially during the flowering and fruiting period. It’s best to water the plants early in the morning so the leaves can dry off during the day. Avoid waterlogging, as this can lead to root rot.
- Fertilizing: Fertilize the plants every 2-3 weeks with an organic fertilizer. I like to use compost tea or diluted nettle tea.
- Mulching: A layer of mulch made of straw or grass clippings helps to retain moisture in the soil, suppress weeds, and fertilize the soil.
- Weed Control: Regularly remove weeds that could compete with the okra plants.
- Pests and Diseases: Okra is relatively resistant to pests and diseases. Occasionally, aphids or slugs may appear. You can usually combat these with natural remedies.
Harvest: The Reward for Your Effort
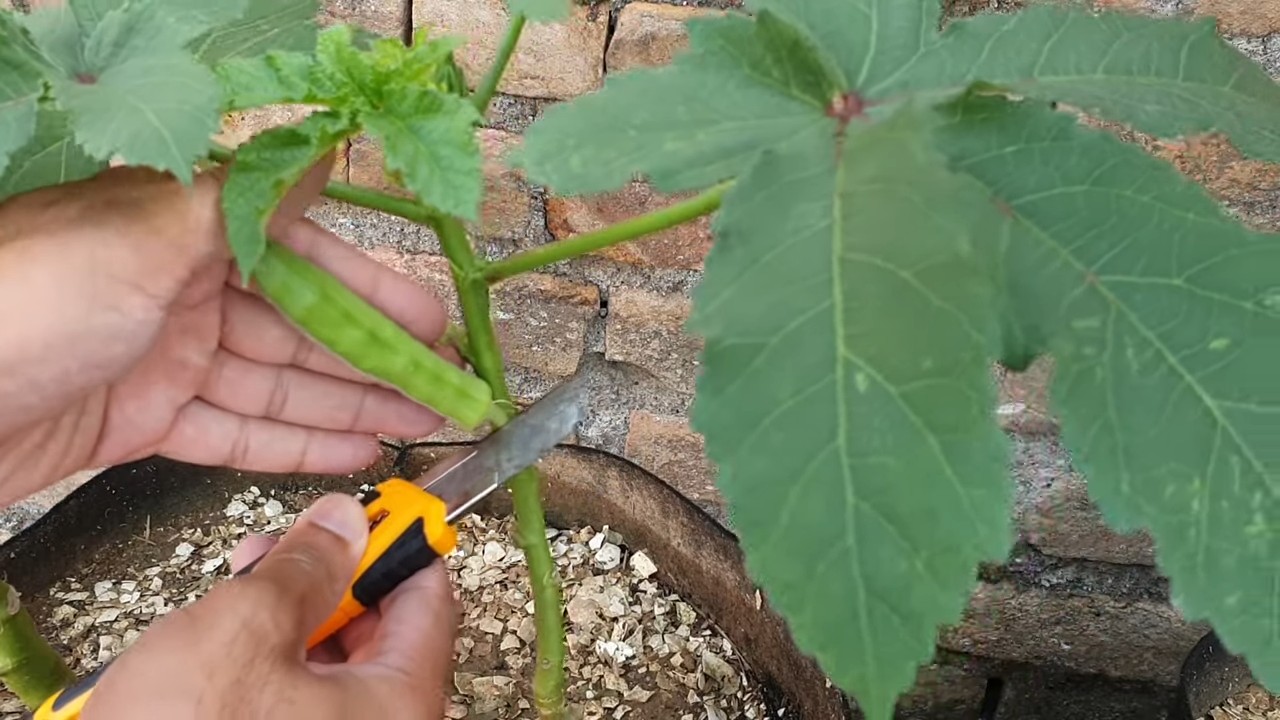
The okra pods are ready to harvest when they are about 7-10 cm long. The harvest time may vary depending on the variety.
- Harvesting Time: Harvest the pods regularly, about every 2-3 days. The more often you harvest, the more new pods will form.
- Harvesting Technique: Use a sharp knife or garden shears to cut the pods. Wear gloves, as the pods can have small hairs that may cause skin irritation.
- Storage: Okra pods do not last long. You can store them in the refrigerator for 2-3 days. Alternatively, you can freeze or pickle them.
Additional Tips for Successful Okra Cultivation:
- Variety Selection: Choose an okra variety that is suitable for your climate and growing conditions. There are different varieties that differ in size, color, and ripening time.
- Crop Rotation: Do not plant okra in the same location every year. Rotate the planting area to prevent diseases and pests.
- Companion Plants: Good companion plants for okra are basil, marigolds, and nasturtiums. These plants help to repel pests.
- Support: Some okra varieties can grow very tall and need support. Use plant stakes or a trellis to stabilize the plants.
Common Problems and Solutions:
- Yellow Leaves: Yellow leaves can be a sign of nutrient deficiency or overwatering. Check the soil moisture and fertilize the plants if necessary.
- No Flowers: If the okra plants are not producing flowers, it could be due to too little sunlight or a nutrient deficiency. Make sure the plants get enough sun and fertilize them regularly.
- Pests: Aphids and slugs can infest okra plants. Combat them with natural remedies like neem oil or slug pellets.
Growing Okra in a Pot: Is It Possible?
Absolutely! If you don’t have a garden, you can also easily grow okra in a pot.
Soil: Use a high-quality potting soil that is well-draining…
Pot Size: Choose a pot with a diameter of at least 30 cm.
Conclusion
So, there you have it! Growing okra at home isn’t just a gardening project; it’s an investment in fresh, delicious, and nutritious food right at your fingertips. We’ve walked through the essential steps, from selecting the right variety and preparing your soil to nurturing your plants and harvesting your bounty. But why is this DIY trick a must-try?
First and foremost, the taste of homegrown okra is simply unparalleled. Forget the tough, sometimes slimy okra you might find at the grocery store. When you grow your own, you control the harvest, picking the pods when they are young and tender, resulting in a flavor that is sweet, slightly grassy, and incredibly satisfying.
Beyond the superior taste, growing your own okra offers a level of control and transparency that you just can’t get with store-bought produce. You know exactly what goes into your garden – no harmful pesticides or herbicides unless you choose to use them (and we encourage organic practices!). This is especially important for those concerned about their health and the environment.
Furthermore, growing okra is surprisingly rewarding. Watching those tiny seeds sprout and develop into towering plants laden with beautiful flowers and edible pods is a truly fulfilling experience. It connects you to nature, provides a sense of accomplishment, and can even be a therapeutic activity.
But the benefits don’t stop there. Okra is a nutritional powerhouse, packed with vitamins, minerals, and fiber. Incorporating fresh, homegrown okra into your diet can contribute to improved digestion, lower cholesterol levels, and a stronger immune system.
Now, let’s talk about variations and suggestions. While we’ve covered the basics, there’s always room for experimentation. Consider companion planting okra with basil, peppers, or cucumbers to deter pests and improve overall garden health. You can also try different okra varieties, such as ‘Clemson Spineless’ for its smooth pods or ‘Burgundy’ for its beautiful red color.
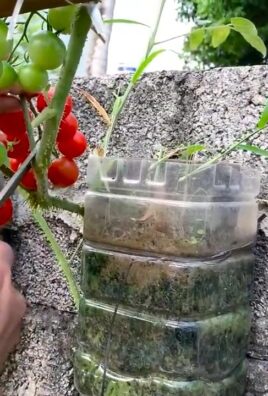
For those with limited space, growing okra in containers is a viable option. Just be sure to choose a large pot (at least 10 gallons) and provide adequate sunlight and water. You can even try vertical gardening techniques to maximize your space.
And don’t forget about the flowers! Okra blossoms are stunningly beautiful and attract pollinators to your garden. They are also edible and can be added to salads or used as a garnish.
Ultimately, the key to successful okra cultivation is patience and observation. Pay attention to your plants, monitor their growth, and adjust your care as needed. Don’t be afraid to experiment and learn from your mistakes.
So, what are you waiting for? Grab some okra seeds, prepare your garden, and embark on this rewarding journey. We are confident that you’ll be amazed by the results.
We wholeheartedly encourage you to try this DIY trick and experience the joy of growing your own okra. And most importantly, we want to hear about your experiences! Share your tips, successes, and challenges in the comments below. Let’s build a community of okra enthusiasts and learn from each other. Happy gardening! Let us know how your **growing okra** journey goes!
FAQ
What is the best time to plant okra?
The ideal time to plant okra is in late spring or early summer, after the last frost. Okra thrives in warm weather and requires soil temperatures of at least 65°F (18°C) for optimal germination. In warmer climates, you can even plant a second crop in late summer for a fall harvest. Check your local frost dates to determine the best planting time for your region. Planting too early in cold soil can lead to seed rot and poor germination.
How much sunlight does okra need?
Okra requires at least 6-8 hours of direct sunlight per day to thrive. Choose a planting location that receives full sun throughout the day. Insufficient sunlight can result in leggy plants, reduced flowering, and smaller pods. If you’re growing okra in containers, make sure to place them in a sunny spot.
What type of soil is best for growing okra?
Okra prefers well-drained, fertile soil with a slightly acidic to neutral pH (6.0-7.0). Amend your soil with compost or other organic matter to improve drainage and fertility. Avoid heavy clay soils, as they can become waterlogged and inhibit root growth. A soil test can help you determine the pH and nutrient levels of your soil and guide you in making necessary amendments.
How often should I water okra plants?
Okra plants need consistent moisture, especially during hot, dry weather. Water deeply and regularly, aiming to keep the soil consistently moist but not waterlogged. Avoid overhead watering, as it can promote fungal diseases. Mulching around the plants can help retain moisture and suppress weeds. As a general rule, water when the top inch of soil feels dry to the touch.
How do I fertilize okra plants?
Okra benefits from regular fertilization, especially during the growing season. Apply a balanced fertilizer (e.g., 10-10-10) at planting time and then side-dress with a nitrogen-rich fertilizer every 4-6 weeks. Avoid over-fertilizing, as it can lead to excessive foliage growth at the expense of pod production. Organic fertilizers, such as compost tea or fish emulsion, are also excellent options.
When is the best time to harvest okra?
Okra pods should be harvested when they are young and tender, typically 2-4 inches long. Overripe pods become tough and fibrous. Harvest okra every 1-2 days to encourage continuous production. Use a sharp knife or pruning shears to cut the pods from the plant, being careful not to damage the stem. Wear gloves when harvesting, as some okra varieties have prickly spines that can irritate the skin.
Why is my okra plant not producing pods?
There are several reasons why your okra plant might not be producing pods. Common causes include insufficient sunlight, poor soil fertility, inadequate watering, and pest infestations. Make sure your plants are receiving at least 6-8 hours of direct sunlight per day, and fertilize them regularly with a balanced fertilizer. Water deeply and consistently, and monitor your plants for pests and diseases. If your plants are stressed, they may not produce pods.
How do I deal with common okra pests and diseases?
Okra can be susceptible to various pests and diseases, including aphids, flea beetles, nematodes, and fungal diseases. Regularly inspect your plants for signs of infestation or disease. Use organic pest control methods, such as insecticidal soap or neem oil, to control aphids and flea beetles. Rotate your crops to prevent nematode infestations. Ensure good air circulation and avoid overhead watering to prevent fungal diseases. Remove and destroy any infected plant parts to prevent the spread of disease.
Can I grow okra in containers?
Yes, okra can be successfully grown in containers. Choose a large pot (at least 10 gallons) with drainage holes. Use a well-draining potting mix and provide adequate sunlight and water. Fertilize regularly with a balanced fertilizer. Container-grown okra may require more frequent watering than plants grown in the ground.
How do I save okra seeds for next year?
To save okra seeds, allow some pods to mature fully on the plant. The pods will become dry and brown. Once the pods are completely dry, harvest them and remove the seeds. Store the seeds in an airtight container in a cool, dry place. Okra seeds can remain viable for several years if stored properly. Make sure the seeds are completely dry before storing them to prevent mold growth.

Leave a Comment