

Growing Kohlrabi at Home might sound intimidating, but trust me, it’s easier than you think! Imagine biting into a crisp, slightly sweet, and utterly refreshing vegetable you nurtured from seed to table, right in your own backyard. That’s the magic of kohlrabi, and I’m here to show you how to unlock it.
Kohlrabi, sometimes called a “German turnip,” has a fascinating history, dating back to ancient Europe. While not as widely known as its cabbage cousins, it’s a nutritional powerhouse packed with vitamins and fiber. For centuries, it’s been a staple in European and Asian cuisines, prized for its unique flavor and versatility.
But why should you bother growing kohlrabi at home? Well, for starters, store-bought kohlrabi can sometimes be tough or lack that fresh, vibrant flavor. Plus, gardening is incredibly therapeutic! More importantly, with rising food costs and a growing desire for sustainable living, cultivating your own food is becoming increasingly important. This DIY guide will provide you with simple, effective tricks and hacks to ensure a bountiful kohlrabi harvest, even if you’re a complete beginner. I’ll walk you through everything from seed selection to pest control, making the process fun and rewarding. Let’s get our hands dirty and start growing!
Growing Kohlrabi at Home: A Beginner’s Guide
Hey there, fellow gardening enthusiasts! I’m so excited to share my experience with growing kohlrabi – that quirky, alien-looking vegetable that tastes surprisingly delicious. Don’t let its unusual appearance intimidate you; kohlrabi is actually quite easy to grow, and I’m going to walk you through every step of the process. Get ready to enjoy fresh, homegrown kohlrabi in your salads, stir-fries, or even just as a crunchy snack!
What is Kohlrabi Anyway?
Before we dive in, let’s talk about what kohlrabi actually is. It’s a member of the cabbage family, but instead of forming a head like cabbage, it develops a swollen stem that grows above ground. This stem is the part we eat, and it tastes like a cross between a turnip and a cabbage, with a slightly sweet and mild flavor. The leaves are also edible, and they taste similar to collard greens.
Why Grow Kohlrabi?
There are so many reasons to grow your own kohlrabi!
* Freshness: Nothing beats the taste of freshly harvested vegetables from your own garden.
* Cost-effective: Growing your own food can save you money at the grocery store.
* Nutritious: Kohlrabi is packed with vitamins, minerals, and fiber.
* Fun and rewarding: Gardening is a great way to relax and connect with nature.
* Unique: You can impress your friends and family with this unusual vegetable.
Choosing the Right Kohlrabi Variety
There are several kohlrabi varieties to choose from, each with its own unique characteristics. Here are a few popular options:
* Early White Vienna: A classic variety that matures quickly and produces pale green bulbs.
* Early Purple Vienna: Similar to Early White Vienna, but with purple skin.
* Grand Duke: A hybrid variety that is known for its large size and disease resistance.
* Kossak: Another large hybrid variety that is slow to bolt (go to seed).
* Superschmelz: This variety can grow to an enormous size (up to 10 pounds!), but it still retains its tender flavor.
I personally prefer the Early White Vienna and Early Purple Vienna because they mature quickly and are easy to grow. But feel free to experiment and find the variety that you like best!
When to Plant Kohlrabi
Kohlrabi is a cool-season crop, which means it grows best in the spring and fall.
* Spring Planting: Start seeds indoors 6-8 weeks before the last expected frost. Transplant seedlings outdoors 2-3 weeks before the last expected frost.
* Fall Planting: Sow seeds directly into the garden 6-8 weeks before the first expected frost.
I usually start my kohlrabi seeds indoors in early March for a spring harvest and again in late July for a fall harvest.
Preparing the Soil
Kohlrabi prefers well-drained soil that is rich in organic matter. Before planting, amend your soil with compost or well-rotted manure. This will improve drainage, add nutrients, and help retain moisture.
* Soil pH: Kohlrabi grows best in soil with a pH between 6.0 and 7.5. You can test your soil pH with a soil testing kit, which you can find at most garden centers.
* Sunlight: Kohlrabi needs at least 6 hours of sunlight per day. Choose a sunny spot in your garden for planting.
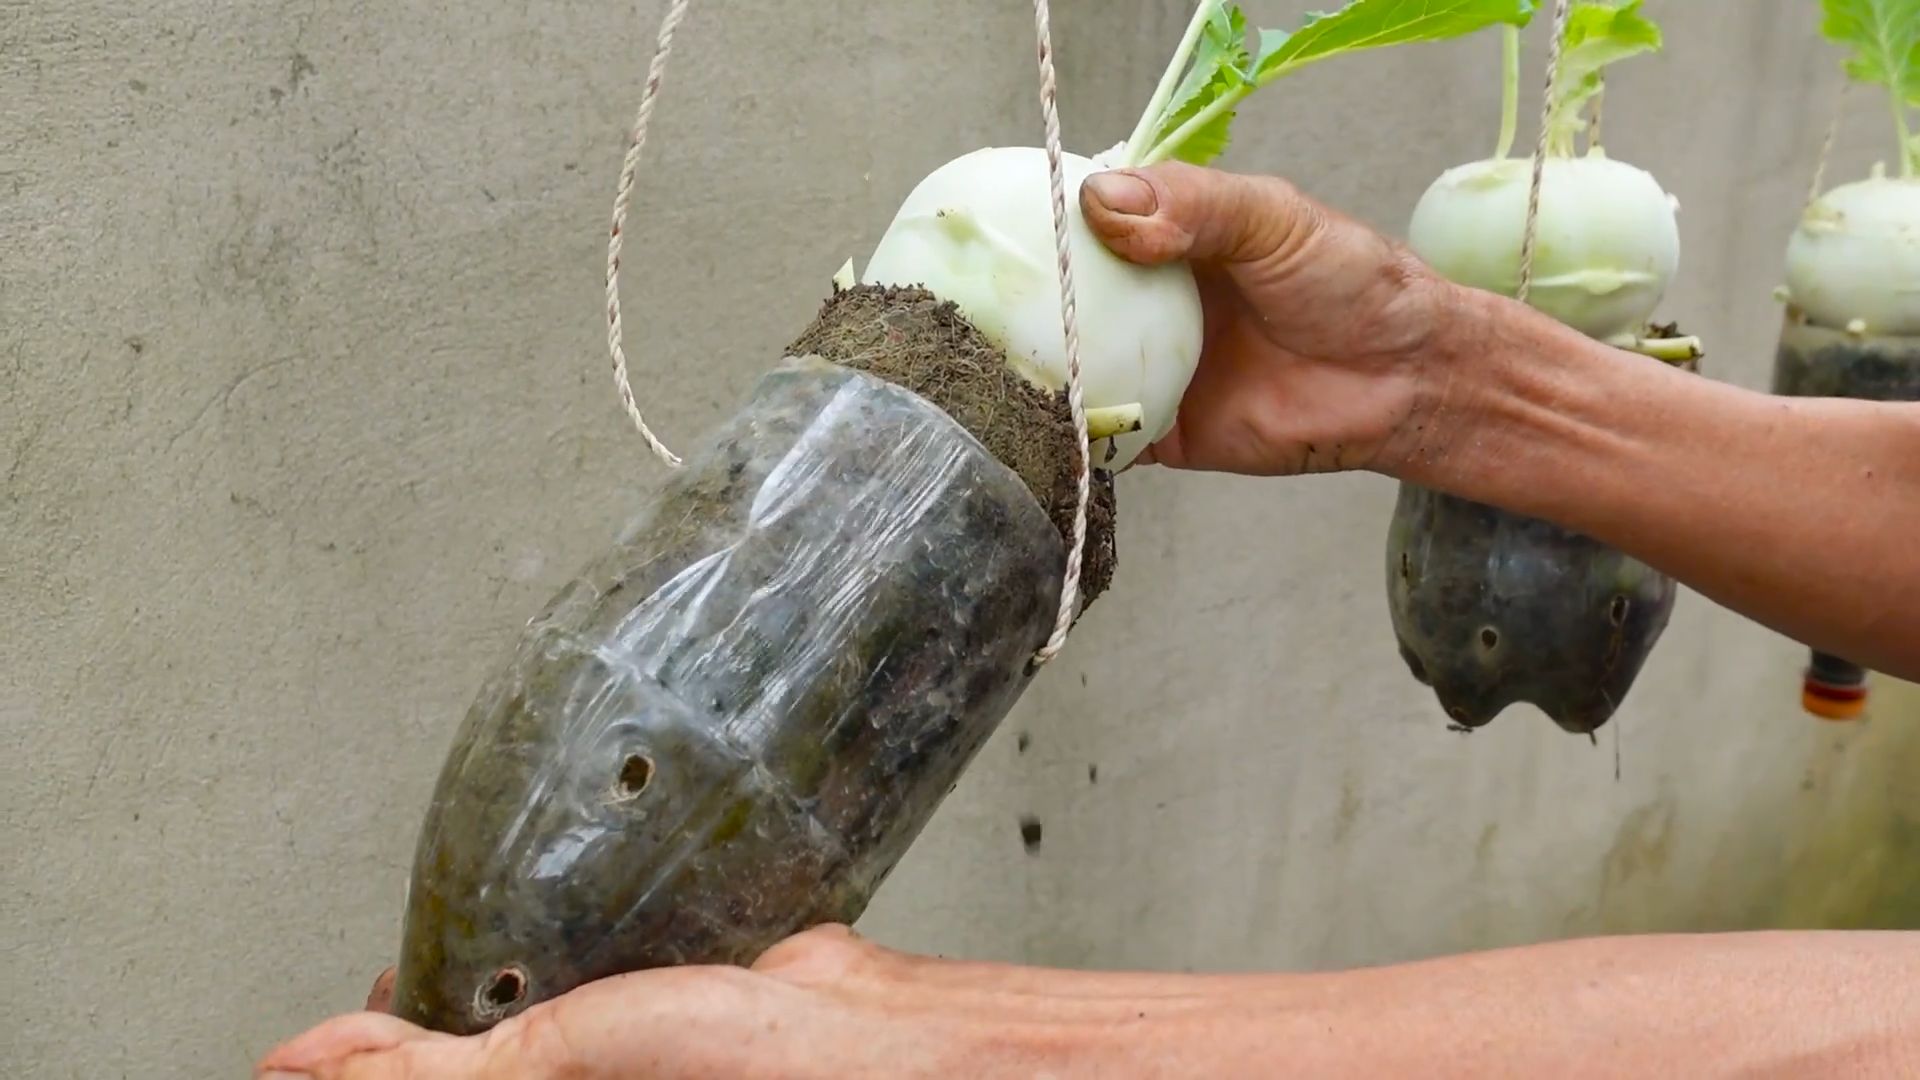
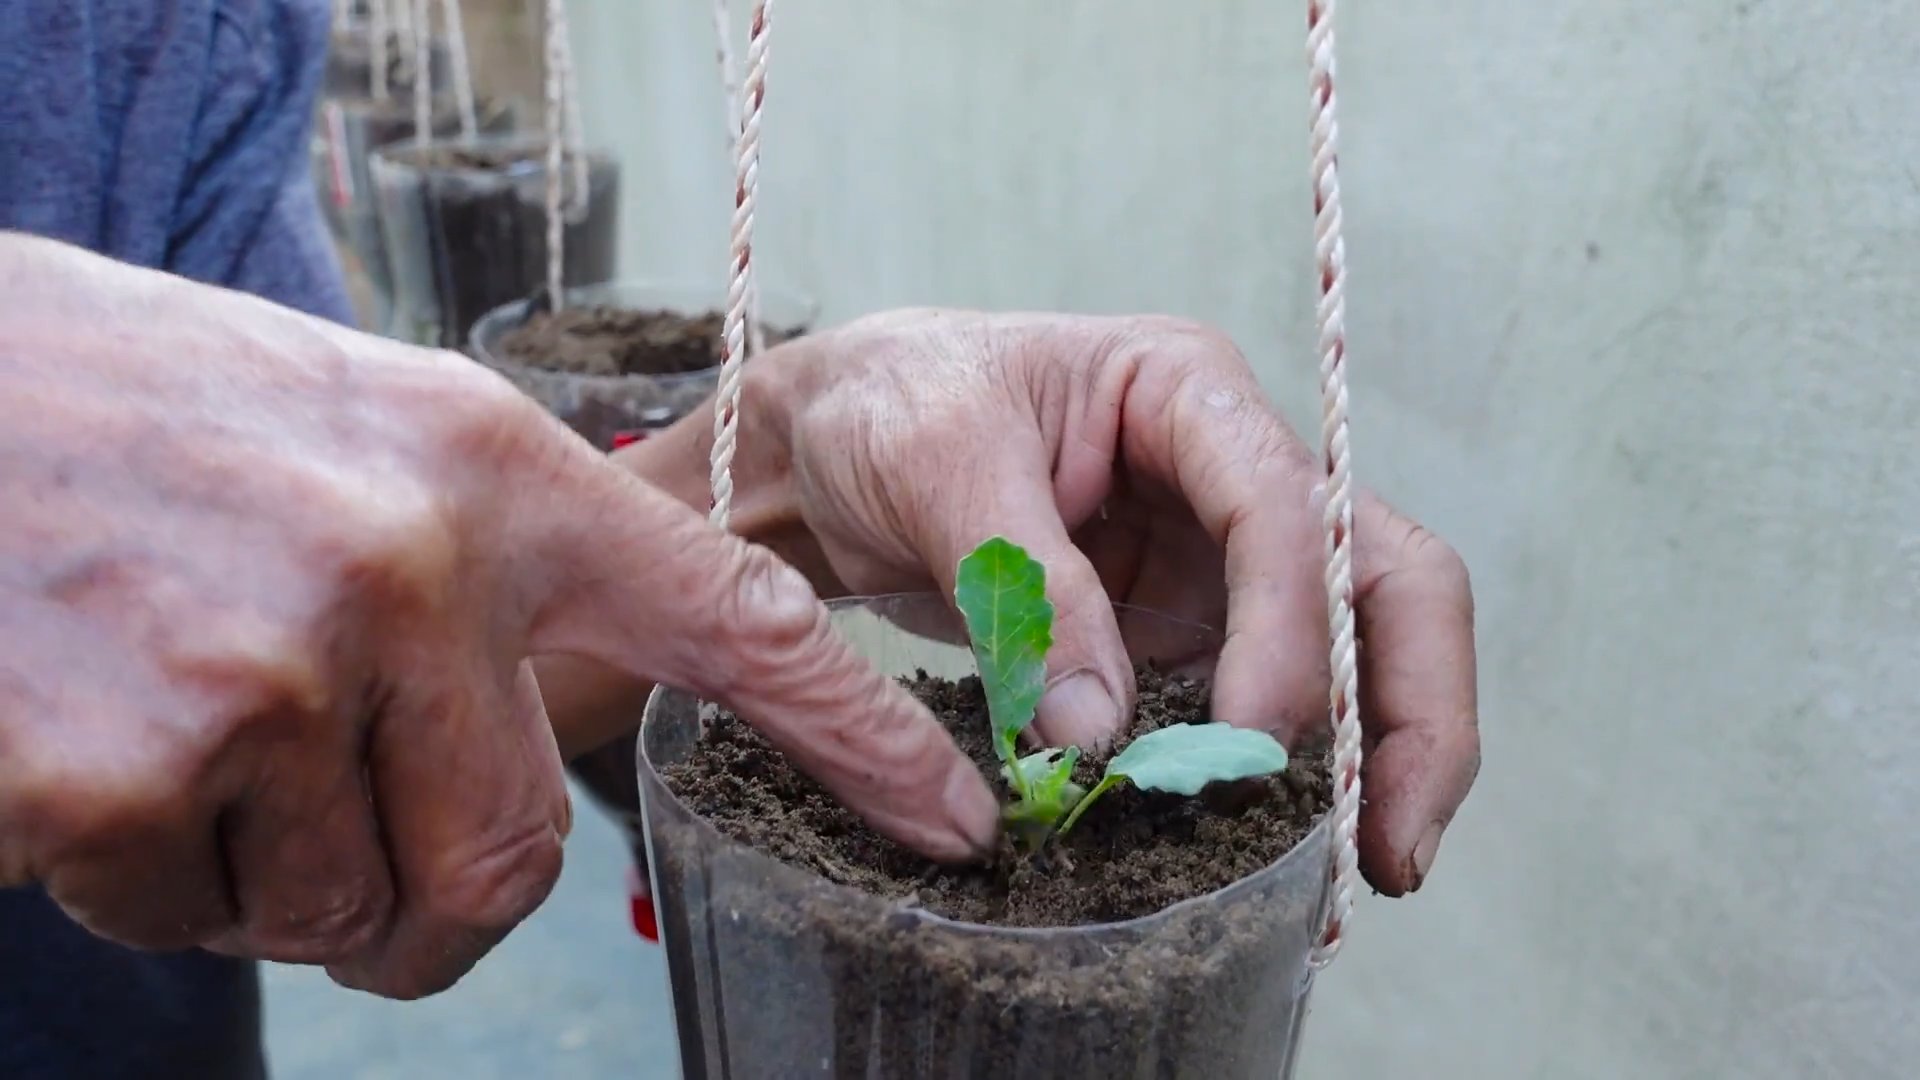
Step-by-Step Planting Guide
Okay, let’s get our hands dirty! Here’s how to plant kohlrabi:
Starting Seeds Indoors (Optional)
1. Gather your supplies: You’ll need kohlrabi seeds, seed starting trays or pots, seed starting mix, and a spray bottle.
2. Fill the trays or pots with seed starting mix: Moisten the mix with water.
3. Sow the seeds: Plant 2-3 seeds per cell or pot, about 1/4 inch deep.
4. Cover the seeds with soil: Gently pat down the soil.
5. Water the seeds: Use a spray bottle to mist the soil.
6. Provide warmth and light: Place the trays or pots in a warm location (around 70°F) and provide plenty of light. A sunny windowsill or a grow light will work.
7. Keep the soil moist: Water regularly to keep the soil moist, but not soggy.
8. Thin the seedlings: Once the seedlings have emerged and have a few true leaves, thin them to one plant per cell or pot. Choose the strongest seedling and snip off the others at the soil line.
Transplanting Seedlings Outdoors
1. Harden off the seedlings: Before transplanting, you’ll need to harden off the seedlings. This means gradually exposing them to outdoor conditions over a period of 7-10 days. Start by placing the seedlings outdoors in a sheltered location for a few hours each day, gradually increasing the amount of time they spend outdoors.
2. Prepare the planting bed: Dig holes that are slightly larger than the root balls of the seedlings. Space the holes 6-8 inches apart.
3. Transplant the seedlings: Gently remove the seedlings from their trays or pots and place them in the holes.
4. Fill the holes with soil: Gently pat down the soil around the seedlings.
5. Water the seedlings: Water thoroughly after transplanting.
Direct Sowing Seeds Outdoors
1. Prepare the planting bed: Rake the soil smooth and remove any rocks or debris.
2. Sow the seeds: Sow the seeds 1/4 inch deep and 1-2 inches apart in rows that are 12-18 inches apart.
3. Cover the seeds with soil: Gently pat down the soil.
4. Water the seeds: Water gently to avoid washing away the seeds.
5. Thin the seedlings: Once the seedlings have emerged and have a few true leaves, thin them to 6-8 inches apart.
Caring for Your Kohlrabi Plants
Once your kohlrabi plants are in the ground, it’s important to provide them with proper care to ensure a healthy and abundant harvest.
* Watering: Kohlrabi needs consistent moisture to thrive. Water regularly, especially during dry periods. Aim for about 1 inch of water per week.
* Weeding: Keep the area around your kohlrabi plants free of weeds. Weeds can compete with the kohlrabi for nutrients and water.
* Fertilizing: Fertilize your kohlrabi plants every 2-3 weeks with a balanced fertilizer. I like to use a liquid fertilizer diluted to half strength.
* Pest Control: Kohlrabi can be susceptible to pests such as cabbage worms, aphids, and flea beetles. Inspect your plants regularly for signs of pests and take action if necessary. You can use organic pest control methods such as insecticidal soap or neem oil.
* Mulching: Apply a layer of mulch around your kohlrabi plants to help retain moisture, suppress weeds, and regulate soil temperature. Straw, wood chips, or shredded leaves are all good options.
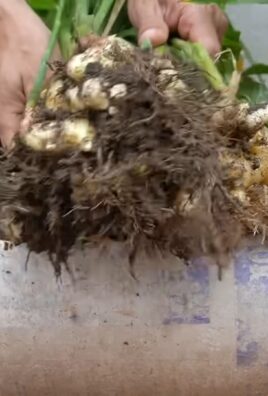
Harvesting Kohlrabi
The key to delicious kohlrabi is harvesting it at the right time. You want to harvest the bulbs when they are about 2-3 inches in diameter. If you let them grow too large, they can become tough and woody.
1. Check the size: Gently feel the bulbs to determine their size.
2. Harvest: Use a sharp knife to cut the bulb from the stem, just above the soil line.
3. Remove the leaves: Cut off the leaves, leaving about 1-2 inches of stem attached to the bulb. The leaves are also edible and can be cooked like collard greens.
Storing Kohlrabi
Kohlrabi can be stored in the refrigerator for several weeks. Remove the leaves before storing, as they can draw moisture from the bulb. Store the bulbs in a plastic bag in the crisper drawer.
Enjoying Your Harvest
Now for the best part – eating your homegrown kohlrabi! There are so many ways to enjoy this versatile vegetable.
* Raw: Peel and slice the kohlrabi bulb and eat it raw in salads or as a snack.
* Cooked: Kohlrabi can be steamed, boiled, roasted, or stir-fried.
* Leaves: The leaves can be cooked like collard greens or added to soups and stews.
I love to grate kohlrabi into salads, add it to stir-fries, or roast it with other root vegetables. It’s also delicious pickled or fermented.
Troubleshooting
Even with
Conclusion
So, there you have it! Growing kohlrabi at home is not only achievable, but it’s a rewarding experience that brings fresh, delicious, and often surprisingly beautiful produce right to your table. We’ve covered everything from seed selection and soil preparation to planting, nurturing, and harvesting your very own kohlrabi crop.
Why is this DIY trick a must-try? Because store-bought kohlrabi simply can’t compare to the flavor and freshness of homegrown. You control the entire process, ensuring organic practices and harvesting at the peak of ripeness. Plus, it’s incredibly satisfying to nurture a plant from seed to table. Imagine the pride you’ll feel serving a dish featuring kohlrabi you grew yourself!
But the benefits extend beyond just taste and satisfaction. Growing your own kohlrabi is also a fantastic way to connect with nature, learn about the growing process, and even save money on your grocery bill. It’s a sustainable and healthy choice that benefits both you and the environment.
Don’t be afraid to experiment! Try different varieties of kohlrabi, such as the ‘Purple Vienna’ for its striking color or the ‘White Vienna’ for its classic flavor. Consider companion planting with herbs like dill or chamomile to deter pests and enhance growth. You can even succession plant, sowing seeds every few weeks, to ensure a continuous harvest throughout the growing season.
And speaking of variations, kohlrabi is incredibly versatile in the kitchen. Enjoy it raw in salads, sliced thinly and added to slaws, or roasted with other root vegetables. The leaves are also edible and can be sautéed like spinach or added to soups and stews. Get creative and explore the many culinary possibilities of this unique vegetable.
Ultimately, growing kohlrabi at home is an adventure waiting to happen. It’s a chance to learn, to connect with nature, and to enjoy the fruits (or rather, vegetables) of your labor. So, grab some seeds, prepare your garden, and get ready to experience the joy of homegrown kohlrabi.
We’re confident that you’ll find the process both enjoyable and rewarding. And we’d love to hear about your experience! Share your tips, tricks, and photos of your homegrown kohlrabi in the comments below. Let’s build a community of kohlrabi enthusiasts and inspire others to give this DIY trick a try. Happy growing!
Frequently Asked Questions (FAQ)
What is kohlrabi, and what does it taste like?
Kohlrabi, often called a German turnip, is a cruciferous vegetable related to cabbage, broccoli, and cauliflower. It features a bulbous stem that grows above ground and edible leaves. The taste is often described as a mild and slightly sweet cross between a turnip and a cabbage, with a crisp and refreshing texture. Younger kohlrabi bulbs tend to be more tender and flavorful.
When is the best time to plant kohlrabi?
The best time to plant kohlrabi depends on your climate. In cooler climates, start seeds indoors 4-6 weeks before the last expected frost and transplant seedlings outdoors after the danger of frost has passed. In warmer climates, you can direct sow seeds in the spring or fall for a fall or winter harvest. Kohlrabi prefers cool weather, so avoid planting during the hottest months of the summer.
How much sunlight does kohlrabi need?
Kohlrabi thrives in full sun, requiring at least 6 hours of direct sunlight per day. However, in hotter climates, some afternoon shade can be beneficial to prevent the bulbs from bolting (going to seed prematurely).
What kind of soil is best for growing kohlrabi?
Kohlrabi prefers well-drained, fertile soil with a pH between 6.0 and 7.5. Amend your soil with compost or other organic matter before planting to improve drainage and fertility. Avoid heavy clay soils, as they can hinder bulb development.
How often should I water kohlrabi?
Kohlrabi needs consistent moisture to thrive. Water deeply and regularly, especially during dry periods. Aim to keep the soil consistently moist but not waterlogged. Mulching around the plants can help retain moisture and suppress weeds.
How do I fertilize kohlrabi?
Fertilize kohlrabi with a balanced fertilizer at planting time and again a few weeks later. You can also side-dress with compost or other organic fertilizer throughout the growing season. Avoid over-fertilizing, as this can lead to excessive foliage growth at the expense of bulb development.
What are some common pests and diseases that affect kohlrabi?
Common pests that affect kohlrabi include cabbage worms, aphids, and flea beetles. Diseases include clubroot and downy mildew. To prevent pests and diseases, practice crop rotation, keep your garden clean and free of debris, and use organic pest control methods as needed.
When is kohlrabi ready to harvest?
Kohlrabi is typically ready to harvest 50-60 days after planting. Harvest the bulbs when they are about 2-3 inches in diameter. Larger bulbs can become tough and woody. You can also harvest the leaves when they are young and tender.
How do I store kohlrabi?
Store kohlrabi bulbs in the refrigerator for up to several weeks. Remove the leaves before storing, as they can draw moisture from the bulb. You can also freeze kohlrabi after blanching it for a few minutes.
Can I grow kohlrabi in containers?
Yes, kohlrabi can be grown in containers. Choose a container that is at least 12 inches deep and wide. Use a well-draining potting mix and provide adequate sunlight and water.
What are some creative ways to use kohlrabi in cooking?
Kohlrabi is incredibly versatile in the kitchen. You can eat it raw in salads, sliced thinly and added to slaws, or roasted with other root vegetables. The leaves can be sautéed like spinach or added to soups and stews. You can also pickle kohlrabi or use it to make fritters or gratins.
Is kohlrabi a healthy vegetable?
Yes, kohlrabi is a very healthy vegetable. It is low in calories and high in fiber, vitamins, and minerals. It is a good source of vitamin C, potassium, and vitamin B6. Kohlrabi also contains antioxidants and other beneficial plant compounds.
Can I eat the kohlrabi leaves?
Yes, the kohlrabi leaves are edible and nutritious. They taste similar to cabbage or kale and can be used in the same way. Harvest the leaves when they are young and tender.
What if my kohlrabi bulbs are small?
Small kohlrabi bulbs are often the result of overcrowding or insufficient nutrients. Thin out your plants to provide more space for each bulb to grow. Also, make sure you are fertilizing regularly with a balanced fertilizer.
What if my kohlrabi bulbs are tough and woody?
Tough and woody kohlrabi bulbs are often the result of harvesting them too late. Harvest the bulbs when they are about 2-3 inches in diameter. Also, make sure you are providing consistent moisture throughout the growing season.

Leave a Comment