

Growing kale in soil bags might sound unconventional, but trust me, it’s a game-changer for home gardeners like us! Are you dreaming of fresh, vibrant kale gracing your dinner table, but limited space or poor soil conditions are holding you back? Well, fret no more! This DIY guide will unlock the secrets to cultivating a thriving kale patch, even if you only have a balcony or a tiny patio.
For centuries, kale has been a nutritional powerhouse, revered for its health benefits and versatility in the kitchen. From ancient Roman feasts to modern-day smoothies, this leafy green has nourished generations. But let’s be honest, sometimes getting it to grow can be a bit of a challenge. That’s where this clever soil bag trick comes in!
Why should you embrace this DIY hack? Because it’s incredibly simple, cost-effective, and adaptable to almost any environment. Growing kale in soil bags eliminates the need for extensive garden beds, tackles drainage issues head-on, and allows you to move your kale plants around to chase the sun. Plus, it’s a fantastic way to recycle those extra soil bags you might have lying around. So, let’s dive in and discover how to create your own flourishing kale oasis, one soil bag at a time!
Kohl im Pflanzsack ziehen: Eine einfache DIY-Anleitung
Hallo liebe Gartenfreunde! Habt ihr Lust auf frischen, knackigen Grünkohl direkt aus dem eigenen Garten, aber wenig Platz? Dann ist das Anbauen von Grünkohl im Pflanzsack genau das Richtige für euch! Ich zeige euch, wie ihr mit dieser einfachen DIY-Methode im Handumdrehen eine reiche Ernte erzielen könnt. Es ist einfacher als ihr denkt und macht richtig Spaß!
Was ihr für euer Grünkohl-Pflanzsack-Projekt braucht:
* Pflanzsäcke: Am besten eignen sich stabile Pflanzsäcke aus atmungsaktivem Material (z.B. Filz) mit einem Volumen von mindestens 40 Litern pro Sack. So haben die Kohlpflanzen genug Platz zum Wachsen.
* Hochwertige Pflanzerde: Verwendet eine nährstoffreiche, gut durchlässige Pflanzerde. Ich mische gerne noch etwas Kompost unter, um den Pflanzen einen zusätzlichen Boost zu geben.
* Grünkohl-Setzlinge oder Samen: Ihr könnt entweder vorgezogene Setzlinge kaufen oder die Samen direkt in den Pflanzsack säen. Bei Setzlingen geht es natürlich schneller.
* Langzeitdünger: Ein Langzeitdünger versorgt die Pflanzen über einen längeren Zeitraum mit wichtigen Nährstoffen. Hornspäne sind eine tolle, natürliche Option.
* Gießkanne oder Gartenschlauch: Zum regelmäßigen Gießen eurer Grünkohlpflanzen.
* Gartenschere oder Messer: Zum Ernten der Blätter.
* Optional: Eine kleine Schaufel oder Kelle zum Befüllen der Pflanzsäcke.
* Optional: Eine Rankhilfe, falls ihr eine hochwachsende Grünkohlsorte anbaut.
Schritt-für-Schritt-Anleitung: Grünkohl im Pflanzsack anbauen
Hier kommt die detaillierte Anleitung, damit bei eurem Grünkohl-Projekt nichts schiefgeht:
1. Den Pflanzsack vorbereiten:
* Sucht euch einen sonnigen Standort für eure Pflanzsäcke aus. Grünkohl liebt die Sonne! Mindestens sechs Stunden direkte Sonneneinstrahlung pro Tag sind ideal.
* Stellt die Pflanzsäcke an den gewählten Standort. Achtet darauf, dass der Untergrund eben ist und das Wasser gut ablaufen kann.
* Faltet den oberen Rand des Pflanzsacks etwas nach außen, um das Befüllen zu erleichtern.
2. Den Pflanzsack befüllen:
* Füllt den Pflanzsack zu etwa einem Drittel mit Pflanzerde.
* Gebt nun den Langzeitdünger (z.B. Hornspäne) hinzu. Die Menge richtet sich nach den Angaben auf der Verpackung. Mischt den Dünger gut mit der Erde.
* Füllt den Pflanzsack mit weiterer Erde auf, bis etwa 5-10 cm unter dem Rand.
* Drückt die Erde leicht an.
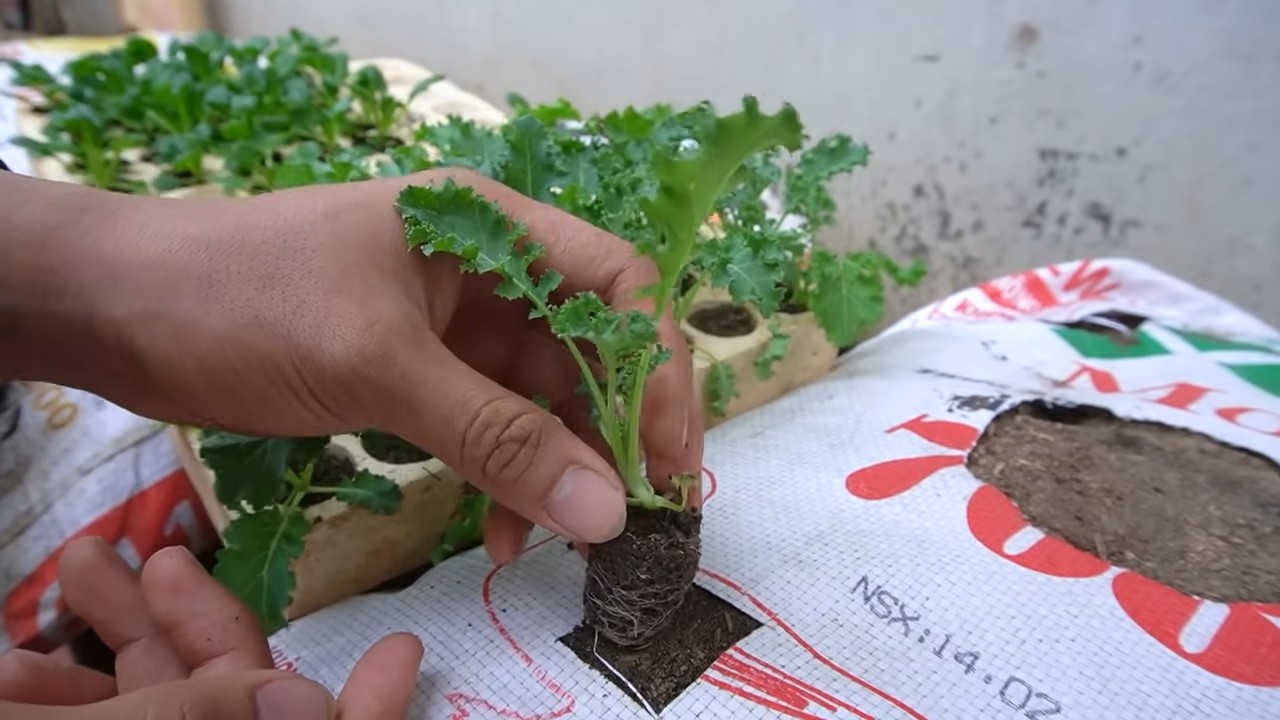
3. Die Grünkohl-Setzlinge pflanzen oder Samen säen:
* Bei Setzlingen: Grabt mit einer kleinen Schaufel oder Kelle kleine Löcher in die Erde, die etwas größer sind als die Wurzelballen der Setzlinge.
* Nehmt die Setzlinge vorsichtig aus ihren Töpfen und lockert die Wurzelballen etwas auf.
* Setzt die Setzlinge in die Löcher und füllt die Löcher mit Erde auf. Drückt die Erde leicht an. Achtet darauf, dass die Setzlinge nicht zu tief sitzen. Die oberste Kante des Wurzelballens sollte mit der Erdoberfläche abschließen.
* Bei Samen: Säet die Samen gemäß den Anweisungen auf der Saatgutpackung aus. In der Regel werden die Samen etwa 1-2 cm tief in die Erde gelegt.
* Bedeckt die Samen mit Erde und drückt sie leicht an.
4. Gießen:
* Gießt die frisch gepflanzten Setzlinge oder die ausgesäten Samen gründlich an. Die Erde sollte gut durchfeuchtet sein.
* Achtet darauf, dass die Erde in den Pflanzsäcken immer feucht bleibt, aber nicht zu nass. Staunässe solltet ihr unbedingt vermeiden, da sie zu Wurzelfäule führen kann.
* Gießt am besten morgens oder abends, um Verdunstung zu vermeiden.
5. Pflege:
* Regelmäßiges Gießen: Wie bereits erwähnt, ist regelmäßiges Gießen wichtig. Überprüft die Feuchtigkeit der Erde regelmäßig mit dem Finger.
* Düngen: Auch wenn ihr Langzeitdünger verwendet habt, solltet ihr eure Grünkohlpflanzen während der Wachstumsphase zusätzlich düngen. Flüssigdünger für Gemüse eignet sich gut dafür. Haltet euch an die Dosierungsanleitung auf der Verpackung.
* Unkraut entfernen: Entfernt regelmäßig Unkraut, das in den Pflanzsäcken wächst. Unkraut konkurriert mit dem Grünkohl um Nährstoffe und Wasser.
* Schutz vor Schädlingen: Grünkohl kann von verschiedenen Schädlingen befallen werden, wie z.B. Kohlweißlingen, Blattläusen oder Erdflöhen. Kontrolliert eure Pflanzen regelmäßig auf Schädlingsbefall. Bei Bedarf könnt ihr biologische Schädlingsbekämpfungsmittel einsetzen. Ein Netz über den Pflanzen kann auch helfen, Kohlweißlinge fernzuhalten.
* Rankhilfe (optional): Wenn ihr eine hochwachsende Grünkohlsorte anbaut, kann eine Rankhilfe sinnvoll sein, um die Pflanzen zu stützen.
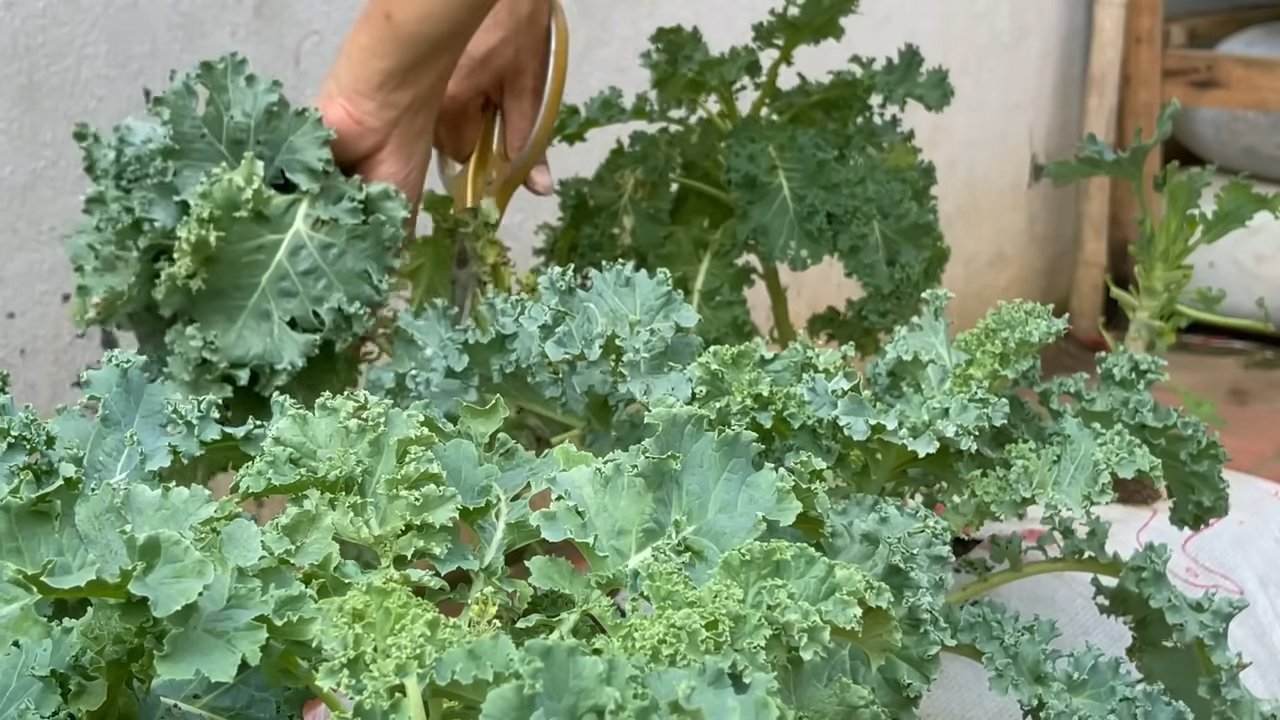
Grünkohl ernten:
* Wann ernten? Ihr könnt mit der Ernte beginnen, sobald die Blätter eine ausreichende Größe erreicht haben (ca. 15-20 cm). Die Erntezeit erstreckt sich in der Regel über den Herbst und Winter.
* Wie ernten? Schneidet die äußeren, älteren Blätter mit einer Gartenschere oder einem Messer ab. Lasst die inneren, jüngeren Blätter stehen, damit die Pflanze weiterwachsen kann.
* Nach der Ernte: Nach der Ernte könnt ihr die Pflanzsäcke mit Kompost oder frischer Erde auffüllen, um die Nährstoffe im Boden wieder aufzufüllen.
Zusätzliche Tipps für eine erfolgreiche Grünkohl-Ernte:
* Sortenwahl: Es gibt verschiedene Grünkohlsorten, die sich in Geschmack, Aussehen und Wuchshöhe unterscheiden. Informiert euch vor dem Kauf über die verschiedenen Sorten und wählt diejenige aus, die euch am besten gefällt und zu euren Platzverhältnissen passt.
* Pflanzzeitpunkt: Der beste Zeitpunkt für die Pflanzung von Grünkohl-Setzlingen ist im Frühjahr (April/Mai) oder im Spätsommer (August/September). Die Aussaat von Samen kann etwas früher erfolgen.
* Frostschutz: Grünkohl ist relativ frosthart, aber bei sehr strengen Frösten kann es sinnvoll sein, die Pflanzen mit einem Vlies abzudecken.
* Bodenverbesserung: Wenn ihr merkt, dass die Erde in den Pflanzsäcken mit der Zeit ausgelaugt ist, könnt ihr sie mit Kompost oder organischem Dünger verbessern.
* Abwechslung: Baut nicht jedes Jahr Grünkohl am selben Standort an, um Krankheiten und Schädlingen vorzubeugen. Wechselt die Anbaufläche regelmäßig.
Häufige Probleme und Lösungen:
* Gelbe Blätter: Gelbe Blätter können ein Zeichen für Nährstoffmangel sein. Düngt die Pflanzen mit einem geeigneten Dünger.
* Blattläuse: Blattläuse können mit einem Wasserstrahl abgespült oder mit einem biologischen Schädlingsbekämpfungsmittel bekämpft werden.
* Kohlweißlinge: Kohlweißlinge legen ihre Eier auf die Blätter des Grünkohls. Die Raupen fressen dann die Blätter. Ein Netz über den Pflanzen kann helfen, Kohlweißlinge fernzuhalten.
* Wurzelfäule: Wurzelfäule wird durch Staunässe verursacht. Achtet darauf, dass das Wasser gut ablaufen kann und gießt nicht zu viel.
Ich hoffe, diese Anleitung hilft euch dabei, euren eigenen Grünkohl im Pflanzsack anzubauen. Es ist wirklich eine einfache und lohnende Möglichkeit, frisches Gemüse im eigenen Garten zu ziehen. Viel Spaß beim Gärtnern!
Conclusion
So, there you have it! Growing kale in soil bags is not just a gardening hack; it’s a game-changer for anyone looking to enjoy fresh, homegrown greens, regardless of their space constraints or gardening experience. We’ve walked you through the simple steps, highlighted the benefits, and addressed potential concerns. But why is this DIY trick a must-try?
Firstly, the sheer convenience is undeniable. Soil bags eliminate the need for extensive digging, tilling, or weeding. They’re essentially self-contained mini-gardens, perfect for balconies, patios, or even small backyards. Secondly, the improved drainage and aeration offered by the bag environment create an ideal growing condition for kale, leading to healthier, more robust plants and a more abundant harvest. Thirdly, it’s incredibly cost-effective. Reusing soil bags or purchasing them in bulk is significantly cheaper than building raised beds or buying multiple containers.
But the real magic lies in the flexibility and control you gain. You can easily move your kale plants to chase the sun or shelter them from harsh weather. You can also tailor the soil mix to perfectly suit kale’s needs, ensuring optimal nutrient uptake.
Don’t be afraid to experiment! Consider these variations to personalize your kale-growing experience:
* Succession Planting: Plant new seeds every few weeks to ensure a continuous supply of fresh kale throughout the growing season.
* Companion Planting: Plant herbs like rosemary or thyme alongside your kale to deter pests and enhance flavor. Marigolds are also excellent companions for pest control.
* Different Kale Varieties: Explore different kale varieties like Lacinato (dinosaur kale), Red Russian, or Curly kale to add variety to your meals. Each variety offers a unique flavor and texture.
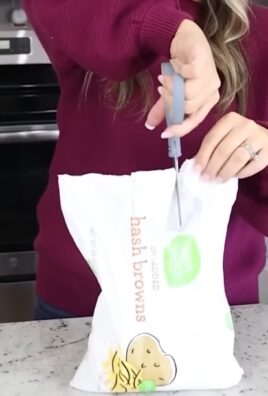
* Vertical Growing: For even smaller spaces, consider creating a vertical garden by cutting slits into the sides of the soil bag and planting kale seedlings in each slit. This maximizes space and creates a visually appealing display.
* Fertilizing: While the soil bag mix provides initial nutrients, supplement with organic fertilizers like compost tea or fish emulsion every few weeks to keep your kale plants thriving.
Ultimately, growing kale in soil bags is about empowering yourself to enjoy fresh, healthy food, regardless of your circumstances. It’s a simple, rewarding, and sustainable way to connect with nature and nourish your body.
We wholeheartedly encourage you to give this DIY trick a try. It’s easier than you think, and the rewards are well worth the effort. Once you’ve harvested your first batch of homegrown kale, we’d love to hear about your experience! Share your photos, tips, and challenges in the comments below. Let’s build a community of kale-growing enthusiasts and inspire others to embrace the joys of homegrown goodness. Remember, the best way to learn is by doing, so grab a soil bag, some kale seeds, and get growing! This method of growing kale is sure to be a success.
Frequently Asked Questions (FAQ)
What type of soil should I use in the soil bag for growing kale?
The ideal soil mix for growing kale in soil bags is a well-draining, nutrient-rich blend. A good starting point is a mix of equal parts compost, potting soil, and perlite or vermiculite. The compost provides essential nutrients, the potting soil offers a good base for root growth, and the perlite or vermiculite ensures proper drainage and aeration. Avoid using garden soil directly, as it can be too heavy and compacted, hindering root development. You can also amend the soil with slow-release organic fertilizer to provide a steady supply of nutrients throughout the growing season. Consider adding a handful of bone meal for phosphorus, which promotes strong root growth.
How often should I water kale grown in soil bags?
Watering frequency depends on several factors, including the weather, the size of the soil bag, and the stage of kale growth. Generally, you should water your kale plants when the top inch of soil feels dry to the touch. During hot, dry weather, this may mean watering daily, while in cooler, wetter conditions, you may only need to water every few days. When watering, water deeply, ensuring that the entire soil bag is thoroughly moistened. Avoid overwatering, as this can lead to root rot. A good rule of thumb is to water until you see water draining from the bottom of the bag. Monitor your plants closely and adjust your watering schedule accordingly.
How much sunlight does kale need when grown in soil bags?
Kale thrives in full sun, which means at least 6 hours of direct sunlight per day. However, it can also tolerate partial shade, especially in hotter climates. If you live in an area with intense summer heat, providing some afternoon shade can help prevent the leaves from scorching. When growing kale in soil bags, you have the advantage of being able to easily move the bags to optimize sunlight exposure. Observe your plants throughout the day and adjust their position as needed. If your kale plants are not getting enough sunlight, they may become leggy and produce fewer leaves.
What are some common pests and diseases that affect kale grown in soil bags, and how can I prevent them?
Common pests that affect kale include aphids, cabbage worms, flea beetles, and slugs. Diseases include black rot, clubroot, and downy mildew. To prevent these problems, start with healthy seedlings and use a well-draining soil mix. Regularly inspect your plants for signs of pests or diseases. Handpick pests or use organic pest control methods like insecticidal soap or neem oil. To prevent diseases, ensure good air circulation around your plants and avoid overhead watering. Crop rotation can also help prevent soilborne diseases. Consider using companion planting to deter pests. For example, planting marigolds near your kale can help repel nematodes and other pests.
How do I harvest kale grown in soil bags?
You can start harvesting kale leaves when they are about 6-8 inches long. The best way to harvest kale is to pick the outer leaves, leaving the inner leaves to continue growing. This allows you to harvest kale continuously throughout the growing season. Use a sharp knife or scissors to cut the leaves cleanly from the stem. Avoid tearing the leaves, as this can damage the plant. Harvest in the morning, when the leaves are crisp and hydrated. After harvesting, wash the leaves thoroughly and store them in the refrigerator.
Can I reuse the soil bag for growing kale again next season?
Yes, you can reuse the soil bag for growing kale again next season, but it’s important to amend the soil first. After harvesting your kale, remove any remaining plant debris and weeds. Then, add fresh compost and organic fertilizer to replenish the nutrients that were used by the kale plants. You may also want to add some lime to adjust the soil pH, as kale prefers a slightly alkaline soil. If you suspect that the soil may be contaminated with diseases, you can solarize it by covering the soil bag with clear plastic for several weeks during the hottest part of the summer. This will help kill any pathogens in the soil. Alternatively, you can replace the soil entirely with a fresh mix.
How do I know when my kale is ready to harvest?
Kale is typically ready to harvest about 55-75 days after planting, depending on the variety. The leaves should be a good size (6-8 inches long) and a deep green color. The leaves should also be firm and crisp, not wilted or yellowed. You can start harvesting kale leaves gradually as needed, picking the outer leaves first and allowing the inner leaves to continue growing. This will extend your harvest period. Taste a leaf to make sure it is tender and flavorful before harvesting a large quantity.
What are the benefits of growing kale in soil bags compared to traditional gardening methods?
Growing kale in soil bags offers several advantages over traditional gardening methods:
* Space-saving: Soil bags are ideal for small spaces like balconies, patios, and decks.
* Improved drainage: Soil bags provide excellent drainage, preventing root rot.
* Portability: Soil bags can be easily moved to optimize sunlight exposure or protect plants from harsh weather.
* Cost-effective: Soil bags are a relatively inexpensive way to grow kale.
* Weed control: Soil bags help prevent weeds from growing around your kale plants.
* Soil control: You can easily customize the soil mix in soil bags to meet the specific needs of kale.
* Less digging and tilling: Soil bags eliminate the need for extensive digging and tilling.
Leave a Comment