

Growing Kale at Home can seem daunting, but trust me, it’s easier than you think! Have you ever dreamed of stepping into your backyard and harvesting fresh, vibrant kale for a healthy smoothie or a delicious salad? Well, dream no more! This DIY guide is packed with simple tricks and hacks that will transform your garden into a kale-producing powerhouse, even if you have limited space or a self-proclaimed “brown thumb.”
Kale, a nutritional powerhouse, has a rich history, dating back to ancient Greece and Rome, where it was a staple food. Throughout the centuries, different cultures have embraced kale for its hardiness and health benefits. Today, it’s experiencing a resurgence in popularity, and for good reason! But buying kale at the grocery store can be expensive, and you never quite know how fresh it is.
That’s where this DIY guide comes in. Growing Kale at Home allows you to control the quality of your food, save money, and enjoy the satisfaction of nurturing something from seed to table. Plus, fresh kale tastes so much better! Whether you’re a seasoned gardener or a complete beginner, these easy-to-follow tips will help you cultivate a thriving kale patch in no time. Get ready to unleash your inner gardener and enjoy the bounty of homegrown kale!
Growing Kale: Your DIY Guide for Your Own Garden
Hey garden friends! I love harvesting fresh vegetables right from my garden, and cabbage is right at the top of the list. It’s super healthy, versatile, and surprisingly easy to grow, even if you don’t have a huge garden. In this article, I’ll show you step-by-step how to grow your own cabbage—whether in a garden bed, a raised bed, or even in a pot on the balcony. Let’s get started!
What you need: The Preparation
Before we begin, we’ll naturally need the right equipment and materials. Here is a list to ensure you have everything on hand:
- Cabbage seeds or young plants: You can grow cabbage from seed or buy young plants from a garden center. I personally find young plants easier, especially for beginners.
- Seed-starting mix (optional): If you want to grow cabbage from seed, you’ll need seed-starting mix.
- Garden soil: Good, nutrient-rich garden soil is essential.
- Compost or organic fertilizer: Cabbage is a heavy feeder, so it needs plenty of food.
- Watering can or garden hose: For watering.
- Planting tools: A small trowel or a dibber.
- Slug pellets (optional): Slugs love cabbage, so slug pellets can be useful.
- Netting or fleece (optional): To protect against cabbage whites and other pests.
- Pots or planters (optional): If you want to grow cabbage in a pot.
Choosing the Right Variety: Which Cabbage is Right for You?
There are so many different cabbage varieties, making the choice difficult! Here are a few of my favorites and what you should look for when choosing:
- Kale: The classic! Super robust and hardy. Perfect for growing in the fall and winter.
- Lacinato Kale (Cavolo Nero): Looks great and tastes delicious. Needs a bit more space than curly kale.
- Brussels Sprouts: Takes a long time, but the small sprouts are worth it!
- Savoy Cabbage: A mild cabbage that is great for stews and cabbage rolls.
- Cauliflower: A bit more demanding, but with the right care, it can also succeed in your own garden.
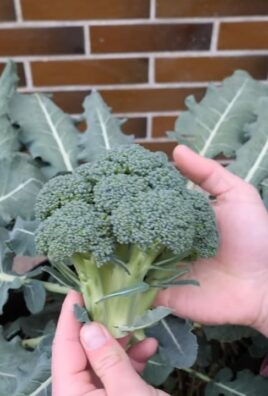
- Broccoli: Also a bit more demanding, but very popular.
What you should look for when choosing:
- Climate: Not all cabbage varieties are equally winter-hardy. Find out which varieties grow well in your region.
- Space: Some cabbage varieties need more space than others. Consider this when planning your garden.
- Taste: Think about which cabbage varieties you like to eat the most.
- Harvest time: Some cabbage varieties are ready for harvest earlier than others. If you want to harvest cabbage all year round, choose different varieties with different harvest times.
Growing Cabbage from Seed: The Path to Your Own Cabbage
If you want to grow cabbage from seed, you should start sowing about 6-8 weeks before the last frost date.
- Preparation: Fill small starter pots or a seed tray with seed-starting mix. Lightly moisten the soil.
- Sowing: Place 2-3 seeds per pot or in the seed tray. Cover the seeds lightly with soil.
- Watering: Gently moisten the soil with a spray bottle.
- Location: Place the starter pots or seed tray in a bright and warm place (approx. 18-20°C / 64-68°F).
- Care: Keep the soil moist, but not wet. The seeds should germinate after about a week.
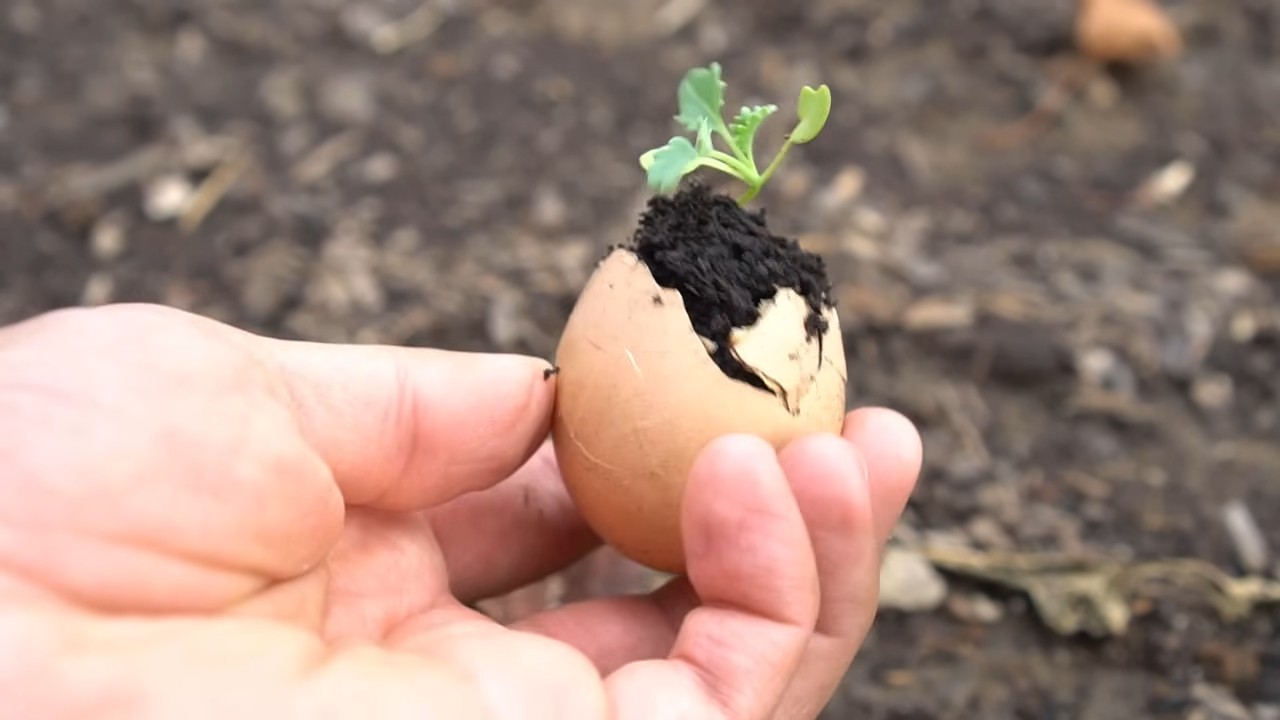
- Pricking Out: When the seedlings have 2-3 leaves, you can prick them out. This means you plant each seedling in its own pot.
- Hardening Off: Before you plant the young plants outdoors, you should harden them off. To do this, place them outside for a few hours during the day and bring them back in at night.
Planting Cabbage: Into the Bed!
Once the young plants are about 15-20 cm (6-8 inches) tall and there is no longer a danger of frost, you can plant them outdoors.
- Prepare the bed: Loosen the soil well and remove weeds. Work compost or organic fertilizer into the soil.
- Planting holes: Dig planting holes that are slightly larger than the root balls of the young plants.
- Planting: Place the young plants in the planting holes and fill the holes with soil. Press the soil down lightly.
- Watering: Water the young plants thoroughly.
- Spacing: Pay attention to the correct plant spacing. Kale and Lacinato kale need about 50-60 cm (20-24 inches) of space, while Brussels sprouts need about 60-70 cm (24-28 inches).
- Protection: Protect the young plants from slugs and cabbage whites. You can sprinkle slug pellets or place netting or fleece over the plants.
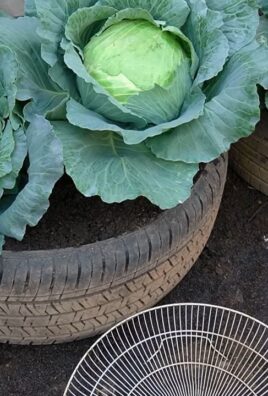
Growing Cabbage in a Pot: Balcony Gardeners, Take Note!
Even if you don’t have a garden, you can grow cabbage. It also feels at home in a pot on the balcony or patio.
- Pot size: Choose a pot with a diameter of at least 30 cm (12 inches).
- Soil: Use good, nutrient-rich garden soil.
- Drainage: Make sure the pot has a drainage hole so excess water can escape.
- Planting: Plant the young plants in the pot and water them thoroughly.
- Location: Place the pot in a sunny location.
- Fertilizing: Fertilize the cabbage regularly with an organic fertilizer.
Caring for Cabbage: Watering, Fertilizing, Protecting
Cabbage is relatively low-maintenance, but you should pay attention to a few things:
- Watering: Water the cabbage regularly, especially during dry periods. The soil should always be slightly moist.
- Fertilizing: Cabbage is a heavy feeder and needs regular fertilizer. Feed it every 2-3 weeks with an organic fertilizer.
- Pest protection: Cabbage whites, slugs, and aphids can trouble cabbage. Protect it with nets, slug pellets, or natural pesticides.
- Weed removal: Regularly remove weeds so the cabbage gets enough nutrients.
- Loosen the soil: Loosen the soil regularly so the roots get enough air.
Harvesting Cabbage: The Reward for Your Effort
Depending on the variety and planting time, you can harvest cabbage after about 2-6 months.
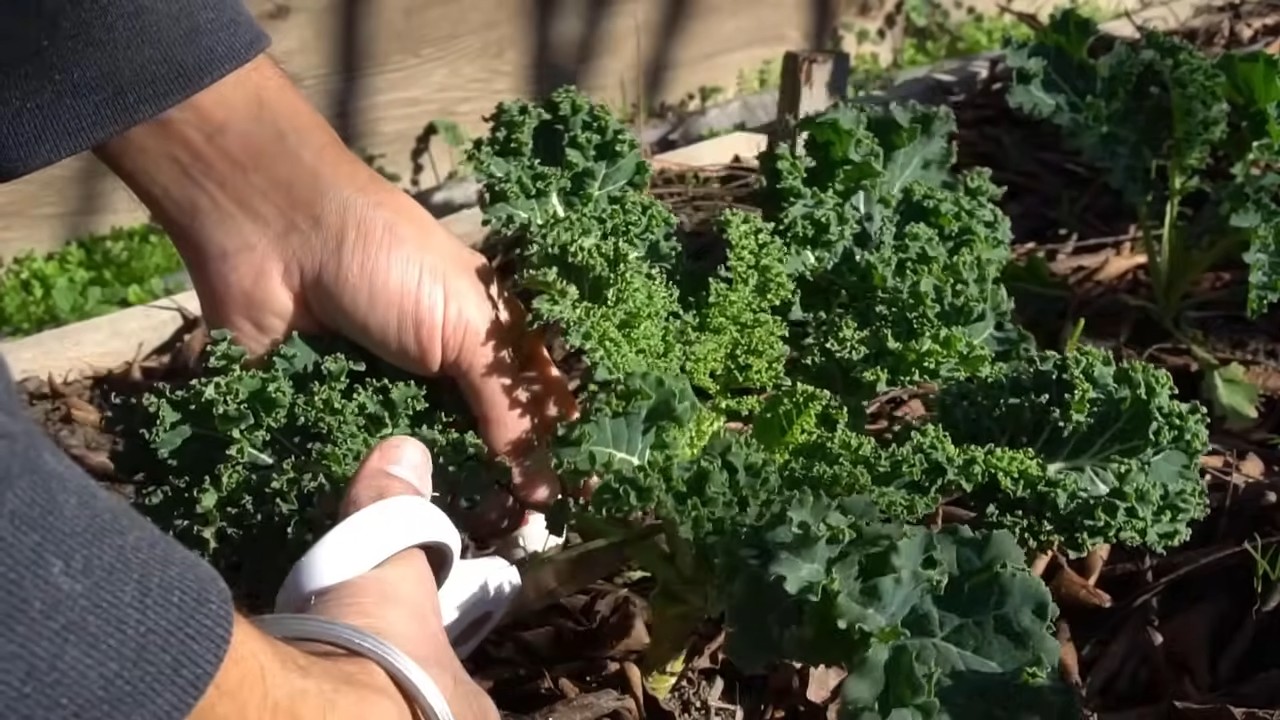
- Kale: You can harvest as needed. Start with the outer leaves.
- Lacinato Kale: You can also harvest as needed.
- Brussels Sprouts: Are ready when the sprouts are firm and closed.
- Savoy Cabbage: Is ready when the head is firm.
- Cauliflower: Is ready when the head has reached the desired size and is still closed.
- Broccoli: Is ready when the florets are firm and closed.
Tip: It’s best to harvest cabbage on a dry day.
Conclusion
So, there you have it! Growing kale at home is not only achievable, but it’s also a rewarding experience that brings fresh, nutritious greens right to your table. We’ve walked through the essential steps, from selecting the right variety to harvesting your bountiful crop. But why is this DIY trick a must-try?
Firstly, consider the unparalleled freshness. Store-bought kale, even when organic, can’t compete with the vibrant flavor and crisp texture of kale harvested moments before you eat it. The nutrients are at their peak, and you avoid the wilting and degradation that can occur during transportation and storage.
Secondly, think about the cost savings. While the initial investment in seeds or seedlings and some basic gardening supplies might seem like a hurdle, the long-term savings are significant. A single packet of kale seeds can yield multiple harvests, providing you with a continuous supply of this superfood for a fraction of the price you’d pay at the grocery store.
Thirdly, and perhaps most importantly, growing kale at home connects you to your food in a meaningful way. You’ll gain a deeper appreciation for the effort and resources that go into producing the food you eat, and you’ll have the satisfaction of knowing exactly where your kale comes from and how it was grown. No pesticides, no hidden ingredients, just pure, wholesome goodness.
But the beauty of growing kale at home lies in its adaptability. Feel free to experiment with different varieties. Try ‘Lacinato’ (dinosaur kale) for its unique texture and nutty flavor, or ‘Red Russian’ for its beautiful purple stems and milder taste. You can also adjust your growing methods to suit your space and climate. If you have limited space, consider growing kale in containers on your balcony or patio. If you live in a colder climate, you can extend your growing season by using row covers or a cold frame.
Another variation to consider is companion planting. Kale thrives when planted alongside certain other vegetables and herbs. For example, planting kale with onions or garlic can help deter pests, while planting it with chamomile can improve its flavor.
Don’t be afraid to get creative and personalize your kale-growing experience. The possibilities are endless!
We wholeheartedly encourage you to give this DIY trick a try. It’s easier than you might think, and the rewards are well worth the effort. Imagine the satisfaction of serving a salad made with kale you grew yourself, or adding a handful of fresh kale to your morning smoothie.
And once you’ve experienced the joy of growing kale at home, we’d love to hear about it! Share your experiences, tips, and photos in the comments below. Let’s create a community of kale-loving gardeners who can learn from each other and inspire others to embrace the joys of homegrown food. What are you waiting for? Get your hands dirty and start growing kale today!
Frequently Asked Questions (FAQ)
What is the best time of year to plant kale?
The best time to plant kale depends on your climate. In general, kale is a cool-season crop that thrives in temperatures between 60°F and 70°F (15°C and 21°C). For spring harvests, start seeds indoors 6-8 weeks before the last expected frost, or direct sow seeds outdoors 2-4 weeks before the last frost. For fall and winter harvests, sow seeds outdoors in late summer or early fall. Kale can tolerate light frosts and even snow, which can actually improve its flavor. In warmer climates, you can grow kale throughout the winter.
How much sunlight does kale need?
Kale needs at least 6 hours of sunlight per day to thrive. However, it can tolerate partial shade, especially in hotter climates. If you’re growing kale indoors, make sure to provide it with plenty of light, either from a sunny window or a grow light. Insufficient sunlight can result in leggy, weak plants.
What kind of soil is best for growing kale?
Kale prefers well-drained soil that is rich in organic matter. The ideal soil pH is between 6.0 and 7.5. Before planting, amend your soil with compost or other organic matter to improve its fertility and drainage. You can also add a slow-release fertilizer to provide your kale plants with the nutrients they need to grow.
How often should I water kale?
Kale needs consistent moisture to thrive. Water your kale plants deeply whenever the top inch of soil feels dry to the touch. Avoid overwatering, as this can lead to root rot. During hot, dry weather, you may need to water your kale plants more frequently. Mulching around your kale plants can help to retain moisture in the soil.
What are some common pests and diseases that affect kale?
Kale is susceptible to a variety of pests and diseases, including aphids, cabbage worms, flea beetles, and downy mildew. To prevent pest and disease problems, practice good garden hygiene. Remove any weeds or debris that could harbor pests or diseases. Inspect your kale plants regularly for signs of infestation or disease, and take action promptly if you notice any problems. You can use organic pest control methods, such as insecticidal soap or neem oil, to control pests. For diseases, you can try using a copper fungicide.
How do I harvest kale?
You can start harvesting kale leaves as soon as they are large enough to eat, typically when they are about 4-6 inches long. Harvest the outer leaves first, leaving the inner leaves to continue growing. You can harvest kale leaves continuously throughout the growing season. To harvest, simply cut or snap off the leaves at the base of the stem.
Can I grow kale in containers?
Yes, you can grow kale in containers. Choose a container that is at least 12 inches deep and wide. Fill the container with a well-draining potting mix. Plant your kale seedlings or seeds in the container, and water them regularly. Make sure to provide your container-grown kale plants with plenty of sunlight.
How do I store kale after harvesting?
To store kale after harvesting, wash the leaves thoroughly and dry them with a salad spinner or paper towels. Store the kale leaves in a plastic bag in the refrigerator. Kale will typically last for about 1 week in the refrigerator. You can also freeze kale for longer storage. To freeze kale, blanch the leaves in boiling water for 2 minutes, then plunge them into ice water. Drain the kale leaves and squeeze out any excess water. Store the kale leaves in a freezer bag or container.
What are some ways to use kale in cooking?
Kale is a versatile vegetable that can be used in a variety of dishes. You can add kale to salads, soups, stews, smoothies, and stir-fries. You can also bake kale into chips or sauté it with garlic and olive oil. Kale is a great source of vitamins, minerals, and antioxidants.
Is growing kale at home really worth the effort?
Absolutely! While it requires some initial effort, the benefits of growing kale at home far outweigh the challenges. You’ll have access to fresh, nutritious greens, save money on groceries, and gain a deeper connection to your food. Plus, it’s a fun and rewarding hobby that can bring joy to your life. Give it a try, and you might just discover your green thumb!
Leave a Comment