

Growing Garlic in a Bag might sound unconventional, but trust me, it’s a game-changer for anyone with limited space or a yearning for fresh, homegrown flavor! Forget sprawling gardens and back-breaking labor; this DIY trick unlocks the delicious potential of garlic cultivation right on your balcony, patio, or even a sunny windowsill.
Garlic, a culinary staple with roots stretching back thousands of years, has been prized for its medicinal properties and pungent taste across cultures. From ancient Egypt, where it fueled pyramid builders, to modern kitchens worldwide, garlic’s versatility is undeniable. But what if you thought you couldn’t enjoy the satisfaction of harvesting your own cloves because of space constraints? That’s where this clever hack comes in!
Let’s face it, not everyone has access to a sprawling garden. Apartment living, busy schedules, and limited mobility can all make traditional gardening a challenge. But with this simple method for growing garlic in a bag, you can bypass those obstacles and enjoy the unparalleled taste of freshly grown garlic. Imagine adding homegrown garlic to your favorite dishes, knowing you nurtured it from clove to bulb. Plus, it’s a fantastic way to reduce your reliance on store-bought produce and embrace a more sustainable lifestyle. So, grab a bag, some soil, and let’s get started on this exciting gardening adventure!
Growing Garlic in a Bag: A Beginner’s Guide
Hey there, fellow gardening enthusiasts! Ever thought about growing your own garlic but felt intimidated by the whole garden bed thing? Well, I’m here to tell you that you can absolutely grow delicious, pungent garlic right in a bag! It’s a fantastic way to get started, especially if you’re short on space or just want a low-commitment gardening project. I’ve been doing this for a few years now, and trust me, the satisfaction of harvesting your own homegrown garlic is unbeatable. So, grab your supplies, and let’s get started!
What You’ll Need
Before we dive in, let’s gather everything we need. This is a pretty straightforward project, so the list isn’t too long:
* Garlic Bulbs: Choose organic garlic bulbs from a reputable source. Avoid supermarket garlic, as it may have been treated to prevent sprouting. Look for firm, healthy bulbs with no signs of mold or damage. Softneck varieties are generally easier to grow in bags, but hardneck varieties can work too, especially if you live in a colder climate. I personally prefer softneck for bag growing because they tend to produce more cloves.
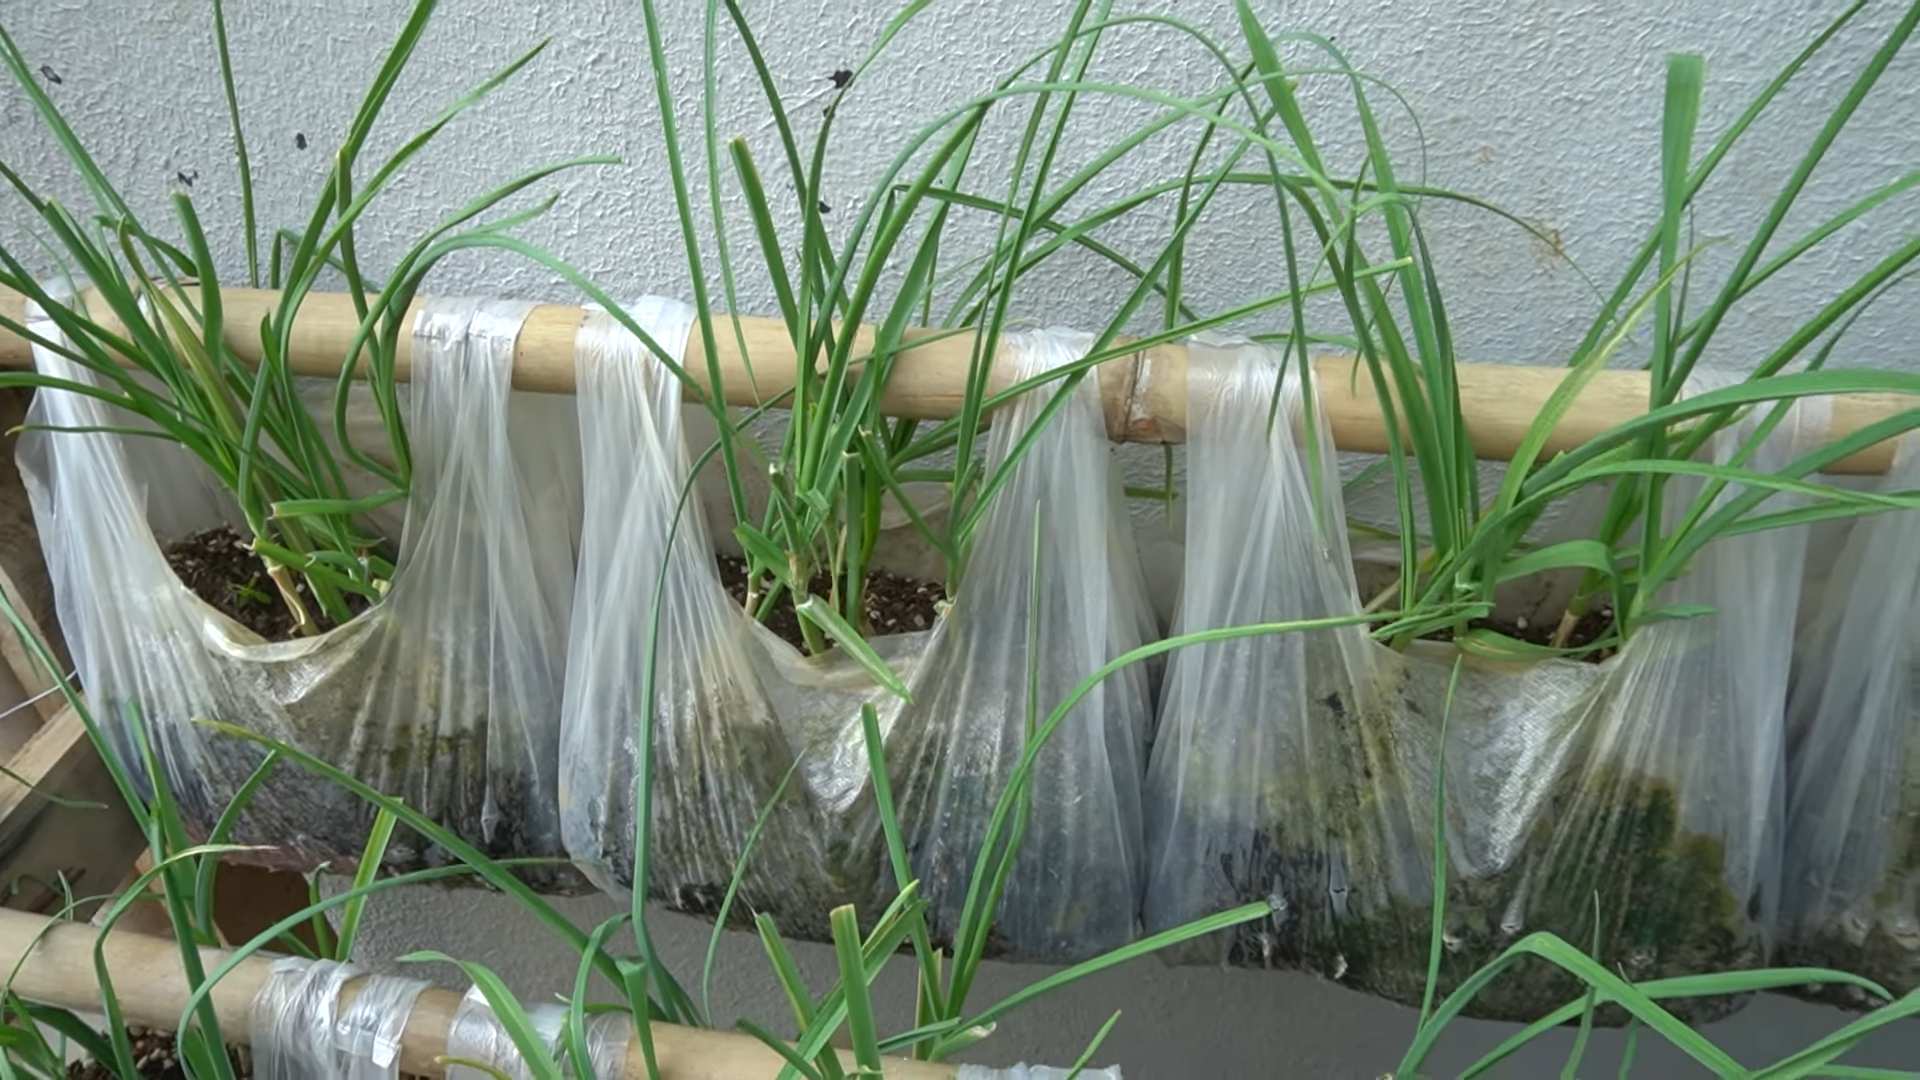
* Large Grow Bag: I recommend a grow bag that’s at least 10 gallons in size. The bigger, the better, as it gives the garlic roots plenty of room to spread out. Fabric grow bags are ideal because they allow for good drainage and aeration.
* Potting Mix: Use a high-quality potting mix that’s well-draining and rich in organic matter. Avoid using garden soil, as it can become compacted in a bag and hinder drainage. I like to mix in some compost for extra nutrients.
* Compost: As mentioned above, compost is your friend! It adds essential nutrients to the soil and helps retain moisture.
* Watering Can or Hose: You’ll need a way to water your garlic regularly.
* Optional: Bone meal or garlic fertilizer. These can give your garlic an extra boost, but they’re not strictly necessary.
Preparing the Grow Bag
This is a crucial step to ensure your garlic has a happy home.
1. Choose Your Location: Garlic needs at least 6 hours of sunlight per day, so pick a sunny spot for your grow bag. A patio, balcony, or even a sunny windowsill can work.
2. Fill the Grow Bag: Fill the grow bag with your potting mix, leaving about 2-3 inches of space at the top.
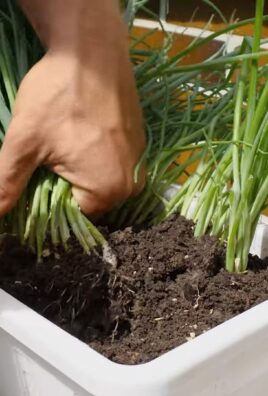
3. Mix in Compost: Mix in a generous amount of compost into the top layer of the potting mix. This will provide your garlic with the nutrients it needs to thrive. I usually aim for about a 1:4 ratio of compost to potting mix.
4. Water Thoroughly: Water the potting mix until it’s evenly moist but not soggy. This will help settle the soil and prepare it for planting.
Planting the Garlic Cloves
Now for the fun part!
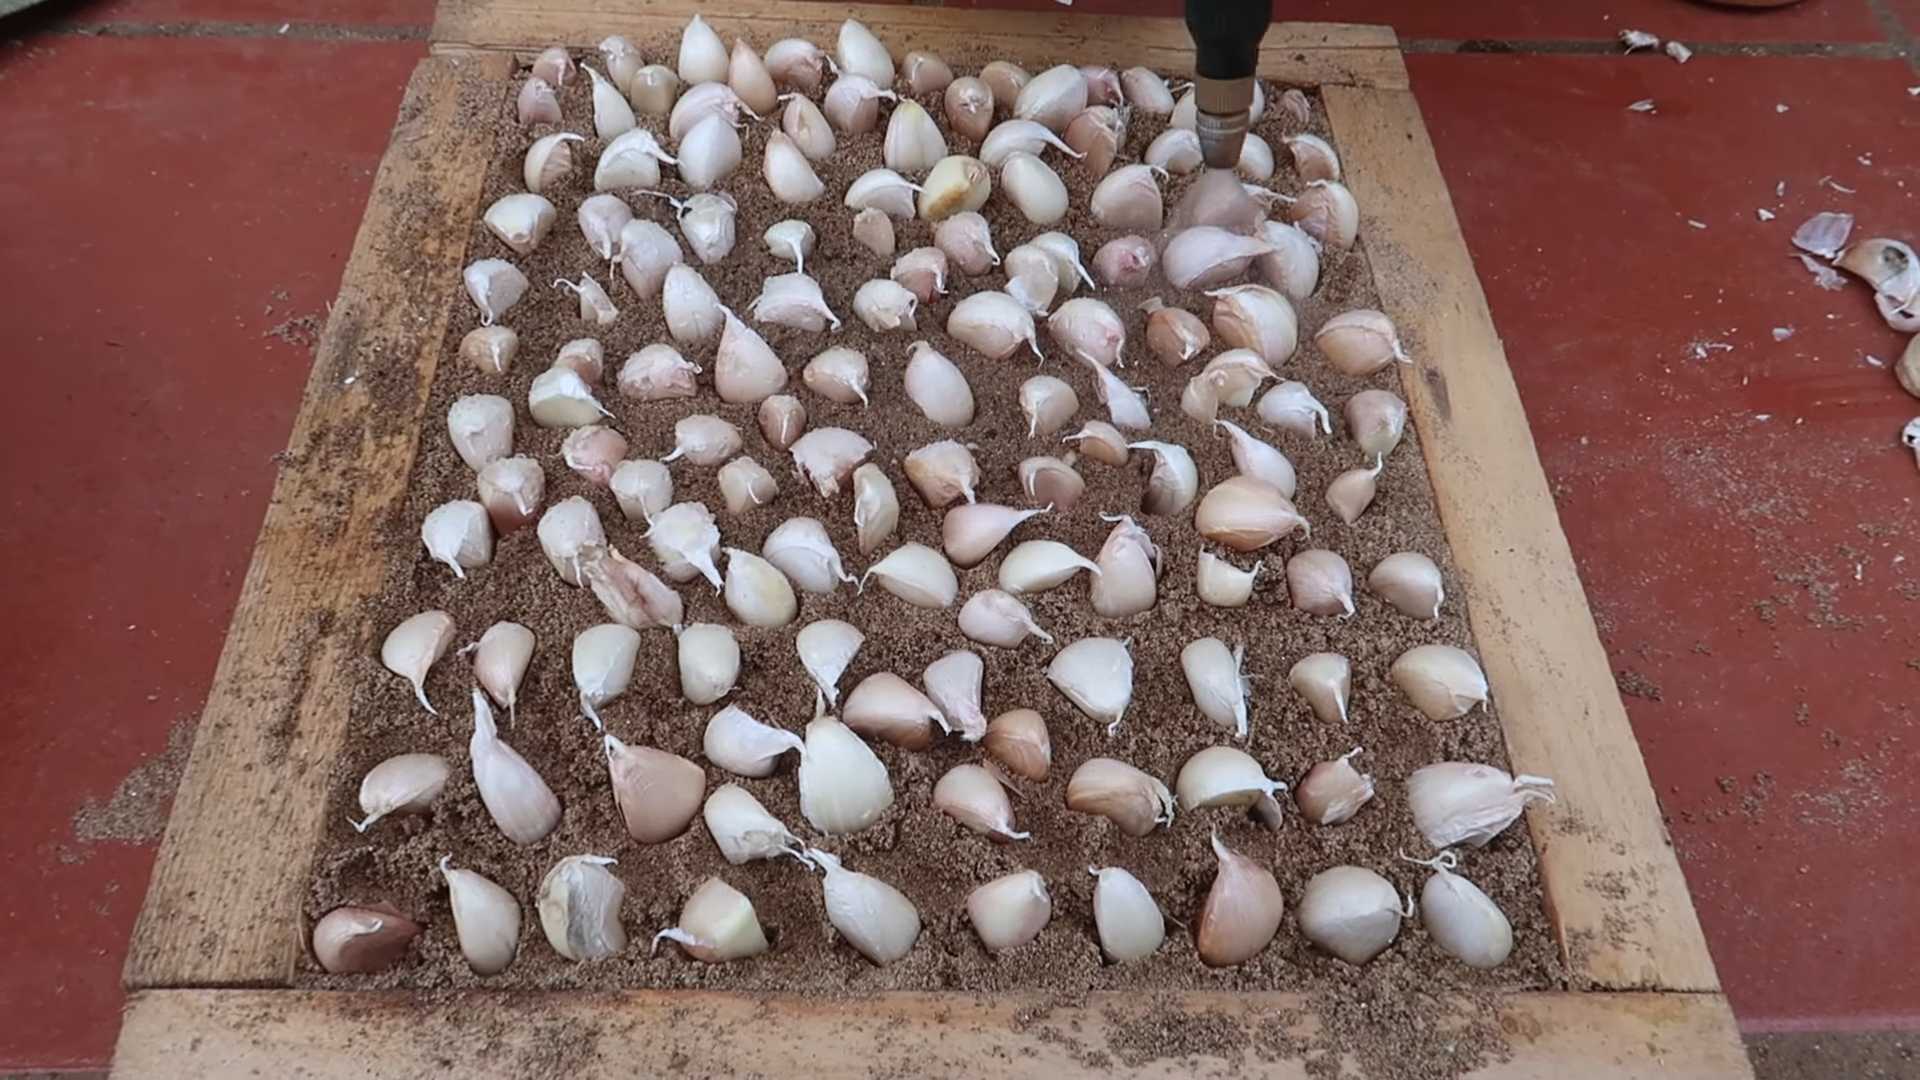
1. Separate the Cloves: Gently separate the cloves from the garlic bulb, being careful not to damage them. Leave the papery skin on each clove intact.
2. Select the Best Cloves: Choose the largest, healthiest-looking cloves for planting. These will produce the strongest plants.
3. Plant the Cloves: Make holes in the potting mix about 4-6 inches apart and 2 inches deep. Plant each clove with the pointed end facing up and the blunt end facing down.
4. Cover the Cloves: Gently cover the cloves with potting mix and lightly pat down the soil.
5. Water Again: Water the grow bag again to settle the soil around the cloves.
Caring for Your Garlic
This is where the patience comes in. Garlic takes several months to mature, but the rewards are well worth the wait.
1. Watering: Water your garlic regularly, especially during dry periods. The soil should be consistently moist but not waterlogged. Overwatering can lead to rot, so be careful. I usually check the soil moisture every few days and water when the top inch feels dry.
2. Fertilizing: If you want to give your garlic an extra boost, you can fertilize it every few weeks with a balanced fertilizer or a garlic-specific fertilizer. Bone meal is also a good option, as it provides phosphorus, which is essential for root development. Follow the instructions on the fertilizer package.
3. Weeding: Keep the grow bag free of weeds, as they can compete with the garlic for nutrients and water. Hand-pull any weeds that pop up.
4. Mulching: Adding a layer of mulch, such as straw or wood chips, can help retain moisture, suppress weeds, and regulate soil temperature.
5. Pest Control: Garlic is generally pest-resistant, but keep an eye out for common garden pests like aphids or onion maggots. If you spot any pests, you can try spraying them with insecticidal soap or neem oil.
6. Removing Scapes (Hardneck Varieties Only): If you’re growing hardneck garlic, you’ll notice that it produces a flower stalk called a scape. These scapes should be removed to encourage the plant to focus its energy on bulb development. You can harvest the scapes when they start to curl and use them in cooking – they have a mild garlic flavor.
Harvesting Your Garlic
The moment you’ve been waiting for!
1. Timing: Garlic is typically ready to harvest in late spring or early summer, about 8-9 months after planting. The leaves will start to turn yellow and brown, and the stems will begin to fall over. This is a sign that the bulbs are mature.
2. Check a Bulb: To be sure, you can gently dig up one bulb to check its size and development. The cloves should be plump and well-formed.
3. Harvesting: Carefully dig up the garlic bulbs with a garden fork or trowel, being careful not to damage them.
4. Curing: Gently brush off any excess soil and let the garlic bulbs cure in a well-ventilated, shady place for 2-3 weeks. This will allow the outer layers of the bulbs to dry and harden, which will help them store longer. I usually hang them in bundles in my garage.
5. Storing: Once the garlic is cured, you can store it in a cool, dry place for several months. Braiding the garlic is a traditional way to store it, but you can also store it in mesh bags or baskets.
Troubleshooting
Even with the best planning, things can sometimes go wrong. Here are a few common problems and how to address them:
* Yellowing Leaves: This could be a sign of overwatering, underwatering, or nutrient deficiency. Check the soil moisture and adjust your watering accordingly. If the soil is dry, water more frequently. If it’s soggy, water less frequently. You can also try fertilizing with a balanced fertilizer.
* Small Bulbs: This could be due to insufficient sunlight, poor soil, or overcrowding. Make sure your garlic is getting at least 6 hours of sunlight per day. Amend the soil with compost to improve its fertility. If you planted the cloves too close together, they may not have enough room to develop properly.
* Rotting Bulbs: This is usually caused by overwatering or poor drainage. Make sure your grow bag has good drainage and avoid overwatering. If you suspect that your garlic is rotting, you can try digging up the affected bulbs and discarding them.
* Pests: Keep an eye out for common garden pests like aphids or onion maggots. If you spot any pests, you can try spraying them with insecticidal soap or neem oil.
Extra Tips and Tricks
* Planting in Fall: For the best results, plant your garlic in the fall, about 4-6 weeks before the first frost. This will give the cloves time to develop roots before winter sets in.
* Succession Planting: To have a continuous supply of garlic, you can plant cloves every few weeks.
* Saving Cloves for Next Year: Save some of the largest, healthiest cloves from your harvest to plant next year. This will ensure that you have a continuous supply of homegrown garlic.
* Companion Planting: Garlic is a great companion plant for many vegetables, including tomatoes, peppers, and eggplant. It can help repel pests and improve the flavor of these vegetables.
Growing garlic in a bag is a rewarding and easy way to enjoy fresh, homegrown garlic. With a little bit of care and attention, you can harvest a bountiful crop of delicious garlic right in your own backyard (or balcony!). Happy gardening!
Conclusion
So, there you have it! Growing garlic in a bag is not just a gardening hack; it’s a game-changer for anyone, regardless of their space or experience level. We’ve walked you through the simple steps, highlighting how accessible and rewarding this method can be. Forget the sprawling garden plot and back-breaking labor. With just a bag, some soil, and a few cloves, you can cultivate your own supply of fresh, flavorful garlic right at your fingertips.
Why is this a must-try? Because it democratizes gardening. It empowers apartment dwellers, balcony enthusiasts, and even those with limited mobility to participate in the joy of growing their own food. Imagine the satisfaction of harvesting plump, juicy garlic bulbs that you nurtured from start to finish. Think of the incredible flavor boost you’ll add to your dishes, knowing that it came from your own little bag garden.
But the beauty of this method lies not only in its simplicity but also in its adaptability. Feel free to experiment with different types of garlic. Hardneck varieties, with their flavorful scapes, might be a fun challenge. Or, if you live in a warmer climate, try a softneck variety, known for its braiding capabilities. You can also play around with the soil mix. Adding compost or other organic matter can further enrich the growing medium and boost your garlic’s growth. Consider companion planting within the bag. Herbs like thyme or rosemary can deter pests and enhance the overall health of your garlic.
Don’t be afraid to get creative! This is your garden, your experiment, your journey into the world of homegrown garlic.
We are confident that once you try growing garlic in a bag, you’ll be hooked. It’s a low-effort, high-reward activity that connects you with nature and provides you with a delicious and versatile ingredient. The process is incredibly gratifying, and the results are undeniably rewarding.
So, what are you waiting for? Grab a bag, some soil, and a few garlic cloves, and embark on this exciting gardening adventure. We encourage you to try this DIY trick and share your experience with us! Let us know what worked for you, what challenges you faced, and any tips or tricks you discovered along the way. Share your photos, your stories, and your newfound love for growing garlic in a bag. Together, we can create a community of bag-gardeners, sharing our knowledge and inspiring others to embrace this simple and sustainable way to grow their own food. We can’t wait to hear about your success!
Frequently Asked Questions (FAQ)
What kind of bag should I use for growing garlic?
The best type of bag to use is a durable, breathable grow bag made of fabric. These bags allow for good drainage and aeration, which are crucial for healthy garlic growth. Avoid using plastic bags, as they can trap moisture and lead to root rot. If you must use a plastic bag, ensure it has plenty of drainage holes. A 5-10 gallon bag is generally sufficient for several garlic plants. You can also repurpose burlap sacks or even sturdy shopping bags, as long as they provide adequate drainage.
What kind of soil should I use?
Garlic thrives in well-draining, fertile soil. A good potting mix is a great starting point. You can also create your own mix by combining equal parts of garden soil, compost, and perlite or vermiculite. The compost provides essential nutrients, while the perlite or vermiculite improves drainage and aeration. Avoid using heavy clay soil, as it can become waterlogged and suffocate the garlic roots. The ideal pH for garlic is between 6.0 and 7.0.
When is the best time to plant garlic in a bag?
The best time to plant garlic is in the fall, about 4-6 weeks before the first expected frost. This allows the garlic cloves to establish roots before winter sets in. In colder climates, the winter chill is actually beneficial for garlic development. If you live in a warmer climate, you can plant garlic in late fall or early winter. The key is to provide a period of cool temperatures for proper bulb formation.
How deep should I plant the garlic cloves?
Plant the garlic cloves about 2-3 inches deep, with the pointed end facing up. Space the cloves about 4-6 inches apart to allow for adequate growth. After planting, water the soil thoroughly.
How often should I water the garlic in a bag?
Water the garlic regularly, especially during dry periods. The soil should be consistently moist but not waterlogged. Check the soil moisture by sticking your finger about an inch into the soil. If it feels dry, it’s time to water. Avoid overwatering, as this can lead to root rot. During the winter months, you may need to water less frequently.
How much sunlight does garlic need?
Garlic needs at least 6-8 hours of sunlight per day. Place the bag in a sunny location where it will receive plenty of direct sunlight. If you don’t have a sunny spot, you can supplement with grow lights.
How do I fertilize garlic growing in a bag?
Garlic is a heavy feeder, so it’s important to fertilize it regularly. You can use a balanced fertilizer, such as 10-10-10, or an organic fertilizer, such as compost tea or fish emulsion. Apply the fertilizer according to the package directions. Avoid over-fertilizing, as this can burn the roots.
How long does it take for garlic to grow in a bag?
Garlic typically takes about 8-9 months to mature. You can harvest the garlic when the leaves start to turn yellow and brown. This usually happens in late spring or early summer.
How do I harvest garlic from a bag?
To harvest the garlic, gently loosen the soil around the bulbs and pull them out of the bag. Be careful not to damage the bulbs. Once harvested, cure the garlic by hanging it in a cool, dry, well-ventilated place for 2-3 weeks. This allows the outer layers to dry and protects the bulbs from rotting.
Can I grow garlic in a bag indoors?
While it’s possible to grow garlic indoors, it can be challenging to provide the necessary conditions, especially the required chilling period. If you want to try growing garlic indoors, make sure to provide plenty of light and cool temperatures. You may need to refrigerate the cloves for a few weeks before planting to simulate the winter chill.
What are garlic scapes and what do I do with them?
Garlic scapes are the curly flower stalks that grow from hardneck garlic varieties. They are a delicious and versatile ingredient that can be used in a variety of dishes. You can harvest the scapes when they are still young and tender. Simply cut them off near the base of the plant. Use them in stir-fries, pesto, soups, or salads. Removing the scapes also encourages the plant to put more energy into bulb development.
What if my garlic doesn’t form bulbs?
There are several reasons why garlic might not form bulbs. The most common reasons are insufficient sunlight, poor soil, or lack of water. Make sure your garlic is getting at least 6-8 hours of sunlight per day, is planted in well-draining, fertile soil, and is watered regularly. Also, ensure that you planted the garlic at the correct time of year.
How do I store garlic after harvesting?
After curing the garlic, store it in a cool, dry, well-ventilated place. You can braid the garlic bulbs together or store them in mesh bags. Properly stored garlic can last for several months.
Can I reuse the soil in the bag for growing garlic again?
It’s generally not recommended to reuse the same soil for growing garlic repeatedly, as it can deplete the nutrients and increase the risk of disease. It’s best to replace the soil with fresh potting mix each year. However, you can amend the old soil with compost and other organic matter to improve its fertility and drainage.
What are some common pests and diseases that affect garlic?
Some common pests that affect garlic include aphids, thrips, and onion maggots. Common diseases include white rot, bulb rot, and downy mildew. You can prevent these problems by using healthy planting material, providing good drainage, and practicing crop rotation. If you encounter pests or diseases, you can use organic pest control methods or fungicides.
Leave a Comment