

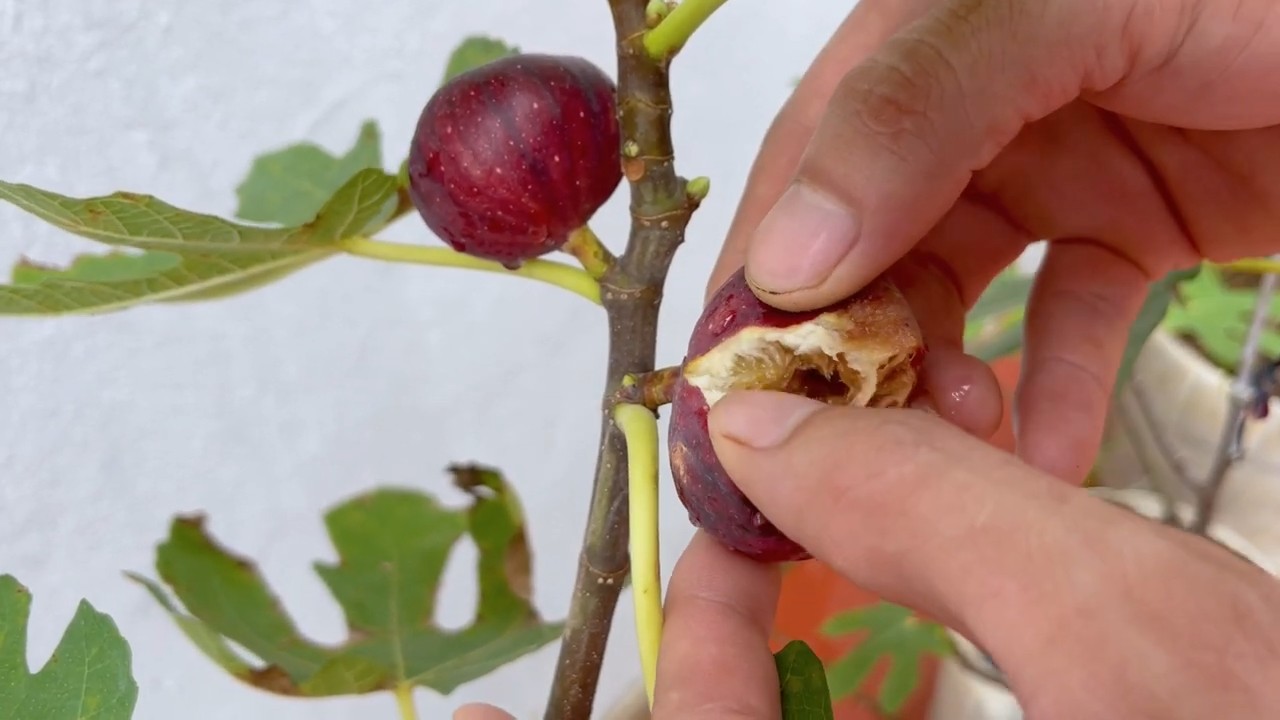
Growing Figs in Bottles: Sounds a little crazy, right? But trust me, this quirky DIY project is about to revolutionize your small-space gardening game! Forget sprawling orchards; we’re bringing the sweet, juicy goodness of figs right to your windowsill or balcony.
For centuries, figs have been cherished across cultures, from ancient Greece, where they were considered a sacred fruit, to the Mediterranean, where they’re a staple ingredient in countless dishes. But what if you don’t have the space for a traditional fig tree? That’s where our ingenious bottle-growing method comes in!
Let’s face it, not everyone has a sprawling backyard perfect for a fig tree. Many of us are living in apartments, condos, or homes with limited outdoor space. This DIY trick allows you to enjoy the delicious taste of homegrown figs, regardless of your living situation. Plus, it’s a fantastic conversation starter! Imagine the look on your friends’ faces when they see you growing figs in bottles. It’s not just about the fruit; it’s about the experience, the innovation, and the sheer joy of creating something unique and delicious. So, grab your empty bottles, some soil, and let’s get started on this exciting gardening adventure! I promise, you won’t regret it.
Feigen im Glas ziehen: Ein DIY-Projekt für Naschkatzen
Hallo liebe Gartenfreunde! Habt ihr auch so eine Schwäche für süße, saftige Feigen? Ich liebe sie! Aber leider ist mein Garten nicht gerade das ideale Feigenparadies. Deshalb habe ich mich auf die Suche nach einer kreativen Lösung gemacht und bin auf die Idee gekommen, Feigen in Flaschen zu ziehen. Klingt verrückt? Ist es vielleicht ein bisschen, aber es funktioniert! Und das Beste daran: Es ist ein super spannendes DIY-Projekt, das auch auf kleinstem Raum möglich ist. Lasst uns gemeinsam loslegen!
Was du für dein Feigen-Flaschen-Projekt brauchst:
* Feigenbaum-Stecklinge: Am besten von einer bewährten Sorte, die in deiner Region gut gedeiht. Frag doch mal bei Freunden oder Nachbarn nach, ob du ein paar Stecklinge bekommen kannst.
* Glasflaschen: Große Weinflaschen, Einmachgläser oder sogar leere Saftflaschen eignen sich hervorragend. Achte darauf, dass sie sauber und unbeschädigt sind.
* Bewurzelungshormon: Hilft den Stecklingen, schneller Wurzeln zu bilden. Gibt’s im Gartencenter oder online.
* Spezielle Erde für Stecklinge: Diese Erde ist besonders locker und nährstoffarm, was die Wurzelbildung fördert.
* Perlit oder Vermiculit: Verbessert die Drainage und Belüftung der Erde.
* Sprühflasche: Zum Befeuchten der Stecklinge.
* Scharfes Messer oder Gartenschere: Zum Schneiden der Stecklinge.
* Plastiktüten oder Frischhaltefolie: Um ein feuchtes Klima in den Flaschen zu erzeugen.
* Geduld: Das Wichtigste überhaupt! Die Natur braucht ihre Zeit.
Stecklinge schneiden und vorbereiten
1. Der richtige Zeitpunkt: Der beste Zeitpunkt, um Feigenbaum-Stecklinge zu schneiden, ist im späten Winter oder frühen Frühjahr, bevor die Bäume austreiben.
2. Die Auswahl der Stecklinge: Wähle gesunde, einjährige Triebe mit einer Länge von etwa 15-20 cm. Sie sollten mindestens 3-4 Knospen haben.
3. Der Schnitt: Schneide die Stecklinge mit einem scharfen Messer oder einer Gartenschere direkt unterhalb einer Knospe ab. Entferne die unteren Blätter, damit sie nicht im Substrat verrotten. Lass nur die obersten 2-3 Blätter dran und halbiere diese, um die Verdunstung zu reduzieren.
4. Bewurzelungshormon: Tauche das untere Ende der Stecklinge in Bewurzelungshormon. Das fördert die Wurzelbildung und schützt vor Pilzbefall.
Die Flaschen vorbereiten und bepflanzen
1. Reinigung der Flaschen: Reinige die Glasflaschen gründlich mit heißem Wasser und Spülmittel. Spüle sie gut aus, damit keine Spülmittelreste zurückbleiben.
2. Drainage: Fülle eine Schicht Perlit oder Vermiculit (ca. 2-3 cm) auf den Boden der Flasche. Das sorgt für eine gute Drainage und verhindert Staunässe.
3. Substrat: Mische die spezielle Erde für Stecklinge mit etwas Perlit oder Vermiculit (Verhältnis ca. 3:1). Fülle die Flasche mit dem Substrat, lass aber noch etwas Platz bis zum Rand.
4. Stecklinge einsetzen: Mach mit einem Stift oder Finger ein kleines Loch in das Substrat und setze den Steckling vorsichtig hinein. Drücke die Erde leicht an. Achte darauf, dass die Blätter den Flaschenrand nicht berühren.
5. Bewässerung: Gieße die Stecklinge vorsichtig an, sodass das Substrat gut durchfeuchtet ist. Vermeide Staunässe.
Das Mini-Gewächshaus: Für ein optimales Klima
1. Feuchtigkeit: Um ein feuchtes Klima in der Flasche zu erzeugen, stülpe eine Plastiktüte oder Frischhaltefolie über die Flasche. Befestige sie mit einem Gummiband oder einer Schnur.
2. Belüftung: Mach ein paar kleine Löcher in die Plastiktüte oder Frischhaltefolie, damit die Luft zirkulieren kann und sich kein Schimmel bildet.
3. Standort: Stelle die Flaschen an einen hellen, aber nicht direkten sonnigen Standort. Vermeide pralle Mittagssonne, da die Stecklinge sonst verbrennen können.
4. Regelmäßige Kontrolle: Kontrolliere die Stecklinge regelmäßig auf Schimmelbildung oder Schädlingsbefall. Lüfte die Flaschen regelmäßig, um die Luftfeuchtigkeit zu regulieren.
5. Bewässerung: Besprühe die Stecklinge regelmäßig mit Wasser, um sie feucht zu halten. Achte darauf, dass das Substrat nicht austrocknet.
Geduld ist gefragt: Die Bewurzelung
1. Wartezeit: Die Bewurzelung der Stecklinge kann einige Wochen bis Monate dauern. Hab Geduld und lass dich nicht entmutigen, wenn es nicht sofort klappt.
2. Wurzelkontrolle: Nach einigen Wochen kannst du vorsichtig an den Stecklingen ziehen, um zu prüfen, ob sie Wurzeln gebildet haben. Wenn du Widerstand spürst, haben sie Wurzeln geschlagen.
3. Umtopfen: Sobald die Stecklinge ausreichend Wurzeln gebildet haben, kannst du sie in größere Töpfe mit normaler Blumenerde umtopfen.
Die Pflege deiner Feigenbäumchen
1. Standort: Stelle die Feigenbäumchen an einen sonnigen und warmen Standort.
2. Bewässerung: Gieße die Feigenbäumchen regelmäßig, besonders während der Wachstumsperiode. Vermeide Staunässe.
3. Düngung: Dünge die Feigenbäumchen während der Wachstumsperiode regelmäßig mit einem speziellen Feigendünger.
4. Schnitt: Schneide die Feigenbäumchen regelmäßig, um sie in Form zu halten und die Fruchtbildung zu fördern.
5. Überwinterung: Feigenbäumchen sind nicht winterhart und müssen im Winter an einen kühlen, frostfreien Ort gebracht werden.
Häufige Probleme und Lösungen
* Schimmelbildung: Wenn sich Schimmel in der Flasche bildet, lüfte sie regelmäßig und entferne befallene Blätter.
* Schädlingsbefall: Kontrolliere die Stecklinge regelmäßig auf Schädlingsbefall und bekämpfe ihn gegebenenfalls mit geeigneten Mitteln.
* Keine Wurzelbildung: Wenn die Stecklinge nach einigen Wochen keine Wurzeln gebildet haben, versuche es mit frischen Stecklingen und einem anderen Bewurzelungshormon.
Zusätzliche Tipps für den Erfolg
* Die richtige Sorte: Wähle eine Feigensorte, die für den Anbau im Topf geeignet ist. Es gibt spezielle Zwergfeigensorten, die sich besonders gut eignen.
* Gute Drainage: Achte auf eine gute Drainage, um Staunässe zu vermeiden.
* Regelmäßige Kontrolle: Kontrolliere die Stecklinge und die jungen Feigenbäumchen regelmäßig auf Schädlinge und Krankheiten.
* Geduld: Hab Geduld und lass dich nicht entmutigen, wenn es nicht sofort klappt. Die Natur braucht ihre Zeit.
Fazit
Feigen im Glas zu ziehen ist ein spannendes und lohnendes DIY-Projekt. Mit etwas Geduld und Sorgfalt kannst du dir deine eigenen kleinen Feigenbäumchen heranziehen und dich schon bald über die ersten süßen Früchte freuen. Ich hoffe, diese Anleitung hat dir geholfen und inspiriert. Viel Spaß beim Gärtnern! Und denk dran: Auch wenn es mal nicht klappt, nicht aufgeben! Gärtnern ist ein Lernprozess, und jeder Fehler bringt dich weiter. Also, ran an die Flaschen und los geht’s!

Conclusion
So, there you have it! Growing figs in bottles isn’t just a quirky gardening experiment; it’s a game-changer for fig enthusiasts, especially those with limited space or challenging climates. We’ve explored how this method allows for better control over the growing environment, protects against pests and diseases, and even accelerates fruit production. It’s a testament to the ingenuity of gardeners and a fantastic way to enjoy fresh, delicious figs even if you don’t have a sprawling orchard.
But why is this DIY trick a must-try? Simply put, it democratizes fig cultivation. No longer is the joy of harvesting your own figs limited to those with the perfect soil, ample sunlight, and a green thumb honed over years of experience. This method levels the playing field, making it accessible to apartment dwellers, balcony gardeners, and anyone who’s ever dreamed of plucking a ripe fig straight from the branch.
Beyond the practical benefits, there’s a certain satisfaction that comes from nurturing a plant in such an unconventional way. It’s a conversation starter, a unique addition to your garden, and a tangible demonstration of your resourcefulness. Plus, the concentrated root system often leads to more intensely flavored fruit – a reward well worth the effort.
Now, let’s talk variations. While we’ve focused on using plastic bottles, feel free to experiment with other containers. Glass jars, repurposed jugs, or even fabric grow bags can work, as long as they provide adequate drainage and sunlight exposure. Consider different fig varieties as well. Some dwarf varieties are particularly well-suited to container growing, maximizing your yield in a smaller space. You can also adjust the soil mix to suit the specific needs of your chosen fig variety. For example, some figs prefer a slightly more acidic soil, while others thrive in a more alkaline environment. Don’t be afraid to get creative with your supports, too. Trellises, stakes, or even repurposed branches can provide the necessary support as your fig tree grows.
Remember to monitor your fig trees closely, especially during the initial stages of growth. Adjust watering schedules as needed, and be vigilant for any signs of pests or diseases. A little extra attention in the beginning will pay off handsomely in the long run.
Ultimately, the success of growing figs in bottles hinges on your willingness to experiment and adapt. There’s no one-size-fits-all approach, so don’t be afraid to try different techniques and find what works best for you and your specific growing conditions.
We wholeheartedly encourage you to give this DIY trick a try. It’s a rewarding experience that will not only provide you with delicious figs but also deepen your connection to the natural world. And most importantly, we want to hear about your experiences! Share your successes, your challenges, and your unique variations in the comments below. Let’s build a community of fig-growing enthusiasts and learn from each other’s journeys. Your insights could inspire others to embark on their own fig-growing adventures. So, grab a bottle, some soil, and a fig cutting, and get ready to experience the joy of growing your own figs in a whole new way! Let’s unlock the secrets of successful fig cultivation together!
Frequently Asked Questions (FAQ)
What type of fig varieties are best suited for growing in bottles?
Dwarf or compact fig varieties are generally the best choice for bottle growing. These varieties tend to stay smaller and produce fruit more readily in confined spaces. Some popular options include ‘Little Miss Figgy’, ‘Brown Turkey’ (though it can get large, pruning helps), ‘Celeste’, and ‘Black Mission’. Research the specific needs of each variety to ensure you provide the optimal growing conditions. Consider the climate you live in as well, as some varieties are more cold-hardy than others.
How often should I water my fig tree grown in a bottle?
Watering frequency depends on several factors, including the size of the bottle, the type of soil, the climate, and the stage of growth. As a general rule, water thoroughly when the top inch of soil feels dry to the touch. Avoid overwatering, as this can lead to root rot. During hot, dry weather, you may need to water more frequently. Conversely, during cooler or rainy periods, you can reduce watering. Ensure the bottle has adequate drainage to prevent water from pooling at the bottom. A good way to check is to insert your finger into the soil to feel for moisture.
What type of soil is best for growing figs in bottles?
Figs thrive in well-draining soil that is rich in organic matter. A good mix would be equal parts potting soil, compost, and perlite or vermiculite. The potting soil provides a base for nutrients, the compost adds organic matter and improves drainage, and the perlite or vermiculite enhances aeration and prevents compaction. Avoid using heavy clay soils, as they can retain too much moisture and suffocate the roots. You can also amend the soil with a slow-release fertilizer to provide a steady supply of nutrients.
How much sunlight do fig trees need when grown in bottles?
Fig trees need at least 6-8 hours of direct sunlight per day to thrive. Place your bottle-grown fig tree in a sunny location, such as a south-facing window or balcony. If you live in a particularly hot climate, you may need to provide some afternoon shade to prevent the leaves from scorching. Rotate the bottle periodically to ensure all sides of the tree receive adequate sunlight. If you don’t have access to enough natural sunlight, you can supplement with grow lights.
How do I protect my fig tree from pests and diseases when growing in a bottle?
Regularly inspect your fig tree for signs of pests or diseases. Common pests include aphids, spider mites, and scale. You can control these pests with insecticidal soap or neem oil. Diseases such as fig rust and leaf spot can be prevented by ensuring good air circulation and avoiding overwatering. Remove any infected leaves promptly. You can also use a copper-based fungicide to prevent fungal diseases. Consider using organic pest control methods whenever possible to minimize the impact on the environment.
How do I prune my fig tree when growing in a bottle?
Pruning is essential for maintaining the shape and size of your fig tree and encouraging fruit production. Prune your fig tree in late winter or early spring, before new growth begins. Remove any dead, damaged, or crossing branches. You can also prune to shape the tree and control its size. For bottle-grown figs, focus on maintaining a compact shape and removing any branches that are growing too large or unruly. Pruning also helps to improve air circulation and sunlight penetration, which can reduce the risk of diseases.
How do I fertilize my fig tree when growing in a bottle?
Fig trees benefit from regular fertilization, especially when grown in containers. Use a balanced fertilizer with a ratio of 10-10-10 or 20-20-20. Fertilize your fig tree every 4-6 weeks during the growing season (spring and summer). Reduce or stop fertilizing during the dormant season (fall and winter). You can also use organic fertilizers, such as compost tea or fish emulsion. Be careful not to over-fertilize, as this can damage the roots.
How do I overwinter my fig tree when growing in a bottle?
Fig trees are not cold-hardy and need protection from freezing temperatures. If you live in a cold climate, you will need to overwinter your fig tree indoors. Before the first frost, bring your fig tree indoors and place it in a cool, dark location, such as a garage or basement. Water sparingly during the winter months, only enough to keep the soil from drying out completely. In the spring, gradually acclimate your fig tree to outdoor conditions before placing it back in its sunny location.
How long does it take for a fig tree to produce fruit when grown in a bottle?
The time it takes for a fig tree to produce fruit depends on several factors, including the variety, the age of the tree, and the growing conditions. Some fig varieties can produce fruit in as little as one year, while others may take several years. Bottle growing can sometimes accelerate fruit production by concentrating the root system and providing a more controlled environment. Be patient and provide your fig tree with the best possible care, and you will eventually be rewarded with delicious figs.
Leave a Comment