

Growing Cilantro at Home can seem daunting, but trust me, with a few simple tricks, you’ll be snipping fresh, flavorful leaves in no time! Have you ever bought a bunch of cilantro, used a sprig or two, and watched the rest wilt away in your fridge? I know I have, countless times! That’s why I’m so excited to share these easy DIY hacks that will transform your kitchen into a personal cilantro garden.
Cilantro, also known as coriander in some parts of the world, has a rich history dating back thousands of years. Evidence suggests it was used in ancient Egypt and even mentioned in the Bible! Cultures around the globe have cherished it for its culinary and medicinal properties. But let’s be honest, the real magic happens when you can effortlessly add a burst of fresh cilantro to your tacos, salads, or guacamole.
So, why do you need these DIY tricks? Because store-bought cilantro can be expensive, and let’s face it, often lacks that vibrant, fresh flavor. Plus, growing cilantro at home is incredibly rewarding! Imagine the satisfaction of harvesting your own herbs, knowing exactly where they came from and how they were grown. These simple hacks will help you avoid common pitfalls, extend the life of your cilantro harvest, and ensure you always have a supply of this delicious herb on hand. Let’s get started!
Growing Cilantro at Home: Your DIY Guide for a Bountiful Harvest
Hey garden friends! Cilantro, also known as coriander, is a herb that is either loved or hated. I personally love it! And what’s even better: it’s super easy to grow cilantro at home, whether you have a large garden or just a sunny windowsill. In this article, I’ll show you how to grow your own cilantro with simple materials and a little patience. Let’s get started!
What you need
Before we begin, here is a list of the things you’ll need:
- Cilantro seeds: You can buy them at any garden center or online. Make sure they are intended for planting and not for culinary use (though they would be edible in a pinch).
- Pots or containers: Choose pots with good drainage. Cilantro does not like waterlogging.
- High-quality potting soil: A well-draining potting mix is crucial.
- Water: Cilantro needs regular watering.
- Sunlight: Cilantro needs at least 6 hours of sunlight per day.
- Optional: Liquid fertilizer for herbs.
The Preparation: Preparing Cilantro Seeds
Sometimes cilantro seeds are a bit slow to germinate. To speed up the process, you can prepare them. I always do this, and it works great!
- Crack the seeds: Cilantro seeds are actually small fruits that contain two seeds. To improve germination, you can gently crack the seeds. Place the seeds on a hard surface (e.g., a cutting board) and roll over them lightly with a rolling pin or a glass. Don’t press too hard, you don’t want to crush the seeds!
- Soak: Place the cracked seeds in a bowl of lukewarm water and let them soak for 12-24 hours. This helps to soften the seed coat and speed up germination.
Sowing: Planting Cilantro
Now for the exciting part: sowing!
- Prepare the pots: Fill your pots or containers with potting soil. Leave about 2-3 cm (about 1 inch) of space to the rim.
- Sow the seeds: Sprinkle the soaked cilantro seeds evenly over the soil. Press them down lightly, but don’t cover them too deeply. A thin layer of soil (about 0.5 cm or 1/4 inch) is sufficient.
- Water: Gently water the soil so that it is moist but not soaked.
- Location: Place the pots in a sunny spot. Cilantro needs at least 6 hours of sunlight per day. A south-facing window is ideal.
Care: Caring for Cilantro Properly
Proper care is crucial for your cilantro to grow well.
- Watering: Cilantro needs regular watering. The soil should always be slightly moist, but not soaked. Check the soil moisture daily and water when the top layer is dry.
- Fertilizing: If you wish, you can fertilize your cilantro every few weeks with a liquid fertilizer for herbs. Follow the instructions on the package.
- Pests: Cilantro is relatively resistant to pests. However, if you spot aphids or other pests, you can combat them with a mild insecticide or a mixture of water and dish soap.
- Preventing bolting: Cilantro tends to bolt (flower quickly), especially in high temperatures. When it flowers, it loses its flavor. To delay bolting, you can regularly pinch off the flower buds. Placing the cilantro in a cooler location also helps.
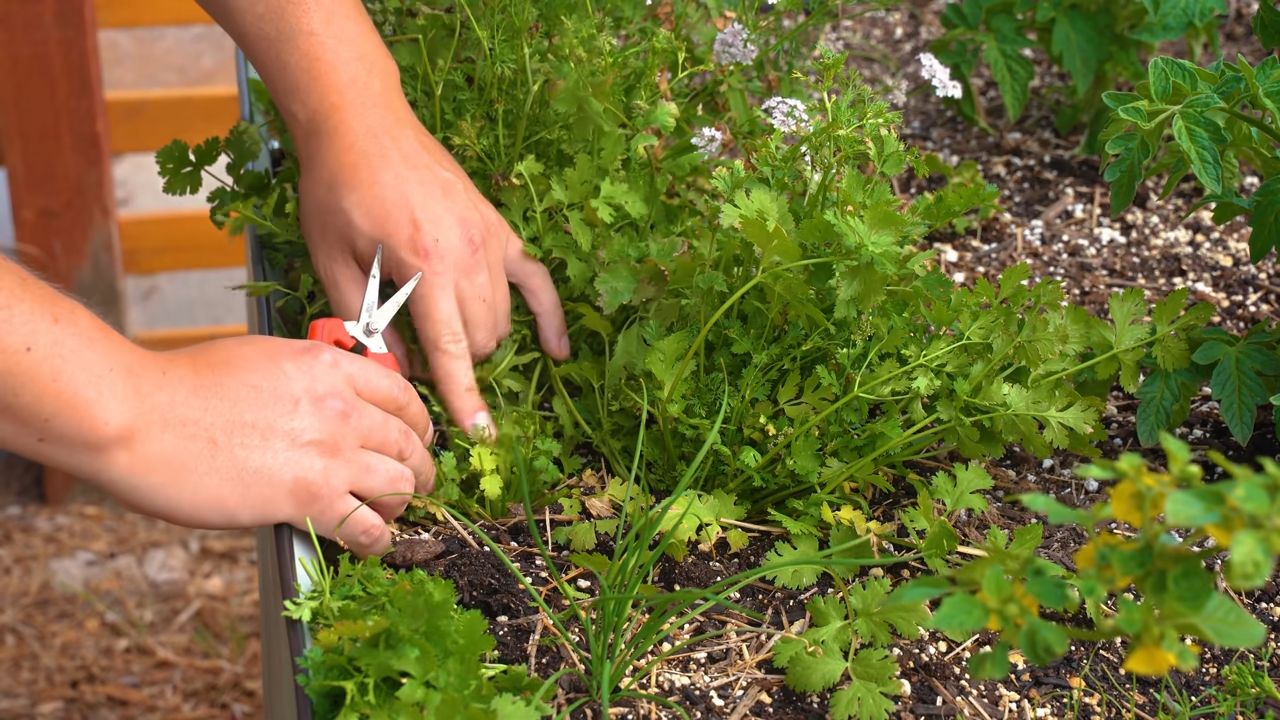
Harvest: Harvesting and Using Cilantro
The time has finally come: the harvest!
- When to harvest: You can harvest cilantro as soon as the plants are about 15 cm (6 inches) tall. This is usually about 4-6 weeks after sowing.
- How to harvest: Cut the leaves with scissors or a knife. Cut the outer leaves first so the inner leaves can continue to grow.
- Use: Fresh cilantro is best. You can use it in salads, salsas, soups, curries, and many other dishes.
- Storage: If you have harvested more cilantro than you can use immediately, you can store it in the refrigerator. Wrap it in a damp paper towel and place it in a plastic bag. It will keep for about a week this way. You can also freeze it.
Challenges and Solutions
Sometimes things don’t go smoothly. Here are some common problems and how you can solve them:
- Cilantro bolts quickly: As mentioned, cilantro tends to bolt, especially in high temperatures. To prevent this, choose a cooler location, regularly remove flower buds, and sow new seeds regularly.
- Poor germination: If your seeds don’t germinate, there could be several reasons. Make sure the seeds are fresh, that you have prepared them correctly (cracking and soaking), and that the soil is moist enough.
- Yellow leaves: Yellow leaves can be a sign of overwatering or a nutrient deficiency. Check your watering and fertilize if necessary.
Growing Cilantro in Winter
You can also grow cilantro in the winter if you keep a few things in mind:
- Additional light: In winter, sunlight is often not sufficient. Use a grow light to provide your cilantro with enough light.
- Warmth: Make sure the cilantro is not kept too cold. A temperature of 15-20°C (59-68°F) is ideal.
- Less watering: In winter, water evaporates more slowly. Water less than in the summer.
Additional Tips for a Bountiful Harvest
Here are a few more tips that can help you achieve a bountiful cilantro harvest:
- Sow regularly: Cilantro grows relatively quickly and then bolts. To always have fresh cilantro, sow new seeds every few weeks.
- Try different varieties: There are different varieties of cilantro. Try out different types to find out which one you like best and which grows best in your climate.
- Mulch: A thin layer of mulch (e.g., straw or wood chips) can help retain moisture in the soil and suppress weeds.
Propagating Cilantro
The easiest way to propagate cilantro is by seed. You can harvest the seeds from your own plants once they are ripe. Let the seeds dry on the plant and then collect them. Store them in a cool, dry place until you want to sow them.
Growing Cilantro in Hydroponics
If you don’t want to use soil, you can also grow cilantro in hydroponics. This is a method where plants grow in water with nutrients. There are various hydroponic systems you can use. Research the different options online or at a specialty store.
Cilantro as a Companion Plant
Cilantro is a good companion plant for many other plants. It can help deter pests and promote the growth of other plants. Good companion plants for cilantro include carrots, tomatoes, and lettuce.
Cilantro and its Health Benefits
Cilantro is not only tasty but also healthy. It contains many vitamins and minerals,

Conclusion
So, there you have it! Growing cilantro at home is not only achievable, but it’s also a game-changer for anyone who loves fresh, vibrant flavors in their cooking. Forget those sad, wilted bunches from the grocery store that cost a fortune and seem to disappear within days. With a little patience and these simple steps, you can have a constant supply of this fragrant herb right at your fingertips.
Why is this DIY trick a must-try? Because it empowers you to control the quality and freshness of your cilantro. You’ll be amazed at the difference in taste between homegrown and store-bought. Plus, it’s incredibly satisfying to nurture a plant from seed to harvest, knowing you’re contributing to your own delicious meals. Imagine the pride you’ll feel garnishing your tacos, soups, and salads with cilantro you grew yourself!
But the benefits don’t stop there. Growing your own cilantro is also a more sustainable and cost-effective option. You’ll reduce your reliance on commercially grown produce, which often travels long distances and contributes to environmental pollution. And over time, you’ll save money by not having to constantly repurchase cilantro from the store.
Ready to take your cilantro game to the next level? Consider these variations and suggestions:
* Succession Planting: Plant new seeds every few weeks to ensure a continuous harvest throughout the growing season. This is especially important since cilantro tends to bolt (go to seed) in hot weather.
* Container Gardening: If you’re short on space, cilantro thrives in containers. Choose a pot that’s at least 6 inches deep and wide to allow for root growth.
* Hydroponics: For a more advanced approach, try growing cilantro hydroponically. This method allows you to control the growing environment and potentially increase yields.
* Companion Planting: Plant cilantro alongside other herbs and vegetables that benefit from its presence. For example, cilantro can repel pests that attack tomatoes and carrots.
* Seed Saving: Allow some of your cilantro plants to bolt and collect the seeds. These seeds can be used to grow new plants, ensuring a continuous supply of cilantro for years to come.
Don’t be intimidated if you’ve never grown herbs before. Growing cilantro at home is a relatively easy and rewarding experience. Even if you encounter a few challenges along the way, the satisfaction of harvesting your own fresh cilantro will make it all worthwhile.
We encourage you to give this DIY trick a try and share your experience with us! Let us know in the comments below how your cilantro is growing, what challenges you’ve faced, and any tips you’ve discovered along the way. We’re excited to hear your success stories and learn from your experiences. Happy growing!
Frequently Asked Questions (FAQ)
Why is my cilantro bolting (going to seed) so quickly?
Bolting is a common issue with cilantro, especially in hot weather. Cilantro is a cool-season herb, and when temperatures rise, it tends to focus on reproduction rather than leaf production. To prevent bolting, try these tips:
* Plant in partial shade: Protect your cilantro from the intense afternoon sun, especially during the hottest months.
* Water regularly: Keep the soil consistently moist, but not waterlogged. Dry soil can stress the plant and trigger bolting.
* Succession planting: Plant new seeds every few weeks to ensure a continuous harvest of fresh leaves.
* Harvest frequently: Regular harvesting encourages the plant to produce more leaves and delays bolting.
* Choose bolt-resistant varieties: Some cilantro varieties are specifically bred to be more resistant to bolting. Look for varieties like ‘Slow Bolt’ or ‘Santo’.
How often should I water my cilantro?
The frequency of watering depends on several factors, including the weather, the type of soil, and the size of the container. In general, you should water your cilantro whenever the top inch of soil feels dry to the touch. During hot, dry weather, you may need to water daily. In cooler, wetter weather, you may only need to water every few days. Be careful not to overwater, as this can lead to root rot.
What kind of soil is best for growing cilantro?
Cilantro prefers well-draining soil that is rich in organic matter. A good potting mix for cilantro should contain a combination of peat moss, perlite, and vermiculite. You can also amend your garden soil with compost or other organic matter to improve its drainage and fertility. The ideal soil pH for cilantro is between 6.0 and 7.0.
How much sunlight does cilantro need?
Cilantro needs at least 6 hours of sunlight per day to thrive. However, in hot climates, it’s best to provide some afternoon shade to prevent bolting. If you’re growing cilantro indoors, place it near a sunny window or use a grow light.
When is the best time to harvest cilantro?
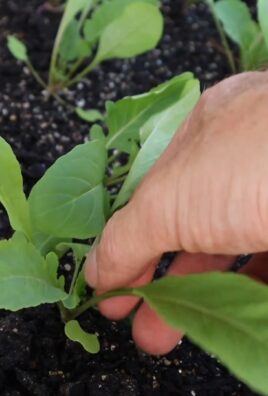
You can start harvesting cilantro leaves as soon as the plant has several sets of true leaves. To harvest, simply snip off the leaves with scissors or pruning shears. Avoid cutting more than one-third of the plant at a time, as this can stress the plant and slow down its growth. Harvest frequently to encourage the plant to produce more leaves and delay bolting.
Can I grow cilantro indoors?
Yes, you can grow cilantro indoors, but it requires some extra care. Make sure to provide plenty of sunlight or use a grow light. Choose a pot that’s at least 6 inches deep and wide, and use a well-draining potting mix. Water regularly and fertilize every few weeks with a balanced liquid fertilizer.
What are some common pests and diseases that affect cilantro?
Cilantro is generally resistant to pests and diseases, but it can be susceptible to aphids, spider mites, and fungal diseases like powdery mildew. To prevent these problems, keep your plants healthy by providing adequate sunlight, water, and nutrients. Inspect your plants regularly for signs of pests or diseases, and take action promptly if you notice any problems. You can use insecticidal soap or neem oil to control aphids and spider mites, and a fungicide to treat powdery mildew.
Can I eat the cilantro flowers and seeds?
Yes, both the cilantro flowers and seeds are edible. The flowers have a mild cilantro flavor and can be used as a garnish or added to salads. The seeds, also known as coriander, have a different flavor than the leaves and are commonly used as a spice in Indian and Mexican cuisine.
How do I save cilantro seeds for future planting?
To save cilantro seeds, allow some of your plants to bolt and go to seed. Once the seed heads have dried and turned brown, cut them off and place them in a paper bag. Allow the seeds to dry completely for a few weeks, then separate them from the seed heads. Store the seeds in an airtight container in a cool, dry place.
Is growing cilantro at home really worth the effort?
Absolutely! While it requires a little bit of attention, the reward of having fresh, flavorful cilantro readily available is well worth the effort. Plus, it’s a fun and rewarding gardening project that anyone can enjoy. Give it a try, and you’ll be amazed at how easy and satisfying it is to grow your own cilantro at home.

Leave a Comment