

Growing Chives Kitchen Method: Unlock the secrets to a flourishing herb garden right on your windowsill! Have you ever wished you could snip fresh, flavorful chives whenever you needed them, without a trip to the grocery store? I know I have! This simple, yet incredibly effective, DIY guide will show you exactly how to bring the vibrant taste of homegrown chives into your kitchen, no matter the season.
Chives, with their delicate oniony flavor, have been a culinary staple for centuries. Originating in Asia, they’ve graced dishes from ancient Rome to modern-day kitchens. Their versatility and ease of cultivation have made them a beloved herb worldwide. But let’s face it, sometimes life gets in the way, and maintaining an outdoor garden isn’t always feasible. That’s where this kitchen method comes in!
Imagine adding a sprinkle of freshly chopped chives to your morning omelet, or garnishing a creamy potato soup with their bright green goodness. The possibilities are endless! This growing chives kitchen method is perfect for apartment dwellers, busy professionals, or anyone who simply wants a convenient and sustainable source of fresh herbs. I’m going to show you how to bypass the complexities of traditional gardening and enjoy a continuous supply of chives with minimal effort. Get ready to transform your kitchen into a mini herb haven!

Growing Chives Indoors: A Kitchen Counter Herb Garden
Hey there, fellow plant enthusiasts! Ever wished you could snip fresh chives right from your kitchen counter? Well, I’m here to tell you it’s totally doable, and surprisingly easy! I’ve been growing chives indoors for years, and it’s a game-changer for adding that fresh, oniony zing to my cooking. Forget those sad, wilted chives from the grocery store – let’s get you set up with your own thriving indoor chive patch!
What You’ll Need
Before we dive in, let’s gather our supplies. This is a pretty low-key project, so you probably have most of this stuff already.
* **Chive Seeds or a Chive Plant:** You can start from seeds (which is more budget-friendly) or buy a small chive plant from a garden center. I’ve done both, and both work great! If you’re impatient like me, the plant will give you a head start.
* **A Pot with Drainage Holes:** This is crucial! Chives don’t like soggy feet. Choose a pot that’s at least 6 inches in diameter and 6 inches deep. I prefer terracotta pots because they breathe well, but plastic works too.
* **Potting Mix:** Don’t use garden soil! It’s too heavy and doesn’t drain well. Opt for a good quality potting mix specifically designed for containers.
* **Watering Can or Spray Bottle:** For gentle watering.
* **A Sunny Spot:** Chives need at least 6 hours of sunlight per day. A south-facing windowsill is ideal. If you don’t have enough natural light, you can supplement with a grow light.
* **Optional: Fertilizer:** A balanced liquid fertilizer can help your chives thrive, but it’s not essential.
Starting from Seeds: The Patient Gardener’s Route
If you’re starting from seeds, here’s how to do it:
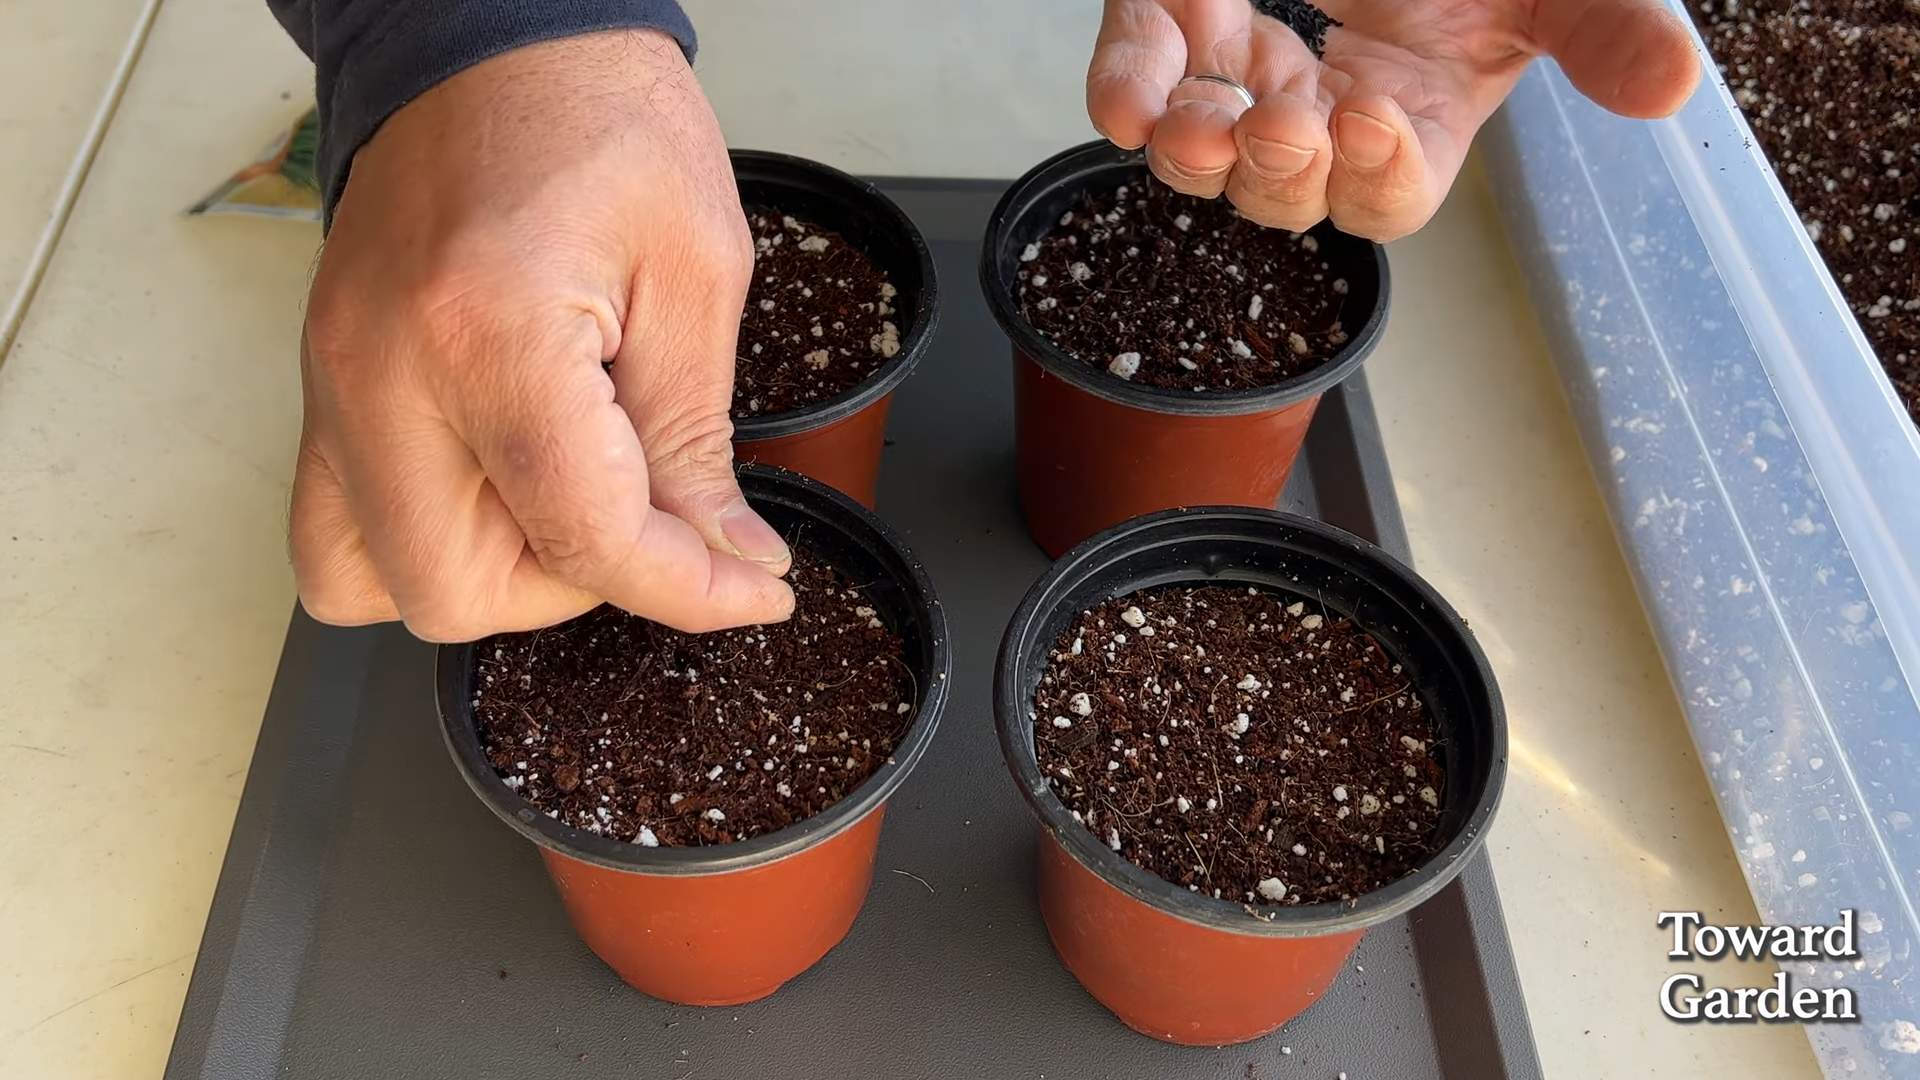
1. **Prepare the Pot:** Fill your pot with potting mix, leaving about an inch of space at the top. Gently pat down the soil.
2. **Sow the Seeds:** Sprinkle the chive seeds evenly over the surface of the soil. You don’t need to bury them too deep – just lightly press them into the soil.
3. **Cover with Soil:** Sprinkle a very thin layer of potting mix over the seeds, just enough to cover them.
4. **Water Gently:** Use a spray bottle to mist the soil thoroughly. You want to moisten the soil without disturbing the seeds.
5. **Cover with Plastic Wrap (Optional):** This helps to retain moisture and speed up germination. Just make sure to remove the plastic wrap once the seedlings emerge.
6. **Place in a Sunny Spot:** Put the pot in a warm, sunny location.
7. **Keep the Soil Moist:** Water regularly to keep the soil consistently moist, but not soggy.
8. **Wait Patiently:** Chive seeds can take anywhere from 7 to 21 days to germinate, so be patient!
9. **Thin the Seedlings (Optional):** Once the seedlings are a few inches tall, you can thin them out if they’re too crowded. This will give them more room to grow. I usually just leave them be unless they are really packed together.
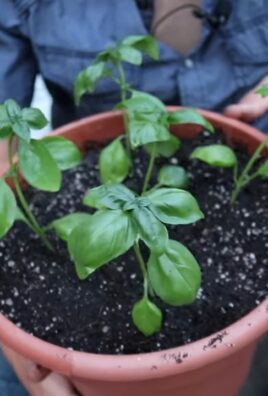
Transplanting a Chive Plant: The Instant Gratification Method
If you’re starting with a chive plant, the process is even simpler:
1. **Prepare the Pot:** Fill your pot with potting mix, leaving about an inch of space at the top.
2. **Remove the Plant from its Container:** Gently squeeze the sides of the container to loosen the plant. Carefully remove the plant, trying not to disturb the roots too much.
3. **Loosen the Roots:** Gently tease apart the roots with your fingers. This will encourage them to spread out and establish themselves in the new pot.
4. **Plant the Chives:** Place the chive plant in the center of the pot. The top of the root ball should be level with the surface of the soil.
5. **Fill with Soil:** Fill in the space around the plant with potting mix. Gently pat down the soil.
6. **Water Thoroughly:** Water the plant thoroughly until water drains out of the drainage holes.
7. **Place in a Sunny Spot:** Put the pot in a warm, sunny location.
Caring for Your Indoor Chives: Keeping Them Happy and Healthy
Now that your chives are planted, here’s how to keep them thriving:
1. **Watering:** Water your chives regularly, whenever the top inch of soil feels dry to the touch. Be careful not to overwater, as this can lead to root rot. I usually water mine every few days, but it depends on the temperature and humidity in my house.
2. **Sunlight:** Chives need at least 6 hours of sunlight per day. If you don’t have enough natural light, you can supplement with a grow light. I use a simple LED grow light that I got online, and it works wonders.
3. **Fertilizing (Optional):** If you want to give your chives a boost, you can fertilize them every few weeks with a balanced liquid fertilizer. Just follow the instructions on the fertilizer label. I usually use a diluted solution of fish emulsion.
4. **Pruning:** Regular pruning is essential for keeping your chives healthy and productive. Snip off the tips of the leaves regularly to encourage new growth. This also prevents the chives from flowering, which can make them taste bitter.
5. **Repotting (Eventually):** Over time, your chives may outgrow their pot. If you notice that the roots are circling around the bottom of the pot, it’s time to repot them into a larger container. I usually repot mine every year or two.
Harvesting Your Chives: The Best Part!
Harvesting your chives is the most rewarding part of the process!
1. **Wait Until They’re Big Enough:** Don’t start harvesting until your chives are at least 6 inches tall.
2. **Use Scissors or Kitchen Shears:** Use sharp scissors or kitchen shears to snip off the chives near the base of the plant.
3. **Harvest Regularly:** The more you harvest, the more your chives will grow! I usually harvest mine a few times a week.
4. **Use Them Fresh:** Freshly harvested chives have the best flavor. Add them to salads, soups, omelets, dips, or anything else that needs a little oniony kick.
5. **Store Them Properly:** If you’re not going to use your chives right away, you can store them in the refrigerator for a few days. Wrap them in a damp paper towel and place them in a plastic bag. You can also freeze them for longer storage. Chop them up and freeze them in ice cube trays with a little water or olive oil.
Troubleshooting: Common Chive Problems and How to Fix Them
Even with the best care, you might encounter a few problems along the way. Here are some common issues and how to fix them:
* **Yellowing Leaves:** This could be a sign of overwatering, underwatering, or nutrient deficiency. Check the soil moisture and adjust your watering accordingly. If the soil is consistently moist, let it dry out a bit before watering again. If the soil is dry, water more frequently. You can also try fertilizing your chives with a balanced liquid fertilizer.
* **Leggy Growth:** This is usually caused by insufficient sunlight. Move your chives to a sunnier location or supplement with a grow light.
* **Pests:** Chives are generally pest-resistant, but they can occasionally be attacked by aphids or spider mites. If you notice any pests, try spraying them with a strong stream of water or using an insecticidal soap. I’ve found that a simple solution of water and a few drops of dish soap works well too.
* **Slow Growth:** This could be due to a number of factors, including insufficient sunlight, poor soil, or lack of nutrients. Make sure your chives are getting enough sunlight, and consider repotting them into fresh potting mix. You can also try fertilizing them with a balanced liquid fertilizer.
Enjoy Your Fresh, Homegrown Chives!
And there you have it! Growing chives indoors is a simple and rewarding way to add fresh flavor to your cooking. With a little bit of care, you can enjoy a continuous supply of chives right from your kitchen counter. Happy gardening! I hope you found this guide helpful, and I’m excited for you to start your own indoor chive adventure!
Conclusion
So, there you have it! A simple, effective, and incredibly rewarding method for growing chives in your kitchen. Forget those sad, wilted bunches from the grocery store. Imagine snipping fresh, vibrant chives directly from your windowsill whenever you need them. The difference in flavor is truly remarkable – a burst of oniony goodness that elevates everything from scrambled eggs to baked potatoes.
This DIY trick isn’t just about convenience; it’s about connecting with your food and experiencing the joy of nurturing something from a humble bulb into a thriving herb. It’s a small step towards self-sufficiency and a fantastic way to add a touch of green to your indoor space, especially during those long winter months when access to fresh herbs is limited.
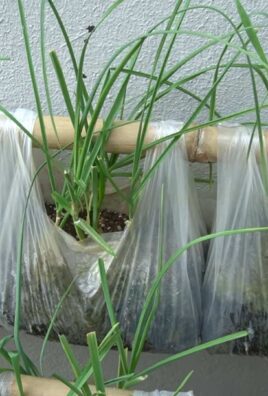
But the beauty of this method lies in its adaptability. While we’ve focused on chives, you can experiment with other members of the allium family, such as scallions or garlic chives. The process is largely the same, and you might discover a new favorite herb to cultivate indoors. Consider using different types of containers too. While a simple pot works perfectly, you could repurpose old jars or even create a mini herb garden in a larger planter.
For an extra boost, try adding a diluted liquid fertilizer every few weeks. This will provide your chives with the nutrients they need to flourish and produce even more flavorful leaves. Remember to rotate the pot regularly to ensure even growth and prevent the chives from leaning towards the light source.
We wholeheartedly encourage you to give this DIY trick a try. It’s a project that’s accessible to everyone, regardless of their gardening experience. The minimal effort required yields maximum flavor and satisfaction. Plus, it’s a fantastic way to introduce children to the wonders of gardening and teach them about where their food comes from.
Don’t be afraid to experiment and adapt the method to suit your own needs and preferences. The most important thing is to have fun and enjoy the process. Once you’ve successfully grown your own chives, we’d love to hear about your experience! Share your photos, tips, and variations in the comments below. Let’s create a community of indoor herb growers and inspire others to embrace the joy of fresh, homegrown flavor. What are you waiting for? Get those chives growing!
Frequently Asked Questions (FAQ)
What kind of chives are best for growing indoors?
While you can technically grow any type of chives indoors, common chives (Allium schoenoprasum) are generally the easiest and most readily available. They adapt well to indoor conditions and produce a consistent supply of flavorful leaves. Garlic chives (Allium tuberosum) are another option, offering a slightly milder, garlicky flavor. Experiment to see which variety you prefer!
How much sunlight do indoor chives need?
Chives thrive in bright, indirect sunlight. Aim for at least 6 hours of sunlight per day. A south-facing windowsill is ideal, but an east- or west-facing window can also work. If you don’t have access to enough natural light, you can supplement with a grow light. Position the grow light a few inches above the chives and keep it on for 12-14 hours per day.
What kind of soil should I use for growing chives indoors?
Use a well-draining potting mix. Avoid using garden soil, as it can become compacted and doesn’t drain well in containers. A mix of peat moss, perlite, and vermiculite is a good option. You can also find pre-made potting mixes specifically formulated for herbs.
How often should I water my indoor chives?
Water your chives when the top inch of soil feels dry to the touch. Avoid overwatering, as this can lead to root rot. Ensure that the pot has drainage holes to allow excess water to escape. During the warmer months, you may need to water more frequently.
How do I harvest chives?
Harvest chives by snipping the leaves near the base of the plant, about an inch above the soil line. This encourages new growth. Avoid cutting off more than one-third of the plant at a time. You can harvest chives regularly throughout the growing season.
Why are my chives turning yellow or brown?
Yellowing or browning leaves can be caused by several factors, including overwatering, underwatering, lack of sunlight, or nutrient deficiencies. Check the soil moisture and adjust your watering schedule accordingly. Ensure that your chives are receiving enough sunlight. If you suspect a nutrient deficiency, try fertilizing with a diluted liquid fertilizer.
Can I grow chives from seed indoors?
Yes, you can grow chives from seed indoors. Start the seeds in a seed-starting tray or small pots filled with seed-starting mix. Keep the soil moist and warm. Once the seedlings have developed a few sets of true leaves, you can transplant them into larger pots.
How long will my indoor chives last?
With proper care, your indoor chives can last for several years. However, they may become less productive over time. You can propagate new plants by dividing the clumps of chives. Simply dig up the plant, separate the clumps, and replant them in separate pots.
Are there any pests or diseases that affect indoor chives?
Indoor chives are generally resistant to pests and diseases. However, they can occasionally be affected by aphids or spider mites. If you notice any pests, try spraying the plants with a strong stream of water or using an insecticidal soap.
Can I freeze chives for later use?
Yes, you can freeze chives for later use. Wash and dry the chives thoroughly. Chop them into small pieces and place them in a freezer bag or container. Remove as much air as possible before sealing. Frozen chives will retain their flavor for several months. You can also dry chives, but they will lose some of their flavor in the process.
My chives are flowering. Should I cut off the flowers?
While chive flowers are edible and have a mild onion flavor, allowing the plant to flower can reduce leaf production. If you want to maximize leaf production, it’s best to cut off the flower buds before they open. However, if you enjoy the flowers, you can leave them on the plant.
Can I use tap water to water my chives?
While tap water is generally safe to use, it can contain chlorine and other chemicals that can harm plants. If possible, use filtered water or rainwater to water your chives. Let tap water sit out for 24 hours before using it to allow the chlorine to evaporate.

Leave a Comment