

Growing Chives Indoors can be surprisingly simple and rewarding, even if you don’t have a sprawling garden! Imagine snipping fresh, flavorful chives right from your kitchen windowsill to add a zesty kick to your omelets, salads, or baked potatoes. No more last-minute grocery store runs or settling for dried herbs that lack that vibrant, fresh taste.
For centuries, chives have been a culinary staple, adding a delicate oniony flavor to dishes across various cultures. From ancient Roman gardens to medieval European kitchens, these versatile herbs have been cherished for their taste and ease of cultivation. But you don’t need a green thumb or acres of land to enjoy them.
In today’s busy world, finding time for traditional gardening can be a challenge. That’s where the beauty of growing chives indoors comes in! It’s a fantastic way to bring a touch of nature into your home, even if you’re short on space or time. Plus, it’s incredibly satisfying to nurture your own food source. I’m excited to share some simple DIY tricks and hacks that will have you successfully growing chives indoors in no time. Get ready to enjoy a continuous supply of fresh, flavorful chives right at your fingertips!
Growing Chives Indoors: Your Guide to Fresh Herbs Straight from the Windowsill
Hey herb friend! Do you want to always have fresh chives on hand, whether it’s summer or winter? Then you’ve come to the right place! I’ll show you how you can easily grow chives in your apartment. It’s easier than you think and brings a touch of spring into your kitchen.
What you need: Your Shopping List for Chive Success
Before we get started, here’s a list of everything you’ll need for your chive project:
- Chive seeds or a chive plant: You can either start with seeds or get a small plant from a garden center. Both work great!
- A pot: Choose a pot with a diameter of at least 15 cm (6 inches). This gives the roots enough space.
- High-quality potting soil: It’s best to use organic herb soil. It is nutrient-rich and ensures healthy growth.
- Drainage material: Expanded clay, gravel, or clay shards at the bottom of the pot prevent waterlogging.
- A watering can or spray bottle: For watering your chive plant.
- A sunny location: Chives love light! A south-facing windowsill is ideal.
- Optional: A mini-greenhouse or a clear plastic bag to speed up germination.
- Optional: Liquid fertilizer for herbs to promote growth.
Growing Chives from Seed: Step-by-Step to Your Own Herb Garden
If you’ve decided to start with seeds, here’s a detailed guide:
- Preparing the pot: First, fill the pot with a layer of drainage material. This prevents the roots from sitting in water. On top of that, add the potting soil. Leave about 2-3 cm (about 1 inch) of space to the rim of the pot.
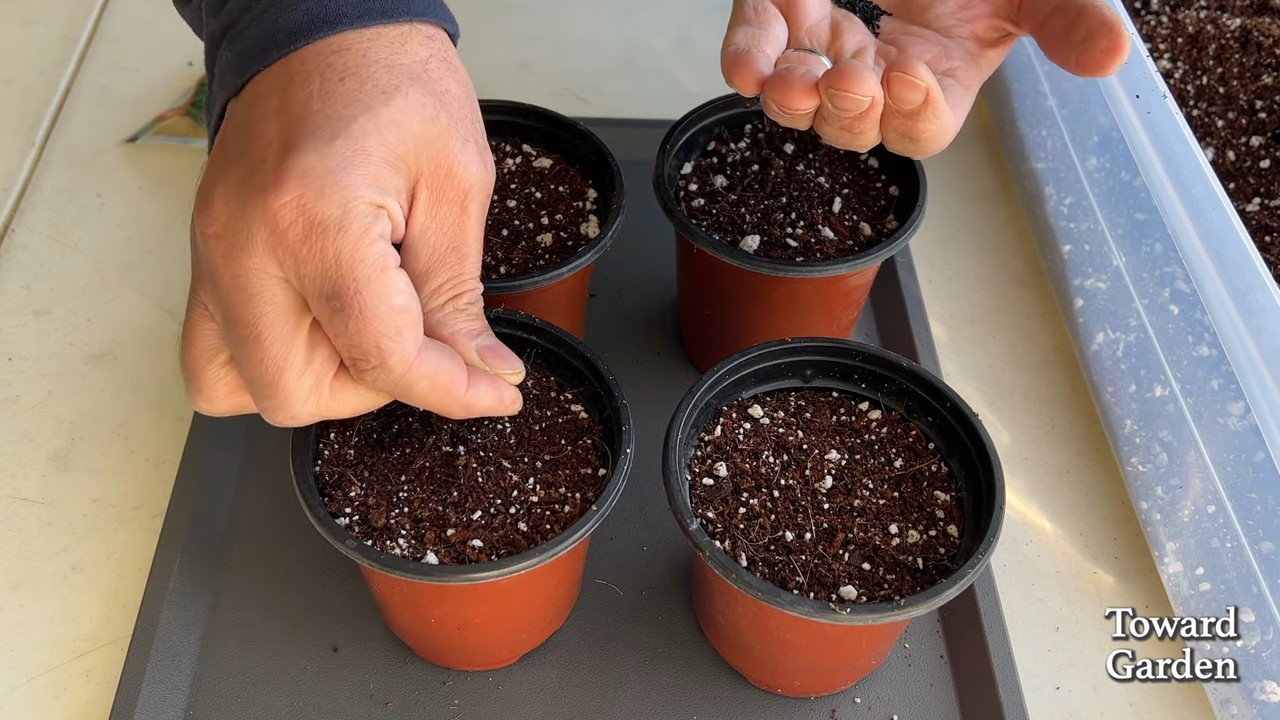
- Sowing the seeds: Distribute the chive seeds evenly on the soil. Press them down lightly, but don’t cover them too thickly with soil. Chives are light germinators, which means they need light to germinate. A thin layer of soil (about 0.5 cm or 1/4 inch) is perfectly sufficient.
- Watering: Gently moisten the soil with a spray bottle. The soil should be damp, but not wet. Avoid washing the seeds away.
- The right location: Place the pot in a warm and bright place. A south-facing windowsill is perfect.
- Speeding up germination (optional): To speed up germination, you can cover the pot with a mini-greenhouse or a clear plastic bag. Make sure the plastic does not touch the soil. Ventilate the greenhouse or bag daily to prevent mold growth.
- Patience is required: Germination usually takes 10-14 days. Keep the soil moist during this time.
- Pricking out (if necessary): If the seedlings are very close together, you can prick them out, i.e., thin them. Carefully lift the small plants out of the soil with a pricking tool or a spoon and place them in separate pots or in other spots in the same pot. Be careful not to damage the roots.
Planting Chives: The Easy Way to Fresh Greens
If you have opted for a pre-grown chive plant, things are even simpler:
- Preparing the pot: Just as with sowing seeds, fill the pot with a layer of drainage material and potting soil.
- Removing the plant from the old pot: Gently squeeze the pot to loosen the plant. Carefully pull the plant out by the base of the stems.
- Planting: Place the chive plant in the new pot. The top of the root ball should be level with the soil surface.
- Filling up: Fill the pot with soil and press it down lightly.
- Watering: Water the plant thoroughly.
- The right location: Place the pot in a bright and sunny location.
The Right Care: How to Keep Your Chives Fit and Vital
To ensure your chives thrive, proper care is crucial:
- Watering: Chives like it moist, but not wet. Water regularly, but avoid waterlogging. The soil should always be slightly moist. It’s best to test with your finger if the soil is dry before you water.
- Light: Chives need a lot of light. A south-facing windowsill is ideal. If your chives don’t get enough light, the stalks will become pale and thin. In this case, you can support them with a grow light.
- Fertilizing: During the growing season (spring and summer), you should fertilize your chives every two to four weeks with a liquid fertilizer for herbs. This ensures strong growth and a rich harvest.
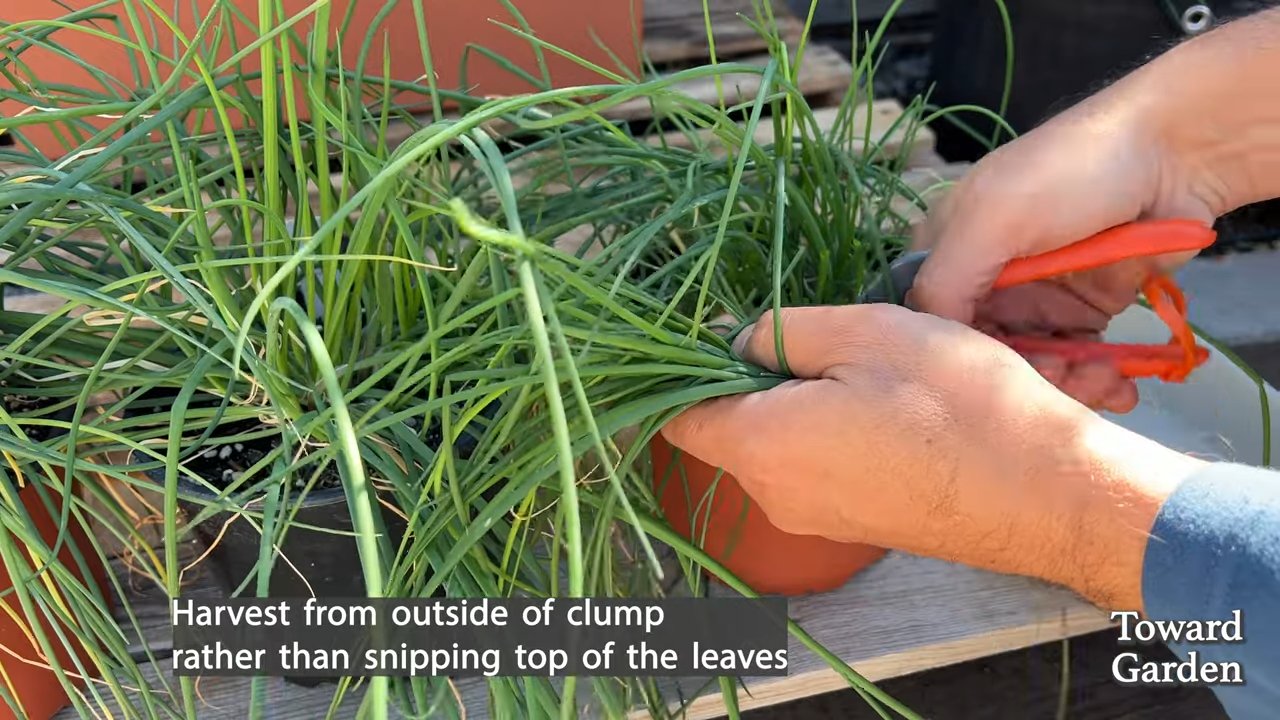
- Cutting: Regular cutting promotes growth. Cut the stalks about 2-3 cm (1 inch) above the soil. This way, the chives will repeatedly grow back. You can harvest the chives as needed.
- Removing flowers: If your chives bloom, you should remove the flowers. Flowering costs the plant energy and reduces the harvest. The flowers can also affect the taste of the chives.
- Repotting: If the pot becomes too small, you should repot your chives into a larger one. This is usually necessary every one to two years.
Overwintering: How to Get Your Chives Through the Winter
Chives are hardy, but in a pot, they need some protection:
- Pruning back: Cut the chives back to just above the soil in the fall.
- Cool location: Place the pot in a cool, but frost-free place. A basement or a garage is ideal.
- Less water: Water the chives sparingly in winter. The soil should not dry out, but it shouldn’t be too wet either.
- Spring: In the spring, when temperatures rise, you can move the chives back to a brighter and warmer location.
Common Problems and Solutions: What to Do When Chives Aren’t Cooperating
Problems can also occur when growing chives. Here are some common problems and their solutions:
- Yellow leaves: Yellow leaves can be a sign of too much or too little water. Check the soil’s moisture and adjust watering accordingly. Yellow leaves can also indicate a nutrient deficiency. In this case, you should fertilize your chives.
- Mold: Mold growth can be caused by high humidity. Ensure good ventilation and avoid waterlogging.
- Pests: Chives can be infested by aphids or other pests. Spray the plant with a natural insecticide or a soap solution.
- Slow growth: Slow growth can indicate too little light or nutrients. Move the chives to a brighter location and fertilize them regularly.
Chives in the Kitchen: Versatile and Delicious
Chives are a versatile herb that can be used in many ways in the kitchen:
Frozen: You can also freeze chives. Chop them finely and freeze them in small portions.
Fresh: Chives taste best freshly chopped over salads, soups, egg dishes, or in dips and savory spreads.
Conclusion
So, there you have it! Growing chives indoors is not only achievable, it’s downright rewarding. Imagine the convenience of snipping fresh, flavorful chives right from your kitchen windowsill whenever a recipe calls for them. No more last-minute trips to the grocery store or settling for dried herbs that lack the vibrant punch of fresh chives. This simple DIY project brings a touch of green into your home and elevates your culinary creations.
Why is this a must-try? Because it’s easy, cost-effective, and incredibly satisfying. You don’t need a green thumb or extensive gardening experience to succeed. With just a few basic supplies and a little bit of patience, you can have a thriving chive plant providing you with fresh herbs for months to come. Think of the possibilities! Sprinkle them on baked potatoes, stir them into scrambled eggs, garnish your soups and salads, or use them as a flavorful addition to dips and sauces. The possibilities are endless.
Beyond the basic method outlined, there are several variations you can explore. For instance, if you’re feeling adventurous, try growing different varieties of chives, such as garlic chives, which offer a milder garlic flavor. You can also experiment with different types of containers, from repurposed yogurt cups to decorative ceramic pots, to find what works best for your space and aesthetic. Consider using a self-watering planter to minimize the risk of over or under-watering, especially if you tend to forget about your plants. Another option is to supplement with a grow light, particularly during the darker winter months, to ensure your chives receive adequate light for optimal growth. You can even try propagating chives from existing plants by dividing the clumps and replanting them in separate containers. This is a great way to expand your chive collection without spending any extra money.
We wholeheartedly encourage you to give this DIY trick a try. It’s a small investment of time and effort that yields a significant return in terms of fresh herbs and culinary enjoyment. Plus, it’s a great way to add a touch of nature to your indoor environment. Once you’ve successfully grown your own chives indoors, we’d love to hear about your experience! Share your tips, tricks, and photos in the comments section below. Let us know what worked well for you, what challenges you encountered, and how you’re using your homegrown chives in your cooking. Your insights can help other readers succeed in their own indoor chive-growing endeavors. So, grab your supplies, get your hands dirty, and start growing your own fresh chives today! You won’t regret it. Embrace the joy of fresh herbs and elevate your culinary creations with the simple pleasure of homegrown chives.
FAQ
Frequently Asked Questions About Growing Chives Indoors
1. What kind of soil should I use for growing chives indoors?
The best soil for growing chives indoors is a well-draining potting mix. Avoid using garden soil, as it can be too heavy and compact, leading to drainage problems and root rot. Look for a potting mix that contains ingredients like peat moss, perlite, and vermiculite, which will help to retain moisture while also providing good aeration. You can also amend your potting mix with compost to add extra nutrients and improve drainage. A slightly acidic to neutral pH (around 6.0 to 7.0) is ideal for chives.
2. How much sunlight do chives need when grown indoors?
Chives need at least 6 hours of direct sunlight per day to thrive. If you don’t have a sunny windowsill, you can supplement with a grow light. Place the grow light about 6-12 inches above the plants and keep it on for 12-14 hours per day. Rotate the chive plant regularly to ensure that all sides receive adequate light. Insufficient light can lead to leggy growth and a weaker flavor.
3. How often should I water my indoor chives?
Water your chives when the top inch of soil feels dry to the touch. Avoid overwatering, as this can lead to root rot. Ensure that the pot has drainage holes to allow excess water to escape. During the warmer months, you may need to water more frequently than during the cooler months. Check the soil moisture regularly and adjust your watering schedule accordingly. A good rule of thumb is to water thoroughly until water drains out of the bottom of the pot.
4. How do I harvest chives from my indoor plant?
Harvest chives by snipping the leaves near the base of the plant with scissors or kitchen shears. Avoid cutting off more than one-third of the plant at a time, as this can stress the plant and slow down growth. Regular harvesting encourages new growth and keeps the plant productive. You can harvest chives as needed, whenever you need fresh herbs for your cooking.
5. Can I grow chives from seed indoors?
Yes, you can grow chives from seed indoors. Start the seeds in a seed-starting tray or small pots filled with seed-starting mix. Keep the soil moist and warm (around 70-75°F) until the seeds germinate. Once the seedlings have developed a few sets of true leaves, transplant them into larger pots filled with potting mix. Be patient, as it can take several weeks for chives to grow from seed.
6. How do I fertilize my indoor chives?
Fertilize your chives every 2-4 weeks with a balanced liquid fertilizer diluted to half strength. Avoid over-fertilizing, as this can burn the roots. Look for a fertilizer that is specifically formulated for herbs or vegetables. You can also use a slow-release fertilizer at the time of planting.
7. What are some common problems when growing chives indoors?
Some common problems when growing chives indoors include overwatering, underwatering, insufficient light, and pests. Overwatering can lead to root rot, while underwatering can cause the leaves to wilt and turn brown. Insufficient light can result in leggy growth and a weaker flavor. Pests such as aphids and spider mites can also infest chives. Inspect your plants regularly for signs of pests and take appropriate action if necessary.
8. Can I move my indoor chives plant outdoors during the summer?
Yes, you can move your indoor chives plant outdoors during the summer, but be sure to acclimate it gradually to the outdoor conditions. Start by placing the plant in a shady spot for a few hours each day, gradually increasing the amount of sunlight it receives over the course of a week or two. Protect the plant from strong winds and extreme temperatures. Bring the plant back indoors before the first frost.
9. How long will my indoor chives plant last?
With proper care, your indoor chives plant can last for several years. Chives are perennial plants, which means they can live for more than two years. To keep your chives plant healthy and productive, divide the clumps every few years and replant them in fresh potting mix.
10. My chives are flowering. Should I cut off the flowers?
While chive flowers are edible and attractive, allowing the plant to flower can reduce leaf production. If you want to maximize leaf production, it’s best to cut off the flower buds before they open. However, if you enjoy the flowers, you can leave them on the plant. Just be aware that the leaves may become slightly tougher and less flavorful after flowering.

Leave a Comment