

Growing Celery in Containers: Unlock the secrets to fresh, crisp celery right on your patio! Imagine stepping outside and harvesting your own celery stalks, ready to be chopped into salads, dipped in peanut butter, or blended into a healthy smoothie. No more wilted, store-bought celery – just vibrant, homegrown goodness.
For centuries, celery has been valued not only for its culinary uses but also for its medicinal properties. From ancient Greece, where it was used to crown victors in athletic games, to its widespread cultivation in European gardens during the Middle Ages, celery has a rich and fascinating history. But let’s be honest, traditionally growing celery can be a bit of a challenge, often requiring a lot of space and specific soil conditions. That’s where container gardening comes to the rescue!
In today’s busy world, many of us don’t have the luxury of sprawling gardens. Apartment living, limited yard space, or simply a desire for a more manageable gardening experience are all valid reasons to explore container gardening. That’s why I’m so excited to share these simple yet effective DIY tricks and hacks for growing celery in containers. You’ll learn everything you need to know, from choosing the right container and soil to providing the perfect amount of sunlight and water. Get ready to enjoy the satisfaction of harvesting your own delicious celery, no matter how small your space!
Growing Celery in Containers: A Beginner’s Guide
Hey there, fellow gardening enthusiasts! Ever thought about growing your own celery? It’s surprisingly easy, even if you don’t have a sprawling garden. I’m going to walk you through how to cultivate crisp, delicious celery right in containers on your patio or balcony. Get ready to enjoy fresh celery sticks straight from your own little garden!
Choosing the Right Celery Variety
Before we dive into the nitty-gritty, let’s talk celery varieties. Not all celery is created equal, and some are better suited for container growing than others.
* ‘Utah’ varieties: These are generally reliable and widely available. They tend to be more compact, making them ideal for containers.
* ‘Golden Self-Blanching’: This heirloom variety is known for its milder flavor and doesn’t require blanching (more on that later!).
* ‘Tango’: A newer variety that’s disease-resistant and produces crisp, flavorful stalks.
I personally prefer ‘Utah Improved’ because it’s readily available at most garden centers and consistently performs well for me.
Preparing Your Celery Container
The right container and soil are crucial for happy celery plants.
* Container Size: Celery needs room to grow. Choose a container that’s at least 12 inches deep and 12 inches wide. A larger container (14-16 inches) is even better, especially if you plan to grow multiple plants.
* Drainage: Make sure your container has drainage holes! Celery loves moisture, but soggy roots are a no-no.
* Potting Mix: Use a high-quality potting mix that’s well-draining but also retains moisture. I like to mix equal parts of potting soil, compost, and perlite. The compost provides nutrients, while the perlite improves drainage.
Starting Celery from Seed (or Transplants!)
You have two options here: starting from seed or buying transplants. Starting from seed takes longer, but it’s more economical. Transplants give you a head start.
Starting from Seed (The Patient Gardener’s Route)
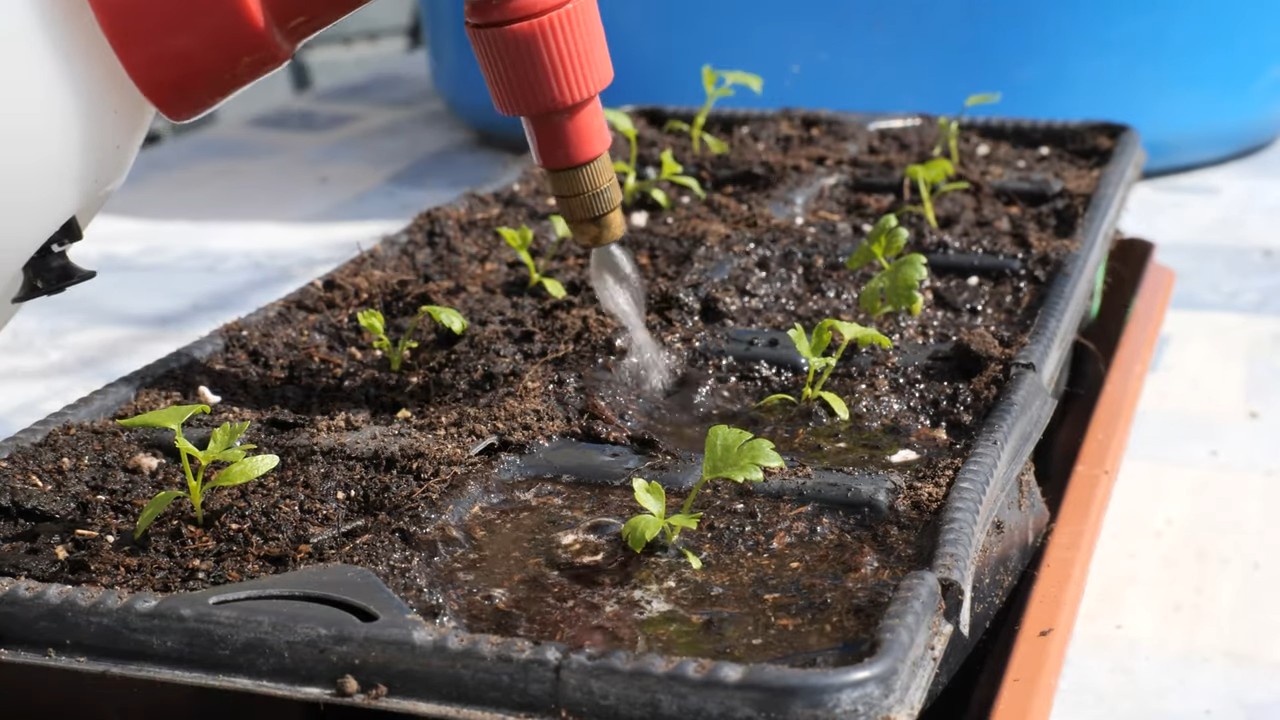
1. Sowing Seeds: Celery seeds are tiny and need light to germinate. Sprinkle them on the surface of a seed-starting mix in a tray or small pots. Gently press them down, but don’t bury them.
2. Providing Light and Moisture: Cover the tray with a clear plastic lid or plastic wrap to create a humid environment. Place it in a warm location (around 70-75°F) with bright, indirect light. A heat mat can be helpful.
3. Germination: Celery seeds can be slow to germinate, taking anywhere from 14 to 21 days. Keep the soil consistently moist by misting it regularly.
4. Thinning Seedlings: Once the seedlings have a few true leaves, thin them out, leaving the strongest seedlings about an inch apart.
5. Transplanting Seedlings: When the seedlings are about 3-4 inches tall, they’re ready to be transplanted into individual pots. Harden them off by gradually exposing them to outdoor conditions for a week before transplanting them into your container.
Using Transplants (The Quick Start)
1. Choosing Transplants: Select healthy-looking transplants with sturdy stems and vibrant green leaves. Avoid plants that are leggy or have yellowing leaves.
2. Preparing the Planting Hole: Dig a hole in your container that’s slightly larger than the root ball of the transplant.
3. Planting the Transplant: Gently remove the transplant from its container and loosen the roots slightly. Place the transplant in the hole, ensuring that the top of the root ball is level with the soil surface.
4. Filling and Watering: Fill in the hole with potting mix and gently firm the soil around the plant. Water thoroughly.
Planting Your Celery in the Container
Now for the fun part! Whether you started from seed or used transplants, here’s how to plant your celery in the container:
1. Spacing: Space your celery plants about 6-8 inches apart in the container. This allows them enough room to grow without overcrowding.
2. Planting Depth: Plant the celery at the same depth it was growing in its previous container.
3. Watering: Water thoroughly after planting. Celery needs consistent moisture, so check the soil daily and water when the top inch feels dry.
Caring for Your Celery Plants
Celery is a bit of a diva when it comes to care, but don’t worry, I’ll guide you through it.
* Watering: As I mentioned, celery needs consistent moisture. Aim to keep the soil evenly moist, but not waterlogged. Water deeply whenever the top inch of soil feels dry. Morning watering is best to allow the foliage to dry before nightfall, reducing the risk of fungal diseases.
* Fertilizing: Celery is a heavy feeder. Fertilize every 2-3 weeks with a balanced liquid fertilizer, following the instructions on the label. You can also side-dress with compost or aged manure.
* Sunlight: Celery prefers full sun (6-8 hours of direct sunlight per day), but it can tolerate partial shade, especially in hot climates. If you live in a very hot area, provide some afternoon shade to prevent the leaves from scorching.
* Blanching (Optional): Blanching is the process of excluding light from the stalks to make them paler and milder in flavor. It’s not strictly necessary, but it can improve the taste. To blanch celery, about 2-3 weeks before harvest, you can wrap the stalks with newspaper, cardboard, or even soil. Leave the tops of the leaves exposed.
* Pest and Disease Control: Keep an eye out for common celery pests like aphids, celery leaf tiers, and slugs. Handpick pests or use insecticidal soap if necessary. Fungal diseases like early blight and late blight can also be a problem. Ensure good air circulation and avoid overhead watering to prevent these diseases. If you spot any signs of disease, remove affected leaves and treat with a fungicide if needed.
Harvesting Your Celery
The moment you’ve been waiting for!
1. When to Harvest: Celery is typically ready to harvest about 80-100 days after planting from seed, or 60-75 days from transplants. The stalks should be at least 6-8 inches long and thick enough to snap easily.
2. How to Harvest: You can harvest the entire plant at once by cutting it off at the base with a sharp knife. Alternatively, you can harvest individual stalks as needed by cutting them off at the base.
3. Storing Celery: Freshly harvested celery can be stored in the refrigerator for up to 2 weeks. Wrap it in a damp paper towel and place it in a plastic bag.
Troubleshooting Common Celery Problems
Even with the best care, you might encounter a few challenges. Here’s how to troubleshoot some common celery problems:
* Yellowing Leaves: This could be a sign of nutrient deficiency, overwatering, or underwatering. Check the soil moisture and fertilize if necessary.
* Stunted Growth: This could be due to poor soil, lack of sunlight, or pest infestation. Ensure your celery is getting enough sunlight and nutrients, and check for pests.
* Bolting (Premature Flowering): Bolting is often caused by stress, such as extreme temperature fluctuations or lack of water. Try to maintain consistent growing conditions.
* Bitter Taste: This can be caused by lack of water or excessive heat. Ensure your celery is getting enough water and provide shade during hot weather.
Extra Tips for Container Celery Success
* Rotate Your Crops: Don’t plant celery in the same container year after year. Rotate your crops to prevent soilborne diseases.
* Companion Planting: Plant celery with companion plants like onions, garlic, and marigolds to deter pests.
* Succession Planting: Plant celery every few weeks to ensure a continuous harvest throughout the growing season.
* Mulching: Apply a layer of mulch around your celery plants to help retain moisture and suppress weeds.
Growing celery in containers is a rewarding experience. With a little patience and care, you can enjoy fresh, homegrown celery all season long. Happy gardening!
Conclusion
So, there you have it! Growing celery in containers isn’t just a whimsical gardening experiment; it’s a genuinely rewarding endeavor that brings fresh, crisp celery right to your doorstep. We’ve walked through the entire process, from selecting the right container and soil to nurturing your celery plants and harvesting your bounty. But why should you actually take the plunge and try this DIY trick?
First and foremost, consider the unparalleled freshness. Store-bought celery, while convenient, often lacks the vibrant flavor and satisfying crunch of homegrown varieties. When you grow your own, you’re in control of the entire process, ensuring that your celery is free from harmful pesticides and bursting with natural goodness. Imagine the difference in your salads, soups, and snacks when you use celery that was harvested just moments before.
Beyond the superior taste, growing celery in containers offers a fantastic opportunity to connect with nature, even if you have limited space. It’s a therapeutic activity that can reduce stress and promote a sense of accomplishment. Watching your celery plants thrive, from tiny seedlings to mature stalks, is a truly gratifying experience. Plus, it’s a great way to teach children about where their food comes from and the importance of sustainable living.
But the benefits don’t stop there. Container gardening allows you to control the growing environment, protecting your celery from pests and diseases that might plague in-ground gardens. You can easily move your containers to optimize sunlight exposure and shield them from harsh weather conditions. This level of control significantly increases your chances of success, even if you’re a beginner gardener.
Now, let’s talk about variations. While we’ve focused on the basic method, there are plenty of ways to customize your container celery growing experience. Consider experimenting with different celery varieties, such as ‘Utah Tall’ for its classic flavor or ‘Redventure’ for its unique color and slightly sweeter taste. You can also try companion planting, adding herbs like parsley or basil to your container to deter pests and enhance the flavor of your celery. Another variation is to try succession planting, planting new celery seeds every few weeks to ensure a continuous harvest throughout the growing season.
Don’t be afraid to get creative with your containers, either. While a standard pot works perfectly well, you can also use repurposed items like old buckets, laundry baskets, or even grow bags. Just make sure your chosen container has adequate drainage to prevent waterlogging.
Growing celery in containers is a must-try for anyone who values fresh, flavorful produce and enjoys the satisfaction of growing their own food. It’s a simple, rewarding, and sustainable way to bring a touch of nature to your home, regardless of your gardening experience or available space.
So, what are you waiting for? Grab a container, some soil, and a packet of celery seeds, and embark on this exciting gardening adventure. We’re confident that you’ll be amazed by the results. And once you’ve harvested your first batch of homegrown celery, we encourage you to share your experience with us. Post photos of your thriving celery plants, share your favorite recipes using your homegrown celery, and let us know any tips or tricks you’ve discovered along the way. Together, we can create a community of container celery growers and inspire others to embrace the joys of homegrown produce. Happy gardening!
Frequently Asked Questions (FAQ)
What is the best size container for growing celery?
A container that is at least 10-12 inches in diameter and 10-12 inches deep is ideal for growing celery. Celery plants need ample space for their roots to develop properly. If you plan to grow multiple celery plants in one container, choose a larger container accordingly, allowing at least 6-8 inches of space between each plant. A rectangular container or a large pot works well for multiple plants. Remember, adequate drainage is crucial, so ensure your container has drainage holes.
What type of soil is best for growing celery in containers?
Celery thrives in rich, well-draining soil that is high in organic matter. A good potting mix specifically formulated for vegetables is an excellent choice. You can also create your own mix by combining equal parts of compost, peat moss (or coconut coir), and perlite or vermiculite. Compost provides essential nutrients, peat moss or coconut coir helps retain moisture, and perlite or vermiculite improves drainage. Avoid using garden soil in containers, as it can become compacted and hinder root growth.
How much sunlight does celery need when grown in containers?
Celery needs at least 6 hours of direct sunlight per day to thrive. Choose a location for your container that receives ample sunlight throughout the day. If you live in a particularly hot climate, providing some afternoon shade can help prevent the plants from wilting. If you don’t have a sunny spot, you can supplement with grow lights. Rotate the container regularly to ensure even sunlight exposure on all sides of the plant.
How often should I water my container celery?
Celery needs consistent moisture to grow properly. Water your container celery deeply whenever the top inch of soil feels dry to the touch. Avoid letting the soil dry out completely, as this can stress the plants and affect their growth. Water in the morning to allow the foliage to dry before nightfall, which can help prevent fungal diseases. During hot weather, you may need to water more frequently. Consider using a self-watering container or adding mulch to the soil surface to help retain moisture.
What are some common pests and diseases that affect container celery, and how can I prevent them?
Common pests that can affect container celery include aphids, spider mites, and celery leaf tiers. Regularly inspect your plants for signs of infestation, such as small insects, webbing, or damaged leaves. You can often control these pests by spraying the plants with a strong stream of water or using insecticidal soap. Diseases that can affect celery include early blight, late blight, and pink rot. To prevent these diseases, ensure good air circulation around the plants, avoid overhead watering, and remove any infected leaves promptly. You can also use a fungicide if necessary.
When and how should I harvest my container celery?
You can begin harvesting celery stalks when they reach a usable size, typically around 6-8 inches tall. To harvest, simply cut the outer stalks near the base of the plant with a sharp knife. Leave the inner stalks to continue growing. You can harvest celery stalks gradually as needed, or you can harvest the entire plant at once. The flavor of celery is best when harvested before it becomes too mature.
Can I grow celery from the base of store-bought celery in a container?
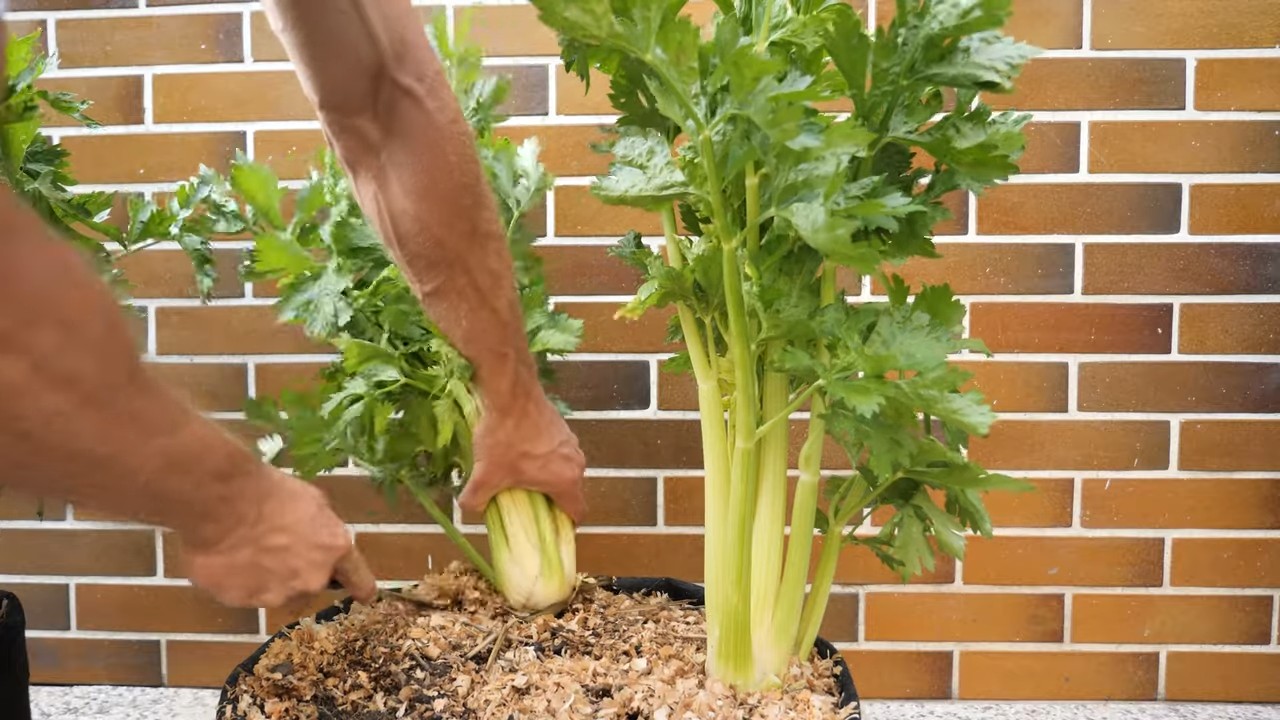
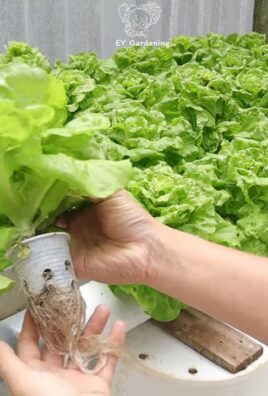
Yes, you can regrow celery from the base of store-bought celery. Cut off the celery stalks about 2 inches from the base. Place the base in a shallow dish of water, with the cut side facing up. Change the water every day or two. After a few days, you should see new roots and leaves starting to grow. Once the roots are about an inch long, you can transplant the celery base into a container filled with potting mix. Keep the soil moist and provide plenty of sunlight. While the regrown celery may not be as robust as celery grown from seed, it’s a fun and easy way to propagate new plants.
How can I fertilize my container celery plants?
Celery is a heavy feeder and benefits from regular fertilization. Use a balanced liquid fertilizer, such as a 10-10-10 or 20-20-20, diluted to half strength. Fertilize your celery plants every 2-3 weeks during the growing season. You can also amend the soil with compost or aged manure to provide a slow-release source of nutrients. Avoid over-fertilizing, as this can lead to excessive foliage growth and reduced stalk development.
Can I grow celery in containers indoors?
Yes, you can grow celery in containers indoors, but it requires adequate light. Place your container near a sunny window that receives at least 6 hours of direct sunlight per day. If you don’t have enough natural light, you can supplement with grow lights. Keep the soil moist and provide good air circulation. Indoor celery may not grow as quickly or as large as outdoor celery, but it can still provide a fresh supply of celery for your kitchen.
What are some good companion plants for celery in containers?
Several plants make excellent companions for celery in containers. Onions and garlic can help deter pests, while marigolds can repel nematodes. Herbs like parsley, basil, and chamomile can also be beneficial, attracting beneficial insects and improving the flavor of the celery. Avoid planting celery near fennel, as it can inhibit its growth.
Leave a Comment