

Growing Brussels Sprouts Containers: Ever dreamed of harvesting your own miniature cabbages right from your patio? I know I have! There’s something incredibly satisfying about nurturing a plant from seed to table, especially when it comes to these quirky, nutritious little vegetables. Forget the grocery store – let’s bring the farm to your balcony!
While Brussels sprouts might seem like a modern health food craze, their history stretches back centuries. Originating, as the name suggests, near Brussels, Belgium, they were cultivated as early as the 13th century. For generations, they’ve been a staple in European cuisine, prized for their unique flavor and cold-hardiness. Now, you can easily enjoy this historical veggie, even without a sprawling garden.
Why should you consider growing Brussels sprouts containers? Well, space is often a premium these days. Many of us live in apartments, condos, or homes with limited yard space. Container gardening opens up a world of possibilities, allowing you to cultivate fresh produce regardless of your square footage. Plus, growing your own food is a fantastic way to control what you eat, avoiding harmful pesticides and ensuring the freshest possible ingredients. This DIY guide will provide you with all the tips and tricks you need to successfully grow Brussels sprouts in containers, from choosing the right pot to harvesting your bounty. Let’s get started!
Growing Brussels Sprouts in Containers: A Comprehensive DIY Guide
Hey there, fellow gardening enthusiasts! I’m super excited to share my tried-and-true method for growing delicious Brussels sprouts right in containers. Forget thinking you need acres of land – with a little know-how, you can enjoy these mini cabbages even if you only have a balcony or patio. Let’s dive in!
Choosing the Right Container and Location
Before we even think about seeds, let’s get the foundation right. Brussels sprouts need space, so don’t skimp on the container size.
* Container Size: Aim for at least a 15-gallon container per plant. I’ve found that 20-gallon containers work even better, giving the roots plenty of room to spread out. The bigger, the better!
* Material: Plastic, terracotta, or even fabric pots will work. Just make sure your chosen container has adequate drainage holes. Soggy roots are a Brussels sprout’s worst enemy.
* Location, Location, Location: These guys need at least 6 hours of direct sunlight per day. A sunny balcony, patio, or even a spot in your yard will do the trick. Make sure it’s a spot where you can easily water them.
Preparing the Soil
Brussels sprouts are heavy feeders, so rich, well-draining soil is crucial. I like to create my own mix, but you can also buy a high-quality potting mix.
* My Go-To Soil Mix:
* 1 part compost (for nutrients and moisture retention)
* 1 part peat moss or coco coir (for drainage and aeration)
* 1 part perlite or vermiculite (for even better drainage)
* Adding Amendments: Mix in a slow-release fertilizer formulated for vegetables. Bone meal is also a great addition for strong root development. I also like to add a handful of Epsom salts to provide magnesium, which helps with chlorophyll production and overall plant health.
Starting from Seed vs. Transplants
You have two options here: starting from seed or buying transplants from a nursery. Both have their pros and cons.
* Starting from Seed: This gives you more control over the variety and can be more cost-effective. However, it requires more time and effort. I usually start my seeds indoors about 6-8 weeks before the last expected frost.
* Buying Transplants: This is the easier option, especially if you’re short on time. Just make sure to choose healthy-looking plants with sturdy stems and no signs of pests or diseases.
Planting Your Brussels Sprouts
Alright, let’s get our hands dirty!
1. If Starting from Seed (Indoors):
* Fill seed trays or small pots with seed-starting mix.
* Sow seeds about 1/4 inch deep.
* Keep the soil consistently moist but not soggy.
* Place the trays under grow lights or in a sunny window.
* Once the seedlings have a few sets of true leaves, transplant them into larger pots.
2. Hardening Off Seedlings: Before transplanting your seedlings (whether you started them indoors or bought transplants), you need to “harden them off.” This process gradually acclimates them to outdoor conditions.
* Start by placing the seedlings outdoors in a sheltered location for a few hours each day.
* Gradually increase the amount of time they spend outdoors over the course of a week or two.
* Protect them from strong winds and direct sunlight during the hardening-off process.
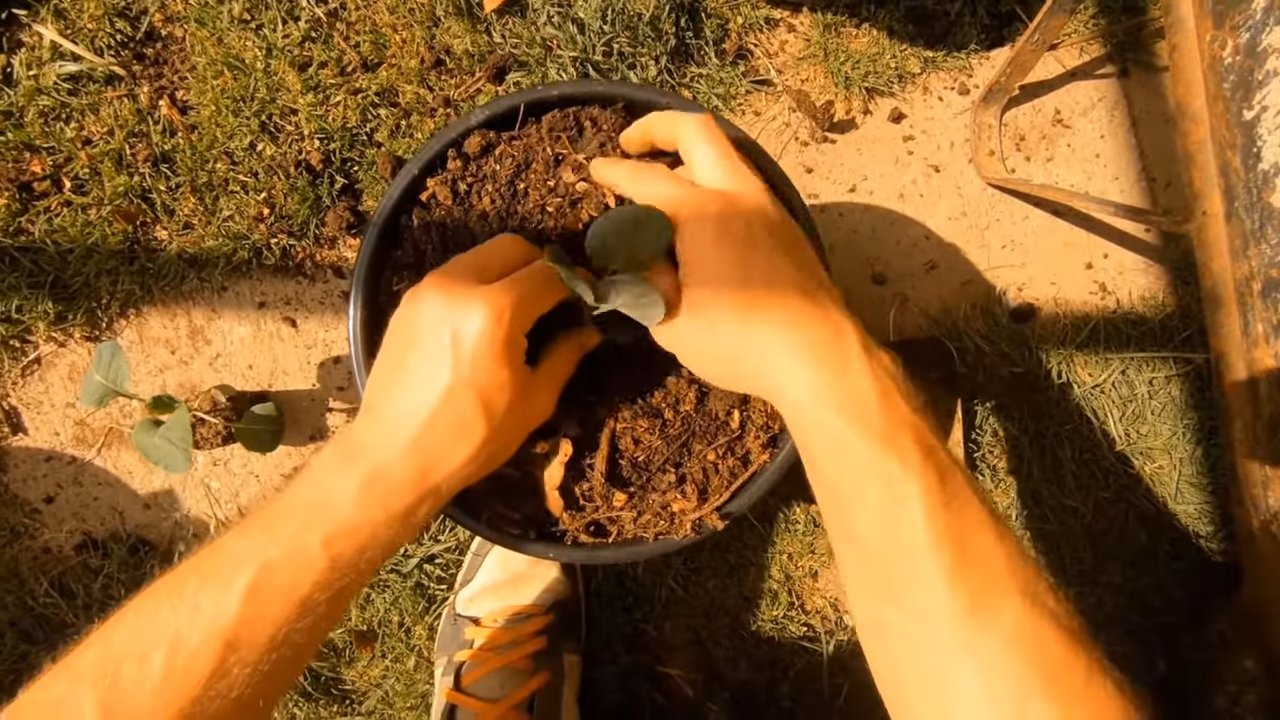
3. Transplanting into Containers:
* Fill your container with your prepared soil mix, leaving a few inches of space at the top.
* Dig a hole large enough to accommodate the root ball of your seedling or transplant.
* Gently remove the plant from its pot and loosen the roots slightly.
* Place the plant in the hole and backfill with soil.
* Water thoroughly.
* Space plants at least 18-24 inches apart. If you’re using a very large container, you might be able to fit two plants, but don’t overcrowd them.
Caring for Your Brussels Sprouts
Now comes the ongoing care to ensure a bountiful harvest.
* Watering: Brussels sprouts need consistent moisture, especially during hot weather. Water deeply whenever the top inch of soil feels dry to the touch. Avoid overhead watering, as this can lead to fungal diseases.
* Fertilizing: As I mentioned, Brussels sprouts are heavy feeders. Side-dress with compost or a balanced fertilizer every few weeks. Liquid seaweed fertilizer is also a great option for providing micronutrients.
* Mulching: Apply a layer of mulch around the base of the plants to help retain moisture, suppress weeds, and regulate soil temperature. Straw, wood chips, or shredded leaves work well.
* Staking: As the plants grow taller and the sprouts develop, they may become top-heavy. Staking can help prevent them from falling over. Use bamboo stakes or tomato cages to provide support.
* Pest Control: Keep an eye out for common pests like aphids, cabbage worms, and flea beetles.
* Aphids: These tiny insects can suck the sap from your plants. Blast them off with a strong stream of water or use insecticidal soap.
* Cabbage Worms: These green caterpillars can devour the leaves of your Brussels sprouts. Handpick them off the plants or use Bacillus thuringiensis (Bt), a natural insecticide.
* Flea Beetles: These tiny beetles can create small holes in the leaves. Cover your plants with row covers to prevent them from reaching the foliage.
* Disease Prevention: Brussels sprouts are susceptible to fungal diseases like clubroot and downy mildew.
* Clubroot: This disease causes the roots to swell and become distorted. Prevent it by ensuring good drainage and avoiding planting Brussels sprouts in the same spot year after year.
* Downy Mildew: This fungal disease causes yellow spots on the leaves. Improve air circulation by spacing plants properly and avoid overhead watering.
Harvesting Your Brussels Sprouts
The moment we’ve all been waiting for!
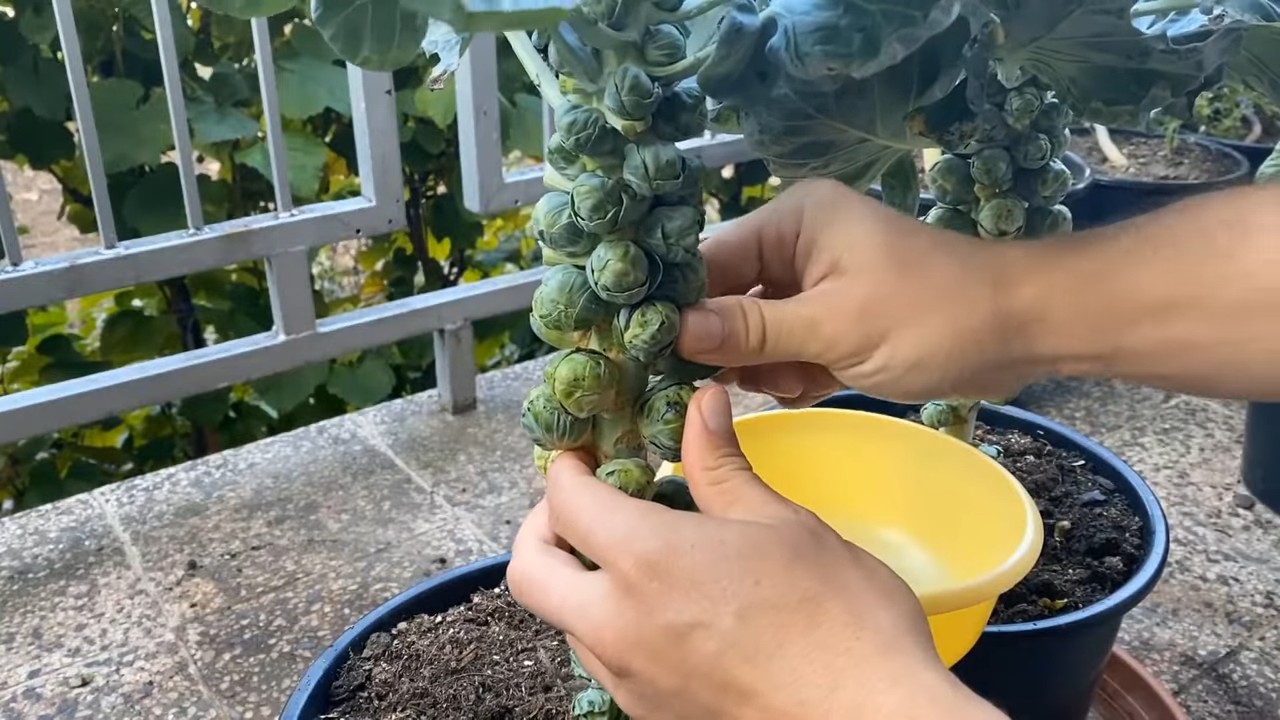
* When to Harvest: Brussels sprouts are typically ready to harvest in the fall or early winter, about 90-100 days after planting. The sprouts should be firm, green, and about 1-2 inches in diameter.
* How to Harvest: Start harvesting from the bottom of the plant, working your way up. Twist or snap off the sprouts when they are ready. The lower leaves will often turn yellow and can be removed to encourage sprout development.
* Extending the Harvest: You can extend the harvest by pinching off the top of the plant once the sprouts have started to form. This will encourage the remaining sprouts to mature more quickly.
* Storage: Freshly harvested Brussels sprouts can be stored in the refrigerator for up to a week.
Troubleshooting
Even with the best care, you might encounter some challenges. Here are a few common problems and how to address them:
* Sprouts Not Forming: This could be due to a lack of sunlight, insufficient nutrients, or high temperatures. Make sure your plants are getting enough sun, fertilize regularly, and try to provide some shade during the hottest part of the day.
* Sprouts Are Loose and Leafy: This is often caused by inconsistent watering or high temperatures. Water deeply and regularly, and provide shade during hot weather.
* Yellowing Leaves: This could be a sign of nutrient deficiency, overwatering, or disease. Check the soil moisture, fertilize if necessary, and inspect the plants for signs of pests or diseases.
Choosing the Right Variety
There are many different varieties of Brussels sprouts to choose from, each with its own unique characteristics. Here are a few of my favorites:
* ‘Long Island Improved’: A classic variety that produces small, tightly packed sprouts.
* ‘Jade Cross’: A hybrid variety that is known for its high yields and disease resistance.
* ‘Redarling’: A beautiful red-purple variety that adds a pop of color to your garden.
* ‘Diablo’: A relatively early variety, good for shorter growing seasons.
Tips and Tricks for Success
Here are a few extra tips to help you grow the best Brussels sprouts possible:
* Rotate Your Crops: Avoid planting Brussels sprouts in the same spot year after year to prevent soilborne diseases.
* Companion Planting: Plant Brussels sprouts with companion plants like rosemary, thyme, and sage to deter pests.
* Protect from Frost: Brussels sprouts can tolerate light frost, but prolonged exposure to freezing temperatures can damage the sprouts. Cover your plants with a blanket or tarp if a hard frost is expected.
* Enjoy Your Harvest! Brussels sprouts are delicious roasted, sautéed, or steamed. Experiment with different recipes and enjoy the fruits (or rather, vegetables) of your
Conclusion
So, there you have it! Growing Brussels sprouts in containers isn’t just a possibility; it’s a rewarding and surprisingly accessible way to enjoy fresh, homegrown vegetables, even if you’re short on space. We’ve walked through the entire process, from selecting the right container and soil to nurturing your plants and anticipating that delicious harvest.
But why is this DIY trick a must-try? Beyond the sheer satisfaction of cultivating your own food, growing Brussels sprouts in containers offers several compelling advantages. First and foremost, it provides unparalleled control over your growing environment. You can easily move your containers to chase the sun, shelter them from harsh weather, and protect them from ground-dwelling pests. This level of control translates to healthier plants and a more abundant yield.
Furthermore, container gardening opens up the world of Brussels sprouts to those who might otherwise be excluded. Apartment dwellers, balcony gardeners, and anyone with limited yard space can now partake in the joy of growing these nutritious and flavorful vegetables. It’s a fantastic way to connect with nature, learn about the growing process, and enjoy the fruits (or rather, the sprouts!) of your labor.
And let’s not forget the taste! Homegrown Brussels sprouts, picked fresh from your container, offer a flavor that far surpasses anything you’ll find in the grocery store. They’re sweeter, more tender, and bursting with that distinctive Brussels sprout goodness.
Ready to take your container gardening to the next level? Consider these variations and suggestions:
* Experiment with different varieties: While we’ve focused on general principles, different Brussels sprout varieties may have slightly different needs. Research varieties that are known to thrive in containers and adapt your approach accordingly. Some dwarf varieties are specifically bred for container growing.
* Companion planting: Enhance your container garden by planting companion plants alongside your Brussels sprouts. Marigolds can deter pests, while herbs like rosemary and thyme can improve the flavor of your sprouts.
* Succession planting: Extend your harvest season by planting Brussels sprouts at staggered intervals. This ensures a continuous supply of fresh sprouts throughout the fall and winter.
* Vertical gardening: If space is truly limited, explore vertical gardening options. You can train your Brussels sprouts to grow up a trellis or use a stacked container system to maximize your growing area.
* Soil Amendments: Consider adding worm castings or compost tea to your watering schedule. These natural amendments provide essential nutrients and beneficial microbes that will boost the health and vigor of your plants.
Ultimately, the best way to learn is by doing. Don’t be afraid to experiment, make mistakes, and learn from your experiences. Growing Brussels sprouts in containers is a journey, and every step of the way is an opportunity to learn and grow.
So, grab your containers, gather your supplies, and get ready to embark on this exciting gardening adventure. We’re confident that you’ll be amazed by the results.
We encourage you to try this DIY trick and share your experience with us! Post photos of your container gardens, share your tips and tricks, and let us know what worked (and what didn’t). Together, we can create a thriving community of container gardeners and spread the joy of growing Brussels sprouts. Happy gardening!
Frequently Asked Questions (FAQ)
What is the best size container for growing Brussels sprouts?
A container that is at least 12 inches in diameter and 12 inches deep is generally recommended for growing Brussels sprouts. However, larger is often better, especially if you plan to grow multiple plants in the same container. A 5-gallon bucket or a large planter pot will provide ample space for the roots to develop and support the growth of the plant. Ensure the container has adequate drainage holes to prevent waterlogging.
How often should I water my container-grown Brussels sprouts?
Watering frequency depends on several factors, including the size of the container, the type of soil, the weather conditions, and the stage of growth of the plant. Generally, you should water your Brussels sprouts when the top inch of soil feels dry to the touch. During hot and dry weather, you may need to water daily. Avoid overwatering, as this can lead to root rot. A good rule of thumb is to water deeply and thoroughly, allowing excess water to drain out of the bottom of the container.
What type of soil is best for growing Brussels sprouts in containers?
A well-draining, nutrient-rich potting mix is ideal for growing Brussels sprouts in containers. Avoid using garden soil, as it can become compacted and doesn’t drain well in containers. Look for a potting mix that contains a blend of peat moss, perlite, and vermiculite. You can also amend the potting mix with compost or aged manure to provide additional nutrients. A slightly acidic to neutral pH (around 6.0 to 7.0) is optimal for Brussels sprouts.
How much sunlight do Brussels sprouts need when grown in containers?
Brussels sprouts require at least 6 hours of direct sunlight per day to thrive. Choose a location for your container garden that receives plenty of sunlight. If you live in a particularly hot climate, you may need to provide some afternoon shade to prevent the plants from overheating. You can also use grow lights to supplement natural sunlight, especially if you are starting your plants indoors.
When is the best time to plant Brussels sprouts in containers?
Brussels sprouts are a cool-season crop, so the best time to plant them is in late spring or early summer for a fall harvest, or in late summer for a winter harvest in milder climates. Check your local climate and growing zone to determine the optimal planting time for your area. You can start seeds indoors 6-8 weeks before the last expected frost or purchase transplants from a local nursery.
How do I fertilize Brussels sprouts grown in containers?
Brussels sprouts are heavy feeders and require regular fertilization to produce a good yield. Use a balanced fertilizer (e.g., 10-10-10) or a fertilizer specifically formulated for vegetables. Follow the instructions on the fertilizer package for application rates. You can also use organic fertilizers, such as compost tea or fish emulsion. Fertilize your Brussels sprouts every 2-3 weeks during the growing season.
What are some common pests and diseases that affect Brussels sprouts, and how can I prevent them?
Common pests that affect Brussels sprouts include aphids, cabbage worms, and flea beetles. Diseases include clubroot and downy mildew. To prevent pests and diseases, practice good sanitation, such as removing plant debris and weeds from around your containers. You can also use insecticidal soap or neem oil to control pests. Ensure good air circulation to prevent fungal diseases. If you suspect clubroot, avoid planting brassicas in the same container for several years.
How long does it take for Brussels sprouts to mature in containers?
Brussels sprouts typically take 80-100 days to mature from seed. The exact time will depend on the variety, the growing conditions, and the climate. You can start harvesting the sprouts when they are about 1-2 inches in diameter and firm to the touch. Harvest from the bottom of the plant upwards, as the lower sprouts mature first.
Can I grow Brussels sprouts in containers indoors?
While it is possible to grow Brussels sprouts indoors, it can be challenging. They require a lot of light, so you will need to provide supplemental lighting with grow lights. You will also need to ensure good air circulation and maintain a cool temperature. Indoor growing is best suited for starting seedlings before transplanting them outdoors.
How do I know when my Brussels sprouts are ready to harvest?
Brussels sprouts are ready to harvest when the sprouts are firm, green, and about 1-2 inches in diameter. The lower sprouts on the plant will mature first. To harvest, simply twist or cut the sprouts off the stem. You can continue to harvest sprouts as they mature, working your way up the plant. The flavor of Brussels sprouts improves after a light frost.
Leave a Comment