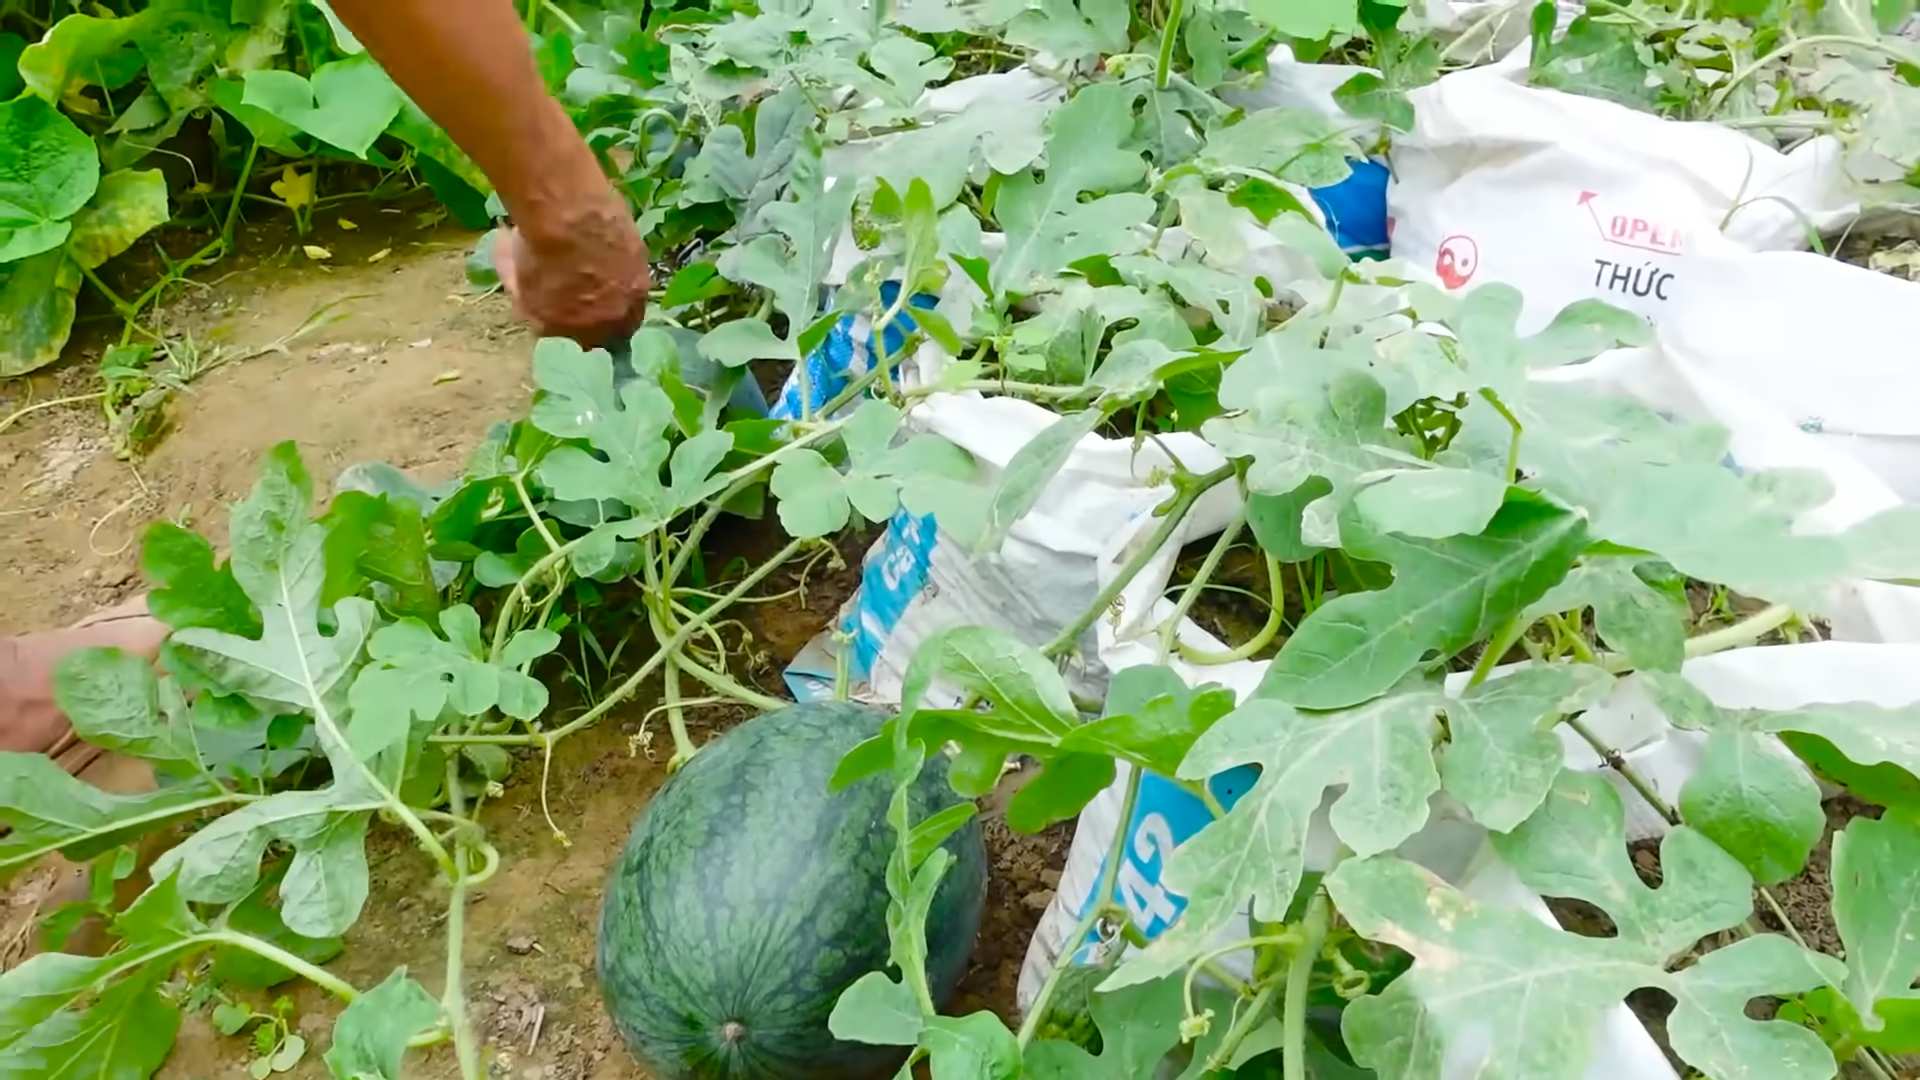
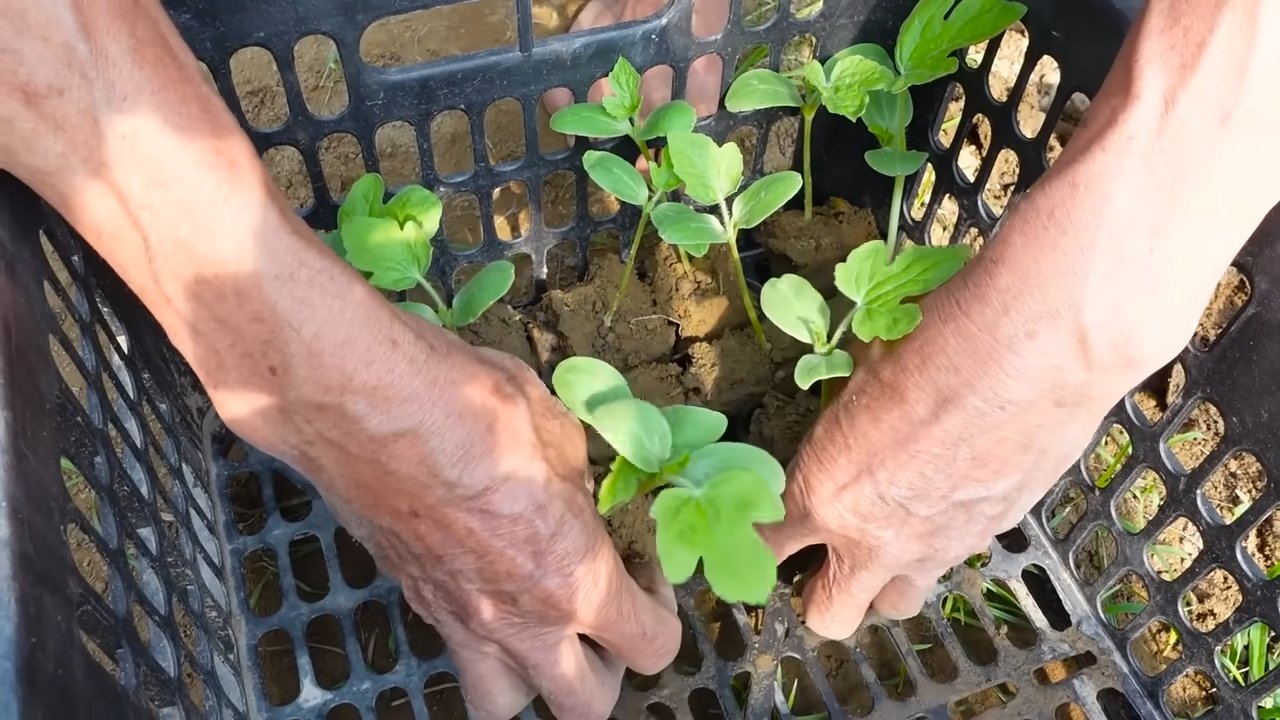
Grow Watermelon at Home – sounds like a summer dream, right? Imagine biting into a juicy, sweet watermelon that you nurtured from seed to fruit, right in your own backyard! Forget those bland, store-bought melons; we’re talking about homegrown flavor that bursts with sunshine and satisfaction.
For centuries, watermelons have been a symbol of summer abundance and refreshing sweetness. Originating in Africa, they’ve traveled the globe, becoming a beloved treat in countless cultures. From picnics to barbecues, watermelons are synonymous with warm weather and good times. But what if you could skip the grocery store and cultivate your own personal watermelon patch?
Many people think growing watermelons is only for experienced farmers with acres of land, but I’m here to tell you that’s simply not true! With a few clever tricks and DIY hacks, you can successfully grow watermelon at home, even if you have limited space. This article is packed with easy-to-follow instructions and insider tips that will transform your garden into a watermelon wonderland. Why spend money on subpar watermelons when you can enjoy the unparalleled taste of homegrown goodness? Let’s dive in and unlock the secrets to cultivating your own delicious watermelons this season!

Grow Your Own Juicy Watermelons: A Beginner’s Guide
Hey there, fellow gardening enthusiasts! Ever dreamt of biting into a sweet, homegrown watermelon on a hot summer day? Well, dream no more! Growing watermelons at home might seem daunting, but trust me, with a little patience and the right know-how, you can totally pull it off. I’m going to walk you through everything you need to know, from choosing the right variety to harvesting your prize-winning melon. Let’s get started!
Choosing the Right Watermelon Variety
First things first, you need to pick a watermelon variety that suits your climate and garden space. Some varieties are better suited for shorter growing seasons, while others need plenty of room to sprawl. Here’s a quick rundown of some popular choices:
* Sugar Baby: This is a classic, compact variety that matures quickly (around 75 days). It’s perfect for smaller gardens and cooler climates. The fruits are typically 8-10 pounds.
* Crimson Sweet: A widely popular variety known for its sweet, red flesh and good disease resistance. It takes about 85 days to mature and produces larger melons (15-25 pounds).
* Jubilee: This heirloom variety produces large, oblong melons (25-40 pounds) with a sweet, crisp texture. It requires a longer growing season (around 95 days).
* Bush Sugar Baby: If space is a major constraint, this bush variety is your best bet. It produces smaller melons (6-8 pounds) on compact vines.
* Yellow Doll: For something different, try this yellow-fleshed watermelon. It’s super sweet and matures in about 70 days.
Consider your local climate, the amount of space you have, and your personal taste preferences when making your selection. I personally love the Crimson Sweet for its reliable sweetness and disease resistance.
Preparing Your Garden Bed
Watermelons are heavy feeders and need well-drained soil that’s rich in organic matter. Here’s how to get your garden bed ready:
* Sunlight: Watermelons need at least 6-8 hours of direct sunlight per day. Choose a location in your garden that gets plenty of sun.
* Soil: Watermelons thrive in sandy loam soil with a pH between 6.0 and 6.8. If your soil is heavy clay, amend it with plenty of compost and other organic matter to improve drainage.
* Nutrients: Watermelons need a lot of nutrients, especially nitrogen, phosphorus, and potassium. Before planting, amend your soil with compost, well-rotted manure, or a balanced fertilizer (like 10-10-10).
* Space: Give your watermelon vines plenty of room to sprawl. Most varieties need at least 4-6 feet of space between plants. Bush varieties can be planted closer together (around 2-3 feet).
Starting Watermelon Seeds (Optional)
While you can directly sow watermelon seeds in your garden, starting them indoors gives them a head start, especially in cooler climates. Here’s how I do it:
* Timing: Start your seeds about 3-4 weeks before the last expected frost.
* Containers: Use peat pots or biodegradable containers to avoid disturbing the roots when transplanting.
* Soil: Use a seed-starting mix that’s light and well-draining.
* Planting: Plant the seeds about 1 inch deep and water gently.
* Warmth: Watermelon seeds need warmth to germinate. Keep the soil temperature between 70-85°F (21-29°C). You can use a heat mat to help maintain the temperature.
* Light: Once the seedlings emerge, provide them with plenty of light. A sunny windowsill or grow lights will work.
* Hardening Off: Before transplanting your seedlings outdoors, you need to harden them off. This means gradually exposing them to outdoor conditions over a period of 7-10 days. Start by placing them in a sheltered spot for a few hours each day, gradually increasing the amount of time they spend outdoors.
Planting Watermelon Seedlings or Seeds
Once the danger of frost has passed and the soil has warmed up to at least 70°F (21°C), it’s time to plant your watermelon seedlings or seeds.
1. Prepare the Planting Hole: Dig a hole that’s slightly larger than the root ball of your seedling or about 1 inch deep for seeds.
2. Planting Seedlings: Gently remove the seedling from its container and place it in the hole. Backfill with soil and water thoroughly.
3. Planting Seeds: Plant 2-3 seeds per hole and thin to the strongest seedling after they emerge.
4. Spacing: Space your plants according to the variety you’re growing. Remember, most varieties need at least 4-6 feet of space between plants.
5. Mulching: Apply a layer of mulch around your plants to help retain moisture, suppress weeds, and keep the soil warm. Straw, hay, or wood chips work well.
Caring for Your Watermelon Plants
Watermelons need consistent care to thrive. Here’s what you need to do:
* Watering: Water your watermelon plants deeply and regularly, especially during hot, dry weather. Aim to keep the soil consistently moist but not waterlogged. Reduce watering as the fruits begin to ripen to prevent them from splitting.
* Fertilizing: Watermelons are heavy feeders, so continue to fertilize them throughout the growing season. Use a balanced fertilizer (like 10-10-10) every 2-3 weeks. You can also side-dress your plants with compost or well-rotted manure.
* Weeding: Keep your garden bed free of weeds, which can compete with your watermelon plants for nutrients and water.
* Pest and Disease Control: Watermelons can be susceptible to various pests and diseases, such as aphids, squash bugs, and powdery mildew. Inspect your plants regularly and take action if you notice any problems. Insecticidal soap or neem oil can be used to control aphids and squash bugs. Fungicides can be used to treat powdery mildew.
* Vine Training: As your watermelon vines grow, you may need to train them to keep them from sprawling too much. You can use stakes or trellises to support the vines.
* Pollination: Watermelons need to be pollinated to produce fruit. If you’re not seeing any fruit set, you may need to hand-pollinate the flowers. To do this, use a small paintbrush to transfer pollen from the male flowers to the female flowers. Female flowers have a small fruit at the base of the flower.
Harvesting Your Watermelons
Knowing when to harvest your watermelons is crucial for getting that perfect, sweet taste. Here are a few signs to look for:
* The tendril closest to the fruit turns brown and dries up. This is one of the most reliable indicators of ripeness.
* The bottom of the watermelon (where it rests on the ground) turns from white to yellow or cream. This is called the “ground spot.”
* The watermelon sounds dull and hollow when you thump it. This takes some practice, but you’ll get the hang of it.
* The rind becomes dull and loses its shine.
Once you’ve determined that your watermelon is ripe, use a sharp knife to cut it from the vine, leaving a few inches of stem attached.
Troubleshooting Common Watermelon Problems
Even with the best care, you might encounter some problems while growing watermelons. Here are a few common issues and how to address them:
* Blossom End Rot: This is caused by a calcium deficiency and results in a dark, sunken spot on the bottom of the fruit. To prevent blossom end rot, make sure your soil is rich in calcium and water your plants consistently.
* Poor Fruit Set: This can be caused by a lack of pollination or extreme temperatures. Hand-pollinate your flowers if you’re not seeing any fruit set.
* Cracked Fruits: This is usually caused by inconsistent watering. Water your plants regularly and avoid letting the soil dry out completely.
* Pests and Diseases: As mentioned earlier, watermelons can be susceptible to various pests and diseases. Inspect your plants regularly and take action if you notice any problems.
Enjoying Your Homegrown Watermelon
Congratulations! You’ve successfully grown your own watermelons. Now it’s time to enjoy the fruits (or rather, the melons) of your labor. Slice it up, share it with friends and family, and savor the sweet, juicy taste of summer. You can also use your watermelons to make refreshing drinks, salads, and desserts. The possibilities are endless!
Growing watermelons at home is a rewarding experience that anyone can enjoy. With a little planning and effort, you can have a

Conclusion
So, there you have it! Growing watermelons at home, while it might seem daunting at first, is entirely achievable with a little planning, patience, and the right approach. We’ve walked you through the essential steps, from selecting the perfect variety for your climate to nurturing those precious seedlings and finally, harvesting your own juicy, homegrown watermelons.
But why go through all this effort when you can simply buy a watermelon at the store? The answer is simple: flavor, satisfaction, and control. Commercially grown watermelons are often bred for size and transportability, sometimes at the expense of taste. When you grow your own, you get to choose varieties known for their exceptional sweetness and unique characteristics. Plus, there’s nothing quite like the feeling of biting into a watermelon you’ve nurtured from seed to fruit. It’s a deeply rewarding experience that connects you to the natural world and provides a delicious, healthy treat for you and your family.
This guide has focused on a general approach to growing watermelons, but don’t be afraid to experiment and adapt the techniques to suit your specific needs and environment. For example, if you live in a cooler climate, consider starting your seeds indoors earlier or using black plastic mulch to warm the soil. If space is limited, try growing bush varieties of watermelon in containers. You can even train the vines to grow vertically on a trellis to save space.
Consider these variations to enhance your watermelon growing experience:
* Grafting: Grafting watermelon scions onto disease-resistant rootstock can significantly improve your chances of success, especially in areas with soilborne diseases.
* Companion Planting: Plant basil, marigolds, or nasturtiums near your watermelons to deter pests and attract beneficial insects.
* Succession Planting: Plant watermelon seeds in stages, a few weeks apart, to extend your harvest season.
* Different Varieties: Explore heirloom varieties like ‘Moon and Stars’ or ‘Blacktail Mountain’ for unique flavors and appearances.
Ultimately, the best way to learn is by doing. Don’t be discouraged if your first attempt isn’t perfect. Every season is a learning opportunity. Embrace the challenges, celebrate the successes, and most importantly, have fun!
We encourage you to take the plunge and try growing watermelons at home. It’s a rewarding experience that will provide you with delicious, healthy fruit and a deeper appreciation for the wonders of nature. Once you’ve harvested your first homegrown watermelon, we’d love to hear about your experience! Share your tips, tricks, and photos in the comments below. Let’s build a community of watermelon growers and learn from each other. Happy growing!
Frequently Asked Questions (FAQ)
What is the best time to start growing watermelons?
The ideal time to start growing watermelons depends on your climate. In warmer regions with long growing seasons, you can direct sow seeds outdoors after the last frost. However, in cooler climates, it’s best to start seeds indoors about 6-8 weeks before the last expected frost. This gives the seedlings a head start and allows them to mature before the weather turns cold. Check your local frost dates and adjust your planting schedule accordingly.
How much space do watermelons need?
Watermelons are sprawling plants that require a significant amount of space. Vining varieties typically need at least 6-8 feet between plants and 8-10 feet between rows. Bush varieties, which are more compact, can be grown closer together, but still require at least 3-4 feet of space. Consider the mature size of the variety you’re growing when planning your garden layout. If space is limited, you can train the vines to grow vertically on a trellis.
What kind of soil is best for watermelons?
Watermelons thrive in well-drained, sandy loam soil that is rich in organic matter. The soil should have a pH between 6.0 and 6.8. Before planting, amend the soil with compost or well-rotted manure to improve its fertility and drainage. Avoid heavy clay soils, as they can become waterlogged and inhibit root growth.
How often should I water my watermelon plants?
Watermelons need consistent moisture, especially during fruit development. Water deeply and regularly, aiming for about 1-2 inches of water per week. Avoid overhead watering, as this can promote fungal diseases. Use a soaker hose or drip irrigation to deliver water directly to the roots. Reduce watering as the fruits ripen to prevent them from splitting.
What are some common pests and diseases that affect watermelons?
Watermelons are susceptible to a variety of pests and diseases, including aphids, squash bugs, vine borers, powdery mildew, and fusarium wilt. Regularly inspect your plants for signs of infestation or disease. Use organic pest control methods, such as insecticidal soap or neem oil, to control pests. Choose disease-resistant varieties and practice good sanitation to prevent diseases. Crop rotation can also help to reduce the risk of soilborne diseases.
How do I know when a watermelon is ripe?
Determining when a watermelon is ripe can be tricky, but there are several indicators to look for. The tendril closest to the fruit should be brown and dry. The spot where the watermelon rests on the ground, known as the ground spot, should be yellow or cream-colored. The rind should be dull rather than shiny. Finally, you can thump the watermelon with your knuckles. A ripe watermelon will sound hollow and deep.
Can I grow watermelons in containers?
Yes, you can grow watermelons in containers, but you’ll need to choose a bush variety and use a large container (at least 20 gallons). Make sure the container has drainage holes and use a high-quality potting mix. Water container-grown watermelons more frequently than those grown in the ground, as the soil in containers tends to dry out quickly. You may also need to provide support for the vines.
How can I improve the sweetness of my watermelons?
Several factors can influence the sweetness of watermelons. Choose a variety known for its sweetness. Ensure that the plants receive adequate sunlight (at least 6-8 hours per day). Provide consistent moisture and fertilize regularly with a balanced fertilizer. Avoid overwatering as the fruits ripen. Allowing the watermelons to ripen fully on the vine will also enhance their sweetness.
What fertilizer should I use for watermelons?
Watermelons benefit from regular fertilization. Use a balanced fertilizer (e.g., 10-10-10) at planting time. Once the plants start to vine, switch to a fertilizer with a higher phosphorus content (e.g., 5-10-5) to promote fruit development. Avoid over-fertilizing with nitrogen, as this can lead to excessive vine growth and reduced fruit production. Follow the instructions on the fertilizer label carefully.
How do I prevent blossom end rot in watermelons?
Blossom end rot is a common problem in watermelons, caused by a calcium deficiency. To prevent blossom end rot, ensure that the soil has adequate calcium levels. Amend the soil with lime or bone meal before planting. Maintain consistent soil moisture, as fluctuations in moisture can interfere with calcium uptake. Avoid over-fertilizing with nitrogen, as this can also contribute to blossom end rot. If you notice blossom end rot developing, you can apply a calcium foliar spray to the affected plants.


Leave a Comment