

Grow Thyme Indoors? Absolutely! Imagine fresh, fragrant thyme readily available right in your kitchen, ready to elevate your culinary creations. No more last-minute dashes to the grocery store or settling for dried herbs that lack that vibrant, fresh flavor. For centuries, thyme has been cherished not only for its culinary uses but also for its medicinal properties and symbolic significance, representing courage and bravery in ancient cultures.
But let’s be honest, not everyone has a sprawling garden or the perfect outdoor climate to cultivate this wonderful herb. That’s where the magic of indoor gardening comes in! I’m here to share some simple yet effective DIY tricks and hacks that will empower you to successfully grow thyme indoors, regardless of your experience level. Whether you’re a seasoned gardener or a complete beginner, these tips will guide you through the process, from selecting the right pot and soil to providing the optimal light and watering conditions. Get ready to enjoy the delightful aroma and flavor of homegrown thyme all year round!
Growing Thyme Indoors: A Beginner’s Guide
Hey there, fellow plant enthusiasts! Ever dreamt of having fresh, fragrant thyme right at your fingertips, no matter the season? Well, you’re in luck! Growing thyme indoors is surprisingly easy and rewarding. I’m going to walk you through everything you need to know to cultivate your own little thyme haven inside your home. Let’s get started!
Choosing the Right Thyme Variety
First things first, not all thyme varieties are created equal when it comes to indoor growing. Some are better suited for containers than others. Here are a few of my favorites:
* English Thyme (Thymus vulgaris): This is the classic culinary thyme, known for its strong flavor and compact growth habit. It’s a great choice for beginners.
* Lemon Thyme (Thymus citriodorus): As the name suggests, this variety has a delightful lemony scent and flavor. It’s also quite ornamental.
* Creeping Thyme (Thymus serpyllum): While often used as a ground cover outdoors, creeping thyme can also thrive in hanging baskets or containers, adding a trailing element to your indoor garden.
Gathering Your Supplies
Before you start planting, make sure you have everything you need. Here’s a checklist:
* Thyme Seeds or Seedlings: You can start from seeds or purchase established seedlings from a local nursery. Seedlings will give you a head start.
* Potting Mix: Use a well-draining potting mix specifically formulated for herbs or vegetables. Avoid using garden soil, as it can become compacted in containers.
* Container: Choose a pot that’s at least 6 inches in diameter and has drainage holes. Thyme doesn’t like to sit in soggy soil. Terracotta pots are a great option because they allow the soil to breathe.
* Grow Lights (Optional): If you don’t have a sunny windowsill, you might need to supplement with grow lights.
* Watering Can or Spray Bottle: For gentle watering.
* Small Trowel or Spoon: For planting.
* Pebbles or Gravel (Optional): To improve drainage.
* Fertilizer (Optional): A balanced liquid fertilizer can help boost growth.
Planting Your Thyme
Now for the fun part! Here’s how to plant your thyme, whether you’re starting from seeds or seedlings:
Starting from Seeds
1. Prepare the Pot: Fill your chosen container with potting mix, leaving about an inch of space at the top. Gently pat down the soil.
2. Sow the Seeds: Sprinkle the thyme seeds evenly over the surface of the soil. Thyme seeds are tiny, so don’t bury them too deep. A light dusting of soil is all they need.
3. Water Gently: Use a spray bottle to mist the soil thoroughly. You want to keep the soil moist but not waterlogged.
4. Provide Light and Warmth: Place the pot in a warm, sunny location or under grow lights. Thyme seeds need light to germinate.
5. Be Patient: Germination can take anywhere from 14 to 21 days. Keep the soil consistently moist during this time.
6. Thin Seedlings (If Necessary): Once the seedlings emerge and have a few sets of true leaves, thin them out so that they’re spaced about 2-3 inches apart. This will give them room to grow.
Planting Seedlings
1. Prepare the Pot: Fill your chosen container with potting mix, leaving about an inch of space at the top.
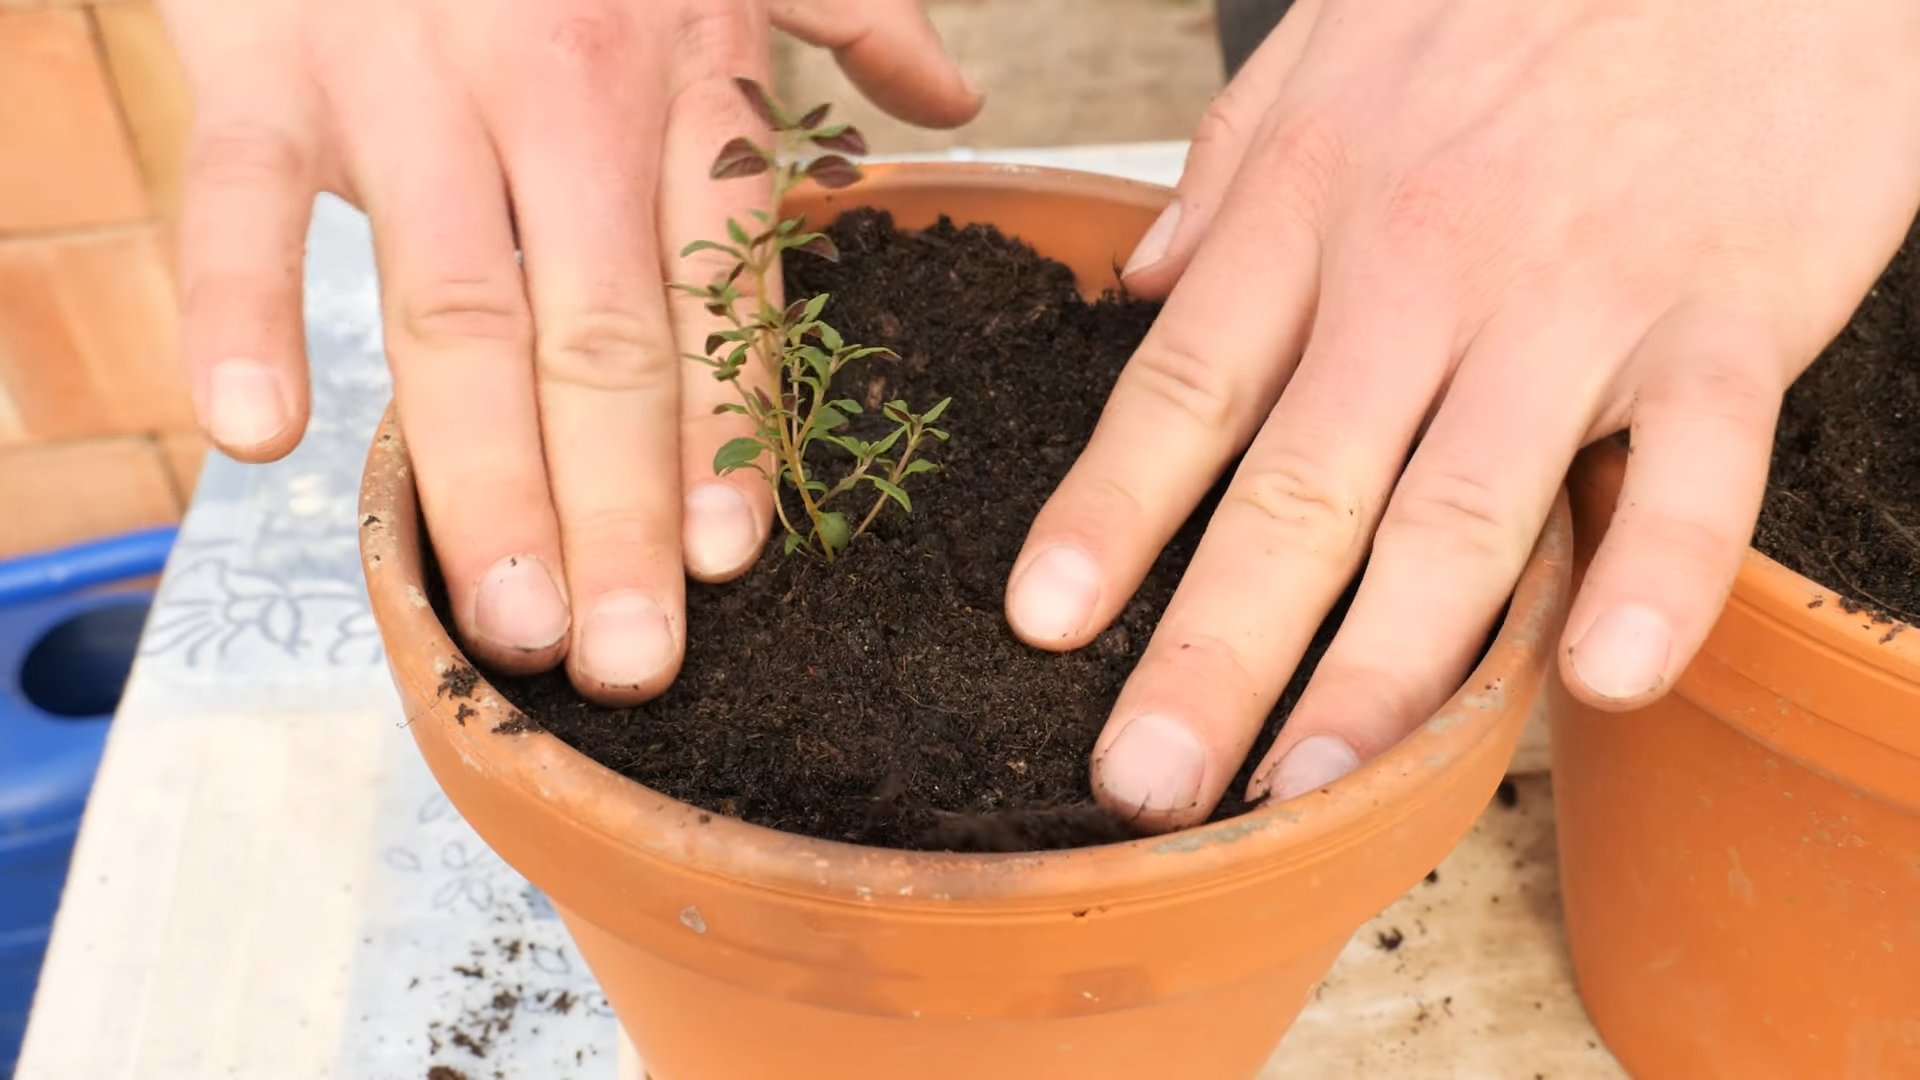
2. Create Planting Holes: Dig small holes in the soil, spaced about 2-3 inches apart. The holes should be large enough to accommodate the root balls of the seedlings.
3. Remove Seedlings from Their Containers: Gently remove the thyme seedlings from their nursery containers. If the roots are tightly bound, gently loosen them with your fingers.
4. Plant the Seedlings: Place each seedling in a planting hole and gently backfill with potting mix. Make sure the top of the root ball is level with the surrounding soil.
5. Water Thoroughly: Water the newly planted seedlings thoroughly until the water drains out of the bottom of the pot.
Caring for Your Indoor Thyme
Once your thyme is planted, it’s time to provide the right care to help it thrive. Here’s what you need to know:
Light
Thyme needs at least 6-8 hours of sunlight per day. A south-facing windowsill is ideal. If you don’t have enough natural light, supplement with grow lights. I’ve found that using a full-spectrum LED grow light for about 12 hours a day works wonders.
Watering
Thyme is drought-tolerant and doesn’t like to be overwatered. Allow the soil to dry out slightly between waterings. When you do water, water deeply until the water drains out of the bottom of the pot. Avoid getting the foliage wet, as this can lead to fungal diseases. I usually check the soil moisture by sticking my finger about an inch deep. If it feels dry, it’s time to water.
Temperature
Thyme prefers temperatures between 60-70°F (15-21°C). Avoid placing your thyme near drafts or heat sources.
Humidity
Thyme doesn’t need high humidity. In fact, it prefers dry air. If your home is particularly humid, you can improve air circulation by placing a small fan near your thyme plant.
Fertilizing
Thyme doesn’t need a lot of fertilizer. In fact, too much fertilizer can make it leggy and less flavorful. If you want to fertilize, use a balanced liquid fertilizer diluted to half strength every 2-3 weeks during the growing season (spring and summer).
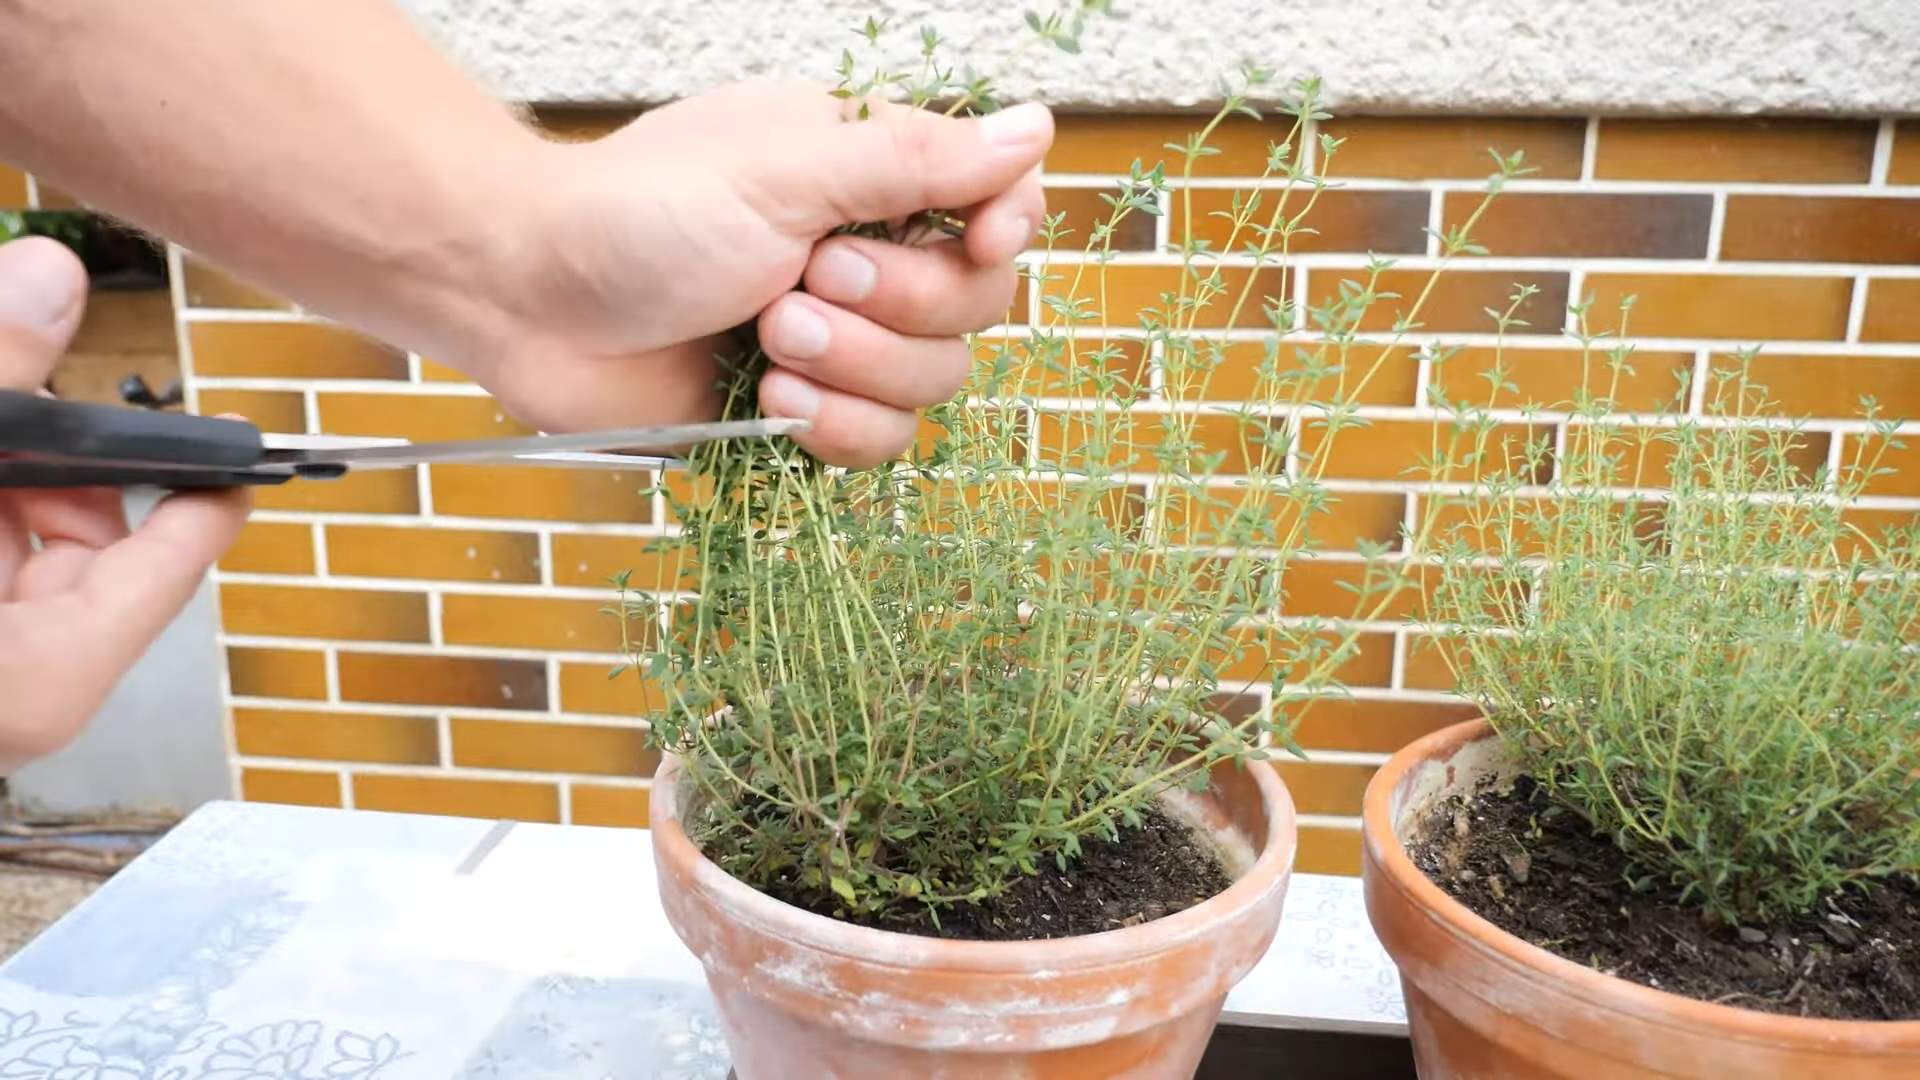
Pruning
Pruning is essential for keeping your thyme plant compact and bushy. Regularly pinch back the tips of the stems to encourage branching. You can also harvest sprigs of thyme as needed for cooking. Don’t remove more than one-third of the plant at a time. I usually prune my thyme every few weeks to keep it looking its best.
Pest and Disease Control
Thyme is relatively pest-resistant, but it can occasionally be affected by aphids or spider mites. If you notice any pests, you can try spraying them off with a strong stream of water or using insecticidal soap. Overwatering can lead to root rot, so make sure your pot has good drainage and avoid letting the soil stay soggy.
Harvesting Your Thyme
One of the best things about growing thyme indoors is being able to harvest fresh herbs whenever you need them. Here’s how to harvest your thyme:
1. Choose the Right Time: The best time to harvest thyme is in the morning, after the dew has dried.
2. Use Sharp Scissors or Pruners: Cut sprigs of thyme from the plant, leaving at least a few inches of growth on each stem.
3. Harvest Regularly: Regular harvesting will encourage the plant to produce more growth.
4. Use Fresh or Dried: You can use thyme fresh or dry it for later use. To dry thyme, tie sprigs together and hang them upside down in a cool, dry place. Once the leaves are dry, you can crumble them and store them in an airtight container.
Troubleshooting
Even with the best care, you might encounter some problems when growing thyme indoors. Here are a few common issues and how to address them:
* Leggy Growth: If your thyme plant is growing tall and spindly, it’s probably not getting enough light. Move it to a sunnier location or supplement with grow lights.
* Yellowing Leaves: Yellowing leaves can be a sign of overwatering or nutrient deficiency. Make sure your pot has good drainage and avoid letting the soil stay soggy. If you suspect nutrient deficiency, try fertilizing with a balanced liquid fertilizer.
* Lack of Flavor: If your thyme doesn’t have a strong flavor, it might be getting too much fertilizer. Reduce or eliminate fertilizing.
* Pests: Check your thyme plant regularly for pests like aphids or spider mites. If you find any, treat them with insecticidal soap or neem oil.
Enjoying Your Homegrown Thyme
Now that you’ve successfully grown your own thyme indoors, it’s time to enjoy the fruits (or rather, herbs) of your labor! Use fresh thyme to flavor soups, stews, roasted vegetables, meats, and more. You can also use it to make herbal teas or infuse oils and vinegars. The possibilities are endless!
Growing thyme indoors is a rewarding experience that allows you to enjoy fresh herbs year-round. With a little bit of care and attention, you can have a thriving thyme plant that adds flavor and fragrance to your home. Happy growing!
Conclusion
So, there you have it! Growing thyme indoors is not only achievable, but it’s also incredibly rewarding. Imagine having fresh, fragrant thyme readily available at your fingertips, no matter the season. Forget those sad, dried-up jars from the supermarket; with a little effort, you can cultivate your own thriving thyme plant right in your kitchen.
This DIY trick is a must-try for several reasons. First and foremost, it elevates your culinary creations. Fresh thyme adds a depth of flavor that dried thyme simply can’t match. Think of the aromatic stews, the flavorful roasted vegetables, and the perfectly seasoned meats you can create with your homegrown herb. Secondly, it’s a sustainable and cost-effective solution. You’ll save money on buying thyme regularly, and you’ll reduce your reliance on commercially grown herbs that often travel long distances. Finally, it’s a therapeutic and enjoyable hobby. Nurturing a plant and watching it flourish is incredibly satisfying, and the fresh, earthy scent of thyme can be incredibly calming.
But don’t stop there! Experiment with different varieties of thyme. Lemon thyme adds a citrusy zing to your dishes, while creeping thyme makes a beautiful and fragrant ground cover if you decide to transplant it outdoors later. You can also try different containers, from rustic terracotta pots to sleek, modern planters, to match your home decor. Consider using a self-watering planter to simplify the watering process, especially if you’re prone to forgetting. Another variation is to propagate your thyme plant from cuttings, allowing you to expand your thyme garden and share your bounty with friends and family. You can even dry your excess thyme to create your own homemade dried herb blend, ensuring that you always have a supply on hand.
We wholeheartedly encourage you to give this DIY trick a try. It’s easier than you might think, and the rewards are well worth the effort. Don’t be afraid to experiment and find what works best for you and your thyme plant. Remember to provide plenty of sunlight, well-draining soil, and consistent watering, and you’ll be well on your way to enjoying a thriving indoor thyme garden.
Once you’ve successfully grown your own thyme indoors, we’d love to hear about your experience! Share your tips, tricks, and photos in the comments below. Let’s create a community of indoor thyme growers and inspire others to embrace the joy of homegrown herbs. Your insights could be invaluable to someone just starting out, and we can all learn from each other’s successes and challenges. So, get planting, get creative, and get ready to enjoy the delicious flavor of fresh, homegrown thyme!
FAQ
What kind of soil is best for growing thyme indoors?
Thyme thrives in well-draining soil. A mix of potting soil, perlite, and sand is ideal. This combination ensures that the soil doesn’t retain too much water, which can lead to root rot. You can also purchase a potting mix specifically formulated for herbs, which often contains the right balance of nutrients and drainage properties. Avoid using garden soil, as it can be too heavy and may contain pests or diseases.
How much sunlight does indoor thyme need?
Thyme needs at least six hours of direct sunlight per day to thrive. Place your thyme plant near a sunny window, preferably one that faces south or west. If you don’t have access to enough natural light, you can supplement with a grow light. Position the grow light a few inches above the plant and keep it on for 12-14 hours per day. Insufficient sunlight can lead to leggy growth and a lack of flavor in the thyme.
How often should I water my indoor thyme plant?
Water your thyme plant when the top inch of soil feels dry to the touch. Avoid overwatering, as this can lead to root rot. When you do water, water thoroughly until the water drains out of the bottom of the pot. Allow the soil to dry out slightly between waterings. During the winter months, when the plant is not actively growing, you may need to water less frequently.
How do I harvest thyme from my indoor plant?
Harvest thyme by snipping off stems with scissors or pruning shears. Avoid cutting more than one-third of the plant at a time, as this can stress the plant. The best time to harvest thyme is in the morning, after the dew has dried. This is when the essential oils are most concentrated, resulting in the best flavor. You can use the fresh thyme immediately or dry it for later use.
How do I dry thyme from my indoor plant?
There are several ways to dry thyme. One method is to tie the stems together in a bundle and hang them upside down in a cool, dry, and well-ventilated place. Another method is to spread the stems out on a baking sheet and dry them in a low oven (around 170°F) for a few hours. You can also use a dehydrator to dry thyme. Once the thyme is completely dry, crumble the leaves and store them in an airtight container.
What are some common problems when growing thyme indoors?
Some common problems when growing thyme indoors include overwatering, underwatering, insufficient sunlight, and pests. Overwatering can lead to root rot, while underwatering can cause the plant to wilt and dry out. Insufficient sunlight can result in leggy growth and a lack of flavor. Pests such as aphids and spider mites can also infest thyme plants. Inspect your plant regularly for signs of pests and take appropriate action if necessary.
Can I propagate thyme from cuttings?
Yes, you can easily propagate thyme from cuttings. Take a 4-6 inch cutting from a healthy stem, removing the lower leaves. Dip the cut end in rooting hormone and plant it in a pot filled with well-draining soil. Keep the soil moist but not soggy, and place the pot in a warm, bright location. Roots should develop within a few weeks. Once the cutting has rooted, you can transplant it into a larger pot.
How do I fertilize my indoor thyme plant?
Thyme doesn’t require heavy fertilization. Fertilize your thyme plant sparingly, using a balanced liquid fertilizer diluted to half strength. Fertilize every 2-3 months during the growing season (spring and summer). Avoid fertilizing during the winter months, when the plant is not actively growing. Over-fertilizing can lead to leggy growth and a decrease in flavor.
What varieties of thyme are best for growing indoors?
Several varieties of thyme are well-suited for indoor growing, including common thyme (Thymus vulgaris), lemon thyme (Thymus citriodorus), and creeping thyme (Thymus serpyllum). Common thyme is a versatile variety with a classic thyme flavor. Lemon thyme has a citrusy aroma and flavor that is great for adding to teas and desserts. Creeping thyme is a low-growing variety that can be used as a ground cover or in hanging baskets.
How do I prevent pests from infesting my indoor thyme plant?
To prevent pests from infesting your indoor thyme plant, inspect the plant regularly for signs of pests. Keep the area around the plant clean and free of debris. Avoid overwatering, as this can create a favorable environment for pests. If you do find pests, you can try washing them off with a strong stream of water or using an insecticidal soap. You can also introduce beneficial insects, such as ladybugs, to help control pests.
Leave a Comment