

Grow Taro Kitchen Organic 鈥?sounds intriguing, doesn’t it? Imagine harvesting fresh, vibrant taro right from your kitchen! For centuries, taro has been a staple in many cultures, particularly in Polynesian and Asian cuisines. It’s more than just a food source; it’s a symbol of sustenance and connection to the land. I’ve always been fascinated by the idea of bringing that connection into my own home, and I’m excited to share my journey with you.
In today’s fast-paced world, we often lose touch with where our food comes from. Supermarket produce, while convenient, lacks the freshness and personal touch of homegrown ingredients. That’s where this DIY guide comes in! I’m going to show you simple, effective tricks to grow taro kitchen organic, even if you have limited space or gardening experience. Think of it as a fun, rewarding project that brings a taste of the tropics to your table.
Why taro, you ask? Besides its delicious, nutty flavor, growing your own taro allows you to control the entire process, ensuring it’s free from harmful pesticides and chemicals. Plus, it’s incredibly satisfying to nurture a plant from start to finish and then enjoy the fruits (or, in this case, the root!) of your labor. So, let’s dive in and discover the secrets to successfully growing taro in your very own kitchen!
Growing Taro Indoors: From Kitchen Scrap to Thriving Plant
Hey there, fellow plant enthusiasts! Ever thought about turning your kitchen scraps into a beautiful, edible plant? Well, today I’m going to walk you through the surprisingly simple process of growing taro (also known as cocoyam or dasheen) right in your own home, starting with a taro root you probably bought from the grocery store. It’s a fun, rewarding project, and you’ll be amazed at how easy it is to get started.
What You’ll Need
Before we dive in, let’s gather our supplies. Don’t worry, you probably have most of these things lying around already:
* A taro root (look for one that’s firm and shows signs of sprouting, like small buds or eyes).
* A sharp knife or vegetable peeler.
* A glass or jar.
* Clean, chlorine-free water (tap water that’s been left out for 24 hours works great).
* A well-draining potting mix (a mix of peat moss, perlite, and vermiculite is ideal).
* A pot with drainage holes (at least 6 inches in diameter).
* Optional: Rooting hormone powder or liquid.
* Optional: A spray bottle for misting.
Preparing the Taro Root for Sprouting
This is a crucial step, so pay close attention! We need to encourage those little buds to turn into healthy sprouts.
1. Inspect the Taro Root: Take a good look at your taro root. Identify any areas that look like they might be sprouting. These are usually small bumps or “eyes” on the surface.
2. Cut the Taro Root (Optional): This step is optional, but it can speed up the sprouting process. If your taro root is large, you can cut it into smaller sections, ensuring each section has at least one “eye.” I usually cut mine into 2-3 sections. Be careful when using the knife!
3. Peel the Bottom (Important): Using your knife or vegetable peeler, carefully peel the bottom portion of the taro root. This is the part that will be submerged in water, and peeling it helps prevent rot. Don’t peel the entire root, just the bottom inch or two.
4. Apply Rooting Hormone (Optional): If you have rooting hormone, now’s the time to use it. Dip the cut end of the taro root (the peeled part) into the rooting hormone powder or liquid. This will encourage root development.
Sprouting the Taro Root in Water
Now for the fun part 鈥?watching your taro root come to life!
1. Fill the Glass or Jar: Fill your glass or jar with clean, chlorine-free water. Make sure the water level is high enough to submerge the peeled portion of the taro root, but not so high that it covers the entire root.
2. Place the Taro Root in Water: Carefully place the taro root in the glass or jar, with the peeled end submerged in water and the “eyes” facing upwards.
3. Find a Sunny Spot: Place the glass or jar in a warm, sunny location. A windowsill that receives indirect sunlight is perfect. Avoid direct sunlight, as it can scorch the taro root.
4. Change the Water Regularly: This is important to prevent algae growth and keep the water fresh. Change the water every 2-3 days.
5. Be Patient: It can take several weeks for the taro root to sprout. Don’t get discouraged if you don’t see any action right away. Just keep changing the water and providing plenty of sunlight. You should start to see small roots emerging from the bottom and sprouts appearing on top.
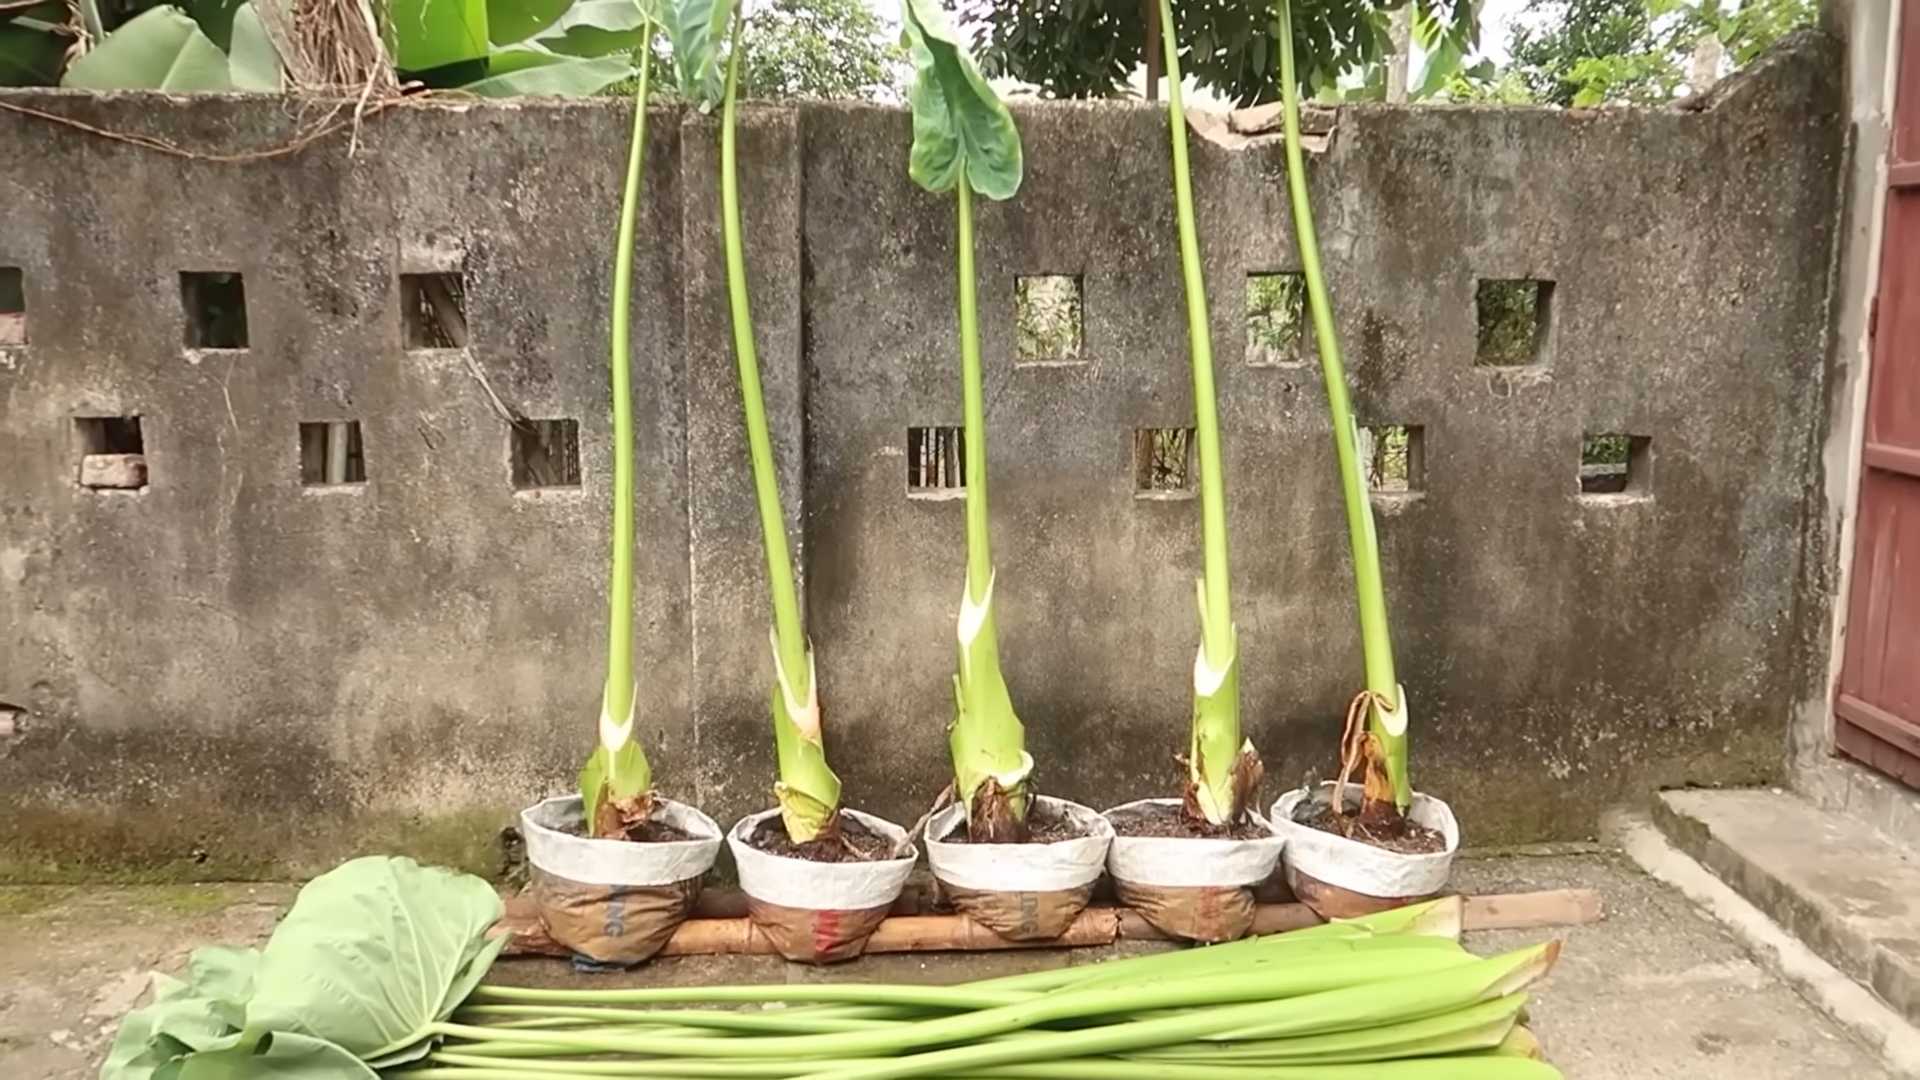
Planting the Sprouted Taro Root in Soil
Once your taro root has developed a good root system (at least an inch or two long) and has visible sprouts, it’s time to plant it in soil.
1. Prepare the Pot: Fill your pot with well-draining potting mix. Leave about an inch of space at the top of the pot.
2. Create a Hole: Use your finger or a small trowel to create a hole in the center of the potting mix, large enough to accommodate the taro root and its roots.
3. Carefully Remove the Taro Root: Gently remove the taro root from the glass or jar. Be careful not to damage the roots.
4. Plant the Taro Root: Place the taro root in the hole, making sure the roots are spread out. Cover the roots with potting mix, leaving the sprouts exposed.
5. Water Thoroughly: Water the potting mix thoroughly until water drains out of the drainage holes.
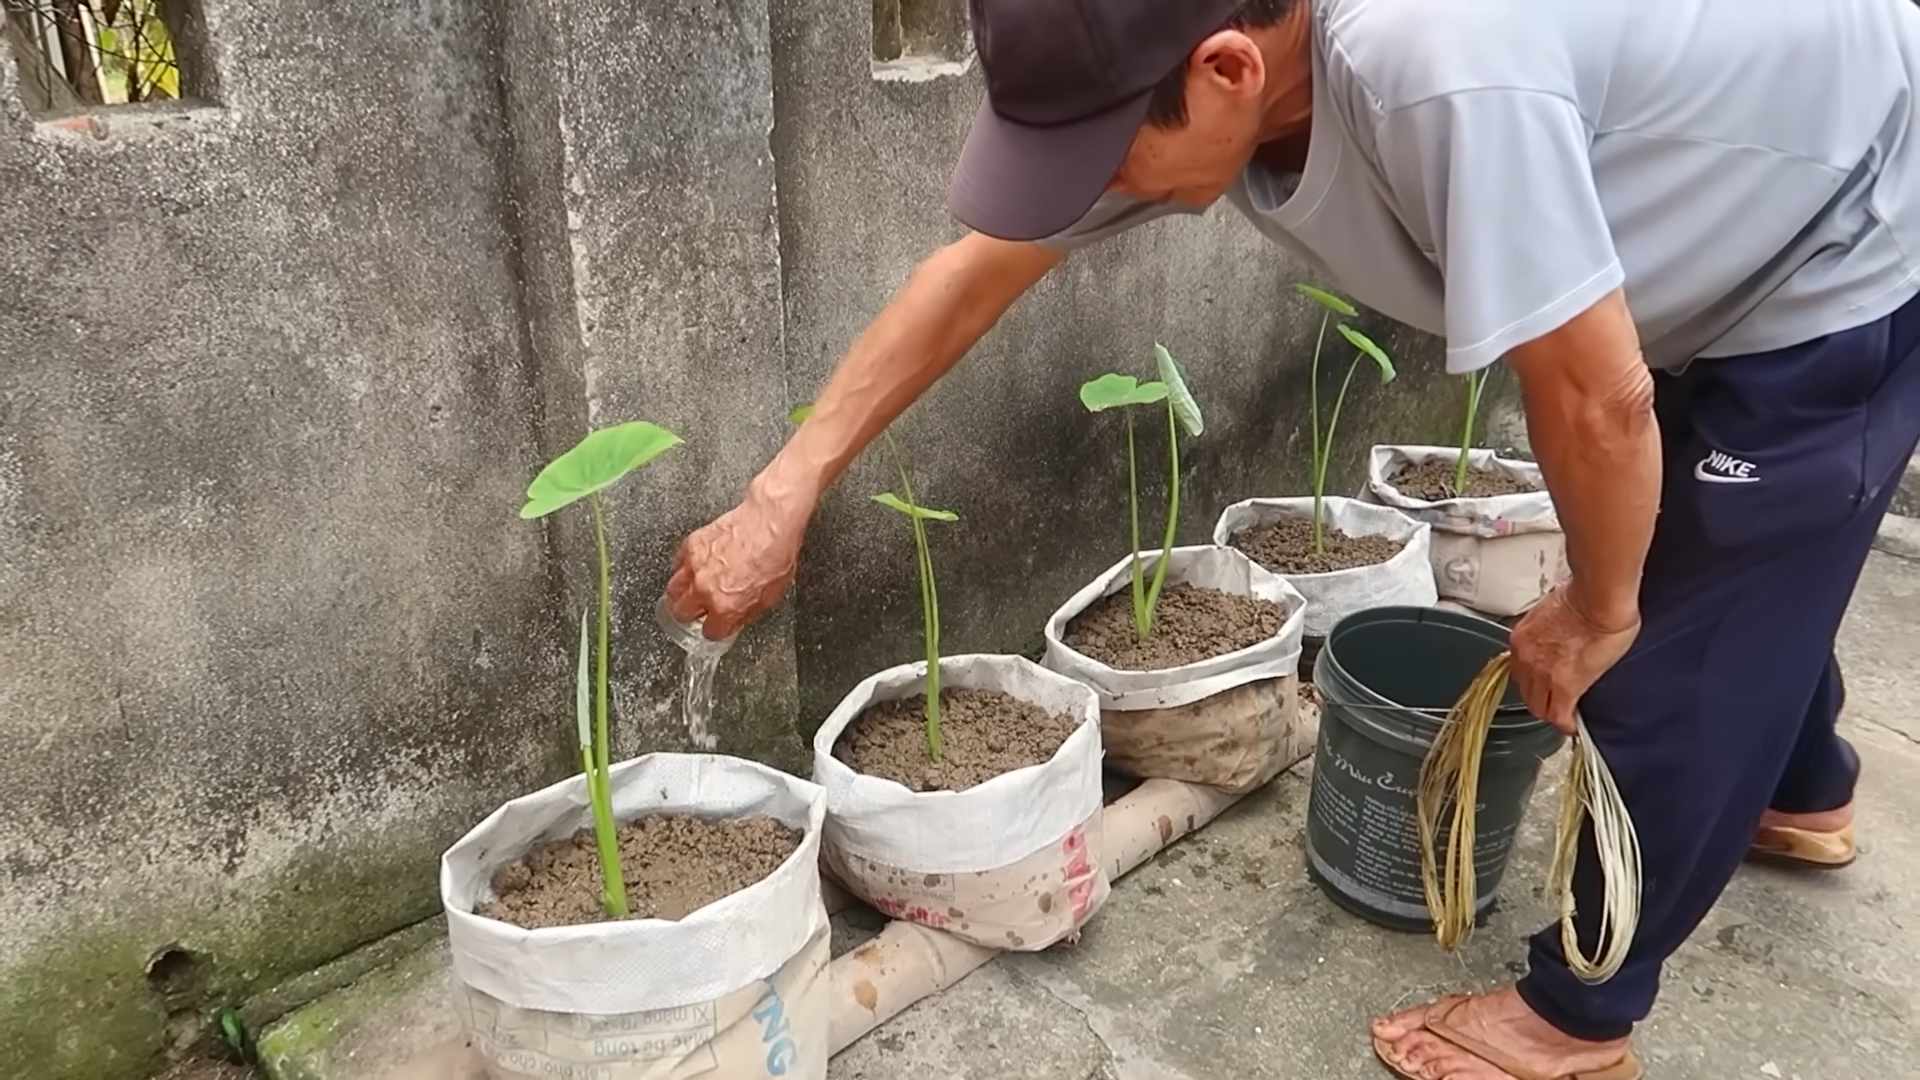
Caring for Your Taro Plant
Now that your taro plant is in soil, it’s time to provide it with the care it needs to thrive.
1. Sunlight: Taro plants need plenty of sunlight, but they don’t like direct sunlight. Place your plant in a location that receives bright, indirect sunlight. A south-facing window is ideal.
2. Watering: Taro plants like to be kept moist, but not soggy. Water your plant when the top inch of soil feels dry to the touch. Make sure the pot has good drainage to prevent root rot.
3. Humidity: Taro plants thrive in humid environments. If your home is dry, you can increase the humidity by misting your plant regularly with a spray bottle, placing a tray of water near the plant, or using a humidifier.
4. Fertilizing: Feed your taro plant with a balanced liquid fertilizer every 2-4 weeks during the growing season (spring and summer). Follow the instructions on the fertilizer label.
5. Temperature: Taro plants prefer warm temperatures, between 65掳F and 85掳F (18掳C and 29掳C). Avoid exposing your plant to cold drafts or sudden temperature changes.
6. Pruning: As your taro plant grows, you may need to prune it to remove any dead or yellowing leaves. Simply cut the leaves off at the base of the plant.
7. Repotting: As your taro plant grows, it may eventually outgrow its pot. When this happens, you’ll need to repot it into a larger pot. Choose a pot that’s at least 2 inches larger in diameter than the current pot.
Troubleshooting
Even with the best care, you might encounter some problems along the way. Here are a few common issues and how to fix them:
* Yellowing Leaves: This can be caused by overwatering, underwatering, or lack of nutrients. Check the soil moisture and adjust your watering schedule accordingly. If the soil is dry, water more frequently. If the soil is soggy, water less frequently. You may also need to fertilize your plant.
* Brown Leaf Tips: This is usually caused by dry air. Increase the humidity around your plant by misting it regularly or placing a tray of water nearby.
* Root Rot: This is caused by overwatering. Make sure your pot has good drainage and avoid letting the soil stay soggy. If you suspect root rot, you may need to repot your plant in fresh potting mix.
* Pests: Taro plants can be susceptible to pests such as spider mites, aphids, and mealybugs. Inspect your plant regularly for pests and treat them with insecticidal soap or neem oil if necessary.
Harvesting Taro (Eventually!)
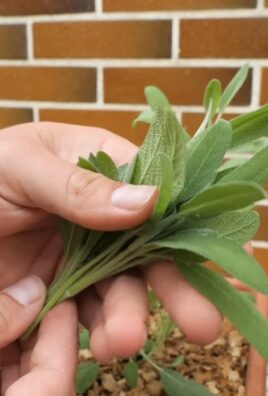
While you can grow taro indoors, it’s unlikely you’ll get a harvestable root in a typical indoor setting. Taro needs a long growing season and a lot of space to develop a large root. However, you *can* harvest the leaves! Taro leaves are edible and can be cooked like spinach. Just be sure to cook them thoroughly, as raw taro leaves contain calcium oxalate crystals that can irritate your mouth and throat.
Important Note: Always research the specific variety of taro you’re growing to ensure it’s safe to eat. Some varieties are more toxic than others.
Enjoy Your Homegrown Taro!
Growing taro indoors is a fun and rewarding experience. It’s a great way to add some greenery to your home and learn about plant propagation. With a little patience and care, you can turn a simple kitchen scrap into a thriving plant. Happy growing!
Conclusion
So, there you have it! Transforming your kitchen scraps into thriving taro plants is not only incredibly rewarding but also a fantastic way to embrace sustainable living. We’ve walked you through the simple steps, demystifying the process of growing taro in your own home, and hopefully, ignited a spark of excitement for this unique gardening adventure.
Why is this DIY trick a must-try? Because it’s more than just growing a plant; it’s about connecting with nature, reducing waste, and enjoying the fruits (or rather, the roots and leaves!) of your labor. Imagine the satisfaction of harvesting your own organically grown taro, knowing you nurtured it from a humble kitchen leftover. It’s a conversation starter, a learning experience, and a delicious addition to your culinary repertoire.
But the beauty of this method lies in its adaptability. Feel free to experiment with different containers. While we recommended a pot with good drainage, you could also try a hydroponic setup for a more modern approach. Consider varying the soil composition. Adding some coco coir or perlite can improve drainage and aeration. And don’t be afraid to explore different varieties of taro if you can source them. Each variety boasts unique flavors and textures, adding another layer of excitement to your home gardening journey.
Think about the possibilities! You could even create a small indoor taro garden, adding a touch of tropical greenery to your home. Imagine the lush, vibrant leaves cascading from your shelves, creating a calming and inviting atmosphere.
We wholeheartedly encourage you to give this DIY taro growing trick a try. It’s easier than you might think, and the rewards are immeasurable. Don’t be intimidated if you’re new to gardening; this is a perfect project for beginners. The most important thing is to be patient, observant, and willing to learn.
And once you’ve embarked on your taro-growing adventure, we’d love to hear about your experience! Share your photos, tips, and challenges in the comments below. Let’s create a community of taro enthusiasts, sharing our knowledge and inspiring others to embrace the joy of growing their own food. Let us know what kind of organic fertilizer you used and if you had any pest problems. Your insights could be invaluable to someone just starting out. So, grab your taro scraps, prepare your soil, and get ready to witness the magic of life unfold in your very own kitchen. Happy growing!
Frequently Asked Questions (FAQs)
1. What part of the taro do I need to start growing it?
You’ll need the top portion of the taro root, the part that was closest to the leaves. This section contains the nodes or “eyes” from which new shoots will emerge. Make sure it has at least one or two visible nodes. If you’re using a taro root purchased from a grocery store, ensure it’s still firm and hasn’t started to rot.
2. What kind of soil is best for growing taro?
Taro thrives in rich, well-draining soil. A mixture of potting soil, compost, and perlite is ideal. The compost provides essential nutrients, while the perlite improves drainage and aeration. Avoid heavy clay soils, as they can become waterlogged and lead to root rot. You can also add a small amount of slow-release organic fertilizer to the soil mix to provide a steady supply of nutrients.
3. How often should I water my taro plant?
Taro loves moisture, but it doesn’t like to sit in soggy soil. Water thoroughly when the top inch of soil feels dry to the touch. Ensure the pot has good drainage to prevent waterlogging. During the warmer months, you may need to water more frequently. In the winter, when growth slows down, you can reduce watering.
4. How much sunlight does taro need?
Taro prefers bright, indirect sunlight. Avoid placing it in direct sunlight, especially during the hottest part of the day, as this can scorch the leaves. A spot near an east-facing or west-facing window is usually ideal. If you don’t have enough natural light, you can supplement with a grow light.
5. How long does it take for taro to grow?
The time it takes for taro to grow depends on several factors, including the variety of taro, the growing conditions, and the size of the starting piece. Generally, you can expect to see new shoots emerging within a few weeks. It can take several months to a year for the taro root to mature enough for harvesting.
6. Can I grow taro indoors year-round?
Yes, you can grow taro indoors year-round, provided you provide the right conditions. Maintain a consistent temperature, provide adequate light, and water regularly. You may need to adjust your care routine depending on the season.
7. What are some common problems when growing taro, and how can I fix them?
Some common problems include root rot (caused by overwatering), yellowing leaves (caused by nutrient deficiencies or lack of light), and pests like aphids or spider mites. To prevent root rot, ensure good drainage and avoid overwatering. To address nutrient deficiencies, fertilize with a balanced organic fertilizer. To control pests, use insecticidal soap or neem oil.
8. Is taro edible, and how do I prepare it?
Yes, taro is edible, but it must be cooked thoroughly before consumption. Raw taro contains calcium oxalate crystals, which can cause irritation and discomfort. Cooking breaks down these crystals, making the taro safe to eat. Taro can be boiled, steamed, baked, or fried. It can be used in a variety of dishes, such as stews, soups, and desserts. The leaves are also edible but require thorough cooking as well.
9. Can I grow taro in water only?
While taro can be initially sprouted in water, it will eventually need to be transplanted into soil to thrive long-term. Growing taro in water only can lead to nutrient deficiencies and stunted growth.
10. How do I know when my taro is ready to harvest?
The best time to harvest taro is when the leaves start to turn yellow and die back. This indicates that the plant is diverting its energy into the root. You can gently dig around the base of the plant to check the size of the root. If it’s large enough for your liking, you can harvest it.
11. What kind of fertilizer is best for growing organic taro?
For organic taro growth, consider using compost tea, fish emulsion, or a balanced organic fertilizer specifically formulated for root vegetables. These options provide essential nutrients without the use of synthetic chemicals. Always follow the instructions on the fertilizer label to avoid over-fertilizing.
12. Are there any specific taro varieties that are better suited for indoor growing?
While most taro varieties can be grown indoors, smaller varieties like ‘Bun Long’ or ‘Elepaio’ might be more manageable in pots. Research the specific needs of the variety you choose to ensure optimal growth.
13. How do I prevent pests from attacking my indoor taro plant?
Regularly inspect your plant for signs of pests. Wipe down the leaves with a damp cloth to remove dust and potential pests. Use insecticidal soap or neem oil as needed, following the product instructions carefully. Maintaining good air circulation can also help prevent pest infestations.
14. Can I propagate taro from cuttings?
While taro is typically propagated from the top portion of the root, you can also try propagating it from stem cuttings. Take a cutting with at least one node and place it in water until roots develop. Then, transplant it into soil. However, root propagation is generally more successful.
15. What do I do with the taro leaves?
Taro leaves are edible but must be cooked thoroughly to remove calcium oxalate crystals. They can be used in dishes like laulau (Hawaiian steamed taro leaves with pork) or added to soups and stews. Always cook the leaves until they are tender and no longer have a sharp taste.
Leave a Comment