

Grow Sweet Potatoes at Home – imagine harvesting a bounty of vibrant, earthy sweet potatoes right from your own backyard! Forget those bland, store-bought spuds; we’re diving into the wonderful world of homegrown goodness. For centuries, sweet potatoes have been a staple in cultures around the globe, from their origins in Central and South America to their prominent place in Southern US cuisine. They’re not just delicious; they’re packed with vitamins and nutrients, making them a healthy and rewarding addition to any meal.
But let’s be honest, the thought of growing your own food can sometimes feel intimidating. Where do you even start? That’s where this DIY guide comes in! I’m here to show you that you don’t need a sprawling farm to enjoy the taste of freshly harvested sweet potatoes. Whether you have a spacious garden or just a sunny balcony, I’ll share simple, effective tricks and hacks to help you grow sweet potatoes at home successfully.
In this article, we’ll unlock the secrets to cultivating these delightful tubers, from sprouting slips (the baby sweet potato plants) to nurturing them through harvest. So, ditch the grocery store and get ready to experience the joy of digging up your own sweet potato treasure. Let’s get growing!
Growing Sweet Potatoes at Home: A Comprehensive DIY Guide
Hello dear garden friends! Have you ever wondered how you can grow those delicious, orange sweet potatoes right in your own garden? I’ll show you how! It’s easier than you think and incredibly fun. Let’s dive into the world of growing sweet potatoes together!
What you need for growing sweet potatoes:
- Sweet potatoes: Organic sweet potatoes are best as they have not been treated with growth inhibitors.
- A glass of water or container: To grow the “slips” (seedlings).
- Toothpicks: To stabilize the sweet potato in the glass of water.
- Potting soil: High-quality, well-draining soil is crucial.
- Garden bed or large pots: Enough space for the sweet potato plants.
- Compost or organic fertilizer: For a nutrient-rich environment.
- Watering can or hose: For watering.
- Pruning shears: For cutting the slips.
- Mulch (optional): To retain moisture and suppress weeds.
Phase 1: Growing Slips (Getting Seedlings)
The “slips” are the small sprouts that grow from the sweet potato, which we will plant later. This step is crucial for success.
- Prepare the sweet potato: Choose a healthy sweet potato. Make sure it has no soft spots or damage.
- Insert toothpicks: Stick four toothpicks into the middle of the sweet potato, all around. These will serve to stabilize the sweet potato in the glass of water.
- Suspend in a glass of water: Fill a glass or container with water. The sweet potato should be about halfway submerged in the water. Make sure the bottom end is in the water, as that is where the roots will grow.
- Place in a warm and bright spot: Put the glass in a warm and bright place, but not in direct sunlight. A windowsill is ideal.
- Check the water level: Make sure the water level always remains the same. Refill water regularly if necessary.
- Be patient: It can take several weeks for the slips to start growing. Be patient and give the sweet potato time.
- Let the slips grow: Once the slips are about 15-20 cm long and have their own roots, they are ready to be planted.
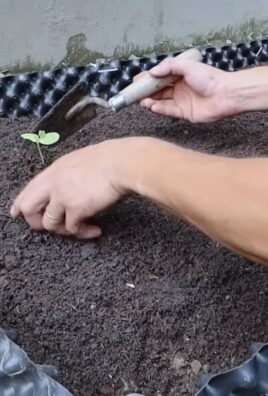
Phase 2: Preparing the Planting Bed or Pots
Proper soil preparation is crucial for the growth of sweet potatoes. They need loose, well-draining soil.
- Choose a location: Sweet potatoes love the sun! Choose a location that gets at least 6-8 hours of sunlight per day.
- Prepare the soil: Loosen the soil thoroughly. Remove stones and weeds.
- Incorporate compost: Mix plenty of compost or organic fertilizer into the soil. Sweet potatoes are heavy feeders and require many nutrients.
- Improve drainage: If the soil is too heavy, you can add sand or perlite to improve drainage. Sweet potatoes do not like waterlogging.
- Form beds: Form slightly raised beds to improve drainage and increase soil temperature.
- Prepare pots (if used): Choose large pots with a diameter of at least 45 cm. Fill the pots with high-quality potting soil and mix in some compost.
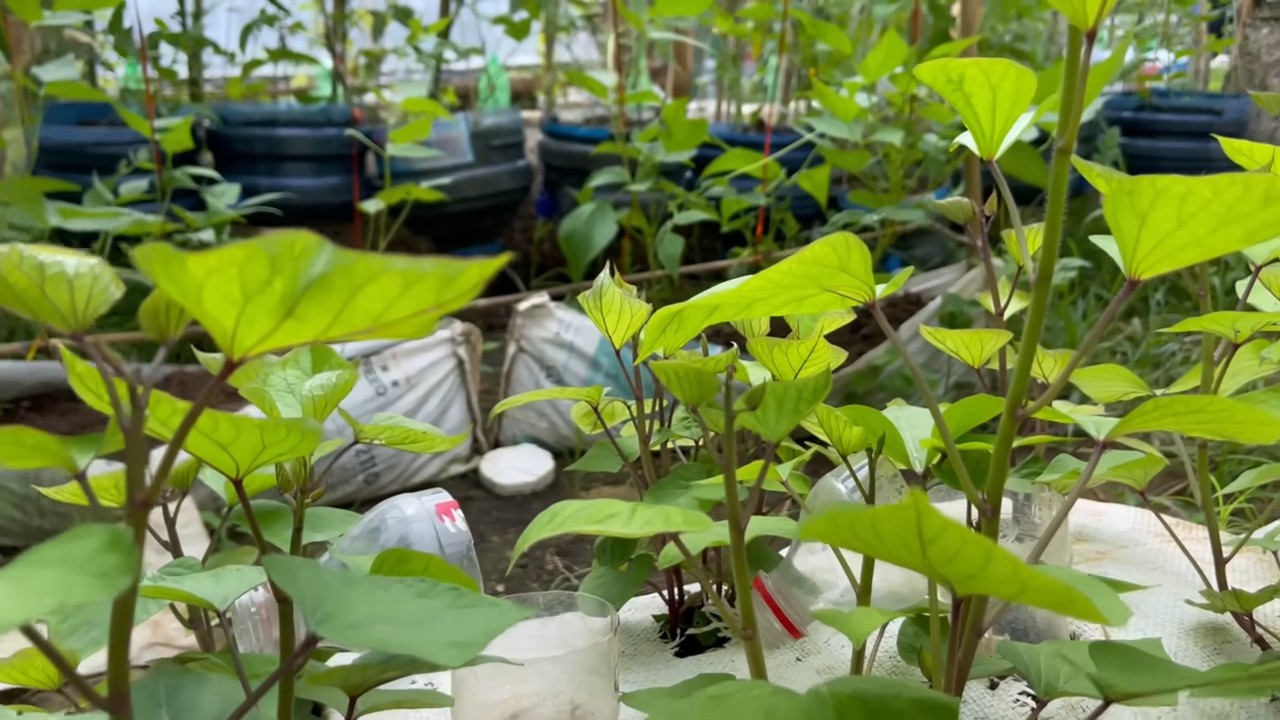
Phase 3: Planting the Slips
Now comes the exciting part: planting the slips!
- Carefully remove the slips: Carefully cut the slips from the sweet potato with pruning shears. Be careful not to damage the roots.
- Plant the slips: Make small holes in the prepared soil or in the pots. Plant the slips about 5-7 cm deep. The distance between the plants should be about 30-45 cm.
- Water them in: Water the freshly planted slips thoroughly.
- Mulch (optional): Spread a layer of mulch around the plants to retain moisture and suppress weeds. Straw, wood chips, or grass clippings are good mulching materials.
Phase 4: Caring for the Sweet Potato Plants
Proper care is crucial for a bountiful harvest.
- Water regularly: Sweet potatoes require regular watering, especially during dry periods. Make sure the soil remains evenly moist, but not too wet.
- Fertilize: Fertilize the plants every few weeks with an organic fertilizer or compost tea.
- Remove weeds: Keep the bed or pots free of weeds. Weeds compete with the sweet potatoes for nutrients and water.
- Control the vines: Sweet potatoes form long vines. You can trim the vines to concentrate the plant’s energy on forming tubers.
- Watch for pests and diseases: Look for signs of pests or diseases. If necessary, you can use organic pesticides.
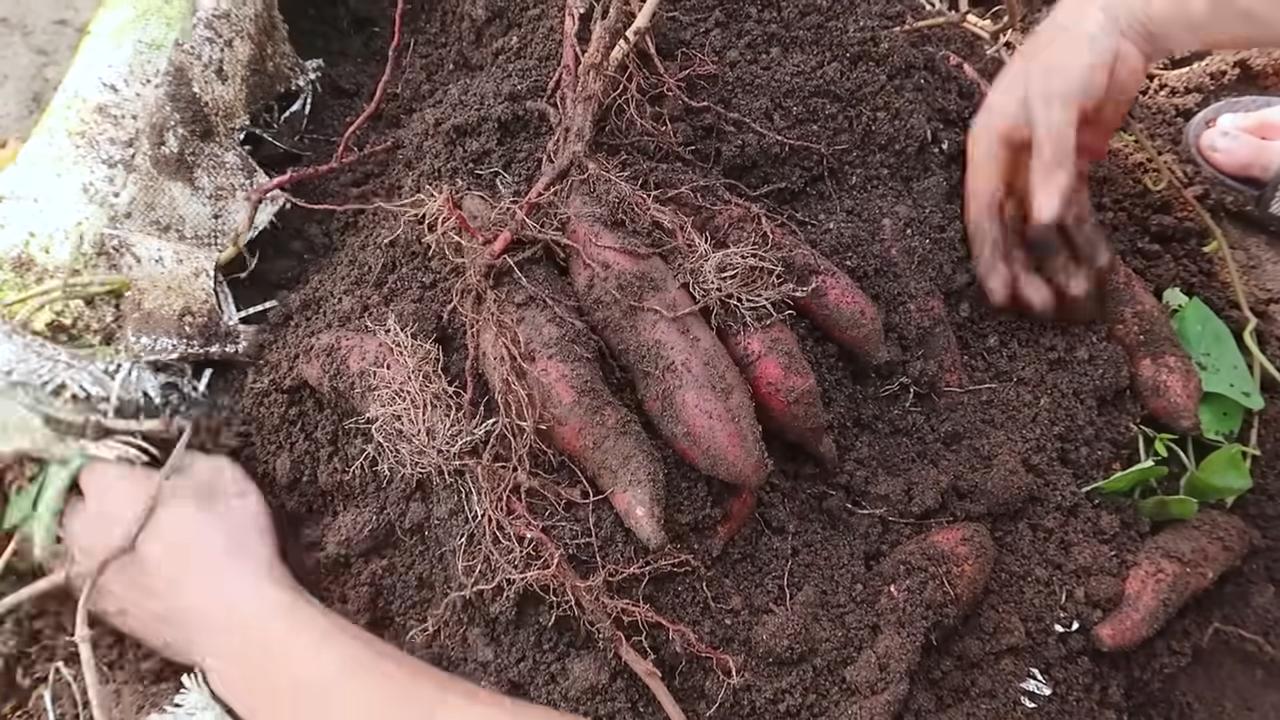
Phase 5: Harvesting the Sweet Potatoes
The harvest is the grand finale of our work!
- Determine harvest time: Sweet potatoes are usually ready to harvest about 90-120 days after planting. The leaves will start to turn yellow and die back.
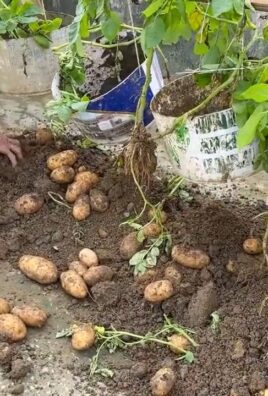
- Dig up carefully: Carefully dig up the sweet potatoes with a garden fork or spade. Be careful not to damage the tubers.
- Let them dry: Let the harvested sweet potatoes dry for a few days in a warm, dry place. This hardens the skin and makes the sweet potatoes last longer.
- Store: Store the dried sweet potatoes in a cool, dark, and dry place. They can be stored for several months.
Additional Tips and Tricks:
- Variety selection: There are many different varieties of sweet potatoes. Find out which varieties grow best in your region.
- Crop rotation: Do not plant sweet potatoes in the same location every year. Rotate your crops to keep the soil healthy.
- Soil analysis: A soil analysis can help determine the nutrient content of the soil and adjust fertilizer needs.
- Protection from frost: Sweet potatoes are sensitive to frost. Protect the plants with fleece or foil if there is a risk of frost.
- Experiment: Try different growing methods to find out what works best for you.
I hope this guide helps you to grow your own sweet potatoes at home. It is a rewarding project that will reward you with delicious and healthy tubers. Happy gardening
Conclusion
So, there you have it! Growing sweet potatoes at home is not only achievable, but it’s also a deeply rewarding experience. Forget those bland, store-bought sweet potatoes – imagine sinking your teeth into a freshly harvested, vibrant orange sweet potato, bursting with natural sweetness and nutrients, all thanks to your own green thumb. This DIY trick transforms the humble sweet potato into a source of homegrown pride and delicious meals.
Why is this a must-try? Because it empowers you to control the quality and origin of your food. You know exactly what went into growing your sweet potatoes – no pesticides, no questionable farming practices, just pure, unadulterated goodness. Plus, it’s incredibly satisfying to nurture a plant from start to finish and witness the miracle of growth. It’s a fantastic way to connect with nature, learn about the growing process, and enjoy the fruits (or rather, the roots!) of your labor.
Beyond the basic method, there are so many ways to personalize your sweet potato growing adventure. Experiment with different varieties! Beauregard, Covington, and Japanese sweet potatoes all offer unique flavors and textures. Consider growing them in containers if you have limited space, or try vertical gardening techniques to maximize your yield. You can even get creative with your soil mix, adding compost or other organic matter to boost nutrient levels. For those in cooler climates, starting your slips indoors is crucial, and you might even consider using a cold frame to extend your growing season. Don’t be afraid to experiment with companion planting! Marigolds can help deter pests, while beans can fix nitrogen in the soil, benefiting your sweet potato plants.
The possibilities are endless, and the rewards are immense. From delicious sweet potato fries and pies to healthy roasted vegetables and hearty stews, your homegrown sweet potatoes will elevate your culinary creations.
We wholeheartedly encourage you to give this DIY trick a try. It’s easier than you might think, and the payoff is well worth the effort. Embrace the challenge, get your hands dirty, and experience the joy of growing your own food.
And most importantly, we want to hear about your experiences! Share your successes, your challenges, and your tips with us in the comments below. Did you try a different variety of sweet potato? Did you encounter any unexpected hurdles? What are your favorite ways to cook with your homegrown sweet potatoes? Your insights will not only inspire others but also help us all learn and grow together. Let’s cultivate a community of passionate home gardeners, one sweet potato at a time! So go ahead, embark on your **grow sweet potatoes at home** journey today!
Frequently Asked Questions (FAQ)
What is the best time of year to start growing sweet potatoes?
The ideal time to start growing sweet potatoes is typically in late spring or early summer, after the last frost has passed and the soil has warmed up to at least 65°F (18°C). Sweet potatoes require a long growing season of at least 100-120 days to mature properly. Starting them too early in cold soil can stunt their growth and reduce your yield. If you live in a cooler climate with a shorter growing season, consider starting your sweet potato slips indoors 6-8 weeks before the last expected frost. This will give them a head start and ensure they have enough time to develop before the weather turns cold again.
How much sunlight do sweet potatoes need?
Sweet potatoes thrive in full sunlight, requiring at least 6-8 hours of direct sunlight per day. Adequate sunlight is crucial for photosynthesis, which is the process by which plants convert sunlight into energy for growth. Insufficient sunlight can result in smaller, less flavorful sweet potatoes. Choose a planting location that receives ample sunlight throughout the day. If you’re growing sweet potatoes in containers, make sure to place them in a sunny spot on your patio or balcony. If you notice your plants are not getting enough sunlight, you may need to supplement with artificial grow lights.
What kind of soil is best for growing sweet potatoes?
Sweet potatoes prefer well-drained, sandy loam soil that is rich in organic matter. Heavy clay soil can become waterlogged and prevent the sweet potatoes from developing properly. Before planting, amend your soil with compost, aged manure, or other organic matter to improve drainage and fertility. Sweet potatoes also prefer slightly acidic soil with a pH between 6.0 and 6.5. You can test your soil pH using a soil testing kit and adjust it accordingly with lime or sulfur. Avoid using nitrogen-rich fertilizers, as they can promote excessive vine growth at the expense of root development.
How often should I water my sweet potato plants?
Sweet potato plants need consistent moisture, especially during the first few weeks after planting. Water deeply and regularly, keeping the soil consistently moist but not waterlogged. Once the plants are established, you can reduce watering frequency, allowing the soil to dry out slightly between waterings. Overwatering can lead to root rot and other fungal diseases. Monitor the soil moisture levels regularly and adjust your watering schedule accordingly. During hot, dry weather, you may need to water more frequently.
How do I know when my sweet potatoes are ready to harvest?
Sweet potatoes are typically ready to harvest in the fall, about 90-120 days after planting. The leaves will start to turn yellow and the vines will begin to die back. You can also check the size of the sweet potatoes by gently digging around the base of the plant. The sweet potatoes should be at least 3-4 inches in diameter. Harvest your sweet potatoes before the first frost, as frost can damage the roots and reduce their storage life. Use a garden fork or shovel to carefully lift the sweet potatoes from the soil, being careful not to damage them.
How do I cure sweet potatoes after harvesting?
Curing sweet potatoes is essential for improving their flavor and storage life. After harvesting, gently brush off any excess soil and allow the sweet potatoes to dry in a warm, well-ventilated place for 1-2 weeks. The ideal curing temperature is between 80-85°F (27-29°C) with high humidity (85-90%). This process allows the skins to harden and the starches to convert to sugars, resulting in a sweeter, more flavorful sweet potato. After curing, store your sweet potatoes in a cool, dark, and dry place with good ventilation. They should last for several months if stored properly.
Can I grow sweet potatoes in containers?
Yes, you can successfully grow sweet potatoes in containers, especially if you have limited space. Choose a large container that is at least 12 inches deep and 18 inches wide. Fill the container with well-drained potting mix that is rich in organic matter. Plant one or two sweet potato slips per container. Water regularly and fertilize with a balanced fertilizer every few weeks. Place the container in a sunny location that receives at least 6-8 hours of direct sunlight per day. Container-grown sweet potatoes may not produce as large of a yield as those grown in the ground, but they can still provide a delicious and rewarding harvest.
What are some common pests and diseases that affect sweet potatoes?
Sweet potatoes can be susceptible to various pests and diseases, including sweet potato weevils, wireworms, flea beetles, and fungal diseases like fusarium wilt and black rot. To prevent pest and disease problems, practice good garden hygiene, such as removing plant debris and weeds regularly. Rotate your crops each year to prevent soilborne diseases from building up. Use organic pest control methods, such as insecticidal soap or neem oil, to control pests. Choose disease-resistant varieties of sweet potatoes whenever possible. If you notice any signs of disease, remove the affected plants immediately to prevent the spread of the disease.
Can I grow sweet potatoes from store-bought sweet potatoes?
Yes, you can grow sweet potato slips from store-bought sweet potatoes, but it’s important to choose organic sweet potatoes that have not been treated with sprout inhibitors. Suspend the sweet potato in a jar of water, with the bottom half submerged. Place the jar in a warm, sunny location. Within a few weeks, sprouts will begin to emerge from the sweet potato. Once the sprouts are 6-8 inches long, gently twist them off and place them in a jar of water to root. Once the roots are 1-2 inches long, you can transplant the slips into your garden or containers.
Leave a Comment