

Grow Romanesco Cauliflower: Ever dreamt of cultivating a vegetable that looks like it belongs in a futuristic garden? I know I have! This stunning, fractal-patterned beauty isn’t just a feast for the eyes; it’s also a delicious and nutritious addition to your home garden. For centuries, Romanesco cauliflower has captivated gardeners and chefs alike, with its unique appearance and mild, nutty flavor. Originating in Italy, it’s a testament to nature’s artistry and a delightful challenge for any home gardener.
But let’s be honest, sometimes growing your own food can feel a little daunting. That’s where these DIY tricks and hacks come in! I’m here to share my tried-and-true methods for successfully cultivating this extraordinary vegetable. Whether you’re a seasoned gardener or just starting out, these tips will help you grow Romanesco Cauliflower with confidence. Imagine the satisfaction of harvesting your own perfectly formed, fractal florets – a true conversation starter and a delicious ingredient for your next culinary masterpiece. Let’s get our hands dirty and unlock the secrets to growing this unique and rewarding vegetable!
Growing Romanesco Cauliflower: A Step-by-Step Guide to Fractal Fun!
Okay, friends, let’s talk about Romanesco cauliflower. It’s not just a vegetable; it’s a work of art! That mesmerizing fractal pattern is enough to make any gardener want to give it a try. And trust me, while it might look intimidating, growing Romanesco is totally achievable with a little planning and patience. I’m going to walk you through everything you need to know, from seed to harvest.
Getting Started: Planning and Preparation
Before we even think about seeds, let’s get the groundwork laid. Romanesco needs a good home to thrive.
* Timing is Key: Romanesco is a cool-season crop, meaning it prefers temperatures between 60-70°F (15-21°C). Hot weather can cause the heads to bolt (go to seed) or develop a bitter taste.
* For a spring harvest: Start seeds indoors 6-8 weeks before the last expected frost.
* For a fall harvest: Direct sow seeds in the garden in mid-summer, about 8-10 weeks before the first expected frost. This is generally the easier option, especially if you live in an area with hot summers.
* Choosing the Right Variety: While “Romanesco” is the most common name, you might see varieties like ‘Veronica’ or ‘Natalino’. They’re all pretty similar, so don’t stress too much about the specific name.
* Sunlight Requirements: Romanesco needs at least 6 hours of direct sunlight per day. Choose a sunny spot in your garden.
* Soil Preparation: This is crucial! Romanesco needs well-drained, fertile soil with a pH between 6.0 and 7.0.
* Amend the soil: Work in plenty of compost or well-rotted manure before planting. This will improve drainage, add nutrients, and help retain moisture.
* Consider a soil test: If you’re unsure about your soil’s pH or nutrient levels, a soil test can provide valuable information. You can usually get these done through your local agricultural extension office.
* Spacing: Give your Romanesco plants plenty of room to grow. Space them 18-24 inches apart in rows that are 24-36 inches apart.
Starting Seeds Indoors (Optional)
If you’re starting seeds indoors for a spring harvest, here’s what you need to do:
1. Gather Your Supplies: You’ll need seed starting trays or small pots, seed starting mix, Romanesco seeds, a spray bottle, and a heat mat (optional but helpful).
2. Sow the Seeds: Fill your seed starting trays or pots with seed starting mix. Moisten the mix with a spray bottle. Sow the seeds about ¼ inch deep.
3. Provide Warmth and Light: Place the trays or pots on a heat mat (if using) and under grow lights or in a sunny window. The ideal temperature for germination is around 70-75°F (21-24°C).
4. Keep the Soil Moist: Water gently with a spray bottle to keep the soil consistently moist but not soggy.
5. Harden Off Seedlings: About a week before you plan to transplant the seedlings outdoors, you’ll need to “harden them off.” This means gradually exposing them to outdoor conditions. Start by placing them outside for an hour or two each day, increasing the time each day. This will help them adjust to the sun, wind, and temperature changes.
Planting Romanesco in the Garden
Whether you started seeds indoors or are direct sowing, here’s how to get your Romanesco plants established in the garden:
1. Prepare the Planting Hole: Dig a hole that’s slightly larger than the root ball of your seedling (if transplanting) or about 1 inch deep (if direct sowing).
2. Transplant or Sow:
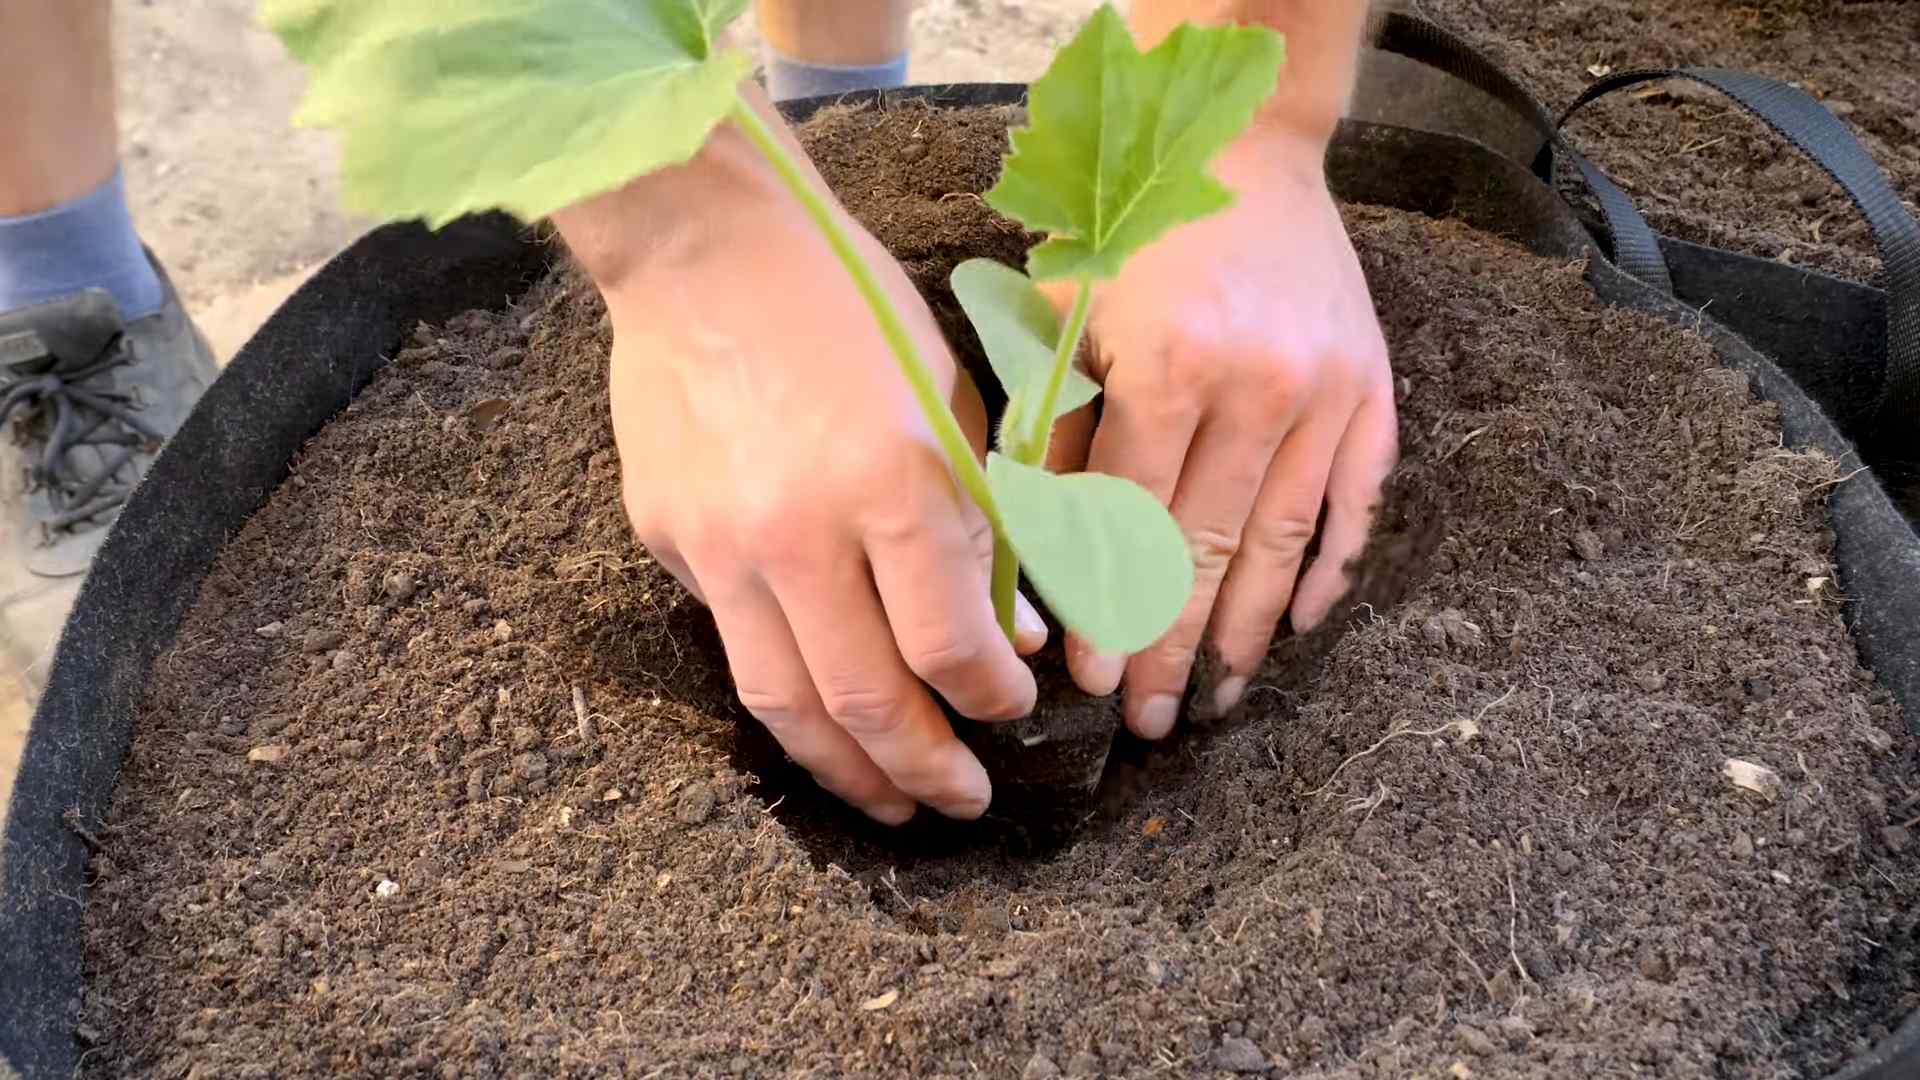
* Transplanting: Gently remove the seedling from its container and place it in the hole. Backfill with soil and gently firm around the base of the plant.
* Direct Sowing: Sow 2-3 seeds per hole. Once the seedlings emerge, thin them to one plant per hole.
3. Water Thoroughly: Water the newly planted seedlings or seeds thoroughly.
4. Mulch: Apply a layer of mulch around the plants to help retain moisture, suppress weeds, and regulate soil temperature. Straw, shredded leaves, or wood chips work well.
Caring for Your Romanesco Plants
Now that your Romanesco plants are in the ground, it’s time to provide them with the care they need to thrive.
* Watering: Romanesco needs consistent moisture, especially during head formation. Water deeply whenever the top inch of soil feels dry. Avoid overhead watering, as this can lead to fungal diseases. Drip irrigation or soaker hoses are ideal.
* Fertilizing: Feed your Romanesco plants every 2-3 weeks with a balanced fertilizer. Look for a fertilizer that’s high in nitrogen, phosphorus, and potassium (NPK). Follow the instructions on the fertilizer package. You can also side-dress with compost or well-rotted manure.
* Weeding: Keep the area around your Romanesco plants free of weeds. Weeds compete with the plants for water and nutrients. Hand-pull weeds regularly or use a hoe to cultivate the soil.
* Pest Control: Romanesco can be susceptible to several pests, including cabbage worms, aphids, and flea beetles.
* Cabbage Worms: These green caterpillars can quickly devour the leaves of your Romanesco plants. Handpick them off the plants or use Bacillus thuringiensis (Bt), a natural insecticide.
* Aphids: These tiny insects suck the sap from plants, causing them to weaken and distort. Spray aphids with a strong stream of water or use insecticidal soap.
* Flea Beetles: These small, jumping beetles can create small holes in the leaves of your Romanesco plants. Cover the plants with row covers to prevent flea beetles from reaching them. You can also use diatomaceous earth, a natural insecticide.
* Disease Prevention: Romanesco can also be susceptible to several diseases, including black rot and clubroot.
* Black Rot: This bacterial disease causes dark lesions on the leaves and heads of Romanesco plants. To prevent black rot, plant disease-resistant varieties, practice crop rotation, and avoid overhead watering.
* Clubroot: This fungal disease causes the roots of plants to swell and distort. To prevent clubroot, maintain a soil pH above 7.0, practice crop rotation, and avoid planting brassicas (like cabbage, broccoli, and cauliflower) in the same location year after year.
Harvesting Your Romanesco Cauliflower
The moment you’ve been waiting for! Harvesting your beautiful Romanesco cauliflower.
1. Timing is Everything: Romanesco is ready to harvest when the head is firm, compact, and about 6-8 inches in diameter. The exact timing will depend on the variety and growing conditions.
2. Check the Head: The individual florets should be tightly packed together and the color should be a vibrant green. If the florets are starting to separate or the color is fading, it’s time to harvest.
3. Cut the Head: Use a sharp knife to cut the head from the plant, leaving a few inches of stem attached.
4. Enjoy Your Harvest: Romanesco can be eaten raw or cooked. It’s delicious roasted, steamed, or added to soups and stews.
Okay, friends, let’s talk about Romanesco cauliflower. It’s not just a vegetable; it’s a work of art! That mesmerizing fractal pattern is enough to make any gardener want to give it a try. And trust me, while it might look intimidating, growing Romanesco is totally achievable with a little planning and patience. I’m going to walk you through everything you need to know, from seed to harvest.
Getting Started: Planning and Preparation
Before we even think about seeds, let’s get the groundwork laid. Romanesco needs a good home to thrive.
* Timing is Key: Romanesco is a cool-season crop, meaning it prefers temperatures between 60-70°F (15-21°C). Hot weather can cause the heads to bolt (go to seed) or develop a bitter taste.
* For a spring harvest: Start seeds indoors 6-8 weeks before the last expected frost.
* For a fall harvest: Direct sow seeds in the garden in mid-summer, about 8-10 weeks before the first expected frost. This is generally the easier option, especially if you live in an area with hot summers.
* Choosing the Right Variety: While “Romanesco” is the most common name, you might see varieties like ‘Veronica’ or ‘Natalino’. They’re all pretty similar, so don’t stress too much about the specific name.
* Sunlight Requirements: Romanesco needs at least 6 hours of direct sunlight per day. Choose a sunny spot in your garden.
* Soil Preparation: This is crucial! Romanesco needs well-drained, fertile soil with a pH between 6.0 and 7.0.
* Amend the soil: Work in plenty of compost or well-rotted manure before planting. This will improve drainage, add nutrients, and help retain moisture.
* Consider a soil test: If you’re unsure about your soil’s pH or nutrient levels, a soil test can provide valuable information. You can usually get these done through your local agricultural extension office.
* Spacing: Give your Romanesco plants plenty of room to grow. Space them 18-24 inches apart in rows that are 24-36 inches apart.
Starting Seeds Indoors (Optional)
If you’re starting seeds indoors for a spring harvest, here’s what you need to do:
1. Gather Your Supplies: You’ll need seed starting trays or small pots, seed starting mix, Romanesco seeds, a spray bottle, and a heat mat (optional but helpful).
2. Sow the Seeds: Fill your seed starting trays or pots with seed starting mix. Moisten the mix with a spray bottle. Sow the seeds about ¼ inch deep.
3. Provide Warmth and Light: Place the trays or pots on a heat mat (if using) and under grow lights or in a sunny window. The ideal temperature for germination is around 70-75°F (21-24°C).
4. Keep the Soil Moist: Water gently with a spray bottle to keep the soil consistently moist but not soggy.
5. Harden Off Seedlings: About a week before you plan to transplant the seedlings outdoors, you’ll need to “harden them off.” This means gradually exposing them to outdoor conditions. Start by placing them outside for an hour or two each day, increasing the time each day. This will help them adjust to the sun, wind, and temperature changes.
Planting Romanesco in the Garden
Whether you started seeds indoors or are direct sowing, here’s how to get your Romanesco plants established in the garden:
1. Prepare the Planting Hole: Dig a hole that’s slightly larger than the root ball of your seedling (if transplanting) or about 1 inch deep (if direct sowing).
2. Transplant or Sow:
* Transplanting: Gently remove the seedling from its container and place it in the hole. Backfill with soil and gently firm around the base of the plant.
* Direct Sowing: Sow 2-3 seeds per hole. Once the seedlings emerge, thin them to one plant per hole.
3. Water Thoroughly: Water the newly planted seedlings or seeds thoroughly.
4. Mulch: Apply a layer of mulch around the plants to help retain moisture, suppress weeds, and regulate soil temperature. Straw, shredded leaves, or wood chips work well.
Caring for Your Romanesco Plants
Now that your Romanesco plants are in the ground, it’s time to provide them with the care they need to thrive.
* Watering: Romanesco needs consistent moisture, especially during head formation. Water deeply whenever the top inch of soil feels dry. Avoid overhead watering, as this can lead to fungal diseases. Drip irrigation or soaker hoses are ideal.
* Fertilizing: Feed your Romanesco plants every 2-3 weeks with a balanced fertilizer. Look for a fertilizer that’s high in nitrogen, phosphorus, and potassium (NPK). Follow the instructions on the fertilizer package. You can also side-dress with compost or well-rotted manure.
* Weeding: Keep the area around your Romanesco plants free of weeds. Weeds compete with the plants for water and nutrients. Hand-pull weeds regularly or use a hoe to cultivate the soil.
* Pest Control: Romanesco can be susceptible to several pests, including cabbage worms, aphids, and flea beetles.
* Cabbage Worms: These green caterpillars can quickly devour the leaves of your Romanesco plants. Handpick them off the plants or use Bacillus thuringiensis (Bt), a natural insecticide.
* Aphids: These tiny insects suck the sap from plants, causing them to weaken and distort. Spray aphids with a strong stream of water or use insecticidal soap.
* Flea Beetles: These small, jumping beetles can create small holes in the leaves of your Romanesco plants. Cover the plants with row covers to prevent flea beetles from reaching them. You can also use diatomaceous earth, a natural insecticide.
* Disease Prevention: Romanesco can also be susceptible to several diseases, including black rot and clubroot.
* Black Rot: This bacterial disease causes dark lesions on the leaves and heads of Romanesco plants. To prevent black rot, plant disease-resistant varieties, practice crop rotation, and avoid overhead watering.
* Clubroot: This fungal disease causes the roots of plants to swell and distort. To prevent clubroot, maintain a soil pH above 7.0, practice crop rotation, and avoid planting brassicas (like cabbage, broccoli, and cauliflower) in the same location year after year.
Harvesting Your Romanesco Cauliflower
The moment you’ve been waiting for! Harvesting your beautiful Romanesco cauliflower.
1. Timing is Everything: Romanesco is ready to harvest when the head is firm, compact, and about 6-8 inches in diameter. The exact timing will depend on the variety and growing conditions.
2. Check the Head: The individual florets should be tightly packed together and the color should be a vibrant green. If the florets are starting to separate or the color is fading, it’s time to harvest.
3. Cut the Head: Use a sharp knife to cut the head from the plant, leaving a few inches of stem attached.
4. Enjoy Your Harvest: Romanesco can be eaten raw or cooked. It’s delicious roasted, steamed, or added to soups and stews.
Troubleshooting
Even with the best planning, things don’t always go perfectly. Here are a few common problems you might encounter and how to deal with them:
* Bolting: If your Romanesco plants bolt (go to seed) before the head forms, it’s usually due to hot weather or stress. Unfortunately, there’s not much you can do to reverse bolting. Try to plant at the right time of year and provide consistent moisture and nutrients to prevent bolting.
* Small Heads: Small heads can be caused by a variety of factors, including poor soil, insufficient sunlight, or pest or disease problems. Make sure your plants have access to plenty of sunlight, water, and nutrients. Control pests and diseases promptly.
* Discolored Heads: Discolored heads can be caused by sunscald or nutrient deficiencies. To prevent sunscald, provide shade for your plants during the hottest part of the day. Make sure your plants have access to all the nutrients they need.
Final Thoughts
Growing Romanesco cauliflower is a rewarding experience. It takes a little effort, but the result is a stunning and delicious vegetable that’s sure to impress. Don’t be afraid to experiment and learn from your mistakes. Happy gardening!
Conclusion
So, there you have it! Growing Romanesco cauliflower at home might seem a little daunting at first, but with the right approach and a little patience, you can cultivate these stunning, fractal vegetables right in your own backyard. This isn’t just about growing another vegetable; it’s about embarking on a rewarding horticultural adventure that yields a truly unique and visually captivating result.
Why is this DIY trick a must-try? Because it offers a level of control and freshness you simply can’t achieve with store-bought Romanesco. You’ll know exactly what went into nurturing your plants, from the soil composition to the watering schedule, ensuring a healthier and more flavorful final product. Plus, let’s be honest, there’s a certain pride that comes with harvesting something so beautiful and intricate that you grew yourself. It’s a conversation starter, a culinary masterpiece waiting to happen, and a testament to your green thumb.
Beyond the basic method outlined, there’s plenty of room for experimentation. Consider companion planting with herbs like rosemary or thyme to deter pests naturally and potentially enhance the flavor of your Romanesco. You could also try different soil amendments to see how they affect the size and density of the heads. For those in warmer climates, explore shade cloth options to protect your plants from excessive heat during the hottest parts of the day. And for the truly adventurous, try succession planting to extend your harvest season and enjoy Romanesco cauliflower for a longer period.
Don’t be afraid to get your hands dirty and embrace the learning process. Every garden is different, and what works for one person might not work for another. The key is to observe your plants closely, adapt your techniques as needed, and most importantly, have fun!
We wholeheartedly encourage you to give this DIY trick a try. Imagine the satisfaction of serving a vibrant, homegrown Romanesco cauliflower dish to your family and friends. Picture the compliments you’ll receive on its unique appearance and delicious taste. Think of the knowledge you’ll gain about gardening and the connection you’ll forge with nature.
And once you’ve successfully grown your own Romanesco cauliflower, we’d love to hear about your experience! Share your tips, tricks, and triumphs in the comments below. Post photos of your beautiful Romanesco heads on social media and tag us. Let’s create a community of Romanesco enthusiasts and inspire others to embark on this rewarding gardening journey. Growing Romanesco cauliflower is an experience you won’t soon forget.
Frequently Asked Questions (FAQ)
What is the best time of year to plant Romanesco cauliflower?
The best time to plant Romanesco cauliflower depends on your climate. In general, it’s a cool-season crop, so you’ll want to plant it either in the spring or fall. For a spring harvest, start seeds indoors 6-8 weeks before the last expected frost. Transplant seedlings outdoors after the danger of frost has passed. For a fall harvest, sow seeds directly into the garden in mid-summer, giving the plants enough time to mature before the first frost. Check your local extension office for specific planting dates in your region.
How much sunlight does Romanesco cauliflower need?
Romanesco cauliflower requires at least 6 hours of direct sunlight per day to thrive. Choose a planting location that receives ample sunlight throughout the day. If you live in a particularly hot climate, some afternoon shade can be beneficial to prevent the plants from overheating.
What type of soil is best for growing Romanesco cauliflower?
Romanesco cauliflower prefers well-drained, fertile soil that is rich in organic matter. Amend your soil with compost or well-rotted manure before planting to improve its fertility and drainage. The ideal soil pH for Romanesco cauliflower is between 6.0 and 7.0.
How often should I water Romanesco cauliflower?
Romanesco cauliflower needs consistent moisture to grow properly. Water deeply and regularly, especially during dry periods. Aim to keep the soil consistently moist but not waterlogged. Mulching around the plants can help to retain moisture and suppress weeds.
What are some common pests and diseases that affect Romanesco cauliflower?
Romanesco cauliflower is susceptible to several common pests and diseases, including cabbage worms, aphids, flea beetles, clubroot, and black rot. Monitor your plants regularly for signs of infestation or disease. Use organic pest control methods, such as insecticidal soap or neem oil, to control pests. Practice crop rotation and choose disease-resistant varieties to prevent diseases.
How long does it take for Romanesco cauliflower to mature?
Romanesco cauliflower typically takes 75-100 days to mature from seed. The exact time will depend on the variety, growing conditions, and climate.
How do I know when Romanesco cauliflower is ready to harvest?
Romanesco cauliflower is ready to harvest when the head is firm, compact, and has reached its desired size. The individual florets should be tightly packed together. Harvest the head by cutting it from the plant with a sharp knife, leaving a few leaves attached.
Can I grow Romanesco cauliflower in containers?
Yes, you can grow Romanesco cauliflower in containers, but you’ll need to choose a large container that is at least 12 inches in diameter and depth. Use a high-quality potting mix and provide regular watering and fertilization. Container-grown Romanesco cauliflower may not grow as large as those grown in the ground, but you can still harvest a decent-sized head.
What are some good companion plants for Romanesco cauliflower?
Good companion plants for Romanesco cauliflower include herbs like rosemary, thyme, and sage, which can help to deter pests. Other beneficial companion plants include marigolds, nasturtiums, and clover. Avoid planting Romanesco cauliflower near other brassicas, such as broccoli, cabbage, and kale, as they can attract the same pests and diseases.
How do I store Romanesco cauliflower after harvesting?
Store Romanesco cauliflower in the refrigerator for up to a week. Wrap the head in a damp paper towel and place it in a plastic bag to help retain moisture. You can also freeze Romanesco cauliflower after blanching it for a few minutes.

Leave a Comment