

Grow Radishes Fast and enjoy the crisp, peppery flavor of homegrown goodness in just a few weeks! Imagine plucking vibrant, ruby-red radishes straight from your garden, adding a zesty crunch to your salads, or enjoying them as a refreshing snack. For centuries, radishes have been a staple in gardens worldwide, dating back to ancient Egypt and Greece, where they were valued for their medicinal properties and culinary versatility.
But let’s be honest, waiting for vegetables to mature can test even the most patient gardener. That’s where these DIY tricks come in! I’m going to share some simple yet effective hacks to help you grow radishes fast, even if you’re short on space or time. These aren’t just random tips; they’re tried-and-true methods that I’ve personally used to accelerate radish growth and maximize my harvest.
Whether you’re a seasoned gardener or just starting out, these DIY tricks will empower you to enjoy the satisfaction of harvesting your own radishes sooner than you ever thought possible. So, grab your gardening gloves, and let’s dive into the secrets of rapid radish cultivation!

Grow Radishes Fast: My Foolproof DIY Guide
Hey there, fellow gardening enthusiasts! I’m so excited to share my tried-and-true method for growing radishes faster than you ever thought possible. Forget waiting weeks – with this DIY hack, you’ll be munching on crisp, peppery radishes in just a few short weeks. I’ve experimented with countless techniques, and this one consistently delivers the quickest and most satisfying results. Let’s get started!
Understanding the Radish’s Needs
Before we dive into the nitty-gritty, it’s important to understand what radishes need to thrive. They’re not fussy plants, which is why they’re perfect for beginner gardeners, but a little knowledge goes a long way.
* Sunlight: Radishes need at least 6 hours of direct sunlight per day. More is always better!
* Soil: Loose, well-draining soil is crucial. Compacted soil will hinder root development and result in small, misshapen radishes.
* Water: Consistent moisture is key. Radishes need to be kept evenly moist, but not waterlogged.
* Temperature: Radishes prefer cooler temperatures, ideally between 50°F and 65°F. Hot weather can cause them to bolt (go to seed) and become bitter.
* Nutrients: While radishes don’t require heavy fertilization, a little boost can help them grow faster.
The Secret Weapon: Soil Preparation and Pre-Sprouting
This is where the magic happens! The key to rapid radish growth lies in preparing the soil perfectly and giving your seeds a head start.
1. Choosing the Right Location
First things first, select a spot in your garden that gets plenty of sunlight. Make sure it’s easily accessible for watering and weeding. If you’re gardening in containers, choose a pot that’s at least 6 inches deep.
2. Amending the Soil
This is the most important step! Radishes need loose, fertile soil to develop quickly. Here’s my go-to soil mix:
* Garden Soil: Use your existing garden soil as a base.
* Compost: Add plenty of compost to improve drainage, aeration, and nutrient content. I usually aim for a 50/50 mix of garden soil and compost.
* Sand: Incorporate some coarse sand to further improve drainage, especially if your soil is heavy clay. About 10-20% sand is usually sufficient.
* Wood Ashes (Optional): A sprinkle of wood ashes can provide potassium, which is beneficial for root development. Be careful not to overdo it, as too much can raise the soil pH.
Thoroughly mix all the ingredients together until you have a light, fluffy soil mixture. Remove any rocks or debris that could impede root growth.
3. Pre-Sprouting the Seeds
This is my secret weapon for super-fast radish growth! Pre-sprouting gives your seeds a head start and ensures that only the most viable seeds are planted.
1. Gather Your Supplies: You’ll need radish seeds, a paper towel, and a small container or plastic bag.
2. Moisten the Paper Towel: Dampen the paper towel with water, but don’t soak it. You want it to be moist, not dripping.
3. Place the Seeds: Spread the radish seeds evenly over the damp paper towel.
4. Fold and Seal: Fold the paper towel in half or thirds to cover the seeds. Place the folded paper towel in a container or plastic bag to keep it moist.
5. Find a Warm Spot: Store the container or bag in a warm place, such as on top of your refrigerator or near a sunny window.
6. Check Daily: Check the paper towel daily to make sure it stays moist. Add a little water if needed.
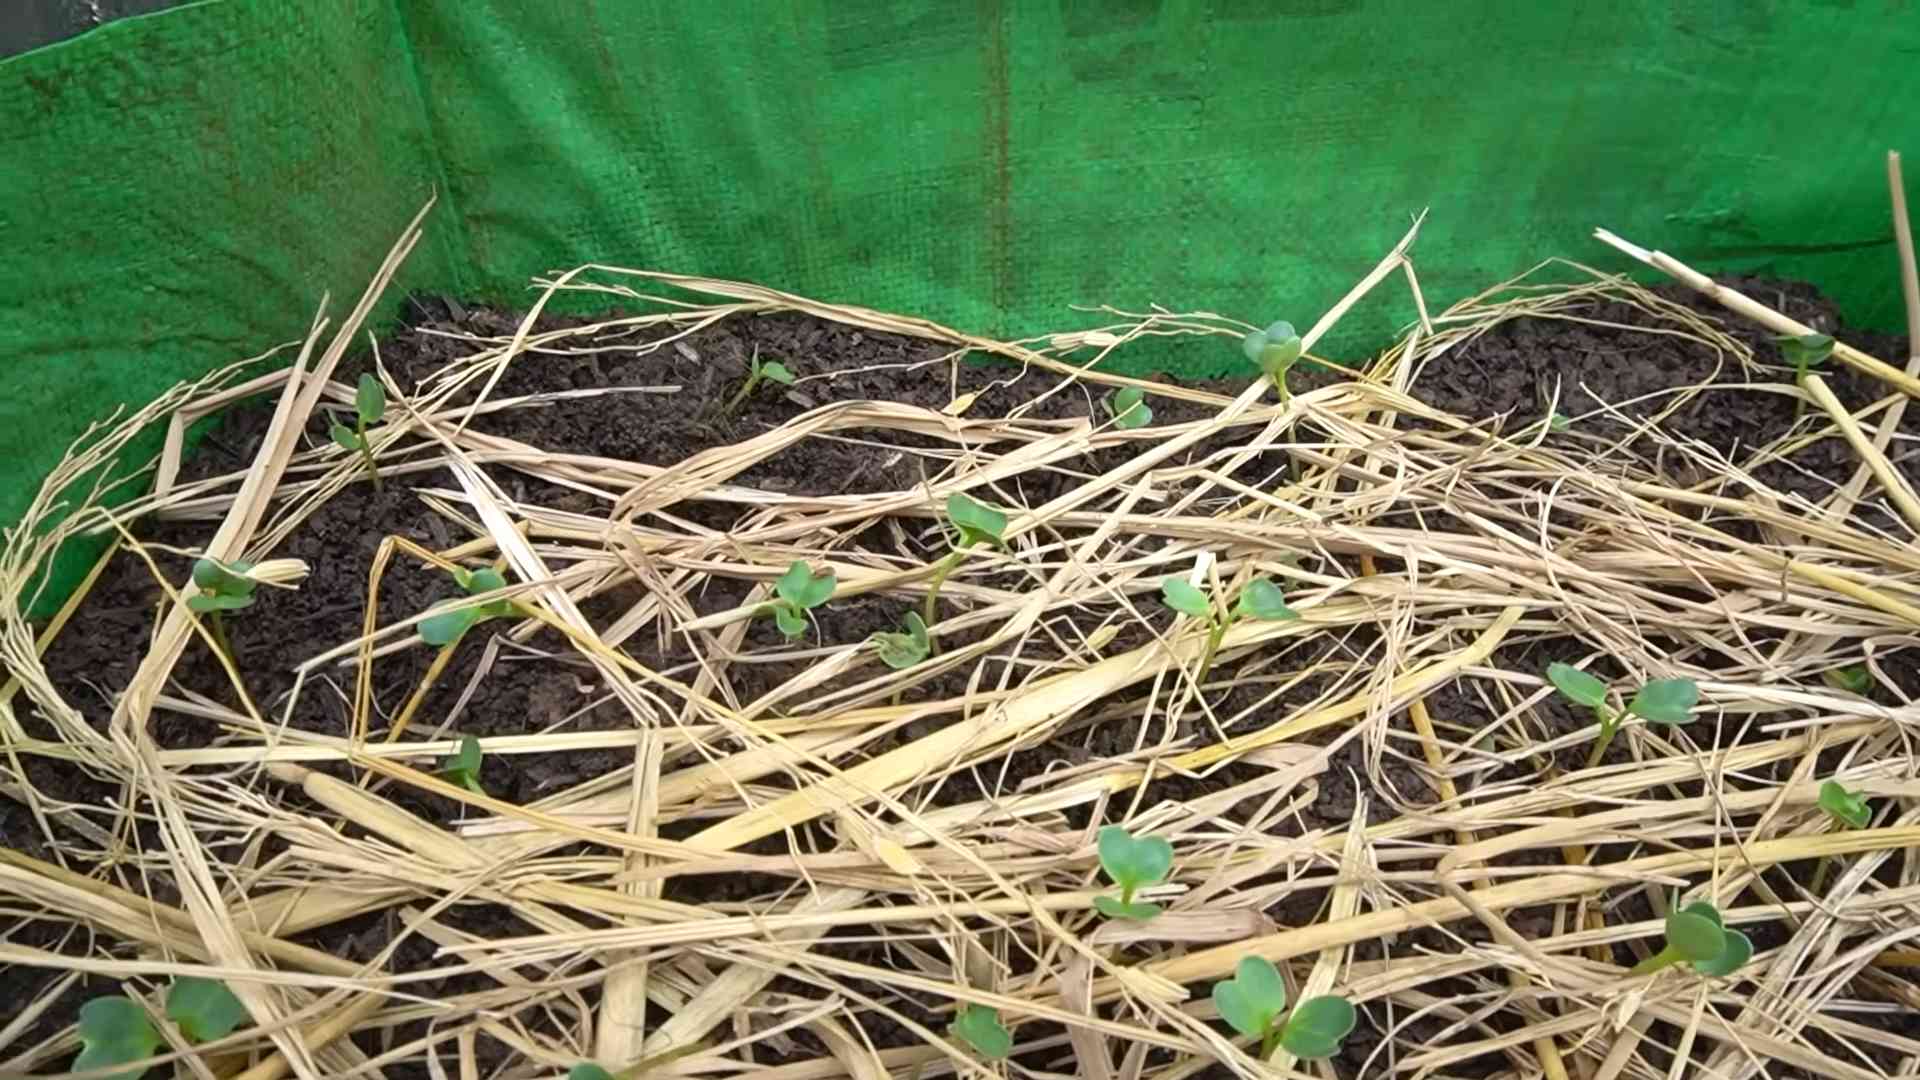
7. Wait for Sprouts: Within 2-3 days, you should see tiny sprouts emerging from the seeds. Once the sprouts are about ¼ inch long, they’re ready to plant.
Planting and Growing Your Radishes
Now that your soil is prepped and your seeds are pre-sprouted, it’s time to get planting!
1. Creating Furrows
Use your finger or a small trowel to create shallow furrows in the prepared soil. The furrows should be about ½ inch deep and spaced about 1 inch apart.
2. Planting the Pre-Sprouted Seeds
Carefully place the pre-sprouted seeds in the furrows, spacing them about 1 inch apart. Be gentle, as the sprouts are delicate.
3. Covering the Seeds
Gently cover the seeds with a thin layer of soil.
4. Watering
Water the soil thoroughly, but be careful not to wash away the seeds. Use a gentle spray nozzle or a watering can with a rose attachment.
5. Thinning (If Necessary)
Once the seedlings emerge, you may need to thin them out if they’re too crowded. Thinning ensures that each radish has enough space to grow. Aim for a final spacing of about 1-2 inches between plants.
6. Watering Regularly
Keep the soil consistently moist, but not waterlogged. Water deeply whenever the top inch of soil feels dry.
7. Weeding
Keep the area around your radishes free of weeds. Weeds compete with radishes for nutrients and water.
8. Fertilizing (Optional)
If you want to give your radishes an extra boost, you can fertilize them with a balanced liquid fertilizer diluted to half strength. Apply the fertilizer every 2 weeks. I personally like using fish emulsion for this.
Protecting Your Radishes
While radishes are relatively pest-resistant, there are a few things you can do to protect them from potential problems.
* Flea Beetles: Flea beetles are tiny jumping insects that can chew small holes in radish leaves. To prevent flea beetle damage, cover your radishes with row covers or apply diatomaceous earth to the leaves.
* Root Maggots: Root maggots are small white larvae that can tunnel into radish roots. To prevent root maggot damage, rotate your crops and avoid planting radishes in the same spot year after year. You can also use row covers to prevent adult flies from laying eggs near your radishes.
* Bolting: As mentioned earlier, hot weather can cause radishes to bolt. To prevent bolting, plant radishes in early spring or late summer, when temperatures are cooler. You can also provide shade during the hottest part of the day.
Harvesting Your Radishes
This is the best part! Radishes are typically ready to harvest in just 3-4 weeks after planting, especially with the pre-sprouting method.
1. Check for Size: Radishes are ready to harvest when they reach the desired size. This will vary depending on the variety, but most radishes are ready when they’re about 1 inch in diameter.
2. Loosen the Soil: Gently loosen the soil around the radishes with a trowel or fork.
3. Pull Gently: Grasp the radish leaves near the base and gently pull the radish out of the ground.
4. Wash and Enjoy: Wash the radishes thoroughly and enjoy them fresh!
Troubleshooting
Even with the best planning, sometimes things don’t go exactly as expected. Here are a few common radish-growing problems and how to fix them:
* Radishes are small and skinny: This is usually caused by compacted soil, overcrowding, or lack of water. Make sure your soil is loose and well-draining, thin your seedlings properly, and water regularly.
* Radishes are cracked: This is often caused by inconsistent watering. Keep the soil evenly moist to prevent cracking.
* Radishes are bitter: This can be caused by hot weather or letting the radishes grow too large. Harvest radishes when they’re young and tender, and plant them in cooler weather.
* Radishes are all leaves and no root: This is usually caused by too much nitrogen in the soil. Avoid over-fertilizing with nitrogen-rich fertilizers.
Variety is the Spice of Life (and the Garden!)
Don’t be afraid to experiment with different radish varieties! There are so many to choose from, each with its own unique flavor and appearance. Some of my favorites include:
* Cherry Belle: A classic red radish with a mild flavor.
* French Breakfast: An elongated red and white radish with a slightly peppery flavor.
* Easter Egg: A mix of colorful radishes in shades of red, pink, purple, and white.
* Black Spanish: A large, black-skinned radish with a pungent flavor.
* Watermelon Radish: A beautiful radish with a green and white exterior and a bright pink interior.
Final Thoughts
Growing radishes quickly is totally achievable with a little preparation and the right techniques. I hope this guide has given
Conclusion
So, there you have it! Growing radishes fast isn’t some gardener’s myth; it’s an achievable reality with a few simple, strategic steps. We’ve covered everything from selecting the right radish variety and preparing the soil meticulously to ensuring optimal watering and providing a little extra TLC. The beauty of this DIY approach is that it puts you in complete control, allowing you to tailor the process to your specific environment and preferences.
Why is this a must-try? Because fresh, crisp radishes, bursting with peppery flavor, are a delightful addition to any meal. Imagine adding them to salads for a zesty crunch, using them as a vibrant garnish for tacos, or simply enjoying them raw with a sprinkle of sea salt. Beyond the taste, growing your own radishes is incredibly rewarding. It connects you to the earth, provides a sense of accomplishment, and ensures you’re consuming produce free from harmful chemicals. Plus, it’s a fantastic way to introduce children to the wonders of gardening and healthy eating habits.
Don’t be afraid to experiment! Consider companion planting your radishes with carrots, lettuce, or spinach. These pairings can help deter pests and improve the overall health of your garden. You could also try succession planting, sowing a new batch of seeds every week or two, to ensure a continuous harvest throughout the growing season. For those in warmer climates, look for heat-tolerant radish varieties specifically bred to withstand higher temperatures. And if you’re short on space, radishes thrive in containers, making them perfect for balconies or patios.
Growing radishes fast is a game-changer for any home gardener. It’s quick, easy, and incredibly satisfying. We’re confident that with the techniques outlined in this guide, you’ll be harvesting your own delicious radishes in no time.
Now, it’s your turn! Grab your seeds, prepare your soil, and get ready to experience the joy of growing your own radishes. We’re eager to hear about your experiences. Share your tips, successes, and even your challenges in the comments below. Let’s build a community of radish-growing enthusiasts and learn from each other. Happy gardening!
Frequently Asked Questions (FAQ)
What is the fastest-growing radish variety?
The champion of speed when it comes to radishes is undoubtedly the ‘Cherry Belle’ variety. It’s known for its vibrant red color, mild flavor, and incredibly quick maturation, often ready for harvest in as little as 22-25 days. Other fast-growing options include ‘French Breakfast’ (around 23 days) and ‘Sparkler’ (around 24 days). Choosing one of these varieties is the first step to ensuring you can grow radishes fast.
How much sunlight do radishes need?
Radishes are relatively low-maintenance when it comes to sunlight. They thrive best in full sun, which means at least 6 hours of direct sunlight per day. However, they can also tolerate partial shade, especially in hotter climates. If you’re growing radishes in a location that receives less than 6 hours of sunlight, they may take a bit longer to mature, and the bulbs might not be as large.
What kind of soil is best for growing radishes?
Radishes prefer loose, well-drained soil that is rich in organic matter. Heavy clay soil can hinder their growth and result in misshapen or stunted roots. Before planting, amend your soil with compost or well-rotted manure to improve its texture and fertility. Aim for a soil pH between 6.0 and 7.0. Good drainage is crucial to prevent the roots from rotting.
How often should I water my radishes?
Consistent watering is key to growing radishes fast and ensuring they develop a crisp, tender texture. Keep the soil consistently moist, but not waterlogged. Water deeply whenever the top inch of soil feels dry to the touch. During hot, dry weather, you may need to water more frequently. Irregular watering can cause the radishes to become tough and bitter.
Why are my radishes cracking?
Cracking in radishes is usually caused by inconsistent watering. If the soil dries out and then is suddenly saturated with water, the radishes can grow too quickly, causing the skin to split. To prevent cracking, maintain consistent soil moisture and avoid letting the soil dry out completely between waterings. Mulching around the plants can also help retain moisture.
Why are my radishes all tops and no bottoms?
This is a common problem that can be caused by several factors. Insufficient sunlight, overcrowding, and poor soil fertility are the most likely culprits. Make sure your radishes are getting at least 6 hours of sunlight per day, thin them out to provide adequate spacing (about 1-2 inches between plants), and amend your soil with compost or fertilizer to provide the necessary nutrients. Also, ensure the soil is loose and not compacted, as this can restrict root growth.
Can I grow radishes in containers?
Absolutely! Radishes are well-suited for container gardening, making them a great option for those with limited space. Choose a container that is at least 6 inches deep and has drainage holes. Use a good-quality potting mix and follow the same planting and watering guidelines as you would for growing radishes in the ground. Container-grown radishes may need more frequent watering, especially during hot weather.
What are some common radish pests and diseases?
Radishes are generally pest-resistant, but they can be susceptible to flea beetles, root maggots, and aphids. Flea beetles can chew small holes in the leaves, while root maggots can damage the roots. Aphids can suck the sap from the plants. To control these pests, you can use row covers, insecticidal soap, or diatomaceous earth. Diseases are less common, but damping-off can affect seedlings. Ensure good air circulation and avoid overwatering to prevent fungal diseases.
How do I know when my radishes are ready to harvest?
The best way to determine if your radishes are ready to harvest is to check the size of the bulbs. Most varieties are ready to harvest when the bulbs are about 1 inch in diameter. You can also gently brush away the soil around the base of the plant to check the size. Don’t let them get too large, as they can become tough and bitter. Harvest radishes promptly once they reach the desired size.
Can I eat radish greens?
Yes, radish greens are edible and nutritious! They have a peppery flavor similar to the radishes themselves. You can use them in salads, stir-fries, or soups. Make sure to wash them thoroughly before eating. Harvest the greens when they are young and tender for the best flavor. Avoid eating greens from radishes that have been treated with pesticides.
How do I store radishes after harvesting?
To store radishes, remove the greens (leaving about an inch of stem) and wash the radishes thoroughly. Place them in a plastic bag or container with a damp paper towel and store them in the refrigerator. They should last for about a week. The greens can be stored separately in a plastic bag in the refrigerator for a few days.
Can I grow radishes in the winter?
In mild climates, you can grow radishes throughout the winter. In colder climates, you can grow them in a greenhouse or cold frame. Choose winter-hardy varieties and provide adequate protection from frost. You may need to supplement with artificial light if the days are short.
What are some creative ways to use radishes?
Beyond salads and garnishes, radishes can be used in a variety of creative ways. Try roasting them with other root vegetables, pickling them for a tangy snack, or adding them to tacos for a spicy kick. You can also use radish greens to make pesto or add them to smoothies for a nutrient boost. Don’t be afraid to experiment and discover your own favorite ways to enjoy radishes!

Leave a Comment