

Grow Malabar Spinach at Home? Absolutely! Imagine stepping into your backyard and harvesting fresh, vibrant greens for your dinner, all thanks to your own green thumb. Forget those wilted, overpriced spinach bunches at the grocery store. This isn’t just about saving money; it’s about connecting with nature and enjoying the unparalleled flavor of homegrown goodness.
Malabar spinach, also known as Basella alba, isn’t actually spinach, but a climbing vine with similar-tasting leaves. Originating from tropical Asia and Africa, it has been cultivated for centuries, prized for its heat tolerance and nutritional value. In some cultures, it’s even considered a symbol of good luck and prosperity.
I know what you’re thinking: “I don’t have a green thumb!” But trust me, you don’t need to be a master gardener to successfully grow Malabar Spinach at Home. This DIY guide is packed with simple, easy-to-follow tricks and hacks that will have you harvesting delicious leaves in no time. We’ll cover everything from choosing the right location and soil to providing the perfect support for this climbing beauty. Plus, I’ll share my secret tips for maximizing your yield and keeping your Malabar spinach thriving all season long. So, grab your gardening gloves, and let’s get started!
Grow Your Own Malabar Spinach: A Beginner’s Guide
Hey there, fellow gardening enthusiasts! I’m so excited to share my experience growing Malabar spinach at home. This leafy green is a fantastic addition to any garden, offering a delicious and nutritious alternative to traditional spinach, especially during the warmer months. It thrives in heat and humidity, making it perfect for those of us who struggle with spinach bolting in the summer. Plus, it’s incredibly easy to grow! Let’s dive into how you can cultivate your own bountiful supply of this climbing veggie.
What You’ll Need
Before we get started, let’s gather all the necessary supplies. Having everything on hand will make the process smooth and enjoyable.
* Malabar Spinach Seeds or Cuttings: You can find seeds online or at your local garden center. Cuttings are another great option if you know someone who already grows it.
* Seed Starting Tray (if starting from seed): This will help you germinate the seeds indoors before transplanting.
* Potting Mix: A well-draining potting mix is crucial for healthy seedlings.
* Gardening Gloves: To protect your hands from dirt and potential irritants.
* Trowel: For transplanting seedlings.
* Garden Soil: Rich, well-draining soil is ideal for Malabar spinach. Amend your soil with compost if needed.
* Compost or Aged Manure: To enrich the soil and provide essential nutrients.
* Trellis or Support Structure: Malabar spinach is a climbing vine, so it needs something to grow on. A trellis, fence, or even sturdy stakes will work.
* Watering Can or Hose: For regular watering.
* Optional: Liquid Fertilizer: To give your plants an extra boost.
Starting from Seed: A Step-by-Step Guide
Starting from seed is a rewarding way to grow Malabar spinach. It allows you to control the entire process from the very beginning. Here’s how I do it:
1. Soaking the Seeds: Malabar spinach seeds have a tough outer shell, so soaking them helps to improve germination rates. Place the seeds in a small bowl of warm water and let them soak for 24 hours. This softens the shell and allows moisture to penetrate, encouraging sprouting.
2. Preparing the Seed Starting Tray: Fill your seed starting tray with a high-quality potting mix. Gently press the soil down to eliminate air pockets.
3. Sowing the Seeds: Sow the seeds about ½ inch deep in the potting mix. Place 2-3 seeds in each cell of the tray to increase your chances of germination.
4. Watering the Seeds: Gently water the seeds using a watering can or spray bottle. Be careful not to overwater, as this can lead to rot. The soil should be moist but not soggy.
5. Providing Warmth and Light: Malabar spinach seeds need warmth to germinate. Place the seed starting tray in a warm location, such as on top of a refrigerator or near a sunny window. If you don’t have a naturally warm spot, you can use a heat mat designed for seed starting. You can also use a grow light if you don’t have enough sunlight.
6. Monitoring Germination: Keep the soil consistently moist and monitor the seeds for germination. It usually takes about 7-21 days for the seeds to sprout. Be patient!
7. Thinning Seedlings (If Necessary): Once the seedlings have emerged and have a few sets of true leaves, thin them out if you planted multiple seeds per cell. Choose the strongest seedling in each cell and snip off the others at the soil line.
Transplanting Your Seedlings
Once your seedlings have developed several sets of true leaves and are a few inches tall, they’re ready to be transplanted into your garden.
1. Hardening Off the Seedlings: Before transplanting, it’s essential to harden off the seedlings. This process gradually acclimates them to outdoor conditions. Start by placing the seed starting tray outdoors in a sheltered location for a few hours each day, gradually increasing the amount of time they spend outside over the course of a week. This will help them adjust to the sun, wind, and temperature changes.
2. Preparing the Garden Bed: Choose a sunny location in your garden with well-draining soil. Amend the soil with compost or aged manure to improve its fertility and drainage. Malabar spinach prefers slightly acidic to neutral soil.
3. Digging the Planting Holes: Dig holes that are slightly larger than the root balls of your seedlings. Space the holes about 12-18 inches apart to allow the plants plenty of room to grow.
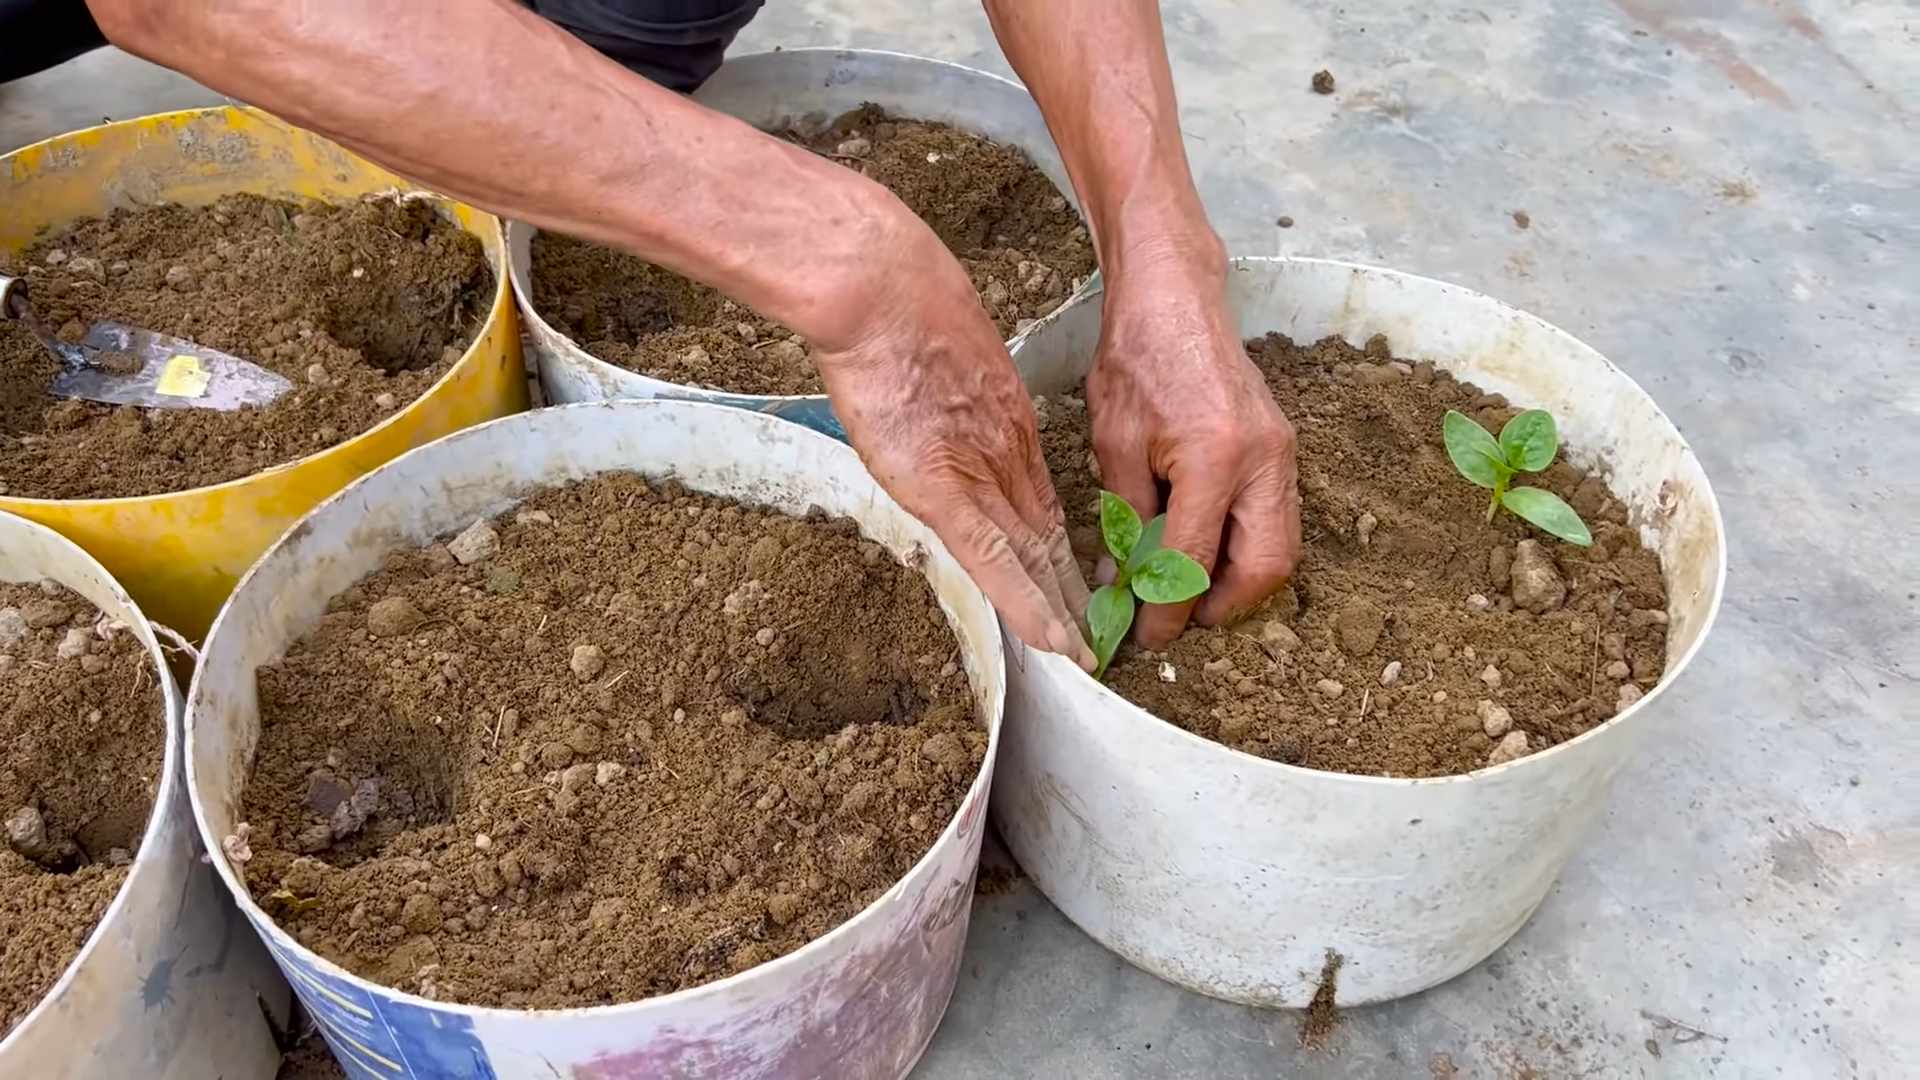
4. Transplanting the Seedlings: Gently remove the seedlings from the seed starting tray and place them in the planting holes. Be careful not to damage the roots.
5. Filling the Holes: Fill the holes with soil and gently press down to secure the seedlings.
6. Watering the Transplanted Seedlings: Water the transplanted seedlings thoroughly to help them settle in.
7. Adding a Trellis or Support Structure: Install a trellis or other support structure near the seedlings. Malabar spinach is a climbing vine and will need something to grow on.
Growing from Cuttings: A Quick and Easy Method
If you have access to a mature Malabar spinach plant, growing from cuttings is a faster and easier way to propagate new plants.
1. Selecting Cuttings: Choose healthy, vigorous stems that are about 4-6 inches long. Cut the stems just below a node (the point where leaves emerge).
2. Removing Lower Leaves: Remove the lower leaves from the cuttings, leaving only a few leaves at the top. This will help prevent rot and encourage root development.
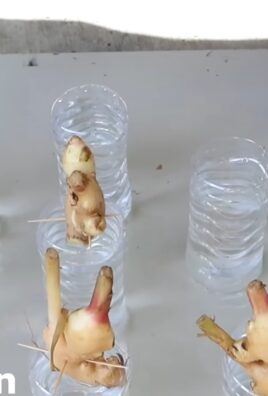
3. Rooting the Cuttings in Water: Place the cuttings in a glass or jar of water, making sure that the nodes are submerged. Change the water every few days to keep it fresh.
4. Waiting for Roots to Develop: Place the jar in a bright, indirect light location. Roots should start to develop within a week or two.
5. Transplanting the Rooted Cuttings: Once the roots are about an inch long, you can transplant the cuttings into pots or directly into your garden. Follow the same transplanting instructions as for seedlings.
Caring for Your Malabar Spinach Plants
Once your Malabar spinach plants are established, they’re relatively low-maintenance. Here’s what you need to do to keep them thriving:
* Watering: Water your plants regularly, especially during hot, dry weather. Malabar spinach prefers consistently moist soil. Avoid overwatering, as this can lead to root rot.
* Fertilizing: Fertilize your plants every few weeks with a liquid fertilizer or compost tea. This will provide them with the nutrients they need to grow and produce abundant foliage.
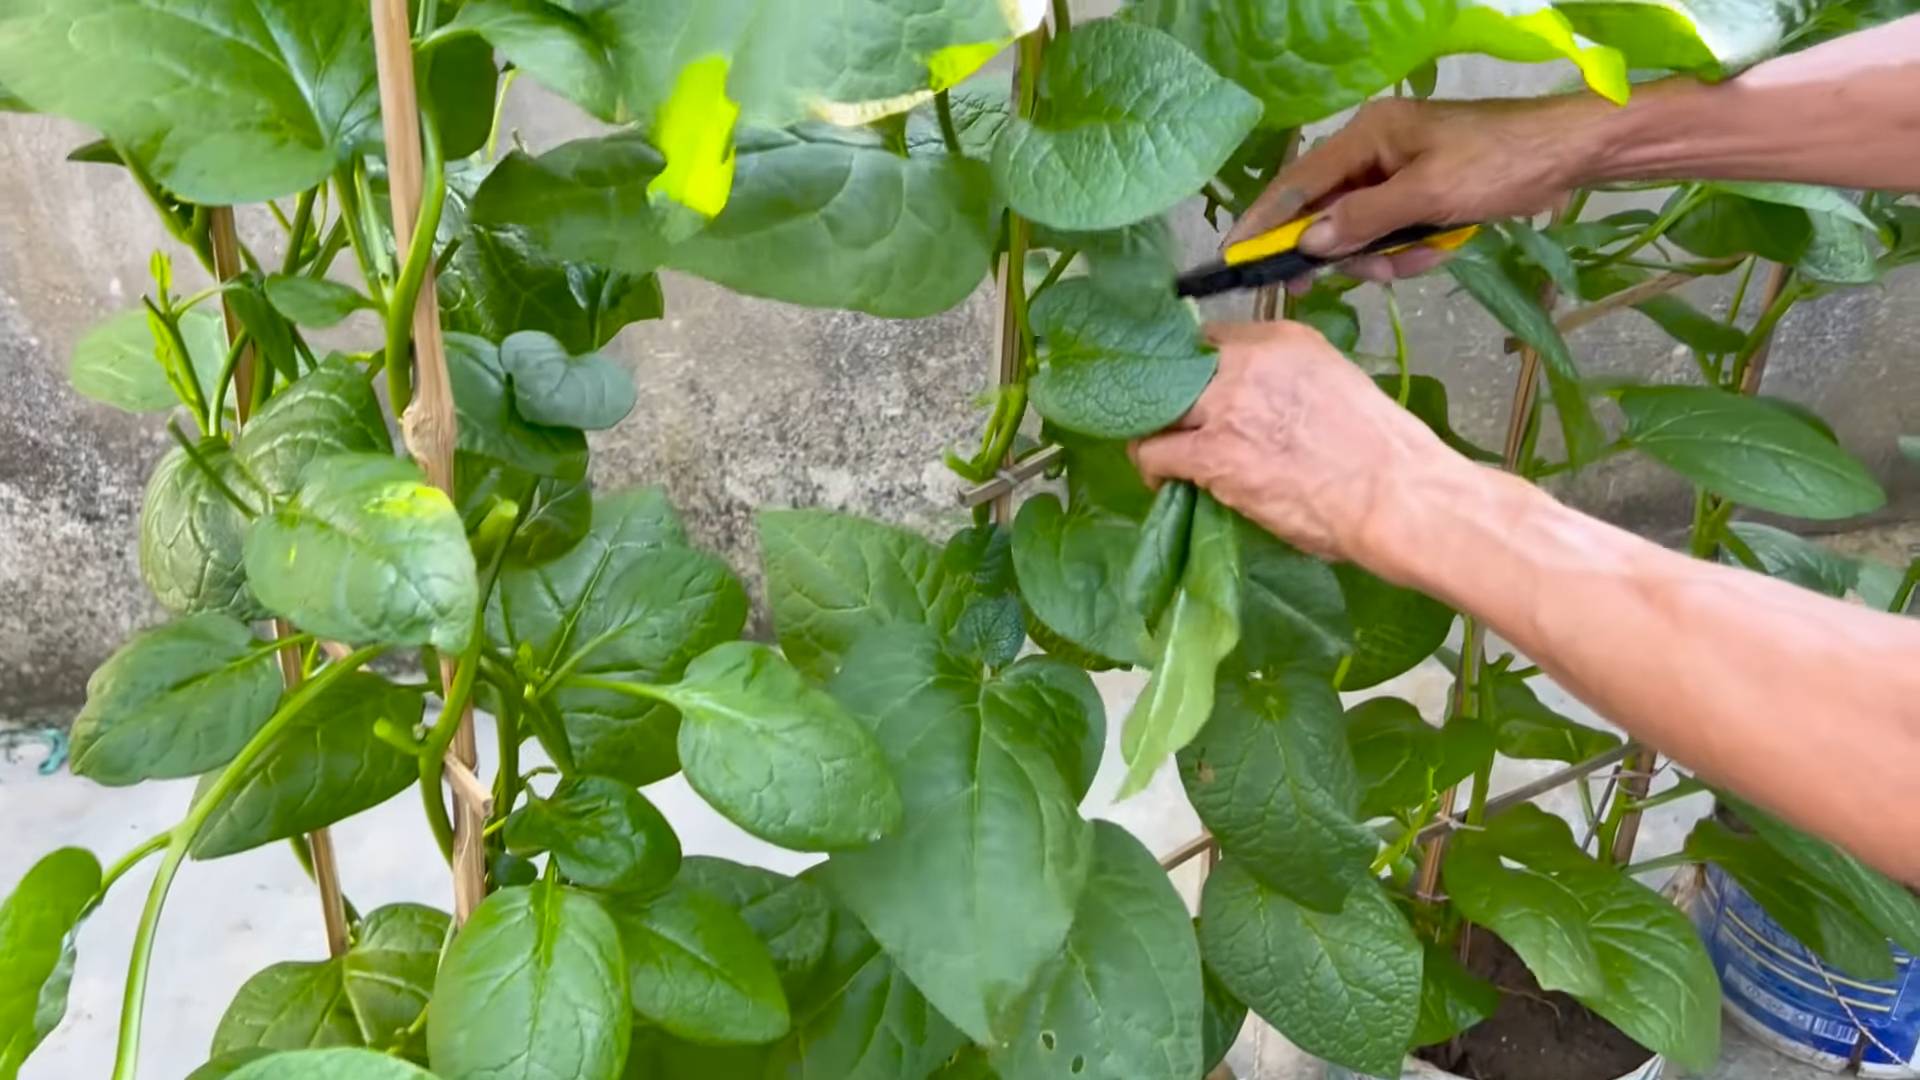
* Pruning: Prune your plants regularly to encourage bushier growth and prevent them from becoming too leggy. You can also prune them to control their size and shape.
* Providing Support: Make sure your plants have adequate support to climb on. Train the vines to grow up the trellis or support structure.
* Pest and Disease Control: Malabar spinach is generally pest and disease-resistant. However, it can occasionally be affected by aphids or spider mites. If you notice any pests, treat them with insecticidal soap or neem oil.
Harvesting Your Malabar Spinach
You can start harvesting your Malabar spinach leaves as soon as the plants are large enough.
1. Harvesting Leaves: Simply snip off the leaves with scissors or garden shears. You can harvest individual leaves or entire stems.
2. Harvesting Regularly: Harvesting regularly will encourage the plants to produce more leaves.
3. Enjoying Your Harvest: Malabar spinach leaves can be used in a variety of dishes, such as salads, soups, stir-fries, and smoothies. They have a mild, slightly tangy flavor that is similar to spinach.
Troubleshooting Common Problems
Even with the best care, you might encounter a few challenges while growing Malabar spinach. Here are some common problems and how to address them:
* Slow Germination: If your seeds are slow to germinate, try soaking them for a longer period of time or scarifying them (gently scratching the outer shell with sandpaper). Make sure the soil is warm and consistently moist.
* Yellowing Leaves: Yellowing leaves can be a sign of nutrient deficiency. Fertilize your plants with a balanced fertilizer or compost tea.
* Pest Infestations: If you notice pests on your plants, treat them with insecticidal soap or neem oil.
* Root Rot: Root rot is caused by overwatering. Make sure your soil is well-draining and avoid watering too frequently.
Enjoying the Fruits (or Leaves!) of Your Labor
Growing Malabar spinach is a rewarding experience that provides you with a delicious and nutritious leafy green. With a little care and attention, you can enjoy a bountiful harvest throughout the growing season. I hope this guide has
Conclusion
So, there you have it! Growing Malabar spinach at home is not only achievable, but it’s also incredibly rewarding. Forget those wilted, overpriced greens at the grocery store. Imagine stepping into your own backyard or onto your balcony and harvesting fresh, vibrant, and nutrient-packed leaves whenever you need them. This DIY project offers a sustainable and cost-effective way to enjoy this delicious and versatile vegetable.
Why is this a must-try? Because it puts you in control of your food source. You know exactly what goes into growing your Malabar spinach – no harmful pesticides or questionable farming practices. Plus, the taste of homegrown produce is simply unmatched. The leaves are more tender, the flavor is more pronounced, and the satisfaction of nurturing something from seed to table is immeasurable.
But the benefits don’t stop there. Malabar spinach is incredibly easy to grow, even for beginners. It’s a vigorous climber, adding a touch of greenery and vertical interest to your garden or balcony. And it’s packed with vitamins and minerals, making it a healthy addition to your diet.
Looking for variations? Consider growing Malabar spinach in different types of containers. Hanging baskets are a great option for balconies, while larger pots can accommodate multiple plants. You can also experiment with different trellising methods to create a stunning green wall. Try companion planting with herbs like basil or marigolds to deter pests and enhance the flavor of your spinach. If you live in a cooler climate, consider starting your seeds indoors to give them a head start. And for a unique twist, try growing the red-stemmed variety of Malabar spinach – it adds a beautiful pop of color to your garden and your dishes.
We’ve covered everything from seed starting to harvesting, providing you with all the information you need to succeed. Now, it’s your turn to get your hands dirty and experience the joy of growing your own Malabar spinach. Don’t be intimidated – it’s easier than you think!
We are confident that you will find this DIY trick to be a game-changer in your gardening journey. The vibrant green leaves, the satisfying harvest, and the knowledge that you’re providing yourself with fresh, healthy food – it’s all worth it.
So, what are you waiting for? Grab some seeds, prepare your soil, and get ready to embark on this exciting adventure. We encourage you to try this DIY trick and share your experiences with us. Let us know how your Malabar spinach is growing, what dishes you’re creating with it, and any tips or tricks you’ve discovered along the way. Share your photos and stories on social media using #HomegrownMalabarSpinach – we can’t wait to see your success! Happy gardening!
Frequently Asked Questions (FAQ)
What exactly is Malabar spinach, and how is it different from regular spinach?
Malabar spinach (Basella alba or Basella rubra) isn’t actually related to true spinach (Spinacia oleracea). It’s a tropical vine that thrives in warm weather, whereas true spinach prefers cooler temperatures. Malabar spinach has thicker, succulent leaves and a slightly citrusy, peppery flavor. It’s also more heat-tolerant and less prone to bolting (going to seed) in hot weather than true spinach. This makes it an excellent alternative for gardeners in warmer climates who struggle to grow regular spinach.
Is Malabar spinach easy to grow for beginners?
Yes, absolutely! Malabar spinach is known for being relatively easy to grow, even for novice gardeners. It’s a vigorous grower and doesn’t require a lot of fuss. As long as you provide it with well-draining soil, plenty of sunlight, and something to climb on, it should thrive. Starting with healthy seedlings or seeds and following the basic guidelines outlined in this article will set you up for success.
How much sunlight does Malabar spinach need?
Malabar spinach thrives in full sun, which means it needs at least 6-8 hours of direct sunlight per day. However, it can tolerate partial shade, especially in hotter climates. If you live in a region with intense afternoon sun, providing some afternoon shade can help prevent the leaves from scorching.
What kind of soil is best for growing Malabar spinach?
Malabar spinach prefers well-draining soil that is rich in organic matter. Amend your soil with compost or well-rotted manure before planting to improve its fertility and drainage. A slightly acidic to neutral soil pH (around 6.0 to 7.0) is ideal.
How often should I water my Malabar spinach?
Water your Malabar spinach regularly, especially during hot and dry weather. The soil should be kept consistently moist, but not waterlogged. Check the soil moisture by sticking your finger about an inch deep – if it feels dry, it’s time to water. Avoid overhead watering, as this can increase the risk of fungal diseases.
Does Malabar spinach need fertilizer?
Yes, Malabar spinach benefits from regular fertilization. Feed your plants with a balanced fertilizer every 2-3 weeks during the growing season. You can also use organic fertilizers like compost tea or fish emulsion. Avoid over-fertilizing, as this can lead to excessive foliage growth at the expense of flavor.
How do I harvest Malabar spinach?
You can start harvesting Malabar spinach leaves as soon as the plant is established and has reached a decent size. Simply snip off the leaves you need with scissors or pruning shears. Harvest the older, larger leaves first, as this will encourage the plant to produce new growth. You can also harvest the tender stem tips.
What are some ways to use Malabar spinach in cooking?
Malabar spinach is a versatile vegetable that can be used in a variety of dishes. It can be eaten raw in salads, or cooked like regular spinach. It’s a great addition to soups, stews, stir-fries, and curries. The leaves can also be used to make smoothies or juices. Because of its slightly mucilaginous texture when cooked, it can also be used as a thickening agent in soups and sauces.
Are there any pests or diseases that affect Malabar spinach?
Malabar spinach is generally resistant to pests and diseases. However, it can be susceptible to aphids, spider mites, and fungal diseases like leaf spot. Inspect your plants regularly for signs of pests or diseases and take action promptly if you notice any problems. Use organic pest control methods like insecticidal soap or neem oil to control pests. Ensure good air circulation around your plants to prevent fungal diseases.
Can I grow Malabar spinach in a container?
Yes, Malabar spinach grows very well in containers. Choose a pot that is at least 12 inches in diameter and has good drainage holes. Use a high-quality potting mix and provide a trellis or other support for the plant to climb on. Container-grown Malabar spinach may need more frequent watering and fertilization than plants grown in the ground.
How do I save seeds from Malabar spinach?
To save seeds from Malabar spinach, allow some of the flowers to develop into berries. Once the berries turn dark purple or black and are slightly soft to the touch, they are ready to harvest. Squeeze the seeds out of the berries and rinse them thoroughly. Allow the seeds to dry completely before storing them in an airtight container in a cool, dark place.
Is Malabar spinach a perennial or an annual?
Malabar spinach is a perennial in tropical and subtropical climates (USDA zones 9-11). In colder climates, it is typically grown as an annual. However, you can overwinter your Malabar spinach indoors by bringing it inside before the first frost. Provide it with plenty of light and water, and it should continue to grow throughout the winter.
Is Malabar Spinach safe to eat?
Yes, Malabar Spinach is generally safe to eat for most people. However, like many leafy greens, it contains oxalates. Individuals with kidney problems should consume it in moderation. If you have any concerns, consult with your doctor or a registered dietitian.

Leave a Comment