

Grow Grape Tomatoes at Home and unlock a world of fresh, flavorful goodness right in your backyard! Imagine popping sweet, juicy grape tomatoes straight from the vine into your salad, or enjoying them as a healthy snack. Sounds amazing, right? For centuries, home gardening has been a source of sustenance and joy, connecting us to the earth and providing fresh produce for our tables. From ancient Roman gardens to the victory gardens of World War II, the ability to cultivate our own food has always been valued.
But let’s be honest, sometimes gardening feels a bit intimidating. That’s where these simple DIY tricks come in! I’m here to show you that you don’t need a green thumb or acres of land to successfully grow grape tomatoes at home. Whether you have a sprawling garden, a sunny balcony, or just a windowsill, I’ll share easy-to-follow tips and hacks that will have you harvesting delicious grape tomatoes in no time.
Why do you need these DIY tricks? Because store-bought tomatoes often lack the vibrant flavor and freshness of homegrown ones. Plus, growing your own food is incredibly rewarding, reduces your carbon footprint, and gives you complete control over what goes into your food. So, let’s dive in and discover the secrets to a bountiful grape tomato harvest!
DIY: Grow Your Own Juicy Cherry Tomatoes – Here’s How!
I love the taste of freshly picked cherry tomatoes, straight from the plant to my mouth! And the best part: it’s super easy to grow them yourself. Whether you have a large garden, a small balcony, or just a sunny windowsill, you’re guaranteed to succeed with this guide. Let’s get started!
What You Need:
- Seeds: Cherry tomato seeds (preferably organic). You can order them online, buy them at a garden center, or even harvest them from a ripe cherry tomato (more on that later).
- Seed starting pots or trays: Small pots made of peat, coconut fiber, or plastic are ideal. You can also use egg cartons or yogurt cups (with holes in the bottom!).
- Seed starting mix: Special seed starting mix is low in nutrients and loose, which promotes root growth.
- Planters: Larger pots (at least 10-liter volume / 2.5 gallons) for the mature plants.
- Tomato soil: Nutrient-rich soil specifically formulated for the needs of tomatoes.
- Stakes or a trellis: Cherry tomato plants need support to keep from falling over.
- Watering can or spray bottle: For gently watering the plants.
- A bright, warm environment: A sunny windowsill, a greenhouse, or a warm balcony.
- Patience: Tomatoes need time to grow and bear fruit!
Phase 1: Sowing – The Foundation for Your Tomato Bounty
Sowing is the first and most important step. This is where you lay the groundwork for your future tomato harvest. I recommend starting your seeds in March or April, so the plants can go outdoors after the last frost date (mid-May).
Step-by-Step Guide:
- Prepare the seed pots: Fill the seed starting pots or trays with seed starting mix. Lightly press the soil down.
- Sow the seeds: Place 1-2 seeds per pot on the soil. Cover the seeds with a thin layer of soil (about 0.5 cm / ¼ inch).
- Watering: Gently moisten the soil with a spray bottle or a watering can with a fine rose head. The soil should be damp, but not wet.
- Warmth and light: Place the seed pots in a bright and warm spot (approx. 20-25°C / 68-77°F). A mini-greenhouse or a clear plastic cover over the pots helps to increase humidity and speed up germination.
- A test of patience: Keep the soil moist and wait patiently. After about 1-2 weeks, the first seedlings should appear.
Tip: If you want to harvest seeds from a ripe cherry tomato, let the pulp with the seeds ferment in a glass of water for a few days. This helps to dissolve the pulp and makes the seeds easier to clean. Afterward, rinse the seeds thoroughly and let them dry before sowing.
Phase 2: Pricking Out – Giving the Little Seedlings More Space
Once the seedlings have developed their first true leaves (besides the initial seed leaves), it’s time for “pricking out.” This means you’ll transplant the small seedlings into larger pots so they have more room to grow.
Step-by-Step Guide:
- Prepare the planters: Fill the planters with tomato soil.
- Gently lift out: Carefully loosen the small seedlings from their starter pots. This works best with a dibber or a spoon. Be careful not to damage the roots.
- Place in the planters: Place the seedlings into the planters and fill the pots with soil. The seedlings can be planted a little deeper than they were before; this promotes root formation.
- Watering: Gently water the seedlings.
- A bright spot: Place the planters in a bright location, but avoid direct sunlight for the first few days.
Important: Pricking out is a stressful process for the seedlings. Give them a few days of rest to recover.
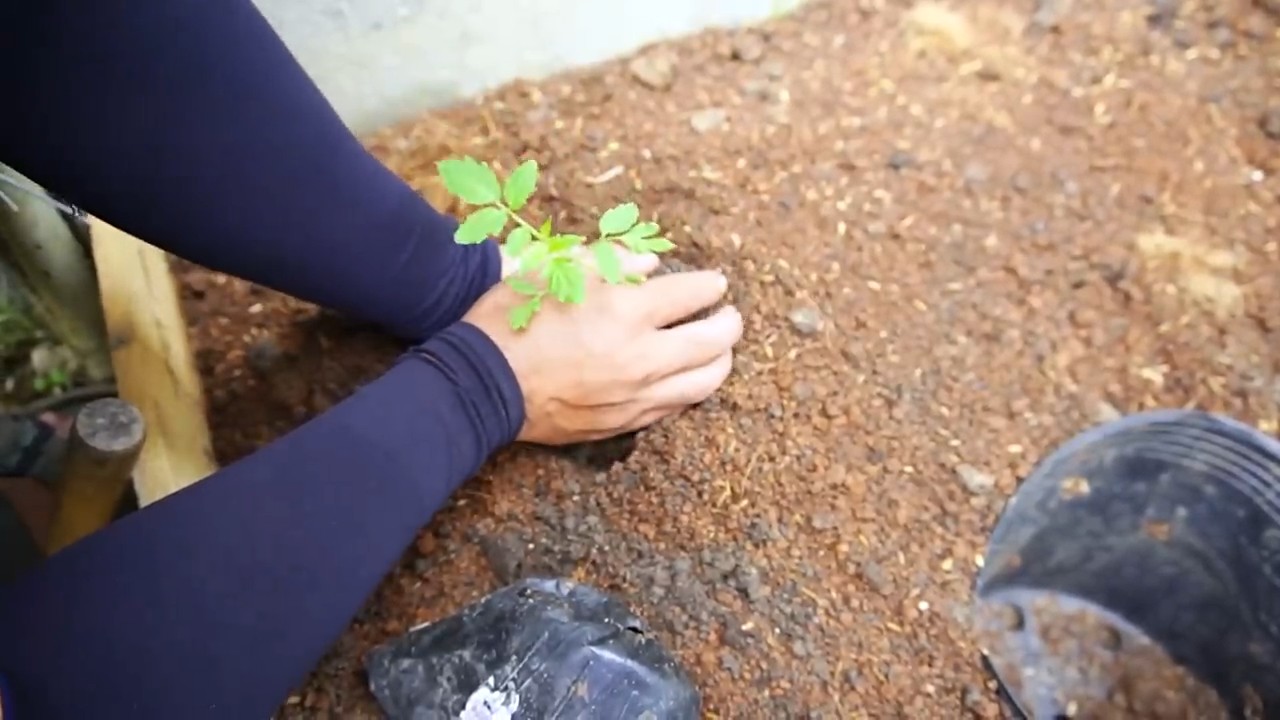
Phase 3: Planting Out – Off to the Great Outdoors!
After the last frost date (mid-May), the time has finally come: the small tomato plants can go outside! Choose a sunny and sheltered location for your tomatoes.
Step-by-Step Guide:
- Prepare the location: Loosen the soil and enrich it with compost or organic fertilizer.
- Planting out: Dig a hole that is slightly larger than the plant’s root ball. Place the plant in the hole and fill it with soil. Lightly press the soil down.
- Stake or trellis: Place a stake next to the plant or install a trellis. Gently tie the plant to the stake or trellis.
- Watering: Water the plant thoroughly.
- Protection from slugs: Protect the young plants from being eaten by slugs. There are various ways to deter slugs, such as snail fences, coffee grounds, or beer traps.
Tip: If you are keeping your tomatoes in pots, make sure the pots are large enough (at least 10-liter volume / 2.5 gallons).
Phase 4: Care – Helping Your Tomatoes Thrive
Proper care is crucial for a bountiful tomato harvest.
Regular Watering: Tomatoes need a lot of water, especially on hot days. It’s best to water the plants in the morning or evening when the sun isn’t shining. Avoid watering the leaves, as this can promote fungal diseases.
Fertilizing: Tomatoes are heavy feeders and need regular fertilizer. It’s best to use a special tomato fertilizer or an organic one. Start fertilizing about 2-3 weeks after planting out.
Pruning Suckers: Regularly remove the side shoots (suckers) that grow in the leaf axils. This helps the plant focus its energy on producing fruit and prevents it from becoming too bushy.
Checking for Pests and Diseases: Check the plants regularly for diseases and pests. If necessary, you can use organic plant protection products.
Support: Regularly tie the plants to the stake or trellis so they don’t fall over.
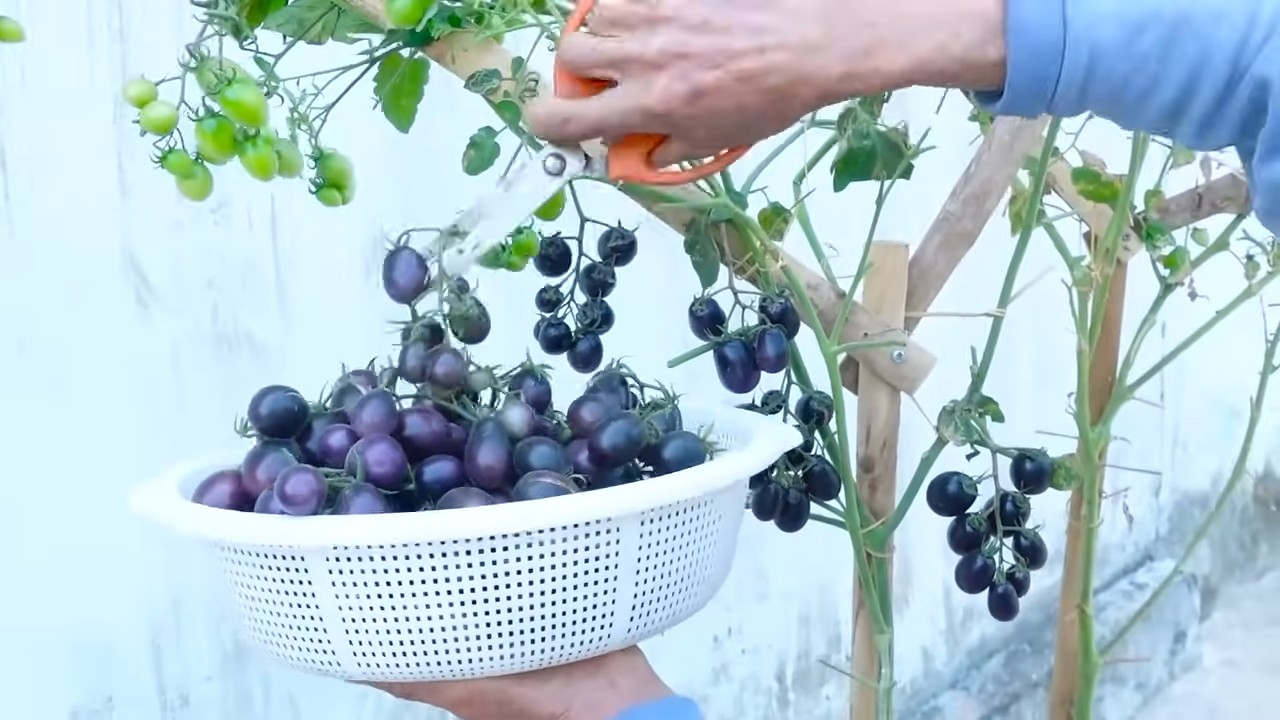
Phase 5: Harvest – The Reward for Your Hard Work!
Finally, the time has come: the first cherry tomatoes are ripe! The fruits are ready when they have an intense color and can be easily detached from the stem.
Step-by-Step Guide:
- Harvest: Gently pick the ripe cherry tomatoes.
- Enjoy: Savor the incomparable taste of freshly picked cherry tomatoes!
Tip: Cherry tomatoes taste best when eaten straight from the plant. But you can also use them in salads, sauces, or as a snack.
Conclusion
So, there you have it! Growing grape tomatoes at home is not only achievable, but it’s also incredibly rewarding. Forget those bland, store-bought tomatoes that lack that burst of sunshine flavor. With a little effort and these simple steps, you can cultivate your own supply of sweet, juicy grape tomatoes right in your backyard, balcony, or even on a sunny windowsill.
Why is this DIY trick a must-try? Because it puts you in control. You control the quality of the soil, the amount of sunlight, and the watering schedule, ensuring your tomatoes are grown with love and care. You’ll taste the difference, and you’ll feel a sense of accomplishment knowing you nurtured these little gems from seed to table. Plus, it’s a fantastic way to reduce your carbon footprint by cutting down on transportation and packaging associated with store-bought produce.
But the fun doesn’t stop there! Feel free to experiment with different varieties of grape tomatoes. Try growing yellow grape tomatoes for a slightly sweeter taste, or opt for a disease-resistant variety if you live in an area prone to tomato blight. You can also explore different growing methods, such as using raised beds, containers, or even hydroponics. Consider companion planting basil or marigolds near your tomato plants to deter pests and enhance flavor.
Don’t be afraid to get your hands dirty and embrace the learning process. Gardening is all about experimentation and adapting to your specific environment. Even if you encounter a few challenges along the way, the satisfaction of harvesting your own homegrown grape tomatoes will make it all worthwhile.
We wholeheartedly encourage you to give this DIY trick a try. Imagine the possibilities: fresh grape tomatoes in your salads, pasta dishes, and snacks, all grown with your own two hands. Share your experience with us! We’d love to hear about your successes, challenges, and any variations you’ve tried. Post pictures of your tomato plants, share your favorite recipes using your homegrown grape tomatoes, and let’s build a community of passionate home gardeners. Let’s all enjoy the deliciousness of growing grape tomatoes at home!
Frequently Asked Questions (FAQ)
Q: How much space do I need to grow grape tomatoes?
A: The amount of space you need depends on whether you’re growing your tomatoes in the ground or in containers. If planting in the ground, space plants about 2-3 feet apart to allow for adequate growth and air circulation. If using containers, choose pots that are at least 12 inches in diameter and depth. One plant per container is generally recommended. Even a small balcony can accommodate a few containers of grape tomatoes.
Q: What kind of soil is best for grape tomatoes?
A: Grape tomatoes thrive in well-draining soil that is rich in organic matter. A good starting point is a mix of equal parts garden soil, compost, and peat moss or coconut coir. You can also amend your soil with aged manure or other organic fertilizers to provide essential nutrients. Avoid heavy clay soils, as they can retain too much water and lead to root rot.
Q: How often should I water my grape tomato plants?
A: Water your grape tomato plants deeply and regularly, especially during hot, dry weather. Aim to keep the soil consistently moist but not waterlogged. A good rule of thumb is to water when the top inch of soil feels dry to the touch. Avoid overhead watering, as this can promote fungal diseases. Instead, water at the base of the plant. Mulching around the base of the plant can also help retain moisture and suppress weeds.
Q: How much sunlight do grape tomatoes need?
A: Grape tomatoes need at least 6-8 hours of direct sunlight per day to thrive. Choose a location that receives plenty of sunlight throughout the day. If you’re growing your tomatoes indoors, supplement with grow lights if necessary. Insufficient sunlight can lead to leggy growth and reduced fruit production.
Q: Do I need to prune my grape tomato plants?
A: Yes, pruning is important for grape tomato plants to encourage healthy growth and fruit production. Remove suckers (the small shoots that grow between the main stem and the branches) regularly to direct the plant’s energy towards fruit development. You can also prune away any yellowing or diseased leaves.
Q: When should I harvest my grape tomatoes?
A: Grape tomatoes are typically ready to harvest about 60-70 days after transplanting. Look for tomatoes that are fully colored (red, yellow, or orange, depending on the variety) and slightly soft to the touch. Gently twist the tomato from the vine. The flavor will be best when the tomatoes are fully ripe.
Q: What are some common pests and diseases that affect grape tomatoes?
A: Common pests that can affect grape tomatoes include aphids, whiteflies, and tomato hornworms. Diseases include early blight, late blight, and blossom end rot. Regularly inspect your plants for signs of pests or diseases and take appropriate action. Organic pest control methods, such as insecticidal soap or neem oil, can be effective. Ensure good air circulation around your plants to prevent fungal diseases. Blossom end rot is often caused by calcium deficiency, so amend your soil with calcium if necessary.
Q: Can I grow grape tomatoes indoors?
A: Yes, you can grow grape tomatoes indoors, but you’ll need to provide them with adequate sunlight or grow lights. Choose a sunny windowsill or use grow lights to supplement natural light. Use a well-draining potting mix and water regularly. You may also need to hand-pollinate the flowers to ensure fruit production.
Q: How can I prevent blossom end rot?
A: Blossom end rot, a common problem in tomatoes, is caused by a calcium deficiency. To prevent it, ensure your soil is rich in calcium by adding bone meal or crushed eggshells to the soil before planting. Maintain consistent watering to help the plant absorb calcium. Avoid over-fertilizing with nitrogen, as this can interfere with calcium uptake.
Q: What are some good companion plants for grape tomatoes?
A: Several plants can benefit grape tomatoes when planted nearby. Basil is a classic companion plant that repels pests and improves the flavor of tomatoes. Marigolds also deter pests, such as nematodes. Other good companion plants include carrots, onions, and garlic. Avoid planting tomatoes near brassicas (cabbage, broccoli, cauliflower) or fennel.
Leave a Comment