

Grow Gourds at Home and unlock a world of creative possibilities right in your backyard! Have you ever imagined crafting your own birdhouses, bowls, or even musical instruments from something you’ve grown yourself? It’s more achievable than you think, and this guide is your first step towards that rewarding experience.
Gourds have a rich history, dating back thousands of years. Across cultures, they’ve been used for everything from practical containers to symbolic art. In many indigenous societies, gourds held a place of honor, representing life, sustenance, and creativity. Imagine connecting with that ancient tradition by cultivating your own gourd patch!
But why should you learn to grow gourds at home? In today’s world, where sustainability and DIY projects are gaining popularity, growing gourds offers a unique opportunity to reduce waste, express your creativity, and connect with nature. Plus, let’s be honest, there’s something incredibly satisfying about transforming a simple seed into a functional and beautiful object. This DIY guide will provide you with the essential tricks and hacks to successfully grow gourds at home, even if you’re a complete beginner. I’m excited to share my tips and tricks with you, so let’s get started!
Grow Your Own Gourds: A Comprehensive DIY Guide
Hey there, fellow gardening enthusiasts! I’m so excited to share my experience with growing gourds. It’s a rewarding project that yields unique and beautiful results. Gourds are incredibly versatile – you can use them for crafting, decorating, or even making birdhouses! This guide will walk you through every step, from seed to stunning creation.
Choosing Your Gourd Variety
First things first, let’s talk about gourds! There are so many different kinds, each with its own charm. Before you even think about planting, you need to decide what kind of gourd you want to grow. This will influence everything from the space you need to the eventual use of your gourd.
* Ornamental Gourds: These are the small, colorful gourds you often see in fall decorations. They come in all sorts of shapes, sizes, and patterns. They’re great for beginners because they’re relatively easy to grow.
* Luffa Gourds: If you’re looking for a natural sponge, luffa gourds are your answer! They require a long growing season and plenty of support, but the end result is totally worth it.
* Bottle Gourds: These are the classic gourds used for making birdhouses, dippers, and other crafts. They come in various shapes, from long and slender to round and bulbous.
* Snake Gourds: These are long and slender, resembling snakes (hence the name!). They’re often used in Asian cuisine and can also be dried and used for decorative purposes.
Once you’ve chosen your gourd variety, it’s time to gather your supplies!
Gathering Your Supplies
To successfully grow gourds, you’ll need a few essential items. Here’s a checklist to get you started:
* Gourd Seeds: Purchase high-quality seeds from a reputable source.
* Seed Starting Trays or Pots: For starting seeds indoors.
* Seed Starting Mix: A light and well-draining mix specifically designed for seedlings.
* Garden Soil: Rich, well-draining soil for planting in the garden.
* Compost or Manure: To enrich the soil and provide nutrients.
* Fertilizer: A balanced fertilizer to support growth.
* Trowel or Shovel: For planting and digging.
* Watering Can or Hose: For watering your plants.
* Trellis or Support Structure: For vining gourd varieties.
* Pruning Shears: For trimming vines and removing unwanted growth.
* Gloves: To protect your hands.
* Gardening Stakes and Ties: To help train the vines.
Starting Your Gourd Seeds
Depending on your climate, you can either start your gourd seeds indoors or directly sow them in the garden. I prefer starting them indoors to get a head start, especially if you have a shorter growing season.
Starting Seeds Indoors
1. Prepare Your Seed Starting Trays: Fill your seed starting trays or pots with seed starting mix. Moisten the mix thoroughly.
2. Sow the Seeds: Plant two to three seeds per cell or pot, about ½ inch deep.
3. Cover the Seeds: Gently cover the seeds with more seed starting mix.
4. Water Gently: Water the trays or pots gently to avoid disturbing the seeds.
5. Provide Warmth: Place the trays or pots in a warm location, such as a sunny windowsill or under grow lights. The ideal temperature for germination is around 70-80°F (21-27°C).
6. Keep the Soil Moist: Keep the soil consistently moist, but not waterlogged.
7. Wait for Germination: Germination typically takes 7-14 days.
8. Thin Seedlings: Once the seedlings emerge, thin them to one plant per cell or pot by snipping off the weaker seedlings at the soil line.
9. Harden Off Seedlings: Before transplanting your seedlings outdoors, you’ll need to harden them off. This process gradually acclimates them to outdoor conditions. Start by placing the seedlings outdoors in a sheltered location for a few hours each day, gradually increasing the amount of time they spend outside over the course of a week.
Direct Sowing Seeds Outdoors
If you live in a warmer climate with a long growing season, you can directly sow your gourd seeds outdoors.
1. Prepare the Soil: Choose a sunny location with well-draining soil. Amend the soil with compost or manure to improve its fertility.
2. Sow the Seeds: Plant the seeds about ½ inch deep, spacing them according to the instructions on the seed packet.
3. Water Gently: Water the area gently to avoid disturbing the seeds.
4. Keep the Soil Moist: Keep the soil consistently moist until the seedlings emerge.
5. Thin Seedlings: Once the seedlings emerge, thin them to the strongest plant per spacing.
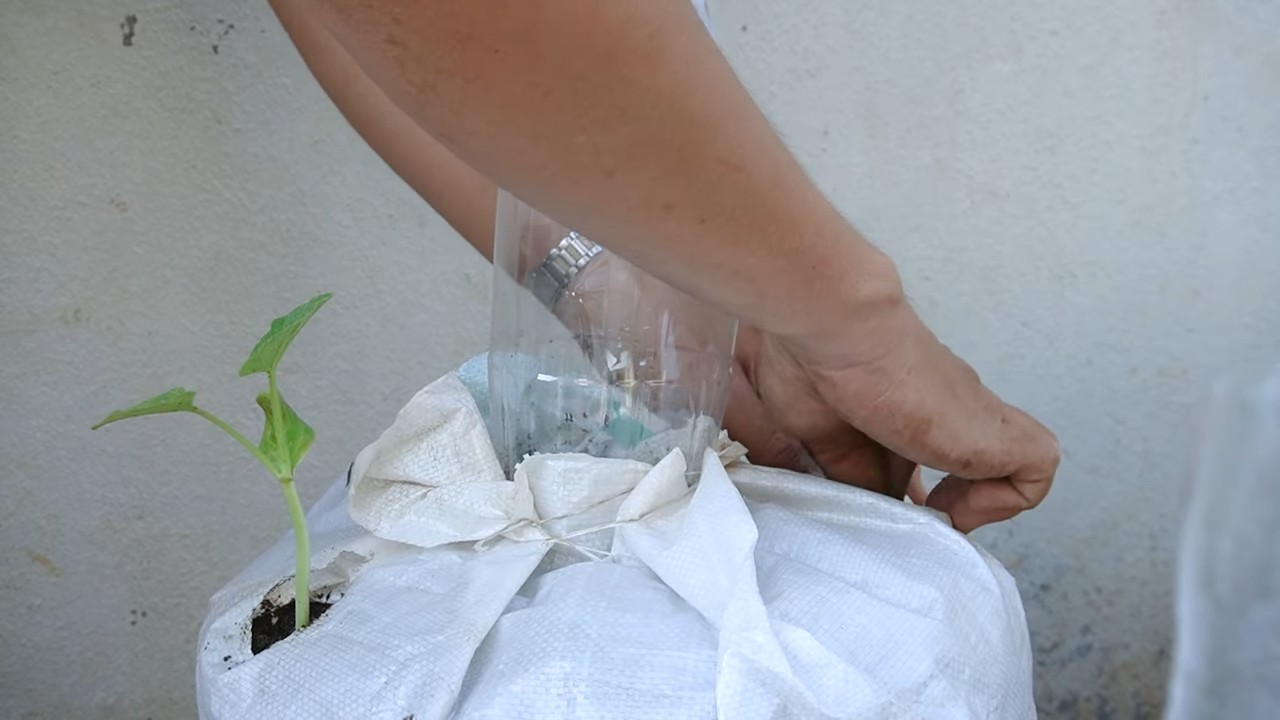
Transplanting Your Gourd Seedlings
Once your seedlings have developed a few sets of true leaves and the danger of frost has passed, it’s time to transplant them into the garden.
1. Prepare the Planting Site: Choose a sunny location with well-draining soil. Gourds need plenty of space to grow, so space the plants according to the instructions on the seed packet.
2. Dig Holes: Dig holes that are slightly larger than the root balls of your seedlings.
3. Amend the Soil: Mix some compost or manure into the soil at the bottom of each hole.
4. Remove Seedlings from Pots: Gently remove the seedlings from their pots, being careful not to damage the roots.
5. Place Seedlings in Holes: Place the seedlings in the holes, making sure the top of the root ball is level with the surrounding soil.
6. Fill Holes: Fill the holes with soil, gently firming it around the base of the plants.
7. Water Thoroughly: Water the plants thoroughly after transplanting.
8. Add Mulch: Add a layer of mulch around the plants to help retain moisture and suppress weeds.
Caring for Your Gourd Plants
Gourds are relatively easy to care for, but they do require some attention to thrive.
* Watering: Water your gourd plants regularly, especially during dry periods. Aim to keep the soil consistently moist, but not waterlogged.
* Fertilizing: Fertilize your gourd plants every few weeks with a balanced fertilizer. Follow the instructions on the fertilizer package.
* Weeding: Keep the area around your gourd plants free of weeds. Weeds can compete with your plants for nutrients and water.
* Pruning: Prune your gourd vines to encourage branching and fruit production. Remove any dead or diseased leaves or stems.
* Providing Support: Vining gourd varieties need a trellis or other support structure to climb on. This will help keep the fruits off the ground and prevent them from rotting.
* Pollination: Gourds are pollinated by insects, so it’s important to attract pollinators to your garden. Plant flowers that attract bees and other beneficial insects. If you’re not seeing enough pollination, you can hand-pollinate the flowers yourself. To do this, use a small paintbrush to transfer pollen from the male flowers to the female flowers. Female flowers have a small gourd-like structure at the base of the flower.
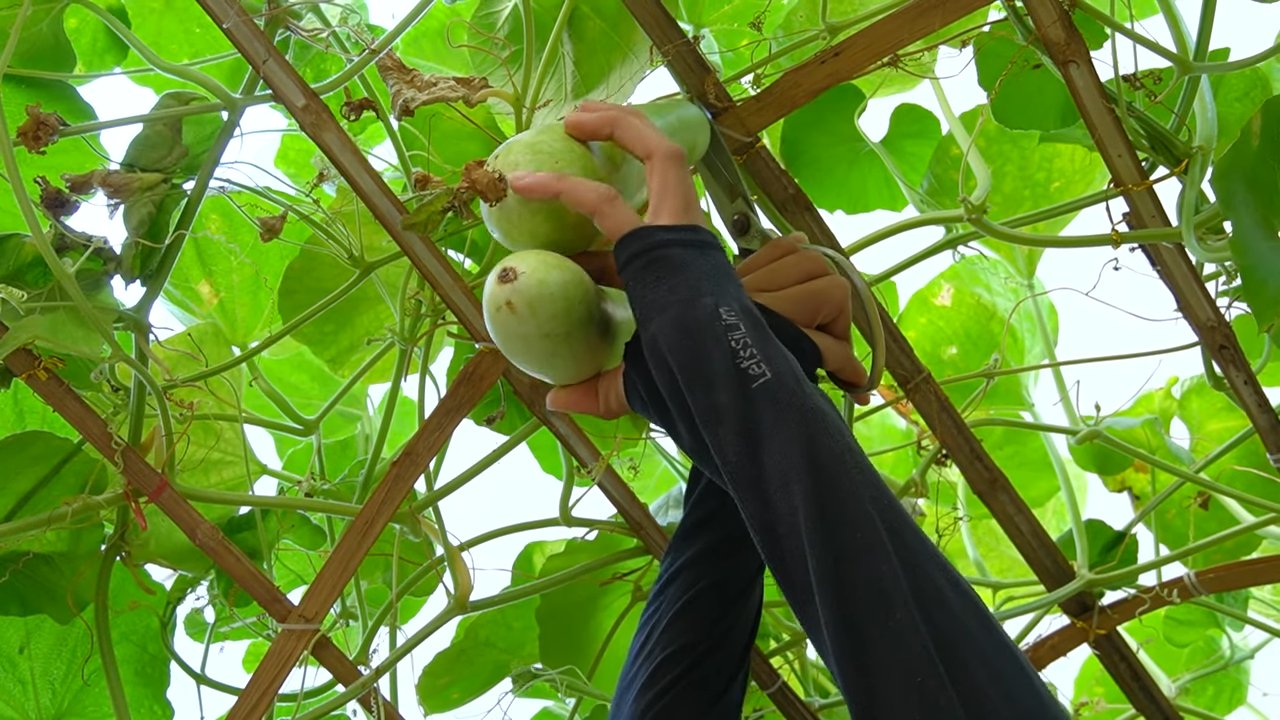
Harvesting Your Gourds
The timing of your gourd harvest will depend on the variety you’re growing and how you plan to use them.
* Ornamental Gourds: Harvest ornamental gourds when they are fully mature and the stems have dried.
* Luffa Gourds: Harvest luffa gourds when they are fully mature and the skin has turned brown and dry.
* Bottle Gourds: Harvest bottle gourds when they are fully mature and the stems have dried.
* Snake Gourds: Harvest snake gourds when they are young and tender, or allow them to mature and dry for decorative purposes.
To harvest your gourds, use pruning shears to cut the stem a few inches above the gourd. Be careful not to damage the gourd itself.
Curing Your Gourds
Curing is an essential step in preserving your gourds and preventing them from rotting.
1. Clean the Gourds: Gently wash the gourds with soapy water to remove any dirt or debris.
2. Dry the Gourds: Place the gourds in a well-ventilated area, such as a garage or shed. Make sure the gourds are not touching each other.
3. Allow to Cure: Allow the gourds to cure for several weeks or months, until they are completely dry and hard. The curing process can take a long time, so be patient.
4. Check for Rot: Check the gourds regularly for signs
Conclusion
So, there you have it! Growing gourds at home is not only achievable, but it’s also a deeply rewarding experience that connects you with nature and provides you with unique, decorative, and even functional items. From selecting the right gourd variety to nurturing its growth and finally harvesting your bounty, each step is a testament to the power of patience and the magic of gardening.
This isn’t just about having a few gourds to display during the fall season. It’s about embracing a sustainable practice, learning about plant life cycles, and creating something beautiful and useful with your own two hands. Imagine the satisfaction of gifting a hand-painted gourd birdhouse to a friend, or using your homegrown dipper gourds for watering your other plants. The possibilities are truly endless!
And don’t be afraid to experiment! Try different gourd varieties to see which ones thrive best in your climate. Explore various training methods to shape your gourds into unique forms. Get creative with your decorating techniques, using paints, dyes, carvings, or even pyrography to personalize your creations. Consider companion planting to deter pests and improve soil health. Plant marigolds or nasturtiums nearby to naturally repel unwanted insects.
Remember, growing gourds at home is a journey, not a destination. There will be challenges along the way, but the rewards are well worth the effort. Don’t be discouraged if your first attempt isn’t perfect. Learn from your mistakes, adapt your approach, and keep trying. Each season brings new opportunities to refine your skills and grow even more impressive gourds.
We wholeheartedly encourage you to give this DIY project a try. It’s a fantastic way to add a touch of rustic charm to your home and garden, while also engaging in a fulfilling and sustainable activity. And most importantly, we want to hear about your experiences! Share your photos, tips, and stories with us in the comments below. Let’s create a community of gourd-growing enthusiasts and inspire others to discover the joy of growing these fascinating plants. What are you waiting for? Get your seeds, prepare your soil, and embark on your gourd-growing adventure today! You’ll be amazed at what you can achieve.
Frequently Asked Questions (FAQ)
What are the best gourd varieties to grow for beginners?
For beginners, some of the easiest and most rewarding gourd varieties to grow include:
* **Birdhouse Gourds:** These are relatively easy to grow and produce large, round gourds that are perfect for crafting birdhouses.
* **Dipper Gourds:** These have a long handle and a rounded body, making them ideal for use as dippers or ladles. They are also relatively easy to grow.
* **Ornamental Gourds:** These come in a wide variety of shapes, sizes, and colors, making them a fun and visually appealing option for beginners. They are primarily used for decoration.
These varieties are generally more forgiving and produce results relatively quickly, which can be encouraging for new gourd growers.
How much space do gourds need to grow?
Gourds are vining plants that require a significant amount of space to grow. Each plant can spread several feet in all directions. Ideally, you should provide at least 6-8 feet of space between plants. If you are growing them on a trellis, make sure the trellis is sturdy enough to support the weight of the mature gourds. Consider the mature size of the specific variety you are growing when determining spacing. Insufficient space can lead to overcrowding, reduced air circulation, and increased susceptibility to diseases.
What kind of soil do gourds need?
Gourds thrive in well-drained, fertile soil that is rich in organic matter. Before planting, amend your soil with compost, aged manure, or other organic amendments to improve its drainage and fertility. A slightly acidic to neutral soil pH (around 6.0 to 7.0) is ideal. Conduct a soil test to determine your soil’s pH and nutrient levels, and amend accordingly. Avoid heavy clay soils, as they can become waterlogged and inhibit gourd growth.
How often should I water my gourds?
Gourds need consistent moisture, especially during hot, dry weather. Water deeply and regularly, aiming to keep the soil consistently moist but not waterlogged. Water at the base of the plants to avoid wetting the foliage, which can increase the risk of fungal diseases. Mulching around the plants can help to retain moisture and suppress weeds. Check the soil moisture regularly and adjust your watering schedule as needed based on weather conditions.
How do I prevent pests and diseases from affecting my gourds?
Preventing pests and diseases is crucial for successful gourd growing. Here are some tips:
* **Choose disease-resistant varieties:** Select gourd varieties that are known to be resistant to common diseases.
* **Provide good air circulation:** Space plants adequately to allow for good air circulation, which helps to prevent fungal diseases.
* **Water at the base of the plants:** Avoid wetting the foliage when watering.
* **Remove diseased leaves:** Promptly remove any leaves that show signs of disease.
* **Use organic pest control methods:** Consider using organic pest control methods, such as insecticidal soap or neem oil, to control pests.
* **Companion planting:** Plant marigolds or nasturtiums nearby to deter pests.
* **Crop rotation:** Avoid planting gourds in the same location year after year to prevent the buildup of soilborne diseases.
When is the best time to harvest gourds?
Gourds are typically harvested in the fall, after the vines have died back and the gourds have fully matured. The gourds should be hard and dry to the touch. Leave the gourds on the vine as long as possible to allow them to fully cure. Once harvested, clean the gourds with a mild soap and water solution and allow them to dry completely. Store them in a cool, dry, well-ventilated place for several months to allow them to fully cure. Curing is essential for preventing rot and ensuring that the gourds will last for a long time.
How do I cure gourds properly?
Proper curing is essential for preserving gourds and preventing them from rotting. Here’s how to cure gourds:
1. **Harvest mature gourds:** Harvest gourds after the vines have died back and the gourds are hard and dry to the touch.
2. **Wash and dry:** Wash the gourds with a mild soap and water solution and allow them to dry completely.
3. **Provide good ventilation:** Place the gourds in a cool, dry, well-ventilated area, such as a shed or garage.
4. **Elevate the gourds:** Elevate the gourds on racks or pallets to allow for good air circulation around them.
5. **Turn the gourds regularly:** Turn the gourds every few days to ensure that all sides are exposed to air.
6. **Curing time:** The curing process can take several weeks or even months, depending on the size and thickness of the gourds.
7. **Discard any rotten gourds:** Check the gourds regularly for signs of rot and discard any that are affected.
Can I paint or decorate my gourds?
Yes, absolutely! Painting and decorating gourds is a fun and creative way to personalize them. Once the gourds are fully cured, you can paint them with acrylic paints, dyes, or other decorative materials. You can also carve them, burn designs into them using pyrography, or add embellishments such as beads, shells, or fabric. Be sure to seal the finished gourds with a clear sealant to protect the paint and decorations. Let your imagination run wild and create unique and beautiful gourd art!


Leave a Comment