

Grow Ginger at Home – imagine the satisfaction of snipping off a piece of fresh, zesty ginger root right from your own backyard (or even your kitchen windowsill!). Forget those sad, shriveled pieces at the grocery store; we’re talking vibrant, flavorful ginger, ready whenever you need it.
Ginger, with its fiery kick and incredible health benefits, has been cherished for centuries. Originating in South Asia, it’s been used in traditional medicine and culinary practices across cultures for thousands of years. From soothing teas to spicy stir-fries, ginger is a versatile ingredient that adds a special touch to almost anything.
But why rely on store-bought ginger when you can easily grow ginger at home? This DIY project isn’t just about saving money; it’s about connecting with nature, learning a new skill, and enjoying the freshest possible ingredients. Plus, it’s surprisingly easy! Many people find that growing their own ginger is a rewarding experience, and I’m here to show you how. I’ll guide you through simple steps and tricks to cultivate your own thriving ginger plant, no matter your gardening experience. Get ready to unlock the secrets to a bountiful ginger harvest, right in your own home!
Growing Ginger at Home: A Comprehensive DIY Guide
Hello, fellow garden lovers! Have you ever wondered how you can grow your own ginger? It’s easier than you think and incredibly rewarding! Freshly harvested ginger has a much more intense flavor than what you find in the supermarket. Plus, you’ll know exactly where it comes from and how it was grown. In this article, I’ll show you step-by-step how to successfully grow ginger at home. Let’s get started!
What You’ll Need for Growing Ginger:
- Ginger root (rhizome): Make sure it looks healthy, is plump, and ideally already has small green buds (eyes). Organic ginger is often the better choice, as it’s less likely to have been treated with growth inhibitors.
- Pot or container: Choose a pot that is at least 30 cm (12 inches) in diameter and 20 cm (8 inches) deep. Ginger roots grow horizontally, so a wide pot is more suitable.
- High-quality potting soil: Well-draining potting soil is crucial. You can also make your own mix of potting soil, compost, and perlite.
- Water: Regular watering is important, but avoid waterlogging.
- Spray bottle: To increase humidity.
- A warm, bright location: Ginger loves warmth and indirect sunlight.
- Optional: Organic fertilizer for the growing phase.
Step-by-Step Guide to Growing Ginger
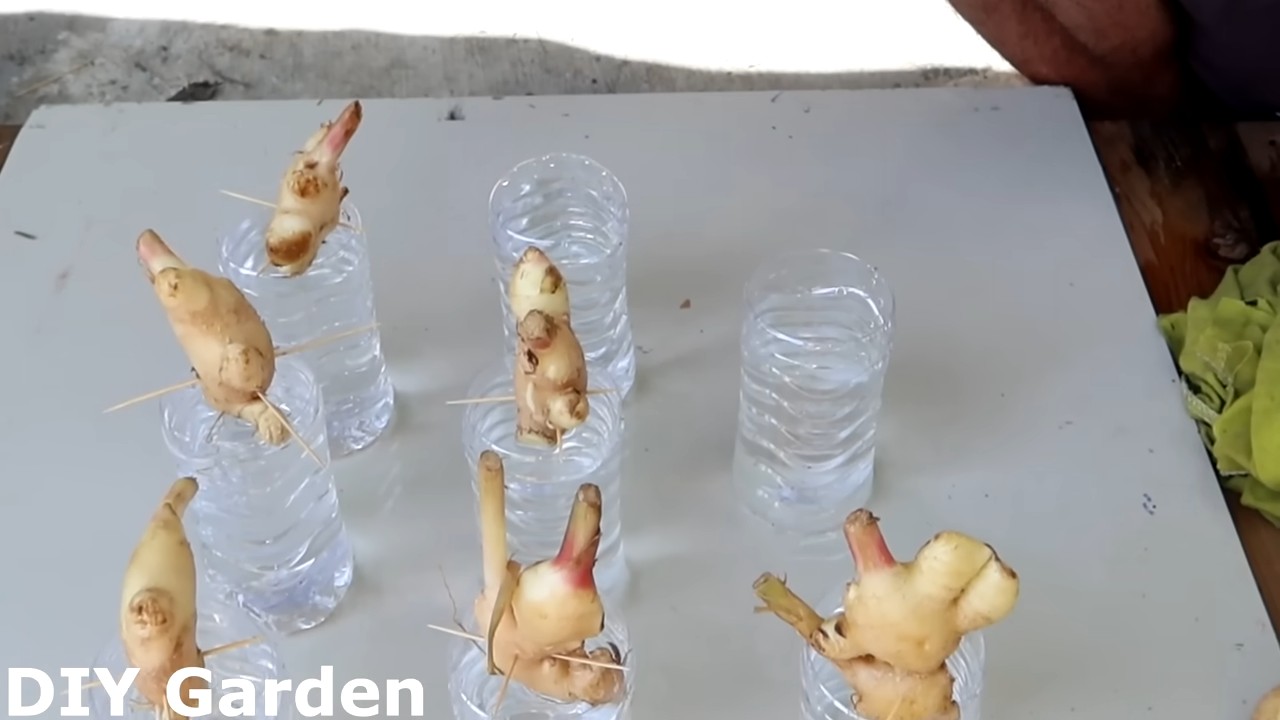
1. Preparing the Ginger Root:
- Choose a nice, plump ginger root. It’s best to use one that already has small green buds. These buds are a sign that the ginger is ready to sprout.
- If your ginger root is very large, you can cut it into several pieces. Make sure each piece has at least one or two buds.
- Let the cut pieces air-dry for a few days. This helps to seal the cut surfaces and reduces the risk of rot.
2. Preparing the Pot:
- Fill your pot with the potting soil. Leave about 5 cm (2 inches) of space at the top.
- Press the soil down lightly, but not too firmly. It should remain loose and airy.
- Water the soil thoroughly so that it is well-moistened.
3. Planting the Ginger:
- Place the ginger pieces on top of the soil with the buds facing up.
- Cover the ginger pieces with about 2-5 cm (1-2 inches) of soil.
- Water the soil lightly again.
4. Choosing the Location:
- Place the pot in a warm, bright spot, but not in direct sunlight. An east- or west-facing windowsill is ideal.
- Ginger likes it warm, so make sure the temperature does not drop below 20°C (68°F).
5. Caring for Your Ginger:
- Watering: Water the ginger regularly, but avoid waterlogging. The soil should always be slightly moist, but not wet.
- Humidity: Ginger loves high humidity. Spray the leaves regularly with water, especially when the air is dry.
- Fertilizing: During the growing phase, you can fertilize the ginger every few weeks with an organic fertilizer. Follow the instructions on the packaging.
- Observing: Watch for signs of pests or diseases. If you notice anything unusual, act quickly.
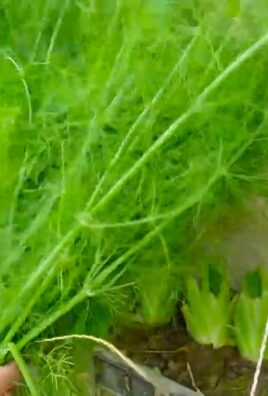
The Growth Stages of Ginger
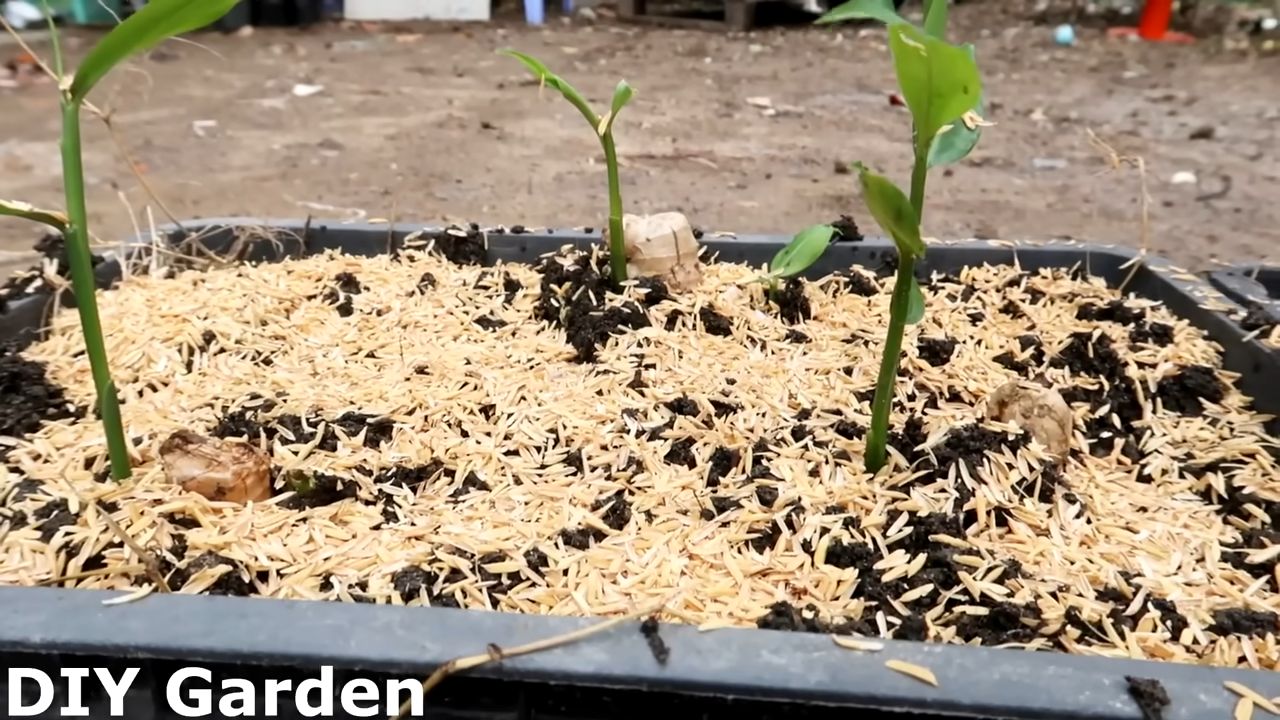
1. Germination:
- It can take several weeks for the first shoots to emerge from the soil. Be patient!
- Once the shoots appear, you can move the pot to a slightly brighter location.
2. Vegetative Growth:
- During this phase, the ginger grows quickly and produces many leaves.
- Make sure the ginger gets enough water and nutrients.
- Rotate the pot regularly so the ginger grows evenly.
3. The Harvest:
- Ginger can be harvested about 8-10 months after planting.
- You can either harvest the whole plant or just cut off a piece of the root and let the rest continue to grow.
- To harvest the ginger, carefully dig up the plant and shake off the soil.
Tips and Tricks for Successful Ginger Cultivation
- Choose the right variety: There are different varieties of ginger that vary in taste and appearance. Find out which variety is best suited for your needs.
- Prepare the soil: Well-draining soil is crucial for success. Mix your potting soil with compost and perlite to improve drainage.
- Optimize your watering: Water the ginger regularly, but avoid waterlogging. Let the soil dry out slightly between waterings.
- Increase humidity: Ginger loves high humidity. Spray the leaves regularly with water or place the pot on a tray with water and pebbles.
- Adjust your fertilizing: Fertilize the ginger regularly with an organic fertilizer during its growth phase.
- Control pests and diseases: Watch for signs of pests or diseases and act quickly.
- Determine the harvest time: Ginger can be harvested about 8-10 months after planting. The longer you wait, the more pungent the flavor will become.
- Store the ginger: Fresh ginger can be stored in the refrigerator or freezer.
Common Problems and Solutions
- Yellow leaves: Yellow leaves can be a sign of overwatering, nutrient deficiency, or pest infestation. Check your watering habits, fertilize the ginger, and look for pests.
- Rot: Rot can be caused by waterlogging or poor air circulation. Make sure the soil is well-draining and the pot has adequate drainage holes.
- Pests: Ginger can be affected by various pests, such as aphids or spider mites. Combat pests with natural remedies or a suitable insecticide.
- Slow growth: Slow growth can be caused by too little light, low temperatures, or a lack of nutrients. Move the ginger to a brighter location, increase the temperature, and fertilize it regularly.
Ginger in the Kitchen and for Your Health
Ginger is not only delicious but also very healthy. It contains many valuable ingredients that have anti-inflammatory, pain-relieving, and digestive-aiding properties.
- In the kitchen: Ginger can be used in many different dishes, such as soups, curries, stir-fries, smoothies, and teas.
- For your health: Ginger can help with nausea, digestive issues, colds, and inflammation.
I hope this guide has helped you understand how to grow ginger at home. With a little patience and care, you can harvest and enjoy your own fresh ginger. Good luck
Conclusion
So, there you have it! Growing ginger at home is not only achievable, but it’s also incredibly rewarding. Forget those bland, store-bought ginger roots that have been sitting on shelves for weeks. Imagine the vibrant, spicy flavor of freshly harvested ginger, ready to elevate your culinary creations and soothe your senses. This DIY trick transforms your kitchen into a mini-farm, providing you with a sustainable source of this incredible spice.
Why is this a must-try? Because it’s more than just growing ginger; it’s about connecting with nature, understanding the origins of your food, and enjoying the unparalleled freshness of homegrown ingredients. The satisfaction of nurturing a tiny rhizome into a thriving plant is immense. Plus, you’ll have a constant supply of ginger on hand, ready to add a zing to your stir-fries, teas, smoothies, and baked goods.
Looking for variations? Experiment with different varieties of ginger! Some are spicier, some are sweeter, and some have unique aromatic profiles. Try growing turmeric alongside your ginger, as they share similar growing conditions and offer complementary health benefits. You can also adjust the growing medium to influence the flavor of your ginger. For a spicier ginger, use a slightly leaner soil mix. For a sweeter ginger, enrich the soil with more compost.
Don’t be afraid to get creative with your container gardening. Use repurposed containers, like old buckets or tubs, to add a rustic charm to your indoor garden. Consider companion planting with herbs like basil or mint, which can help deter pests and enhance the overall health of your ginger plants.
We wholeheartedly encourage you to embark on this exciting gardening adventure. It’s a simple, cost-effective, and incredibly satisfying way to bring the flavors of the world into your home. Once you’ve tasted the difference between homegrown ginger and store-bought ginger, you’ll never go back.
Ready to experience the joy of growing your own ginger? Give this DIY trick a try and witness the magic unfold. We are confident that you will be amazed by the results.
Most importantly, we want to hear about your experiences! Share your photos, tips, and challenges in the comments below. Let’s create a community of home gardeners who are passionate about growing their own food and sharing their knowledge with others. Your insights could inspire someone else to take the plunge and discover the joys of growing ginger at home. Let’s cultivate a greener, healthier, and more flavorful world, one ginger rhizome at a time. This method of growing ginger at home is a game changer.
Frequently Asked Questions (FAQ)
Q: What kind of ginger should I use to start growing?
A: The best ginger to use is a fresh, plump rhizome from your local grocery store or farmers market. Look for pieces that are firm, with smooth skin and visible “eyes” (small buds). Organic ginger is often preferred, as it’s less likely to have been treated with growth inhibitors. Avoid ginger that is shriveled, moldy, or has soft spots. The more eyes the ginger has, the more plants you can potentially grow from it. You can even break the rhizome into smaller pieces, ensuring each piece has at least one or two eyes. Let the cut pieces callous over for a day or two before planting to prevent rot.
Q: How long does it take to grow ginger at home?
A: Growing ginger at home requires patience. It typically takes around 8-10 months from planting to harvest a mature rhizome. However, you can start harvesting small pieces of ginger after about 4 months. The plant will continue to grow and produce more ginger over time. The warmer the climate, the faster the ginger will grow. In cooler climates, you may need to provide supplemental heat and light to encourage growth. Remember that ginger is a tropical plant and thrives in warm, humid conditions.
Q: What kind of soil is best for growing ginger?
A: Ginger thrives in well-draining, nutrient-rich soil. A good mix consists of equal parts potting soil, compost, and perlite or vermiculite. The compost provides essential nutrients, while the perlite or vermiculite ensures proper drainage. Ginger roots are susceptible to rot if the soil is too soggy. You can also add a small amount of slow-release fertilizer to the soil to provide a steady supply of nutrients. Avoid using heavy clay soils, as they tend to retain too much moisture.
Q: How much sunlight does ginger need?
A: Ginger prefers partial shade to filtered sunlight. Direct sunlight can scorch the leaves, especially in hot climates. An east-facing window or a spot that receives morning sun and afternoon shade is ideal. If you’re growing ginger outdoors, choose a location under a tree or a shaded patio. You can also use shade cloth to protect the plants from intense sunlight. The amount of sunlight will also affect the flavor of the ginger; less sunlight can result in a milder flavor.
Q: How often should I water my ginger plant?
A: Water your ginger plant regularly, keeping the soil consistently moist but not waterlogged. Allow the top inch of soil to dry out slightly between waterings. Overwatering can lead to root rot, while underwatering can stunt growth. Check the soil moisture regularly and adjust your watering schedule accordingly. During the warmer months, you may need to water more frequently. In the winter, when the plant is dormant, you can reduce watering.
Q: How do I harvest ginger?
A: You can start harvesting ginger when the plant is about 4 months old. To harvest, gently dig around the plant and remove a small piece of the rhizome. Be careful not to damage the remaining roots. You can also harvest the entire plant at the end of the growing season, when the leaves start to turn yellow and die back. To store harvested ginger, wrap it in a paper towel and place it in a plastic bag in the refrigerator. It can also be frozen for longer storage.
Q: Can I grow ginger indoors year-round?
A: Yes, you can grow ginger indoors year-round, especially in colder climates. Provide adequate light, warmth, and humidity to ensure healthy growth. Use a grow light if natural light is insufficient. Maintain a consistent temperature of around 70-80°F (21-27°C). You can also increase humidity by misting the plant regularly or placing it on a pebble tray filled with water.
Q: What are some common problems when growing ginger, and how can I fix them?
A: Some common problems include root rot, pests, and nutrient deficiencies. Root rot is caused by overwatering and can be prevented by using well-draining soil and avoiding excessive watering. Pests, such as aphids and spider mites, can be controlled with insecticidal soap or neem oil. Nutrient deficiencies can be addressed by fertilizing the plant with a balanced fertilizer. Yellowing leaves can indicate a lack of nutrients or overwatering. Always inspect your plants regularly for signs of problems and address them promptly.
Q: Can I grow ginger in different climates?
A: Yes, you can grow ginger in different climates, but you may need to adjust your growing methods accordingly. In warmer climates, you can grow ginger outdoors year-round. In cooler climates, you can grow ginger in containers and bring them indoors during the winter. You may also need to provide supplemental heat and light to ensure healthy growth. Choose a variety of ginger that is well-suited to your climate.
Q: What are the health benefits of growing and using fresh ginger?
A: Fresh ginger is packed with health benefits. It’s known for its anti-inflammatory and antioxidant properties. It can help relieve nausea, reduce muscle pain, and improve digestion. It’s also a good source of vitamins and minerals. Growing your own ginger ensures that you have access to fresh, high-quality ginger that is free from pesticides and other harmful chemicals. Incorporating fresh ginger into your diet can boost your overall health and well-being.
Leave a Comment