

Grow giant pumpkins at home? Absolutely! Imagine the look on your neighbor’s faces when they see a pumpkin so large it could practically be a small car! For centuries, pumpkins have been a symbol of autumn, harvest, and community. From Native American traditions where they were a staple food source to the modern-day jack-o’-lanterns that adorn our porches, pumpkins hold a special place in our hearts. But why settle for ordinary when you can cultivate extraordinary?
This isn’t just about growing a pumpkin; it’s about embarking on a rewarding journey, connecting with nature, and experiencing the thrill of nurturing something truly magnificent. Let’s be honest, who wouldn’t want to brag about growing the biggest pumpkin on the block? Plus, with rising grocery prices, learning how to grow giant pumpkins at home can be a fun and cost-effective way to enjoy the fruits (or rather, vegetables!) of your labor. I’m here to guide you through some simple yet effective DIY tricks and hacks that will transform your garden into a giant pumpkin-growing paradise. Get ready to roll up your sleeves and prepare for some serious pumpkin power!
Growing Giant Pumpkins: My Step-by-Step Guide to a Prize-Winning Gourd!
Okay, so you want to grow a giant pumpkin? Awesome! It’s a challenging but incredibly rewarding experience. I’ve been growing them for years, and while I’m no expert, I’ve learned a thing or two along the way. This guide is based on my own experiences and research, and I hope it helps you on your giant pumpkin journey!
Choosing the Right Seeds: The Foundation of Your Giant
This is where it all begins! You can’t just grab any pumpkin seed and expect a behemoth. Genetics are key.
* Look for Atlantic Giant Seeds: These are specifically bred for size. Don’t even bother with anything else if your goal is a giant.
* Source from Reputable Growers: Find growers who have produced large pumpkins in the past. Their seeds are more likely to carry the genes for gigantism. Websites and pumpkin growing clubs are great resources.
* Consider Pedigree: Seed pedigrees trace the lineage of the seed back to its parent pumpkins. The larger the parent pumpkins, the better the potential of the seed. Look for seeds with known weights and parentage.
* Don’t be Afraid to Spend a Little More: High-quality seeds from proven growers can be pricey, but it’s an investment in your potential. Think of it as paying for good genes!
* Start with Multiple Seeds: Not all seeds germinate, and not all seedlings will thrive. Plant several seeds to increase your chances of success.
Starting Your Seeds Indoors: Giving Them a Head Start
Getting your seeds started indoors gives them a jump on the growing season and protects them from early frosts and pests.
* Timing is Crucial: Start your seeds about 3-4 weeks before the last expected frost in your area. This usually means late April or early May, depending on where you live.
* Use Peat Pots or Biodegradable Containers: These allow you to transplant the seedlings without disturbing their roots, which is crucial for their delicate early growth.
* Use a Seed Starting Mix: This is a light, well-draining mix specifically formulated for starting seeds. Don’t use garden soil, as it can be too heavy and compact.
* Soak the Seeds: Before planting, soak the seeds in warm water for a few hours (up to 24 hours). This helps to soften the seed coat and speed up germination.
* Planting Depth: Plant the seeds about 1 inch deep in the seed starting mix.
* Warmth is Key: Pumpkin seeds need warmth to germinate. Use a heat mat under the seed trays to maintain a soil temperature of around 80-85°F (27-29°C).
* Humidity Dome: Cover the seed trays with a humidity dome or plastic wrap to create a humid environment.
* Light After Germination: Once the seedlings emerge (usually within 5-10 days), remove the humidity dome and provide them with plenty of light. A grow light is ideal, but a sunny windowsill can also work.
* Water Carefully: Keep the soil consistently moist, but not soggy. Overwatering can lead to damping off, a fungal disease that can kill seedlings.
* Harden Off the Seedlings: Before transplanting the seedlings outdoors, gradually acclimate them to outdoor conditions. Start by placing them outside for a few hours each day, gradually increasing the amount of time they spend outdoors over the course of a week.
Preparing the Pumpkin Patch: Creating the Perfect Growing Environment
Giant pumpkins need a lot of space, sunlight, and nutrients. Preparing the soil properly is essential for success.
* Choose a Sunny Location: Pumpkins need at least 6-8 hours of direct sunlight per day. Choose a location that gets plenty of sun throughout the growing season.
* Space is Essential: Each pumpkin plant needs a lot of space to spread out. Allow at least 400 square feet per plant. That’s a 20×20 foot area!
* Soil Testing: Get your soil tested to determine its pH and nutrient levels. Pumpkins prefer a slightly acidic soil with a pH of around 6.0-6.8.
* Amend the Soil: Based on your soil test results, amend the soil with compost, manure, and other organic matter to improve its fertility and drainage.
* Add Fertilizer: Incorporate a slow-release fertilizer into the soil before planting. Choose a fertilizer that is high in phosphorus and potassium, which are essential for fruit development.
* Raised Beds (Optional): Consider building raised beds to improve drainage and soil warming.
* Black Plastic Mulch: Lay down black plastic mulch to warm the soil, suppress weeds, and conserve moisture.
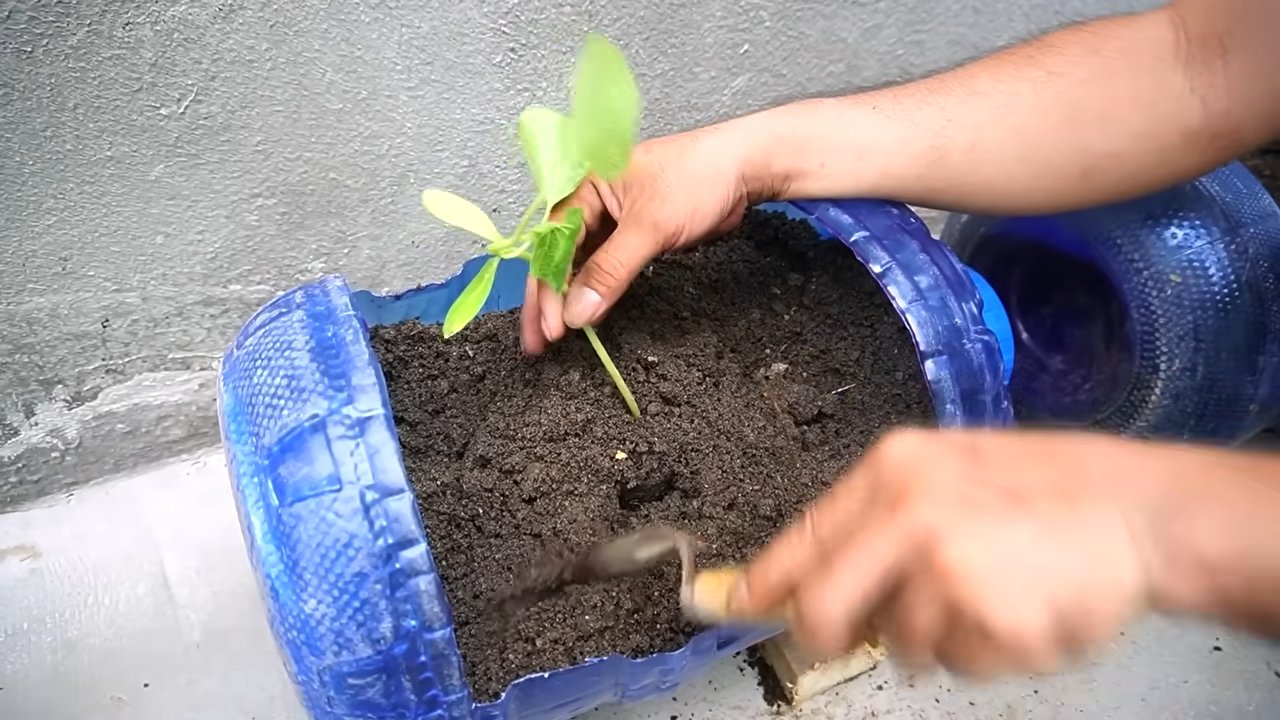
Transplanting Your Seedlings: Moving Them to Their New Home
Transplanting is a delicate process, so handle the seedlings with care.
* Wait for Warm Weather: Transplant your seedlings outdoors after the last expected frost and when the soil has warmed up to at least 60°F (15°C).
* Dig a Hole: Dig a hole that is slightly larger than the peat pot or container.
* Carefully Remove the Seedling: Gently remove the seedling from the peat pot or container, being careful not to damage the roots. If using peat pots, you can plant the entire pot, but make sure to tear off the top edge to prevent it from wicking moisture away from the roots.
* Planting Depth: Plant the seedling at the same depth it was growing in the container.
* Water Thoroughly: Water the seedling thoroughly after planting.
* Protect from Pests: Protect the seedlings from pests such as slugs and snails.
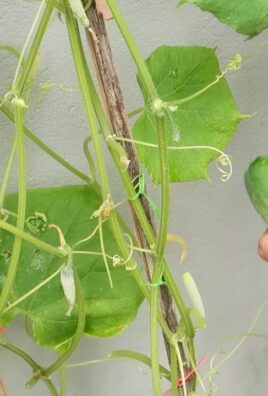
Training the Vine: Guiding Growth for Maximum Potential
Training the vine is crucial for directing the plant’s energy into a single pumpkin.
* Choose the Right Vine: Select the strongest and healthiest vine to be the main vine.
* Bury the Vines: As the vine grows, bury sections of it with soil. This encourages the development of additional roots, which will help to nourish the pumpkin.
* Remove Secondary Vines: Remove any secondary vines that are growing off the main vine. This will help to focus the plant’s energy on the main vine and the chosen pumpkin.
* Direct the Vine: Train the vine to grow in a straight line, perpendicular to the sun. This will help to ensure that the pumpkin receives even sunlight.
* Prune the Vine: Prune the vine after the pumpkin has reached a desirable size. This will help to prevent the plant from wasting energy on unnecessary growth.
Pollinating the Flowers: Ensuring Fruit Set
Pumpkins have separate male and female flowers. You’ll need to hand-pollinate the female flowers to ensure fruit set.
* Identify Male and Female Flowers: Male flowers have a long, thin stem, while female flowers have a small, immature pumpkin at the base.
* Timing is Key: Pollinate the female flowers early in the morning, when the pollen is most viable.
* Hand Pollination: Use a small paintbrush or cotton swab to collect pollen from the male flower and transfer it to the stigma of the female flower.
* Protect the Pollinated Flower: Cover the pollinated flower with a bag or cloth to prevent insects from interfering with the pollination process.
* Mark the Pollinated Flower: Mark the pollinated flower with a tag or ribbon so you can keep track of which flowers have been pollinated.
Selecting and Nurturing the Chosen Pumpkin: Focusing Your Efforts
Once you have several pumpkins developing, you’ll need to choose the one you want to focus on.
* Choose the Right Pumpkin: Select the pumpkin that is the most symmetrical and has the fewest blemishes.
* Remove Other Pumpkins: Remove any other pumpkins that are growing on the vine. This will help to focus the plant’s energy on the chosen pumpkin.
* Provide Shade: Provide shade for the pumpkin to protect it from sunburn. You can use a shade cloth or umbrella.
* Water Regularly: Water the pumpkin regularly, especially during dry periods.
* Fertilize Regularly: Fertilize the pumpkin regularly with a fertilizer that is high in phosphorus and potassium.
* Monitor for Pests and Diseases: Monitor the pumpkin for pests and diseases and take action to control them if necessary.
Watering and Fertilizing: Fueling the Growth
Consistent watering and fertilization are crucial for rapid growth.
* Water Deeply and Regularly: Giant pumpkins need a lot of water, especially during hot weather. Water deeply and regularly, aiming for at least 1-2 inches of water per week.
* Avoid Overwatering: While pumpkins need a lot of water, overwatering can lead to root rot. Make sure the soil is well-draining.
* Fertilize Regularly: Fertilize the pumpkin regularly with a balanced fertilizer. Follow
Conclusion
So, there you have it! Growing giant pumpkins at home isn’t just a whimsical dream; it’s an achievable reality with a little dedication and the right approach. We’ve walked you through the essential steps, from selecting the perfect seeds to nurturing your burgeoning behemoth. But why should you embark on this gourd-geous adventure?
Firstly, the sheer satisfaction of cultivating something so extraordinary is unparalleled. Imagine the awe and wonder on the faces of your friends, family, and neighbors as they witness your pumpkin’s incredible growth. It’s a conversation starter, a source of immense pride, and a testament to your gardening prowess.
Secondly, growing giant pumpkins offers a unique learning experience. You’ll delve into the intricacies of soil science, nutrient management, and pest control, gaining valuable knowledge that can be applied to all aspects of your gardening endeavors. It’s a hands-on education that’s both rewarding and enriching.
Thirdly, let’s talk about the competitive aspect. While not everyone aspires to break world records, participating in local pumpkin weigh-offs can be a thrilling experience. The camaraderie, the friendly rivalry, and the sheer spectacle of these colossal gourds are truly captivating. Even if you don’t win, you’ll have a fantastic story to tell and a newfound appreciation for the art of giant pumpkin cultivation.
But the best reason to try this DIY trick is the sheer fun of it! It’s a project that engages the whole family, fostering teamwork, patience, and a love for the natural world. From the initial seed planting to the final harvest, every stage is filled with excitement and anticipation.
Variations and Suggestions:
Don’t be afraid to experiment! Try different varieties of giant pumpkin seeds to see which performs best in your region. Consider using organic fertilizers and pest control methods to minimize your environmental impact. And if you’re feeling adventurous, you can even try grafting your giant pumpkin plant onto a more vigorous rootstock for enhanced growth.
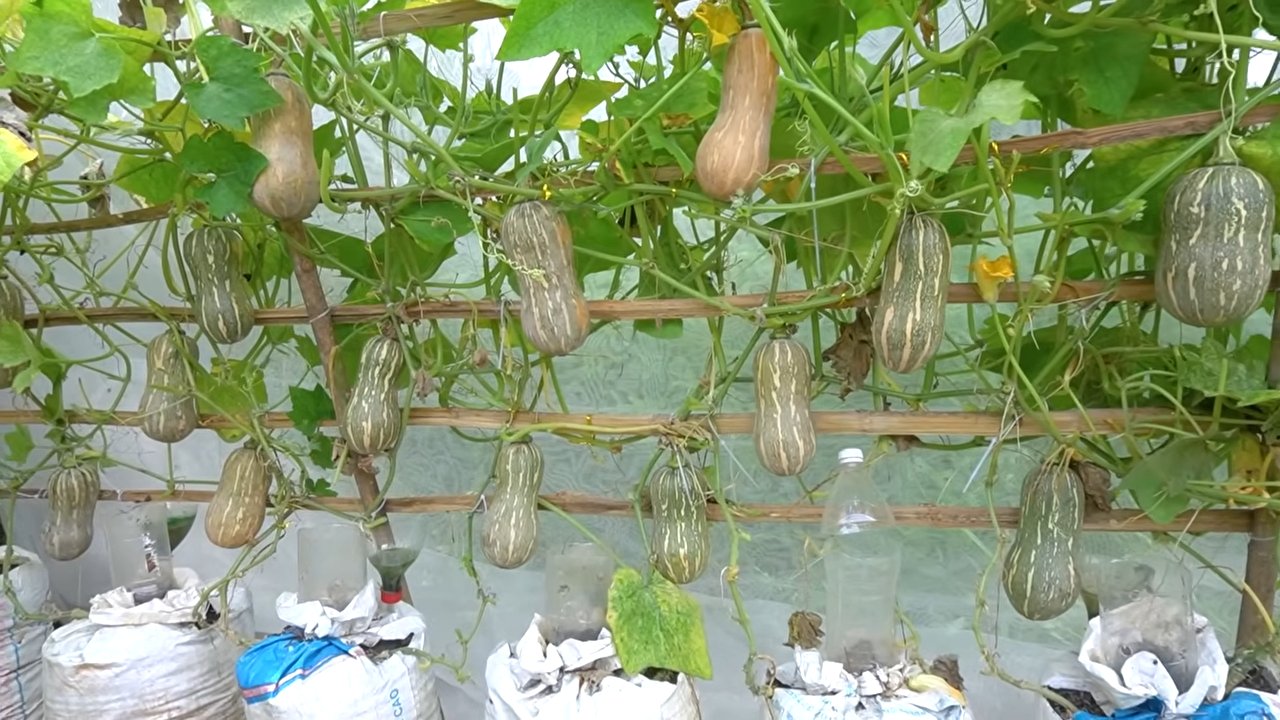
For those with limited space, consider growing your giant pumpkin in a large container. While it may not reach record-breaking proportions, you can still cultivate a respectable-sized gourd that will impress your friends and neighbors. Just be sure to provide adequate support for the vine and fruit.
Another fun variation is to carve your giant pumpkin into a spectacular jack-o’-lantern for Halloween. Imagine the impact of a pumpkin so large that it requires multiple people to lift! It’s a guaranteed showstopper that will make your home the envy of the neighborhood.
We encourage you to take the plunge and try this DIY trick for growing giant pumpkins at home. It’s a challenging but ultimately rewarding experience that will leave you with memories to last a lifetime. And most importantly, don’t forget to share your journey with us! We’d love to see your progress, hear your tips and tricks, and celebrate your successes. Post photos and stories of your giant pumpkin adventures on social media using #GiantPumpkinDIY. Let’s create a community of giant pumpkin enthusiasts and inspire others to embark on this incredible journey!
Frequently Asked Questions (FAQ)
What kind of seeds should I use to grow giant pumpkins?
The most popular and reliable seeds for growing giant pumpkins are those from the Atlantic Giant variety. These seeds have been specifically bred for size and weight, and they consistently produce impressive results. Look for seeds from reputable suppliers who specialize in giant pumpkin cultivation. You can often find seeds from pumpkins that have won weigh-offs, which may have superior genetics. Be aware that even with the best seeds, success depends on many other factors like soil, weather, and care.
How much space do I need to grow a giant pumpkin?
Giant pumpkins require a significant amount of space to thrive. Ideally, you should allocate at least 400-600 square feet per plant. The vines can spread rapidly, and the pumpkin itself can grow to an enormous size. If space is limited, you can try pruning the vines to control their growth, but this may also limit the pumpkin’s potential size. Consider the direction of sunlight and ensure the area receives at least 6-8 hours of direct sunlight per day.
What kind of soil is best for growing giant pumpkins?
Giant pumpkins prefer well-drained, fertile soil that is rich in organic matter. Amend your soil with compost, aged manure, or other organic materials to improve its structure and nutrient content. A slightly acidic to neutral pH (around 6.0-7.0) is ideal. Conduct a soil test to determine the pH and nutrient levels, and adjust accordingly. Proper soil preparation is crucial for providing the pumpkin plant with the nutrients it needs to support rapid growth.
How often should I water my giant pumpkin plant?
Giant pumpkins require consistent watering, especially during hot and dry weather. Water deeply and regularly, ensuring that the soil remains moist but not waterlogged. Aim to provide at least 1-2 inches of water per week, either through rainfall or irrigation. Use a soaker hose or drip irrigation system to deliver water directly to the roots, minimizing water loss through evaporation. Monitor the soil moisture levels regularly and adjust your watering schedule as needed.
What kind of fertilizer should I use for giant pumpkins?
Giant pumpkins are heavy feeders and require a balanced fertilizer regimen to support their rapid growth. Start with a fertilizer that is high in phosphorus to promote root development. As the plant matures, switch to a fertilizer that is higher in nitrogen to encourage vegetative growth. Once the pumpkin begins to develop, use a fertilizer that is high in potassium to promote fruit development and ripening. Supplement with micronutrients such as calcium, magnesium, and iron to prevent deficiencies. Conduct regular soil tests to monitor nutrient levels and adjust your fertilizer applications accordingly.
How do I protect my giant pumpkin from pests and diseases?
Giant pumpkins are susceptible to various pests and diseases, including squash bugs, squash vine borers, powdery mildew, and blossom end rot. Implement preventative measures such as crop rotation, companion planting, and good sanitation practices to minimize the risk of infestations and infections. Inspect your plants regularly for signs of pests or diseases, and take action promptly if you detect any problems. Use organic pest control methods such as insecticidal soap, neem oil, or diatomaceous earth to control pests. Apply fungicides to prevent or treat fungal diseases. Ensure proper air circulation around the plants to reduce humidity and prevent fungal growth.
How do I prevent my giant pumpkin from cracking?
Cracking is a common problem with giant pumpkins, especially during periods of rapid growth or fluctuating temperatures. To prevent cracking, maintain consistent soil moisture levels, avoid over-fertilizing, and protect the pumpkin from direct sunlight and extreme temperature changes. Shade the pumpkin with a tarp or blanket during the hottest part of the day. Provide adequate support for the pumpkin to prevent it from putting too much stress on the vine. Monitor the pumpkin’s growth rate and adjust your care accordingly.
When should I harvest my giant pumpkin?
Harvest your giant pumpkin when it has reached its maximum size and the rind has hardened. The stem should be dry and starting to crack. Avoid harvesting too early, as the pumpkin will continue to gain weight if left on the vine. However, don’t wait too long, as the pumpkin may be susceptible to frost damage or rot. Carefully cut the stem several inches from the pumpkin, using a sharp knife or saw. Lift the pumpkin carefully, using a team of people if necessary, and transport it to its final destination.
Leave a Comment