

Grow Garlic Indoors? Absolutely! Imagine the satisfaction of snipping fresh, pungent garlic greens right from your windowsill, even in the dead of winter. No more last-minute dashes to the store when your recipe calls for that essential garlicky zing. For centuries, garlic has been revered not only for its culinary prowess but also for its medicinal properties, playing a vital role in various cultures around the globe. From ancient Egyptian remedies to traditional Italian cuisine, garlic’s influence is undeniable.
But what if you don’t have a sprawling garden? Or maybe you live in an apartment with limited outdoor space? That’s where the magic of indoor gardening comes in! This DIY guide is your passport to cultivating your own little garlic haven, regardless of your living situation. I’m going to show you simple, effective tricks and hacks to grow garlic indoors successfully. We’ll cover everything from choosing the right garlic variety to providing the optimal growing conditions. Get ready to unleash your inner gardener and enjoy the fresh, flavorful rewards of your own homegrown garlic!
Growing Garlic Indoors: A Simple Step-by-Step Guide
Hello, fellow garden lovers! Have you ever wondered if you can grow garlic indoors? The answer is a clear YES! And I’m going to show you how easy it is. Not only is it a great way to have fresh garlic on hand, but it’s also a fantastic activity, especially when the weather outside isn’t cooperating. Let’s dive into the world of indoor garlic growing together!
What You Need: The Materials List
Before we start, we should make sure we have everything ready. Here is a list of things you will need for your indoor garlic project:
- Garlic cloves: Organic garlic from the supermarket or a farmers’ market is best. Make sure the cloves look firm and healthy.
- Pots: Choose pots that are at least 15 cm (6 inches) in diameter and 20 cm (8 inches) deep. This gives the roots enough space to grow.
- Potting soil: Good, nutrient-rich potting soil is essential. You can also mix in some compost to enrich the soil further.
- Drainage material: Clay shards, pebbles, or expanded clay for the bottom of the pots. This ensures good drainage and prevents waterlogging.
- Watering can: For watering your little garlic plants.
- Spray bottle (optional): To occasionally moisten the leaves.
- A sunny spot: Garlic loves the sun! A south-facing windowsill is ideal.
- Patience: Garlic takes time to grow. But don’t worry, it’s worth it!
The Preparation: The Foundation for Your Success
Before we put the garlic cloves in the soil, good preparation is important. This helps the cloves to root quickly and grow strong.
- Prepare the pots: Start by adding a layer of drainage material to the bottom of the pots. This prevents the roots from sitting in water and rotting. Then fill the pots with potting soil, but leave about 2-3 cm (1 inch) of space to the rim.
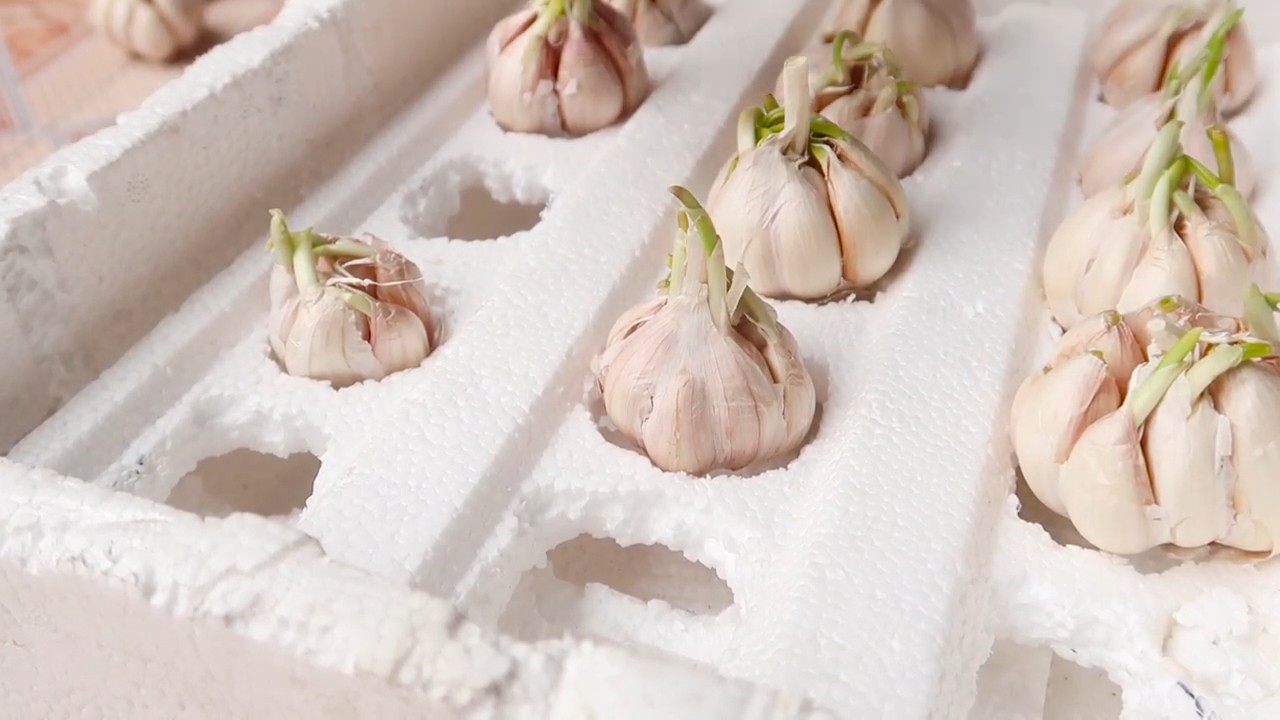
- Select the garlic cloves: Choose the largest and healthiest garlic cloves. The larger the clove, the stronger the plant will be.
- Prepare the cloves (optional): You can place the garlic cloves in water for a few hours before planting. This is said to speed up germination. I personally don’t always do this, but it can’t hurt.
Planting: Kicking Off Your Garlic Project
Now comes the exciting part: planting the garlic cloves!
- Plant the cloves: Push the garlic cloves about 5 cm (2 inches) deep into the soil with the pointed side up. Make sure there is enough space between the cloves (about 5-7 cm or 2-3 inches) so they don’t hinder each other.
- Press down the soil: Lightly press the soil down around the cloves.
- Water: Gently water the soil until it is well-moistened. Be careful not to overwater, as waterlogging should be avoided.
Care: So Your Garlic Thrives
After planting, proper care is crucial for your garlic to thrive.
- The right location: Place the pots in a sunny spot. Garlic needs at least 6 hours of sunlight per day. A south-facing windowsill is ideal.
- Watering: Water the soil regularly, but not too much. The soil should always be slightly moist, but not wet. Check the soil’s moisture by sticking your finger about 2 cm (1 inch) deep into it. If the soil feels dry, it’s time to water.
- Fertilizing: Garlic is a heavy feeder and needs sufficient nutrients. Fertilize the plants every 2-3 weeks with an organic liquid fertilizer. Be sure to dilute the fertilizer to avoid over-fertilizing the plants.
- Temperature: Garlic prefers cool temperatures. A temperature between 13 and 24 degrees Celsius (55-75°F) is ideal.
- Humidity: Garlic does not like excessively high humidity. Ensure good ventilation to prevent mold. You can occasionally moisten the leaves with a spray bottle, but make sure they dry quickly.
- Pests and diseases: Watch for signs of pests or diseases. Aphids, spider mites, and fungal diseases can occur. If infested, you should treat the plants with a suitable remedy. Natural remedies like neem oil or a soap solution are best.
The Harvest: The Fruits of Your Labor
After a few months, you can harvest your home-grown garlic. There are two options:
- Green Garlic: You can harvest the green leaves of the garlic as soon as they are about 15-20 cm (6-8 inches) tall. They have a mild garlic flavor and are excellent for seasoning salads, soups, and other dishes. Simply cut the leaves with scissors, but leave enough behind for the plant to continue growing.
- Garlic Bulbs: If you want to harvest garlic bulbs, you’ll have to wait a bit longer. The bulbs are ready when the leaves turn yellow and die back. This usually takes about 6-8 months. Carefully dig up the bulbs and let them dry in a dry, airy place. After drying, you can store the bulbs and use them as needed.
Additional Tips and Tricks
- Different varieties: Try different garlic varieties to find out which one you like best and which grows best in your home. There are mild and pungent varieties, as well as early and late ones.
- Growing garlic in water: You can also grow garlic in a glass of water. Simply stick a few toothpicks into a garlic clove and suspend it in a glass of water so that the bottom half of the clove is submerged. Place the glass in a bright spot and change the water regularly. After a short time, roots and green shoots will form.
- Garlic scapes: Some garlic varieties form flower stalks, known as garlic scapes. You can also harvest and use these. They have a mild garlic flavor and are excellent for seasoning dishes or as a garnish.
- Propagating garlic: You can propagate your home-grown garlic by replanting the cloves from the harvested bulbs. This way you’ll always have fresh garlic on hand.
Avoiding Common Mistakes
- Overwatering: Waterlogging is garlic’s greatest enemy. Make sure the soil is well-draining and do not water too much.
- Too little light: Garlic needs a lot of light to grow. Place the plants in a sunny spot.
- Wrong soil: Use good, nutrient-rich potting soil. Cheap soil often contains too few nutrients and can lead to problems.
- Not fertilizing: Garlic is a heavy feeder and needs sufficient nutrients. Fertilize the plants regularly.
- Ignoring pests: Watch for signs of pests and treat them promptly.
I hope this guide helps you grow your own garlic indoors.

Conclusion
So, there you have it! Growing garlic indoors is not only achievable, but it’s also a rewarding and surprisingly simple process. Forget relying solely on grocery store bulbs; imagine the satisfaction of snipping fresh, vibrant garlic greens right from your windowsill, adding a burst of flavor to your dishes that you just can’t replicate with store-bought alternatives. This DIY trick is a must-try for anyone who loves fresh ingredients, enjoys a bit of gardening, or simply wants to add a touch of green to their indoor space.
The beauty of growing garlic indoors lies in its versatility. While we’ve focused on growing garlic greens for their mild, chive-like flavor, you can also attempt to grow full garlic bulbs indoors, although this requires a bit more patience and attention to detail. Experiment with different varieties of garlic to discover your favorite flavor profiles. Softneck varieties, known for their flexibility and braiding capabilities, tend to perform better indoors than hardneck varieties, which require a period of cold stratification that can be difficult to replicate in a controlled environment.
Consider using different types of containers to add a decorative element to your indoor garden. Upcycled jars, terracotta pots, or even repurposed plastic containers can all work well, as long as they provide adequate drainage. You can also get creative with your growing medium. While potting mix is a standard choice, you can also experiment with hydroponics or aquaponics for a more advanced and sustainable approach.
Don’t be afraid to experiment with different lighting conditions. While garlic thrives in bright sunlight, it can also tolerate partial shade. Observe your plants closely and adjust their placement accordingly to ensure they receive the optimal amount of light. If you live in a particularly dark environment, consider supplementing with grow lights to provide the necessary illumination.
The benefits of growing garlic indoors extend beyond just fresh flavor. It’s also a sustainable way to reduce your reliance on commercially grown produce, which often travels long distances and contributes to carbon emissions. Plus, garlic is known for its numerous health benefits, including its immune-boosting and anti-inflammatory properties. By growing your own garlic, you can ensure that you’re getting the freshest and most potent source of these beneficial compounds.
We wholeheartedly encourage you to give this DIY trick a try. It’s a fun, educational, and ultimately delicious way to connect with nature and enhance your culinary creations. Once you’ve experienced the joy of harvesting your own fresh garlic greens, you’ll never look at store-bought garlic the same way again.
And most importantly, we want to hear about your experience! Share your tips, tricks, and photos with us in the comments below. Let us know what varieties of garlic you’ve tried, what challenges you’ve encountered, and what successes you’ve achieved. Together, we can create a community of indoor garlic growers and share our knowledge and passion for this amazing plant. So, grab a few cloves, some potting mix, and get ready to embark on a flavorful and rewarding journey of growing garlic indoors!
Frequently Asked Questions (FAQ)
What kind of garlic should I use for growing indoors?
The best type of garlic to grow indoors for greens is softneck garlic. Softneck varieties are more adaptable to indoor conditions and don’t require the cold stratification period that hardneck varieties need to form bulbs. However, you can experiment with hardneck varieties as well, but focus on harvesting the greens rather than expecting a full bulb. Elephant garlic, while technically a leek, can also be grown for its milder, garlic-flavored greens. When selecting garlic, choose organic cloves from a reputable source to ensure they are free from diseases and pesticides. Avoid using garlic from the grocery store that may have been treated to prevent sprouting.
How much sunlight does indoor garlic need?
Garlic thrives in bright, direct sunlight, ideally at least 6-8 hours per day. Place your garlic plants near a sunny south-facing window if possible. If you don’t have access to enough natural light, consider using grow lights to supplement. LED grow lights are energy-efficient and provide the full spectrum of light that plants need to thrive. Position the grow lights about 6-12 inches above the plants and keep them on for 12-16 hours per day. Monitor your plants closely and adjust the lighting as needed to prevent them from becoming leggy or scorched.
How often should I water my indoor garlic?
Water your indoor garlic regularly, keeping the soil consistently moist but not waterlogged. Allow the top inch of soil to dry out between waterings. Overwatering can lead to root rot, which can be fatal to your plants. Use a well-draining potting mix to prevent water from pooling around the roots. When watering, water deeply until water drains out of the bottom of the pot. This ensures that the entire root system is adequately hydrated. Avoid getting water on the leaves, as this can promote fungal diseases.
How long does it take to grow garlic greens indoors?
You can typically start harvesting garlic greens within a few weeks of planting. The exact time will depend on the variety of garlic, the growing conditions, and your desired size of the greens. Once the greens reach about 6-8 inches in height, you can begin snipping them off with scissors. Harvest the outer leaves first, leaving the inner leaves to continue growing. This will allow you to harvest multiple times from the same plant.
Can I grow full garlic bulbs indoors?
While it’s possible to grow full garlic bulbs indoors, it’s more challenging than growing garlic greens. Garlic bulbs require a period of cold stratification to initiate bulb formation, which can be difficult to replicate indoors. Additionally, garlic bulbs need a lot of sunlight and nutrients to develop properly. If you want to try growing garlic bulbs indoors, choose a softneck variety and provide it with plenty of light, water, and fertilizer. You may also need to artificially chill the cloves before planting them. Even with the best care, you may not get as large or flavorful bulbs as you would if you grew them outdoors.
What kind of fertilizer should I use for indoor garlic?
Feed your indoor garlic with a balanced liquid fertilizer every 2-4 weeks. Look for a fertilizer that is specifically formulated for vegetables or herbs. Follow the instructions on the fertilizer label carefully to avoid over-fertilizing, which can damage your plants. You can also use organic fertilizers, such as compost tea or fish emulsion. These fertilizers provide essential nutrients and help to improve the soil health.
How do I prevent pests and diseases on my indoor garlic?
Indoor garlic is generally less susceptible to pests and diseases than outdoor garlic, but it’s still important to take precautions. Inspect your plants regularly for signs of pests, such as aphids, spider mites, or whiteflies. If you find any pests, treat them with insecticidal soap or neem oil. To prevent fungal diseases, avoid overwatering and ensure good air circulation around your plants. You can also spray your plants with a fungicide if necessary.
Can I regrow garlic from store-bought cloves?
Yes, you can regrow garlic from store-bought cloves, but it’s important to choose organic cloves to avoid those treated with growth inhibitors. Non-organic garlic may have been treated to prevent sprouting, which will make it difficult to grow. Also, be aware that store-bought garlic may carry diseases that could affect your indoor garden.
What do I do with the garlic cloves after harvesting the greens?
After you’ve harvested the garlic greens, you can either discard the cloves or try to replant them to grow more greens. If you choose to replant them, they may not produce as many greens as the first time around, but it’s worth a try. You can also use the cloves in your cooking, just like you would with any other garlic.
How do I know when to harvest the garlic greens?
Harvest the garlic greens when they are about 6-8 inches tall. The greens should be firm and vibrant green. Avoid harvesting the greens when they are yellowing or wilting, as this indicates that they are past their prime. To harvest, simply snip off the outer leaves with scissors, leaving the inner leaves to continue growing.


Leave a Comment