

Grow Dragon Beans at Home and unlock a world of vibrant color and delicious flavor right in your backyard! Have you ever dreamed of cultivating something truly unique, something that pops with visual appeal and tastes amazing? Well, get ready to ditch the ordinary because this DIY guide is your ticket to growing these extraordinary beans.
Dragon beans, also known as Dragon Tongue beans, aren’t just another vegetable; they’re a conversation starter! Their striking purple streaks against a creamy yellow background make them a feast for the eyes, adding a touch of artistry to your garden and your plate. While not steeped in ancient history like some heirloom varieties, their relatively recent introduction has quickly made them a favorite among gardeners seeking something special. I remember the first time I saw them at a farmer’s market – I was instantly captivated!
Why should you learn this DIY trick? Because growing your own food is incredibly rewarding, and grow dragon beans at home is easier than you might think! In a world where we’re increasingly conscious of where our food comes from, knowing you’ve nurtured something from seed to table is incredibly satisfying. Plus, fresh, homegrown dragon beans taste infinitely better than anything you’ll find in the store. This guide will provide you with simple, step-by-step instructions, ensuring even beginner gardeners can successfully cultivate these beauties. Get ready to impress your friends and family with your gardening prowess and enjoy the delicious bounty of your own dragon bean harvest!
Growing Dragon Beans: A DIY Guide to a Bountiful Harvest
Hey there, fellow gardening enthusiasts! Ever wanted to grow something truly unique and visually stunning in your garden? Look no further than Dragon Beans, also known as Scarlet Runner Beans! These aren’t your average green beans; they boast vibrant red flowers and striking, mottled pods, making them a beautiful and edible addition to any garden. I’m going to walk you through the entire process, from seed to table, so you can enjoy your own homegrown Dragon Beans.
What You’ll Need
Before we dive in, let’s gather our supplies. This will make the whole process smoother and more enjoyable.
* Dragon Bean Seeds: You can find these online or at your local garden center. Make sure they’re from a reputable source to ensure good germination rates.
* Well-Draining Soil: Dragon Beans aren’t too picky, but they thrive in well-draining soil rich in organic matter.
* Compost or Aged Manure: This will enrich the soil and provide essential nutrients.
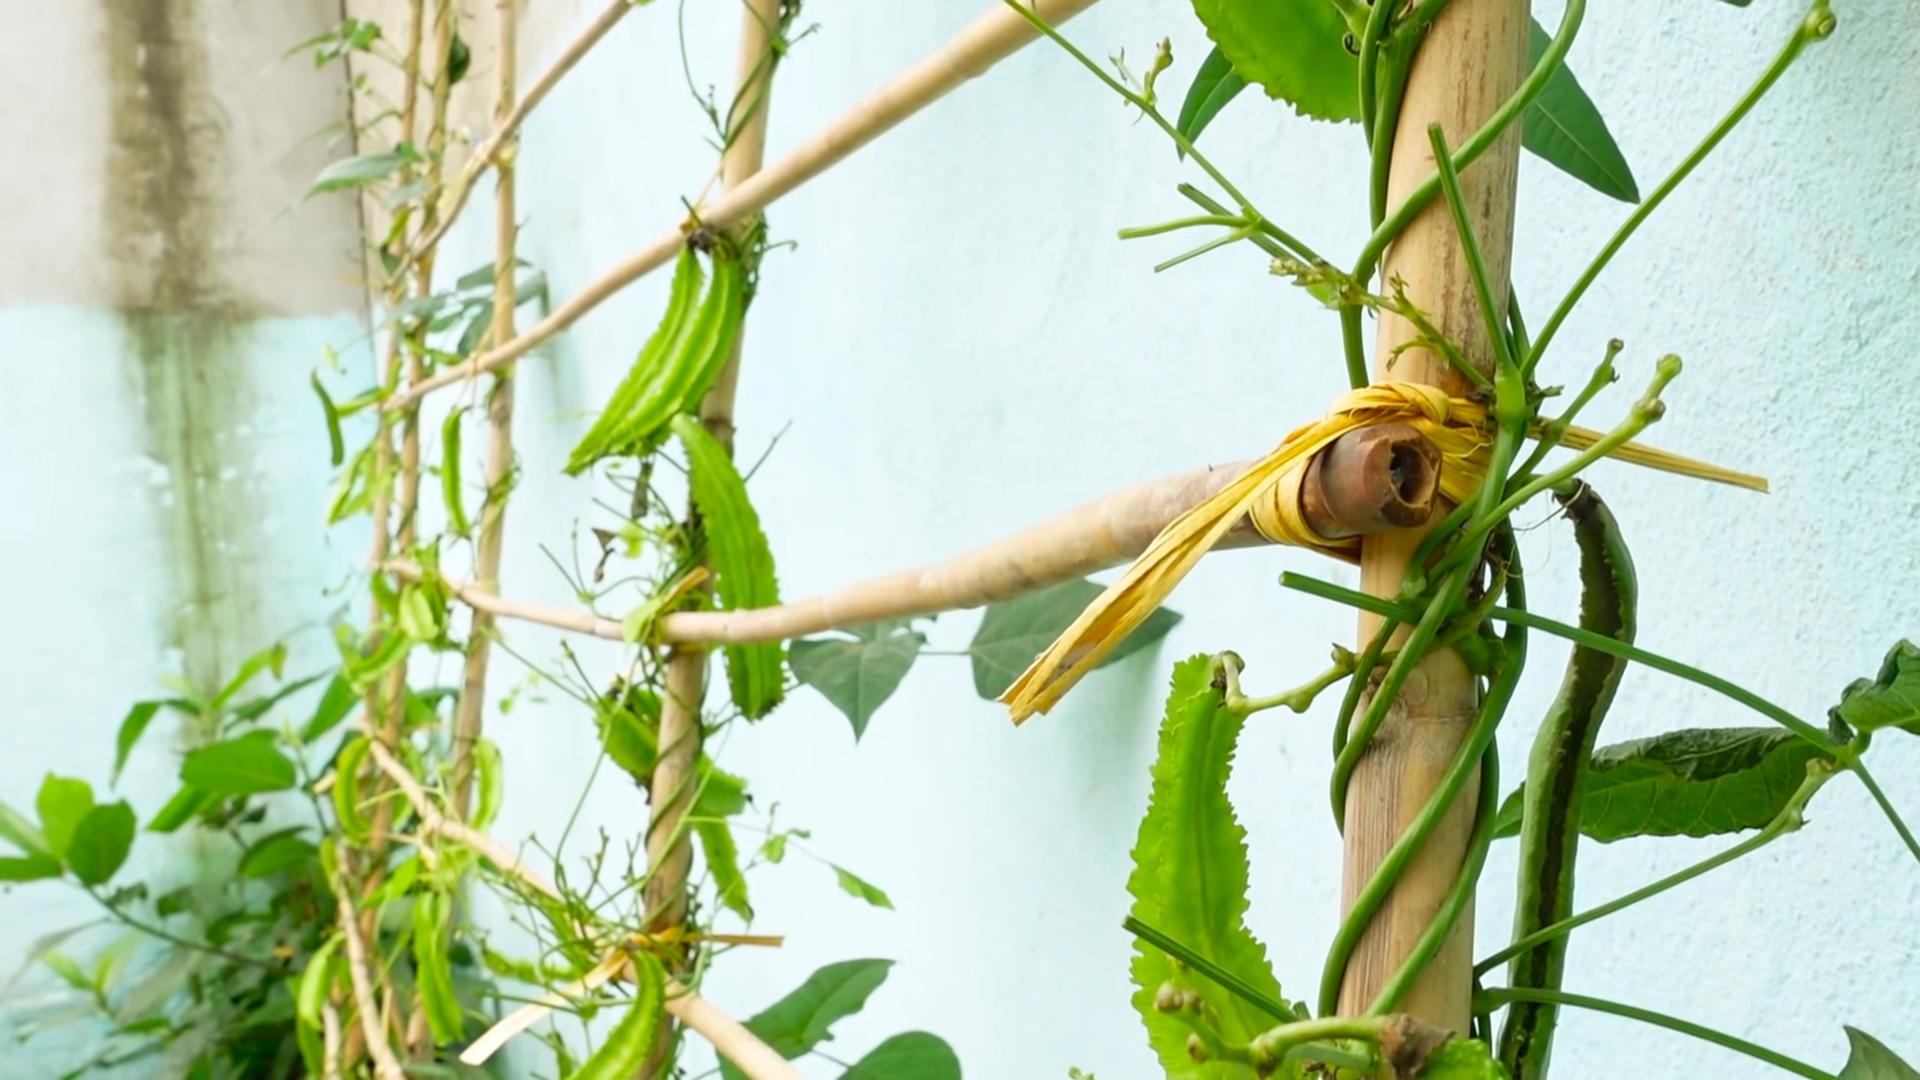
* Trellis or Support Structure: Dragon Beans are climbers, so they need something to grow on. A trellis, fence, or even a sturdy teepee will work.
* Gardening Gloves: To keep your hands clean and protected.
* Watering Can or Hose: For regular watering.
* Optional: Seed starting trays and potting mix (if you’re starting seeds indoors).
* Optional: Fertilizer (balanced, slow-release fertilizer is best).
Getting Started: Planting Your Dragon Beans
There are two main ways to start your Dragon Beans: directly sowing them in the ground or starting them indoors. I personally prefer direct sowing, as it avoids transplant shock, but starting indoors can give you a head start, especially in cooler climates.
Direct Sowing (My Preferred Method)
1. Choose the Right Time: Dragon Beans are warm-weather crops, so wait until after the last frost to plant them. The soil temperature should be at least 60°F (15°C). I usually aim for late spring or early summer.
2. Prepare the Soil: Select a sunny spot in your garden that receives at least 6-8 hours of sunlight per day. Clear the area of weeds and debris. Dig in plenty of compost or aged manure to improve soil fertility and drainage.
3. Create Planting Holes: Space the seeds about 6-8 inches apart and 1-2 inches deep. I like to use a dibber or my finger to make the holes.
4. Sow the Seeds: Place one or two seeds in each hole. Planting two seeds increases the chances of germination.
5. Cover and Water: Gently cover the seeds with soil and water thoroughly. Keep the soil consistently moist but not waterlogged.
6. Provide Support: As soon as the seedlings emerge, provide them with a trellis or other support structure to climb on. Dragon Beans can grow quite tall, so make sure the support is sturdy enough.
Starting Seeds Indoors (For a Head Start)
1. Choose Your Seed Starting Trays: Fill seed starting trays with a good quality potting mix.
2. Sow the Seeds: Plant one or two seeds per cell, about 1 inch deep.
3. Water Gently: Water the trays gently to moisten the soil.
4. Provide Warmth and Light: Place the trays in a warm location, ideally around 70-75°F (21-24°C). You can use a heat mat to speed up germination. Provide plenty of light, either natural or from a grow light.
5. Harden Off Seedlings: Once the seedlings have developed a few true leaves, gradually acclimate them to outdoor conditions over a period of 7-10 days. This process, called “hardening off,” helps them adjust to the sun, wind, and temperature changes.
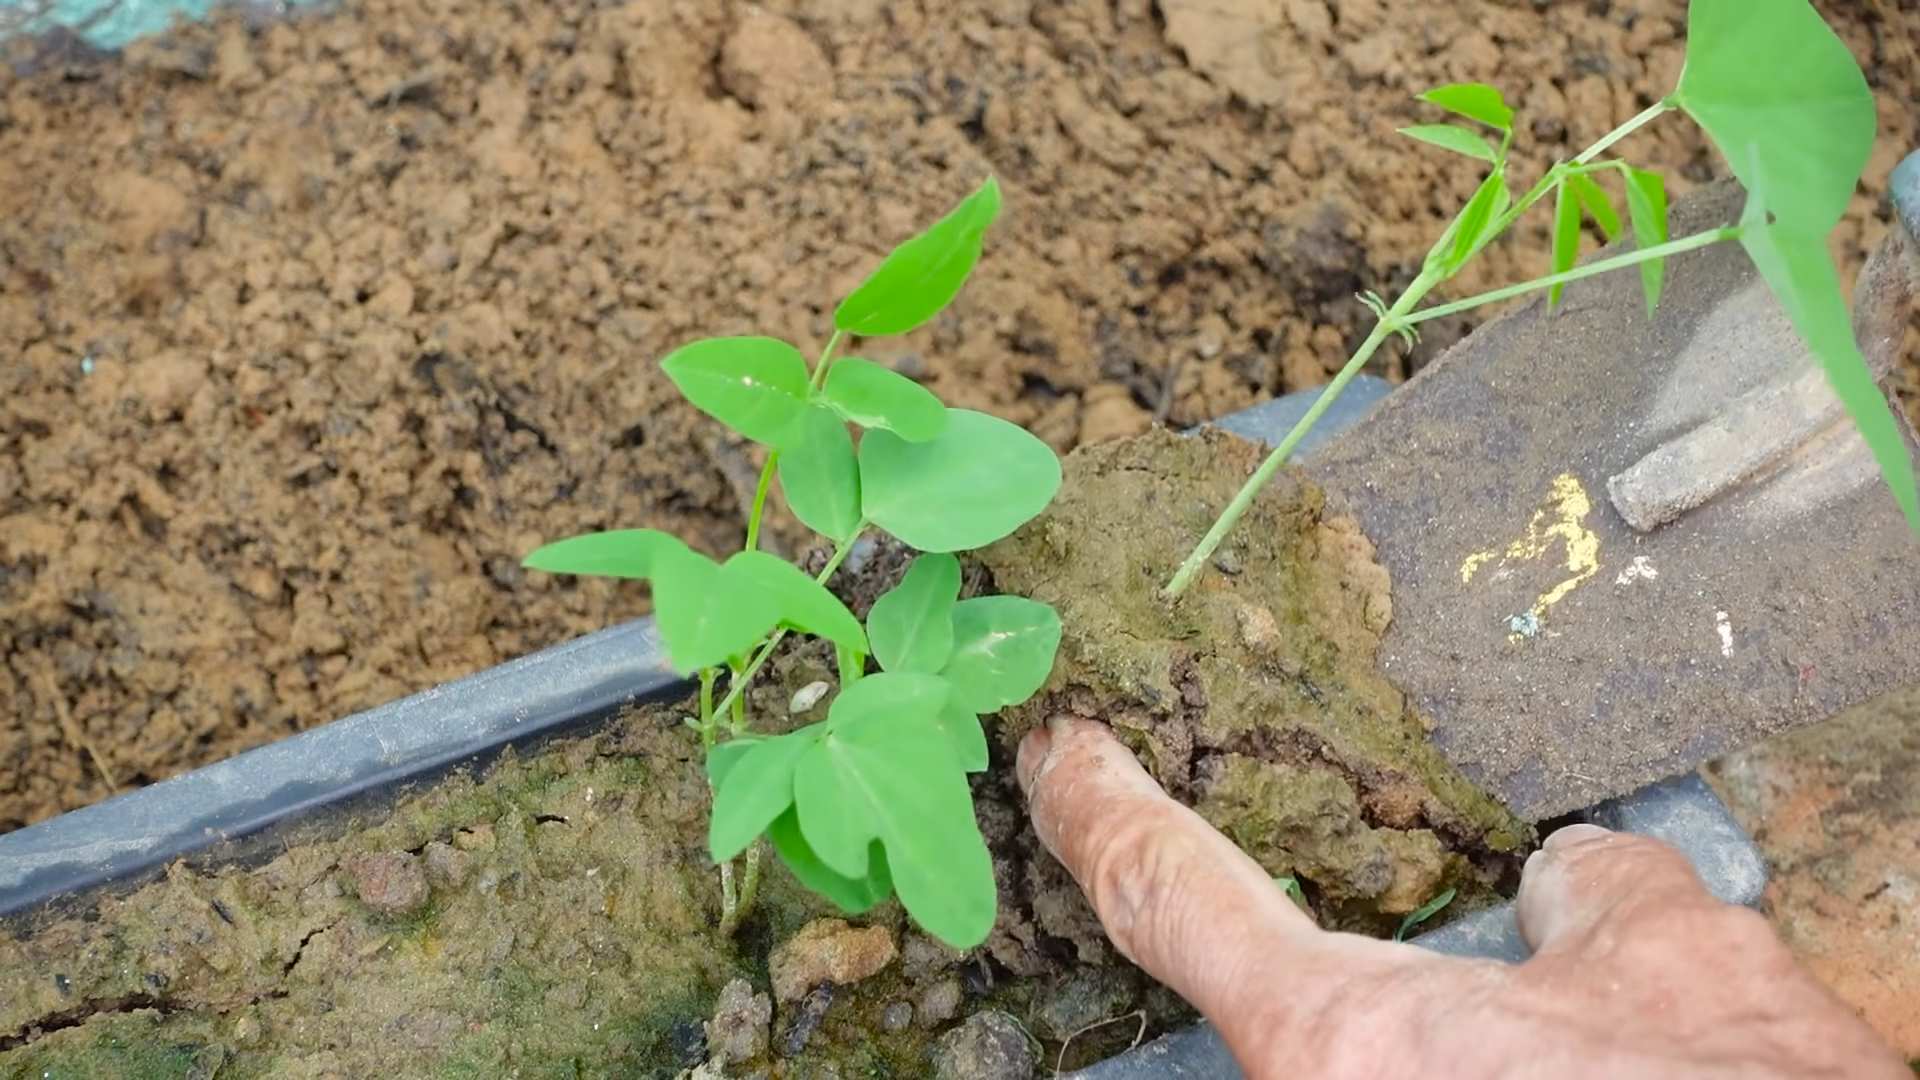
6. Transplant Seedlings: After the last frost, transplant the seedlings into your garden, spacing them 6-8 inches apart. Be careful not to damage the roots during transplanting.
Caring for Your Dragon Beans
Once your Dragon Beans are planted, it’s time to provide them with the care they need to thrive.
1. Watering: Dragon Beans need consistent moisture, especially during hot, dry weather. Water deeply whenever the top inch of soil feels dry. Avoid overhead watering, as this can promote fungal diseases.
2. Fertilizing: Dragon Beans are relatively light feeders, but they benefit from a balanced, slow-release fertilizer applied at planting time. You can also side-dress them with compost or aged manure every few weeks.
3. Weeding: Keep the area around your Dragon Beans free of weeds, as weeds can compete for nutrients and water.
4. Pest and Disease Control: Dragon Beans are generally pest-resistant, but they can be susceptible to aphids, bean beetles, and fungal diseases. Inspect your plants regularly and take action if you notice any problems. For aphids, you can try spraying them with a strong stream of water or using insecticidal soap. For bean beetles, hand-picking them off the plants is often the most effective solution. To prevent fungal diseases, ensure good air circulation and avoid overhead watering.
5. Training: As the Dragon Beans grow, gently guide them onto the trellis or support structure. They will naturally climb, but you may need to help them get started.
Harvesting Your Dragon Beans
The best part of growing Dragon Beans is, of course, the harvest! You can harvest the pods at different stages, depending on your preference.
1. Young Pods: Harvest young pods when they are tender and about 4-6 inches long. These can be eaten whole, like snap beans.
2. Mature Pods: Allow some of the pods to mature and dry on the vine. These can be shelled and the beans used in soups, stews, or other dishes.
3. Harvesting Frequency: Harvest regularly to encourage continued production.
4. Seed Saving: If you want to save seeds for next year, allow some of the pods to dry completely on the vine. Once they are dry and brittle, shell the beans and store them in an airtight container in a cool, dry place.
Enjoying Your Dragon Beans
Dragon Beans are incredibly versatile in the kitchen. Here are a few ideas for how to enjoy your homegrown harvest:
* Snap Beans: Steam, sauté, or stir-fry young pods and serve as a side dish.
* Shelled Beans: Add shelled beans to soups, stews, chili, or casseroles.
* Dried Beans: Use dried beans in your favorite bean recipes.
* Roasted Beans: Roast the beans with olive oil and spices for a delicious and healthy snack.
Troubleshooting
Even with the best care, you might encounter some challenges along the way. Here are a few common problems and how to address them:
* Poor Germination: If your seeds aren’t germinating, make sure the soil is warm enough and consistently moist. You can also try soaking the seeds in water for 24 hours before planting.
* Yellowing Leaves: Yellowing leaves can indicate a nutrient deficiency. Try fertilizing with a balanced fertilizer or side-dressing with compost.
* Pest Infestations: As mentioned earlier, inspect your plants regularly for pests and take action as needed.
* Fungal Diseases: Ensure good air circulation and avoid overhead watering to prevent fungal diseases.
Additional Tips for Success
* Succession Planting: Plant Dragon Beans every few weeks to extend your harvest season.
* Companion Planting: Plant Dragon Beans with beneficial companion plants, such as marigolds, nasturtiums, and rosemary, to deter pests.
* Soil Testing: If you’re unsure about your soil’s nutrient content, consider getting a soil test. This will help you determine what amendments are needed.
* Record Keeping: Keep a gardening journal to track your progress and learn from your experiences.
Growing Dragon Beans is a rewarding experience that will add beauty and flavor to your garden and your table. With a little care and attention, you can enjoy a bountiful harvest of these unique and delicious beans. Happy gardening!
Conclusion
So, there you have it! Growing dragon beans at home is not only achievable but also incredibly rewarding. Forget those expensive, often lackluster, store-bought beans. With a little patience and our simple DIY trick, you can cultivate your own supply of these vibrant, flavorful legumes right in your backyard or even on your balcony.
Why is this a must-try? Because you’re gaining control over the entire process. You know exactly what goes into nurturing your dragon beans – no harmful pesticides, no questionable growing practices. You’re getting the freshest, most nutritious beans possible, bursting with flavor that store-bought varieties simply can’t match. Plus, let’s be honest, there’s a certain magic to watching something you planted with your own hands flourish and provide sustenance. It’s a connection to nature that’s deeply satisfying.
But the benefits don’t stop there. Growing your own dragon beans is also a fantastic way to introduce children to the wonders of gardening and healthy eating. It’s a hands-on learning experience that will instill a lifelong appreciation for fresh produce.
Looking for variations? Absolutely! Consider companion planting. Marigolds, for example, can help deter pests, while basil can improve the flavor of your dragon beans. You can also experiment with different trellising methods. A simple bamboo structure works wonders, but you could also get creative with repurposed materials like old ladders or even decorative metal arches. The possibilities are endless!
Another variation is to try different varieties of dragon beans. While this guide focuses on the common type, there are other cultivars with slightly different colors and flavor profiles. Experiment and find your favorite! You can also adjust the soil composition based on your local climate. If you live in a particularly dry area, consider adding more organic matter to help retain moisture.
We’ve armed you with the knowledge and the DIY trick to succeed. Now, it’s your turn to get your hands dirty! We wholeheartedly encourage you to give growing dragon beans at home a try. It’s a fun, fulfilling, and delicious experience that you won’t regret.
And most importantly, we want to hear about your journey! Share your successes, your challenges, and your tips in the comments below. Let’s create a community of dragon bean enthusiasts, sharing our knowledge and inspiring each other to grow the best beans possible. Post pictures of your thriving plants, your delicious dishes, and your creative trellising solutions. Together, we can unlock the full potential of this amazing legume. So, grab your seeds, prepare your soil, and get ready to embark on a dragon bean adventure! Happy growing!
Frequently Asked Questions (FAQ)
What exactly are dragon beans, and why should I grow them?
Dragon beans, also known as asparagus beans or yardlong beans, are a type of legume characterized by their exceptionally long pods, often reaching lengths of up to three feet. They are not only visually striking but also offer a unique and delicious flavor profile, often described as a slightly sweet and nutty taste. Growing them yourself ensures you have access to the freshest, most flavorful beans possible, free from harmful pesticides and grown with your own loving care. Plus, the satisfaction of harvesting your own food is unparalleled.
What is the best time of year to plant dragon beans?
Dragon beans are warm-weather crops, so the ideal time to plant them is after the last frost in your area, when the soil has warmed to at least 65°F (18°C). Generally, this falls in late spring or early summer. Check your local weather forecasts and planting guides for specific recommendations based on your region’s climate. If you live in a warmer climate with a longer growing season, you may be able to plant a second crop in late summer for a fall harvest.
What kind of soil do dragon beans need?
Dragon beans thrive in well-drained soil that is rich in organic matter. Before planting, amend your soil with compost, aged manure, or other organic materials to improve its fertility and drainage. A slightly acidic to neutral pH (around 6.0 to 7.0) is ideal. If your soil is heavy clay, consider adding sand or perlite to improve drainage. A soil test can help you determine the pH and nutrient levels of your soil and guide you in making necessary amendments.
How much sunlight do dragon beans require?
Dragon beans need at least 6-8 hours of direct sunlight per day to thrive. Choose a planting location that receives ample sunlight throughout the day. If you are growing them indoors, supplement with grow lights if necessary. Insufficient sunlight can lead to weak, leggy plants and reduced bean production.
Do dragon beans need a trellis?
Yes, dragon beans are climbing plants and require a trellis or other support structure to grow properly. A sturdy trellis made of bamboo, wood, or metal is ideal. You can also use a fence or even a sturdy tomato cage. The trellis should be at least 6-8 feet tall to accommodate the vigorous growth of the vines. Train the vines to climb the trellis as they grow, and provide support as needed.
How often should I water dragon beans?
Dragon beans need consistent moisture, especially during hot, dry weather. Water deeply and regularly, aiming to keep the soil consistently moist but not waterlogged. Avoid overhead watering, as this can promote fungal diseases. Mulching around the base of the plants can help retain moisture and suppress weeds. Check the soil moisture regularly and adjust your watering schedule accordingly.
What are some common pests and diseases that affect dragon beans, and how can I prevent them?
Common pests that can affect dragon beans include aphids, bean beetles, and spider mites. To prevent pest infestations, inspect your plants regularly and remove any pests you find. You can also use insecticidal soap or neem oil to control pests. Common diseases that can affect dragon beans include fungal diseases such as powdery mildew and bean rust. To prevent these diseases, ensure good air circulation around the plants, avoid overhead watering, and use disease-resistant varieties.
When are dragon beans ready to harvest?
Dragon beans are typically ready to harvest about 60-70 days after planting. Harvest the beans when they are young and tender, before the seeds inside become too large and tough. The pods should be firm and snap easily when bent. Regular harvesting encourages continued production.
How do I store dragon beans?
Freshly harvested dragon beans can be stored in the refrigerator for up to a week. To store them for longer periods, you can blanch them for a few minutes and then freeze them. You can also pickle or can dragon beans for long-term storage.
Can I save seeds from my dragon bean plants for next year?
Yes, you can save seeds from your dragon bean plants for next year. Allow some of the pods to mature fully on the vine, until they are dry and brown. Remove the seeds from the pods and dry them completely. Store the dried seeds in an airtight container in a cool, dark, and dry place. Be aware that if you grew a hybrid variety, the seeds may not produce plants that are true to type.


Leave a Comment