

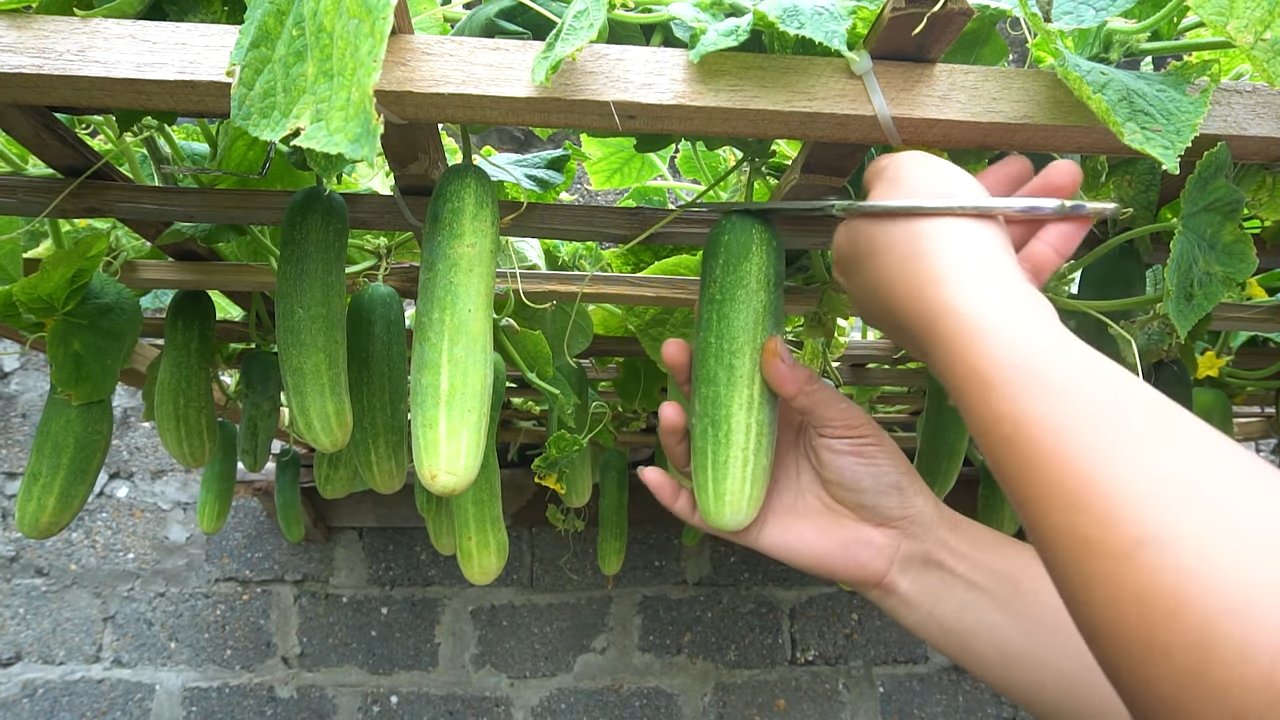
Grow cucumbers fast, and you’ll be swimming in crisp, refreshing salads and tangy pickles before you know it! Imagine biting into a cucumber you nurtured from a tiny seed, bursting with flavor that store-bought varieties just can’t match. That’s the magic of home gardening, and I’m here to share some secrets to accelerate your cucumber harvest.
Cucumbers have a rich history, dating back thousands of years to ancient India. They’ve been enjoyed by emperors and commoners alike, prized for their cooling properties and versatility in the kitchen. But let’s be honest, waiting for those cucumbers to mature can feel like an eternity! That’s where these DIY tricks come in.
In today’s busy world, who has time to wait? We all crave fresh, healthy produce, but the demands of modern life often leave us feeling short on time and resources. That’s why learning how to grow cucumbers fast is so valuable. These simple, effective hacks will help you maximize your yield, minimize your waiting time, and enjoy a bountiful cucumber harvest, even if you’re a beginner gardener. I’m excited to share these tips with you, so let’s get started!
Gurken-Turbo: So bringst du deine Gurken zum Wachstums-Marathon!
Hey Gartenfreunde! Wer liebt es nicht, knackige, selbstgezogene Gurken direkt vom Strauch zu naschen? Aber manchmal scheint das Wachstum einfach ewig zu dauern. Keine Sorge, ich zeige euch ein paar Tricks, mit denen ihr eure Gurkenpflanzen zu wahren Wachstums-Champions macht! Wir werden uns um die richtige Vorbereitung, die optimale Pflege und ein paar clevere Kniffe kümmern, damit ihr schon bald eine reiche Gurkenernte einfahren könnt.
Die Vorbereitung ist das A und O
Bevor wir überhaupt anfangen, Gurken zu pflanzen, müssen wir sicherstellen, dass die Basis stimmt. Das ist wie beim Hausbau – ein stabiles Fundament ist entscheidend!
* Die richtige Sorte wählen: Nicht alle Gurkensorten sind gleich schnell. Achtet beim Kauf auf Sorten, die als “frühreif” oder “schnellwachsend” gekennzeichnet sind. Diese sind speziell gezüchtet, um schneller Früchte zu tragen. Ich persönlich habe super Erfahrungen mit “Marketmore 76” und “Beth Alpha” gemacht.
* Vorkultur im Haus: Startet eure Gurkenpflanzen im Haus vor, etwa 3-4 Wochen bevor der letzte Frost erwartet wird. Das gibt ihnen einen Vorsprung und verkürzt die Zeit, bis ihr die ersten Gurken ernten könnt.
* Der perfekte Standort: Gurken lieben die Sonne! Wählt einen Standort, der mindestens 6-8 Stunden direkte Sonneneinstrahlung pro Tag bekommt. Außerdem sollte der Boden gut durchlässig und reich an Nährstoffen sein.
* Bodenverbesserung: Gurken sind Starkzehrer, das heißt, sie brauchen viele Nährstoffe. Bereitet den Boden vor dem Pflanzen gründlich vor, indem ihr reichlich Kompost oder gut verrotteten Mist einarbeitet. Das sorgt für einen nährstoffreichen und lockeren Boden, in dem sich die Gurkenwurzeln wohlfühlen.
Schritt-für-Schritt-Anleitung zur Vorkultur
1. Saatgut vorbereiten: Legt die Gurkensamen für etwa 24 Stunden in lauwarmes Wasser. Das weicht die Samenschale auf und beschleunigt die Keimung.
2. Aussaatgefäße vorbereiten: Verwendet kleine Töpfe oder Anzuchtschalen mit Anzuchterde. Füllt die Gefäße mit Erde und drückt sie leicht an.
3. Aussaat: Legt pro Topf 1-2 Samen etwa 1-2 cm tief in die Erde. Bedeckt die Samen mit Erde und gießt sie vorsichtig an.
4. Warm und feucht halten: Stellt die Anzuchtschalen an einen warmen und hellen Ort. Die ideale Keimtemperatur liegt bei 20-25°C. Haltet die Erde feucht, aber nicht nass. Eine Sprühflasche ist ideal, um die Erde gleichmäßig zu befeuchten.
5. Pikieren (optional): Wenn beide Samen keimen, könnt ihr den schwächeren Sämling entfernen, um dem stärkeren mehr Platz zu geben.
6. Abhärten: Bevor ihr die Gurkenpflanzen ins Freie pflanzt, müsst ihr sie abhärten. Das bedeutet, dass ihr sie langsam an die Bedingungen im Freien gewöhnt. Stellt die Pflanzen für ein paar Stunden pro Tag nach draußen, zuerst an einen schattigen, windgeschützten Ort, und steigert die Zeit und die Sonneneinstrahlung allmählich.
Das Auspflanzen ins Freie
Sobald die Gurkenpflanzen kräftig genug sind und keine Frostgefahr mehr besteht, können sie ins Freie gepflanzt werden.
1. Den richtigen Zeitpunkt wählen: Wartet, bis die Bodentemperatur mindestens 15°C beträgt. Gurken sind sehr kälteempfindlich.
2. Pflanzabstand beachten: Gurken brauchen Platz! Haltet einen Pflanzabstand von etwa 50-60 cm zwischen den Pflanzen und 100-120 cm zwischen den Reihen ein.
3. Pflanzlöcher vorbereiten: Grabt Pflanzlöcher, die etwas größer sind als die Wurzelballen der Gurkenpflanzen. Gebt etwas Kompost oder Hornspäne in die Pflanzlöcher.
4. Einsetzen und angießen: Setzt die Gurkenpflanzen vorsichtig in die Pflanzlöcher ein und füllt die Löcher mit Erde auf. Drückt die Erde leicht an und gießt die Pflanzen gründlich an.
5. Rankhilfe anbringen: Gurken sind Kletterpflanzen und brauchen eine Rankhilfe, um sich daran festzuhalten. Ihr könnt ein Rankgitter, einen Zaun oder einfach nur Stäbe verwenden. Ich persönlich mag Rankgitter aus Holz oder Metall, weil sie stabil sind und den Gurkenpflanzen guten Halt geben.
Die richtige Pflege für schnelles Wachstum
Nach dem Auspflanzen ist die richtige Pflege entscheidend, um das Wachstum der Gurken zu beschleunigen.
* Regelmäßiges Gießen: Gurken brauchen viel Wasser, besonders während der Fruchtbildung. Gießt die Pflanzen regelmäßig, am besten morgens, damit die Blätter bis zum Abend abtrocknen können. Vermeidet Staunässe, da dies zu Wurzelfäule führen kann.
* Düngen nicht vergessen: Düngt die Gurkenpflanzen regelmäßig mit einem organischen Dünger oder einem speziellen Gurkendünger. Beginnt etwa 2-3 Wochen nach dem Auspflanzen und wiederholt die Düngung alle 2-3 Wochen. Ich verwende gerne Brennnesseljauche, die ich selbst herstelle. Sie ist ein natürlicher Dünger, der reich an Nährstoffen ist.
* Mulchen: Mulcht den Boden um die Gurkenpflanzen herum mit Stroh oder Rasenschnitt. Das hält den Boden feucht, unterdrückt Unkraut und schützt die Früchte vor Verschmutzung.
* Ausgeizen: Entfernt regelmäßig die Seitentriebe, die in den Blattachseln wachsen. Das fördert die Bildung von Haupttrieben und sorgt für eine bessere Belüftung der Pflanzen.
* Schutz vor Schädlingen und Krankheiten: Kontrolliert die Gurkenpflanzen regelmäßig auf Schädlinge und Krankheiten. Bei Bedarf könnt ihr natürliche Schädlingsbekämpfungsmittel oder Fungizide einsetzen. Ich habe gute Erfahrungen mit Neemöl gegen Blattläuse und Mehltau gemacht.
Zusätzliche Tricks für den Wachstums-Boost
Hier sind noch ein paar zusätzliche Tipps, die euch helfen können, das Wachstum eurer Gurken zu beschleunigen:
* Warme Füße: Gurken lieben warme Füße! Ihr könnt den Boden um die Pflanzen herum mit schwarzer Folie abdecken, um die Bodentemperatur zu erhöhen.
* Regelmäßiges Ernten: Erntet die Gurken regelmäßig, sobald sie reif sind. Das regt die Pflanzen an, neue Früchte zu bilden. Lasst die Gurken nicht zu groß werden, da dies die Energie der Pflanze unnötig verbraucht.
* Bestäubung fördern: Gurken sind auf die Bestäubung durch Insekten angewiesen. Fördert die Bestäubung, indem ihr in der Nähe der Gurkenpflanzen blühende Pflanzen anbaut, die Bienen und andere Insekten anlocken. Wenn die Bestäubung nicht gut funktioniert, könnt ihr die Blüten auch von Hand bestäuben.
* Gießen mit warmem Wasser: Gießt die Gurkenpflanzen an kühlen Tagen mit lauwarmem Wasser. Das gibt ihnen einen zusätzlichen Wärmeschub.
* Schutz vor Wind: Schützt die Gurkenpflanzen vor starkem Wind, da dies die Blätter beschädigen und das Wachstum beeinträchtigen kann. Ihr könnt einen Windschutz aus Stoff oder Holz aufstellen.
Häufige Fehler vermeiden
* Zu frühes Auspflanzen: Wartet unbedingt, bis keine Frostgefahr mehr besteht, bevor ihr die Gurkenpflanzen ins Freie pflanzt.
* Zu wenig Wasser: Gurken brauchen viel Wasser, besonders während der Fruchtbildung. Achtet darauf, die Pflanzen regelmäßig zu gießen.
* Zu wenig Dünger: Gurken sind Starkzehrer und brauchen regelmäßig Dünger.
* Vernachlässigung der Rankhilfe: Gurken sind Kletterpflanzen und brauchen eine Rankhilfe, um sich daran festzuhalten.
* Ignorieren von Schädlingen und Krankheiten: Kontrolliert die Gurkenpflanzen regelmäßig auf Schädlinge und Krankheiten und handelt bei Bedarf schnell.
Mit diesen Tipps und Tricks steht einer schnellen und reichen Gurkenernte nichts mehr im Wege! Viel Spaß beim

Conclusion
So, there you have it! Mastering the art of growing cucumbers fast isn’t some unattainable gardening dream. It’s a tangible reality within your reach, achievable with a few simple, yet impactful, DIY tricks. We’ve explored the power of seed starting indoors, the magic of well-prepared soil, the necessity of consistent watering and feeding, and the critical role of vertical support. Each of these elements works synergistically to create the optimal environment for your cucumber plants to thrive and produce a bountiful harvest in record time.
But why is this DIY approach a must-try? Beyond the sheer satisfaction of harvesting your own fresh, crisp cucumbers, you’re gaining control over the entire growing process. You’re eliminating the uncertainties associated with store-bought produce, ensuring that your cucumbers are free from harmful pesticides and bursting with natural flavor. Plus, you’re significantly reducing your carbon footprint by sourcing your food locally – right from your own backyard!
Furthermore, this method empowers you to experiment and tailor the process to your specific needs and preferences. Feel free to explore different cucumber varieties, from the classic slicing cucumbers to the smaller, pickling varieties. Consider adding companion plants like marigolds or basil to deter pests and enhance the overall health of your garden. You can even experiment with different types of fertilizers, opting for organic options like compost tea or fish emulsion to nourish your plants naturally.
Don’t be afraid to get creative! Perhaps you want to try a hydroponic system for even faster growth, or maybe you’d like to build a DIY greenhouse to extend your growing season. The possibilities are endless!
We wholeheartedly encourage you to embark on this exciting gardening adventure. Growing cucumbers fast is not only rewarding but also a fantastic way to connect with nature, learn new skills, and enjoy the fruits (or rather, vegetables!) of your labor.
Take the plunge! Start your seeds, prepare your garden bed, and watch your cucumber plants flourish. And most importantly, don’t forget to share your experiences with us! We’d love to hear about your successes, your challenges, and any unique tips or tricks you discover along the way. Share your photos, your stories, and your insights in the comments below. Let’s build a community of passionate gardeners who are dedicated to growing delicious, homegrown cucumbers faster than ever before!
Frequently Asked Questions (FAQ)
Q: How long does it really take to grow cucumbers fast using these methods?
A: While the exact timeframe can vary depending on factors like your climate, the specific cucumber variety, and the consistency of your care, you can generally expect to harvest cucumbers within 50-65 days from planting seeds directly in the ground. However, by starting seeds indoors 3-4 weeks before the last expected frost and implementing the other techniques discussed (optimal soil, consistent watering/feeding, vertical support), you can often shave off a week or two, potentially harvesting in as little as 45-55 days. Remember, “fast” is relative, but these methods are designed to significantly accelerate the process compared to traditional growing methods.
Q: What kind of soil is best for growing cucumbers fast?
A: Cucumbers thrive in well-draining, fertile soil that is rich in organic matter. Ideally, the soil should have a slightly acidic to neutral pH (around 6.0 to 7.0). Before planting, amend your soil with plenty of compost, well-rotted manure, or other organic materials to improve its structure, drainage, and nutrient content. A good soil mix might include equal parts garden soil, compost, and peat moss or coco coir. You can also add a slow-release fertilizer specifically formulated for vegetables to provide a steady supply of nutrients throughout the growing season.
Q: How often should I water my cucumber plants to ensure fast growth?
A: Consistent watering is crucial for growing cucumbers fast. These plants are heavy drinkers and require ample moisture, especially during hot weather and fruit development. Aim to water deeply and regularly, providing about 1-2 inches of water per week. The best way to determine if your plants need water is to check the soil moisture. Stick your finger about an inch into the soil; if it feels dry, it’s time to water. Avoid overhead watering, as this can lead to fungal diseases. Instead, water at the base of the plants or use a soaker hose or drip irrigation system.
Q: What kind of fertilizer should I use to promote fast cucumber growth?
A: Cucumbers are heavy feeders and benefit from regular fertilization. Start with a balanced fertilizer (e.g., 10-10-10) at planting time, following the instructions on the package. Once the plants start to flower and produce fruit, switch to a fertilizer that is higher in phosphorus and potassium (e.g., 5-10-10) to support fruit development. You can also supplement with organic fertilizers like compost tea, fish emulsion, or seaweed extract. Apply fertilizer every 2-3 weeks, being careful not to over-fertilize, as this can burn the roots.
Q: Why is vertical support important for growing cucumbers fast?
A: Vertical support, such as a trellis or fence, is essential for growing cucumbers fast for several reasons. First, it allows for better air circulation around the plants, which helps to prevent fungal diseases. Second, it keeps the fruits off the ground, reducing the risk of rot and pest damage. Third, it maximizes space in your garden, allowing you to grow more cucumbers in a smaller area. Finally, it makes harvesting easier and more efficient. Cucumbers grown on vertical supports also tend to be straighter and more uniform in shape.
Q: What are some common pests and diseases that can affect cucumber plants, and how can I prevent them?
A: Common pests that can affect cucumber plants include aphids, cucumber beetles, squash bugs, and spider mites. Common diseases include powdery mildew, downy mildew, and bacterial wilt. To prevent these problems, practice good garden hygiene, such as removing weeds and debris, and providing adequate air circulation. You can also use organic pest control methods like insecticidal soap, neem oil, or diatomaceous earth. Choose disease-resistant cucumber varieties whenever possible. If you notice signs of pests or diseases, treat them promptly to prevent them from spreading.
Q: Can I grow cucumbers fast in containers?
A: Yes, you can definitely grow cucumbers fast in containers, as long as you choose a large enough container (at least 5 gallons) and provide adequate support. Select a bush or compact cucumber variety that is well-suited for container gardening. Use a high-quality potting mix and ensure that the container has good drainage. Water and fertilize regularly, as container-grown plants tend to dry out and deplete nutrients more quickly than those grown in the ground. Place the container in a sunny location that receives at least 6-8 hours of sunlight per day.
Q: What are some good companion plants for cucumbers?
A: Companion planting can be a great way to improve the health and productivity of your cucumber plants. Some good companion plants for cucumbers include marigolds (to deter pests), basil (to repel insects and improve flavor), dill (to attract beneficial insects), and beans (to fix nitrogen in the soil). Avoid planting cucumbers near aromatic herbs like sage or mint, as these can inhibit their growth.
Q: What if my cucumber plants are flowering but not producing fruit?
A: There are several reasons why your cucumber plants might be flowering but not producing fruit. One common reason is a lack of pollination. Cucumbers require pollination to set fruit, and if there are not enough bees or other pollinators in your area, you may need to hand-pollinate the flowers. Another reason could be stress due to temperature extremes, insufficient watering, or nutrient deficiencies. Ensure that your plants are receiving adequate care and consider using a blossom set spray to encourage fruit production.
Q: How do I know when my cucumbers are ready to harvest?
A: The best time to harvest cucumbers is when they are still young and tender. The exact size and color will vary depending on the variety, but generally, cucumbers are ready to harvest when they are about 6-8 inches long and have a firm, smooth skin. Avoid letting them get too large, as they can become bitter and seedy. Use a sharp knife or pruning shears to cut the cucumbers from the vine, leaving a small stem attached. Harvest regularly to encourage continued production.
Leave a Comment