

Grow Celery at Home? Absolutely! Imagine stepping into your backyard and snipping fresh, crisp celery stalks for your salad, soup, or even a healthy snack. No more wilted, store-bought celery – just vibrant, homegrown goodness. I’m excited to share some simple DIY tricks that will transform your garden (or even your balcony!) into a celery-growing haven.
Celery, believe it or not, has a rich history. Originating in the Mediterranean, it was initially valued for its medicinal properties before becoming a culinary staple. Ancient Greeks used it to crown victors in athletic games, symbolizing triumph and resilience. Now, you can experience a small victory of your own by successfully cultivating this versatile vegetable.
Why should you bother with this DIY project? Well, for starters, growing your own celery allows you to control the quality and freshness. You’ll avoid harmful pesticides and enjoy a flavor that’s far superior to anything you can find in the supermarket. Plus, it’s incredibly rewarding to nurture a plant from seed (or even a leftover celery base!) to a thriving, edible crop. These easy-to-follow tricks will help you grow celery at home, even if you’re a beginner gardener. Let’s get started!
Growing Celery From Kitchen Scraps: A Beginner’s Guide
Hey there, fellow gardening enthusiasts! Ever wondered if you could regrow that celery stalk you just chopped up for your soup? Well, guess what? You absolutely can! It’s a super easy and rewarding DIY project, perfect for beginners and a fantastic way to reduce food waste. I’m going to walk you through the whole process, step-by-step, so you can have your own little celery patch growing right in your kitchen.
What You’ll Need
Before we dive in, let’s gather our supplies. You probably have most of these things already!
* A celery stalk base (the part you usually chop off and discard)
* A shallow dish or bowl
* Water
* A sunny windowsill
* Potting soil
* A pot or container (at least 6 inches deep)
* A spray bottle (optional, but helpful)
Phase 1: Rooting Your Celery Base
This is where the magic begins! We’re going to coax those roots to sprout from the bottom of the celery base.
1. Prepare the Celery Base: After you’ve used the celery stalks, don’t toss the base! Carefully cut off the very bottom of the celery stalk, leaving about 2-3 inches of the base intact. Make sure to remove any loose or decaying outer stalks. We want a clean, healthy base to work with.
2. Place in Water: Fill your shallow dish or bowl with about an inch of water. Place the celery base, cut-side up, in the water. The water level should reach about halfway up the base.
3. Find a Sunny Spot: Place the dish with the celery base on a sunny windowsill. Celery needs plenty of light to thrive, so a bright location is crucial.
4. Change the Water Regularly: This is important! Change the water every 1-2 days to prevent bacteria growth and keep the water fresh. This will encourage root development.
5. Observe and Wait: Now comes the patience part. Over the next few days, you should start to see small roots emerging from the bottom of the celery base. You might also notice new green leaves sprouting from the top. This is a great sign!
6. Maintain Moisture: Keep the water level consistent. The base should always be partially submerged. If you notice the top of the base drying out, you can gently mist it with a spray bottle.
Phase 2: Planting Your Celery
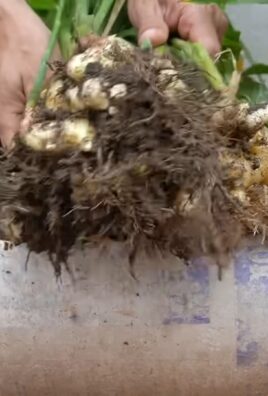
Once your celery has developed a good root system (about an inch or two long), it’s time to move it to a pot with soil.
1. Prepare the Pot: Choose a pot or container that’s at least 6 inches deep. This will give the celery roots plenty of room to grow. Fill the pot with good-quality potting soil, leaving about an inch of space at the top.
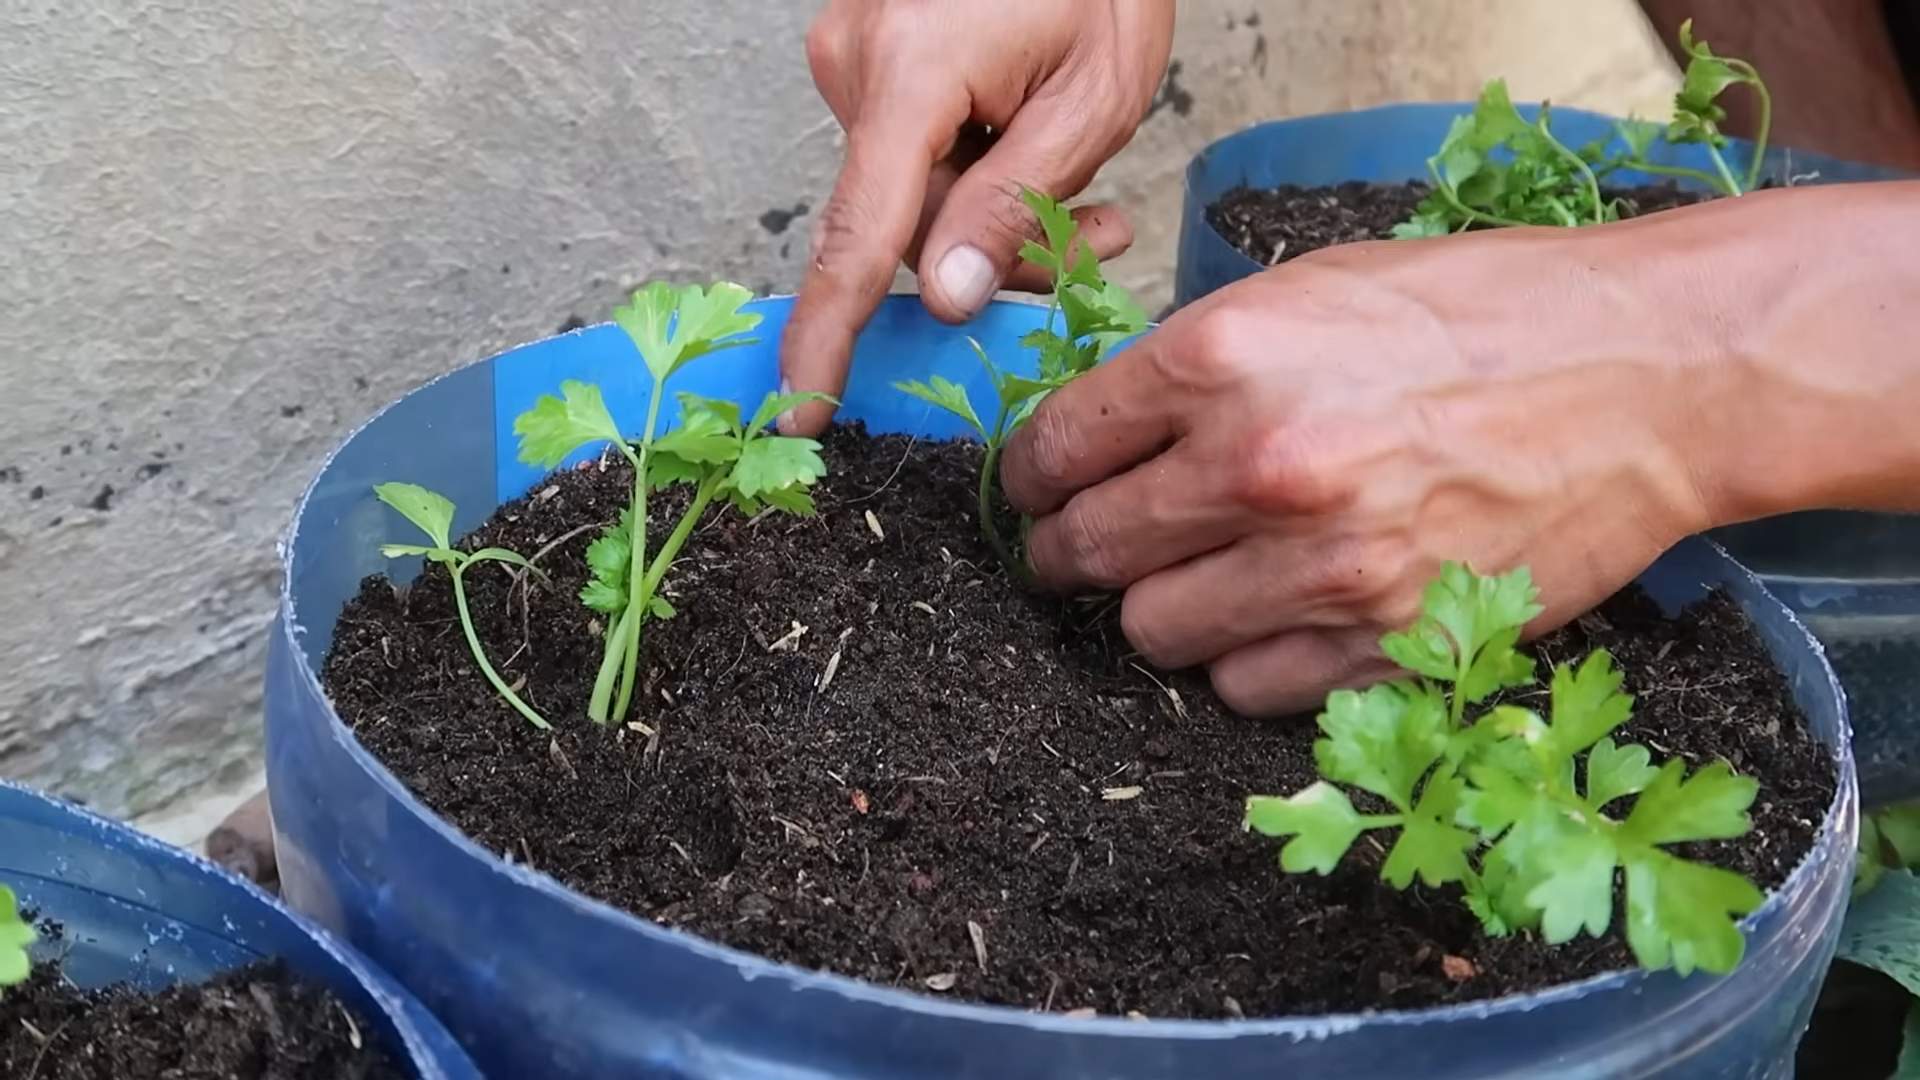
2. Make a Hole: Use your finger or a small trowel to create a hole in the center of the soil, large enough to accommodate the celery base and its roots.
3. Carefully Transplant: Gently remove the celery base from the water. Be careful not to damage the delicate roots. Place the celery base in the hole, making sure the roots are spread out.
4. Cover with Soil: Fill the hole with soil, gently packing it around the celery base. The top of the celery base should be just above the soil level.
5. Water Thoroughly: Water the soil thoroughly until water drains out of the bottom of the pot. This will help settle the soil and ensure the roots are well-hydrated.
Phase 3: Caring for Your Celery Plant
Now that your celery is planted, it’s time to provide it with the care it needs to grow into a healthy plant.
1. Sunlight: Celery loves sunlight! Place your potted celery plant back on the sunny windowsill. It needs at least 6 hours of sunlight per day.
2. Watering: Keep the soil consistently moist, but not soggy. Water when the top inch of soil feels dry to the touch. Avoid overwatering, as this can lead to root rot.
3. Fertilizing: To give your celery a boost, you can fertilize it every 2-3 weeks with a balanced liquid fertilizer. Follow the instructions on the fertilizer packaging.
4. Temperature: Celery prefers cooler temperatures, ideally between 60-70°F (15-21°C). Avoid placing it in direct sunlight during the hottest part of the day, especially in the summer.
5. Pest Control: Keep an eye out for pests like aphids or spider mites. If you notice any pests, you can try spraying the plant with insecticidal soap or neem oil.
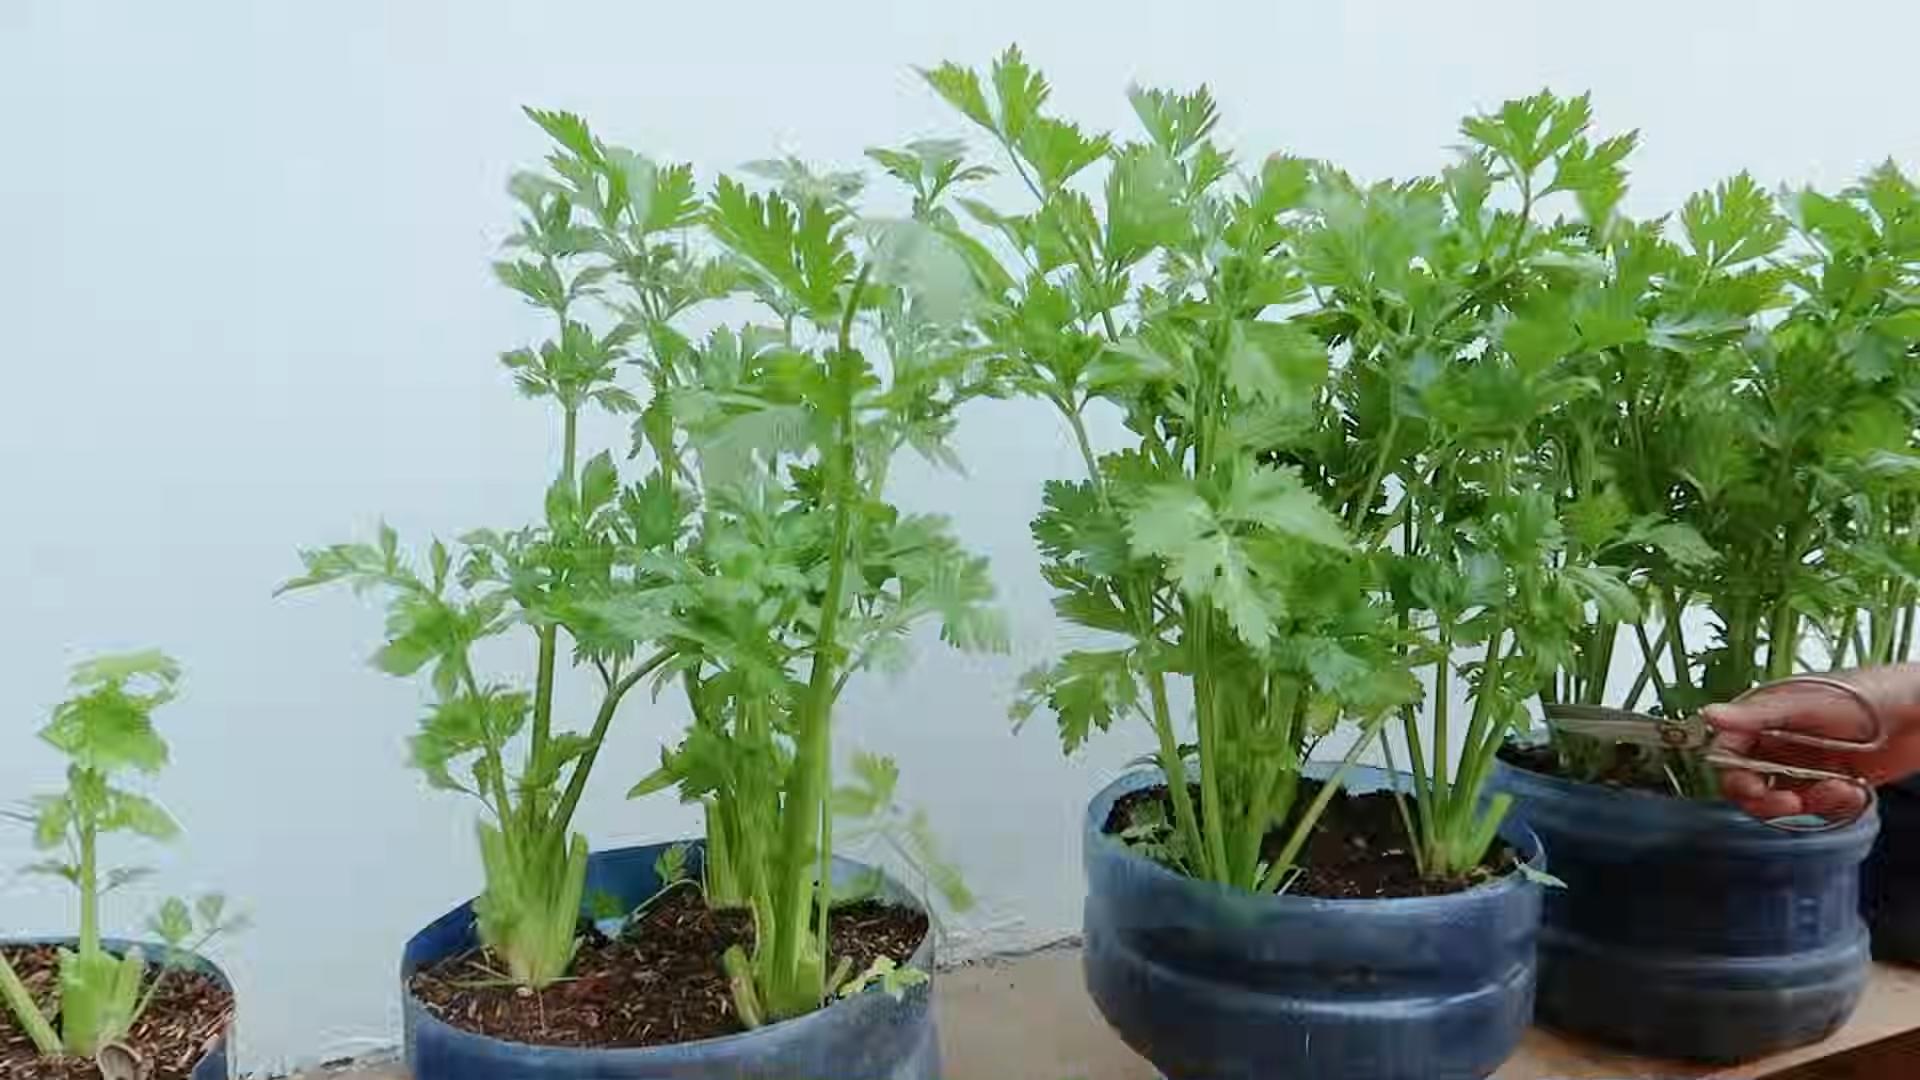
6. Harvesting: While you won’t get a full-sized celery stalk like you buy in the store, you can harvest the outer stalks as they grow. Simply cut them off at the base of the plant. This will encourage the plant to produce more stalks. You can also harvest the leaves for use in salads or soups.
Troubleshooting
Sometimes, things don’t go exactly as planned. Here are a few common issues you might encounter and how to address them:
* Celery base rotting: This is usually caused by bacteria growth. Make sure to change the water regularly and remove any decaying outer stalks.
* No root growth: This could be due to insufficient sunlight or poor water quality. Try moving the celery base to a brighter location and using filtered water.
* Yellowing leaves: This could be a sign of overwatering or nutrient deficiency. Adjust your watering schedule and consider fertilizing the plant.
* Slow growth: Celery can be a slow grower, so be patient! Make sure it’s getting enough sunlight, water, and nutrients.
Tips for Success
Here are a few extra tips to help you succeed in growing celery from kitchen scraps:
* Start with a healthy celery base: Choose a celery stalk that is firm and crisp, with no signs of wilting or decay.
* Use filtered water: Tap water can sometimes contain chemicals that can inhibit root growth. Using filtered water can help.
* Be patient: It can take several weeks for the celery to develop a good root system and start growing new leaves. Don’t get discouraged if you don’t see results immediately.
* Experiment with different varieties: There are many different varieties of celery, so try experimenting with different ones to see which ones grow best in your area.
* Enjoy the process! Growing celery from kitchen scraps is a fun and rewarding experience. Enjoy watching your plant grow and learning about the wonders of nature.
Beyond the Basics: Taking it to the Next Level
Once you’ve mastered the basics of growing celery from kitchen scraps, you can try some more advanced techniques:
* Hydroponics: Grow your celery in a hydroponic system for faster growth and higher yields.
* Succession planting: Start new celery bases every few weeks to ensure a continuous supply of fresh celery.
* Companion planting: Plant celery alongside other vegetables that benefit from its presence, such as tomatoes, onions, and cabbage.
* Seed saving: If your celery plant flowers, you can save the seeds and use them to grow new plants.
Growing celery from kitchen scraps is a fantastic way to reduce waste, save money, and enjoy fresh, homegrown produce. With a little patience and care, you can have your own little celery patch growing right in your kitchen. Happy gardening!
Conclusion
So, there you have it! Growing celery at home from kitchen scraps is not just a fun experiment; it’s a sustainable, cost-effective way to enjoy fresh, crisp celery whenever you want. Forget those wilted, expensive bunches from the grocery store. With a little patience and minimal effort, you can transform the base of a celery stalk into a thriving plant, ready to add flavor and crunch to your favorite dishes.
Why is this DIY trick a must-try? Because it’s incredibly rewarding to witness the magic of regeneration firsthand. It’s a fantastic project for kids, teaching them about plant life cycles and the importance of reducing food waste. Plus, it’s a budget-friendly way to have a constant supply of celery on hand. Imagine the satisfaction of harvesting your own celery for soups, salads, smoothies, or even just a healthy snack.
But the fun doesn’t stop there! Once your celery plant is established, you can experiment with different growing conditions. Try planting it in a larger container or even directly in your garden. See how the flavor changes based on the amount of sunlight and water it receives. You can also try growing different varieties of celery from seed, such as Pascal celery or golden self-blanching celery, to compare their tastes and textures.
For a spicier twist, consider adding a few drops of hot sauce to the water during the initial rooting phase. Some gardeners swear this helps stimulate growth and adds a subtle kick to the celery. Another variation is to use the celery leaves in pesto or as a garnish. Don’t let any part of the plant go to waste!
We wholeheartedly encourage you to give this DIY celery growing trick a try. It’s a simple, satisfying project that will bring a touch of green to your home and fresh flavor to your table. Don’t be afraid to experiment and adapt the process to suit your own environment and preferences.
And most importantly, we want to hear about your experience! Share your photos, tips, and stories in the comments below. Let us know what worked for you, what challenges you faced, and any creative variations you tried. Together, we can build a community of home gardeners who are passionate about growing their own food and reducing waste. So, grab a celery stalk, get your hands dirty, and start growing your own delicious, homegrown celery today! You’ll be amazed at how easy and rewarding it is. This method of growing celery at home is a game changer.
Frequently Asked Questions (FAQ)
How long does it take to grow celery from a base?
The time it takes to grow celery from a base can vary depending on several factors, including the variety of celery, the growing conditions (sunlight, water, temperature), and the overall health of the initial celery base. Generally, you can expect to see new growth within a week or two after placing the base in water. After about 3-4 weeks, you should have a small plant ready to be transplanted into soil. From there, it can take another 2-3 months for the celery to mature and be ready for harvest. So, from start to finish, you’re looking at approximately 3-4 months to grow a full-sized celery stalk. Be patient and consistent with watering and sunlight, and you’ll be rewarded with fresh, homegrown celery.
What kind of soil is best for growing celery?
Celery thrives in rich, well-draining soil that is high in organic matter. The ideal soil pH for celery is between 6.0 and 6.8. Before planting, amend your soil with compost, well-rotted manure, or other organic materials to improve its fertility and drainage. Celery also prefers soil that retains moisture, so consider adding peat moss or coconut coir to help with water retention. If you’re growing celery in containers, use a high-quality potting mix specifically formulated for vegetables. Avoid heavy clay soils, as they can become waterlogged and hinder root growth. Regular fertilization with a balanced fertilizer will also help ensure healthy growth and a bountiful harvest.
How much sunlight does celery need?
Celery needs at least 6 hours of direct sunlight per day to thrive. However, in hotter climates, it can benefit from some afternoon shade to prevent the leaves from scorching. If you’re growing celery indoors, place it near a sunny window or use grow lights to provide adequate light. Insufficient sunlight can result in leggy growth, pale leaves, and a smaller harvest. Observe your celery plants closely and adjust their position as needed to ensure they are receiving enough sunlight.
How often should I water my celery plant?
Celery is a water-loving plant and requires consistent moisture to grow properly. Water your celery plant deeply whenever the top inch of soil feels dry to the touch. During hot, dry weather, you may need to water it daily. Avoid letting the soil dry out completely, as this can stress the plant and affect its growth. However, be careful not to overwater, as this can lead to root rot. Ensure that your soil is well-draining to prevent water from pooling around the roots. Mulching around the base of the plant can also help retain moisture and reduce the need for frequent watering.
Can I grow celery indoors year-round?
Yes, you can grow celery indoors year-round, provided you can meet its needs for sunlight, water, and nutrients. Choose a sunny location near a window or use grow lights to supplement natural light. Use a large container with well-draining soil and water regularly to keep the soil consistently moist. Fertilize your celery plant every few weeks with a balanced fertilizer. Keep an eye out for pests and diseases, and take action promptly if you notice any problems. With proper care, you can enjoy fresh, homegrown celery even during the colder months.
What are some common pests and diseases that affect celery?
Celery can be susceptible to several pests and diseases, including aphids, celery leaf tiers, carrot weevils, early blight, late blight, and pink rot. Regularly inspect your plants for signs of infestation or disease, such as yellowing leaves, spots, or holes. To prevent pest and disease problems, practice good garden hygiene, such as removing weeds and debris, and providing adequate air circulation. Use organic pest control methods, such as insecticidal soap or neem oil, to control aphids and other pests. For fungal diseases, use a copper-based fungicide or other appropriate treatment. Crop rotation can also help prevent soilborne diseases from building up.
How do I harvest celery?
You can harvest celery when the stalks are at least 6-8 inches long and have reached the desired thickness. To harvest, use a sharp knife to cut the stalks at the base of the plant, just above the soil line. You can harvest the entire plant at once or harvest individual stalks as needed. After harvesting, wash the celery stalks thoroughly and store them in the refrigerator. Celery can be stored in the refrigerator for up to 2 weeks if wrapped in a damp paper towel or placed in a plastic bag.
Can I eat the celery leaves?
Yes, celery leaves are perfectly edible and can be used in a variety of dishes. They have a stronger flavor than the stalks and can be used as a garnish, added to salads, soups, stews, or smoothies. You can also dry the leaves and use them as a seasoning. Don’t let those flavorful leaves go to waste!
My celery is bitter. What could be the reason?
Bitter celery can be caused by several factors, including insufficient watering, high temperatures, and nutrient deficiencies. Celery needs consistent moisture to grow properly, so make sure you are watering it regularly, especially during hot weather. High temperatures can also cause celery to become bitter, so provide some afternoon shade if you live in a hot climate. Nutrient deficiencies, particularly a lack of boron, can also contribute to bitterness. Amend your soil with compost or use a fertilizer that contains boron to address this issue.
Is growing celery at home worth the effort?
Absolutely! While it requires some patience and attention, growing celery at home is a rewarding experience that offers several benefits. You’ll have access to fresh, flavorful celery whenever you want it, without having to rely on store-bought produce. You’ll also be reducing food waste by regrowing celery from kitchen scraps. Plus, it’s a fun and educational project that can be enjoyed by the whole family. The taste of homegrown celery is often superior to store-bought celery, and you’ll have the satisfaction of knowing that you grew it yourself. So, give it a try and see for yourself!

Leave a Comment