

Grow Cape Gooseberries Easily, even if you think you don’t have a green thumb! Have you ever dreamt of plucking sweet, tangy golden berries straight from your own garden? Imagine the satisfaction of creating delicious jams, pies, or simply enjoying these little bursts of sunshine fresh off the vine. This isn’t just a pipe dream; it’s an achievable reality with a few simple tricks and DIY hacks.
Cape Gooseberries, also known as Golden Berries or Physalis, have a fascinating history, cultivated for centuries in South America and gradually making their way across the globe. They were even a favorite treat in Victorian England! But beyond their historical charm, these little fruits offer a wealth of nutritional benefits and a unique flavor profile that sets them apart from other berries.
So, why do you need these DIY tricks to grow Cape Gooseberries easily? Well, while they’re relatively low-maintenance, a little know-how can significantly boost your yield and ensure your plants thrive. I’m going to share some of my favorite tips and tricks that I’ve learned over the years, from seed starting to pest control, all designed to make your Cape Gooseberry growing experience a resounding success. Get ready to transform your garden into a golden berry paradise!
Grow Cape Gooseberries Easily: A DIY Guide
Okay, so you want to grow Cape Gooseberries? Awesome! They’re delicious, relatively easy to care for, and add a unique touch to your garden. I’ve been growing them for a few years now, and I’m excited to share my tips and tricks with you. This guide will walk you through everything from starting seeds to harvesting those golden, tangy fruits. Let’s get started!
Choosing Your Variety & Starting Seeds
First things first, let’s talk about varieties and getting those seeds going. While most Cape Gooseberries are pretty similar, some varieties might be better suited to your climate or taste preferences.
* Variety Selection: Look for varieties like ‘Goldie’ or ‘Pineapple’ if you want something particularly sweet. ‘Giant’ is a good choice if you’re after larger fruits. Check with your local nursery or seed supplier to see what grows best in your area.
* Seed Starting Time: I usually start my seeds indoors about 6-8 weeks before the last expected frost. This gives them a good head start.
* Seed Starting Mix: Use a good quality seed starting mix. It’s lighter and drains better than regular potting soil, which is crucial for delicate seedlings.
* Containers: You can use seed trays, small pots, or even recycled yogurt containers (just make sure to poke drainage holes!).
Now, let’s get those seeds planted!
1. Prepare Your Containers: Fill your chosen containers with the seed starting mix, leaving about half an inch of space at the top. Gently tap the containers to settle the soil.
2. Sow the Seeds: Cape Gooseberry seeds are tiny, so be careful not to plant them too deep. I usually sprinkle a few seeds on the surface of the soil in each container.
3. Cover Lightly: Cover the seeds with a very thin layer of seed starting mix – just enough to barely cover them.
4. Water Gently: Use a spray bottle to mist the soil thoroughly. You want to moisten the soil without disturbing the seeds.
5. Provide Warmth and Light: Place the containers in a warm location, ideally around 70-75°F (21-24°C). A heat mat can be really helpful. You’ll also need to provide plenty of light. If you don’t have a sunny windowsill, use a grow light. I keep my grow lights on for about 14-16 hours a day.
6. Maintain Moisture: Keep the soil consistently moist, but not soggy. Check the soil daily and mist as needed.
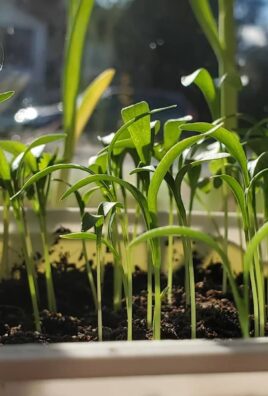
7. Germination: Be patient! Cape Gooseberry seeds can take anywhere from 1-3 weeks to germinate. Once you see seedlings emerge, remove the heat mat (if you were using one) and continue to provide plenty of light.
Transplanting Seedlings
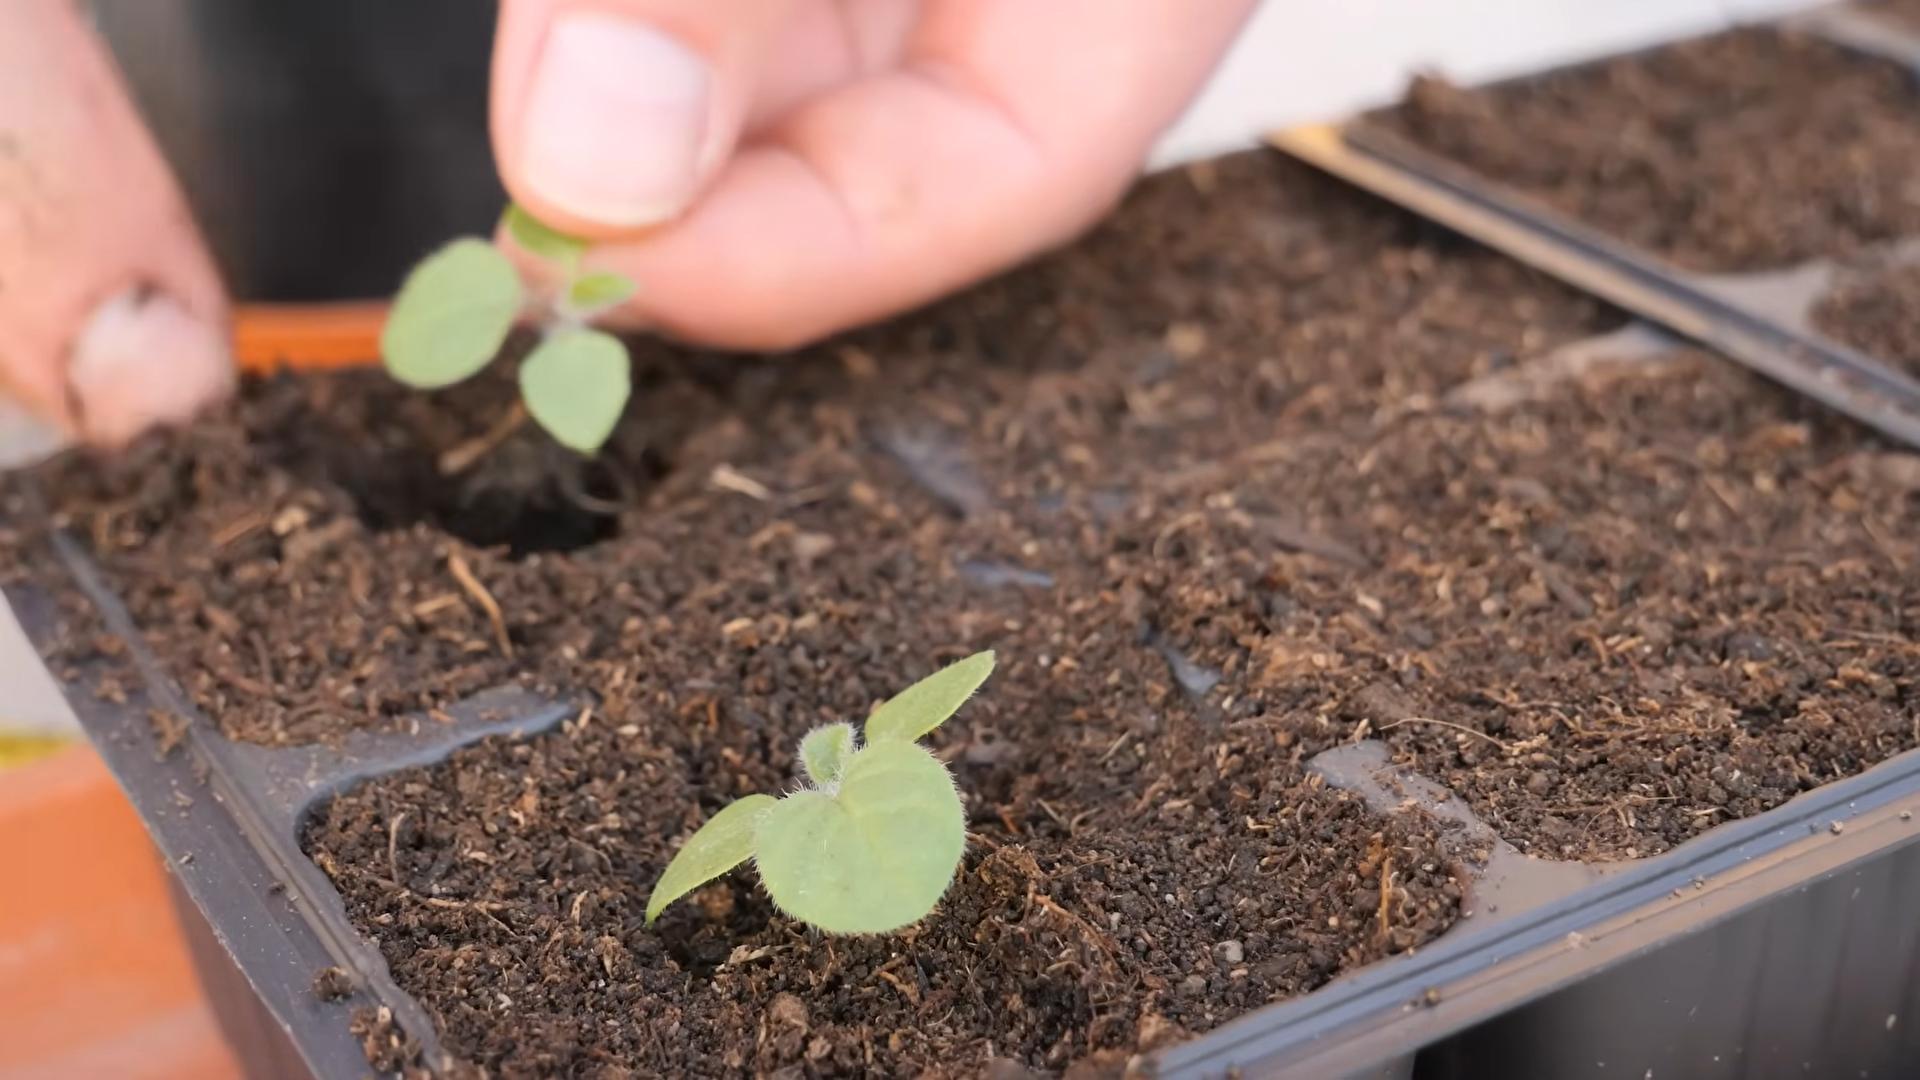
Once your seedlings have developed a few sets of true leaves (the leaves that look like miniature versions of the adult plant’s leaves), it’s time to transplant them into larger pots.
* When to Transplant: I usually wait until the seedlings are about 2-3 inches tall before transplanting.
* Potting Mix: Use a good quality potting mix for this stage.
* Larger Pots: Choose pots that are at least 4 inches in diameter.
Here’s how to transplant your seedlings:
1. Prepare the New Pots: Fill the larger pots with potting mix, leaving about an inch of space at the top.
2. Gently Remove Seedlings: Carefully loosen the soil around the seedlings in the seed tray or small containers. You can use a small spoon or fork to help you.
3. Handle with Care: Gently lift the seedlings by their leaves, not their stems. The stems are delicate and easily damaged.
4. Plant in New Pots: Make a small hole in the center of the potting mix in the new pot. Place the seedling in the hole and gently backfill with potting mix.
5. Water Thoroughly: Water the newly transplanted seedlings thoroughly.
6. Provide Light and Warmth: Place the pots in a sunny location or under a grow light. Continue to provide plenty of light and warmth.
Hardening Off & Planting Outdoors
Before you plant your Cape Gooseberry seedlings outdoors, you need to “harden them off.” This process gradually acclimates them to outdoor conditions, preventing shock.
* What is Hardening Off?: Hardening off involves gradually exposing your seedlings to outdoor temperatures, sunlight, and wind.
* When to Start: Start hardening off your seedlings about a week or two before you plan to plant them outdoors.
* Location: Choose a sheltered location outdoors, such as a porch or patio.
Here’s how to harden off your seedlings:
1. Day 1: Place the seedlings outdoors in the sheltered location for just an hour or two.
2. Day 2: Increase the amount of time the seedlings spend outdoors by an hour or two each day.
3. Day 3-7: Gradually expose the seedlings to more sunlight and wind each day.
4. Overnight: After about a week, you can leave the seedlings outdoors overnight, as long as the temperature doesn’t drop below 50°F (10°C).
Once your seedlings are hardened off, it’s time to plant them in the garden!
* Choosing a Location: Cape Gooseberries need plenty of sunlight (at least 6-8 hours a day) and well-drained soil.
* Soil Preparation: Amend the soil with compost or other organic matter to improve drainage and fertility.
* Spacing: Space the plants about 2-3 feet apart.
Here’s how to plant your Cape Gooseberry seedlings outdoors:
1. Dig Holes: Dig holes that are slightly larger than the root balls of the seedlings.
2. Remove Seedlings from Pots: Gently remove the seedlings from their pots.
3. Plant Seedlings: Place the seedlings in the holes and backfill with soil.
4. Water Thoroughly: Water the newly planted seedlings thoroughly.
5. Mulch: Apply a layer of mulch around the plants to help retain moisture and suppress weeds.
Caring for Your Cape Gooseberry Plants
Now that your Cape Gooseberry plants are in the ground, it’s important to provide them with proper care.
* Watering: Water regularly, especially during dry periods. Cape Gooseberries need consistent moisture to produce well.
* Fertilizing: Fertilize every few weeks with a balanced fertilizer. I like to use a liquid fertilizer diluted to half strength.
* Pruning: Cape Gooseberries don’t require a lot of pruning, but you can remove any dead or diseased branches. You can also pinch back the tips of the stems to encourage bushier growth.
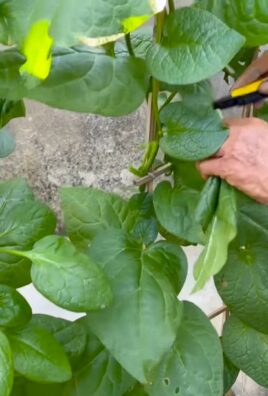
* Support: Cape Gooseberry plants can get quite bushy and may need some support, especially when they’re loaded with fruit. You can use stakes or cages to support the plants.
* Pest and Disease Control: Cape Gooseberries are generally pest and disease resistant, but keep an eye out for common garden pests like aphids and whiteflies. If you notice any problems, treat them promptly with an appropriate insecticide or fungicide.
Harvesting Your Cape Gooseberries
The best part of growing Cape Gooseberries is, of course, harvesting the delicious fruit!
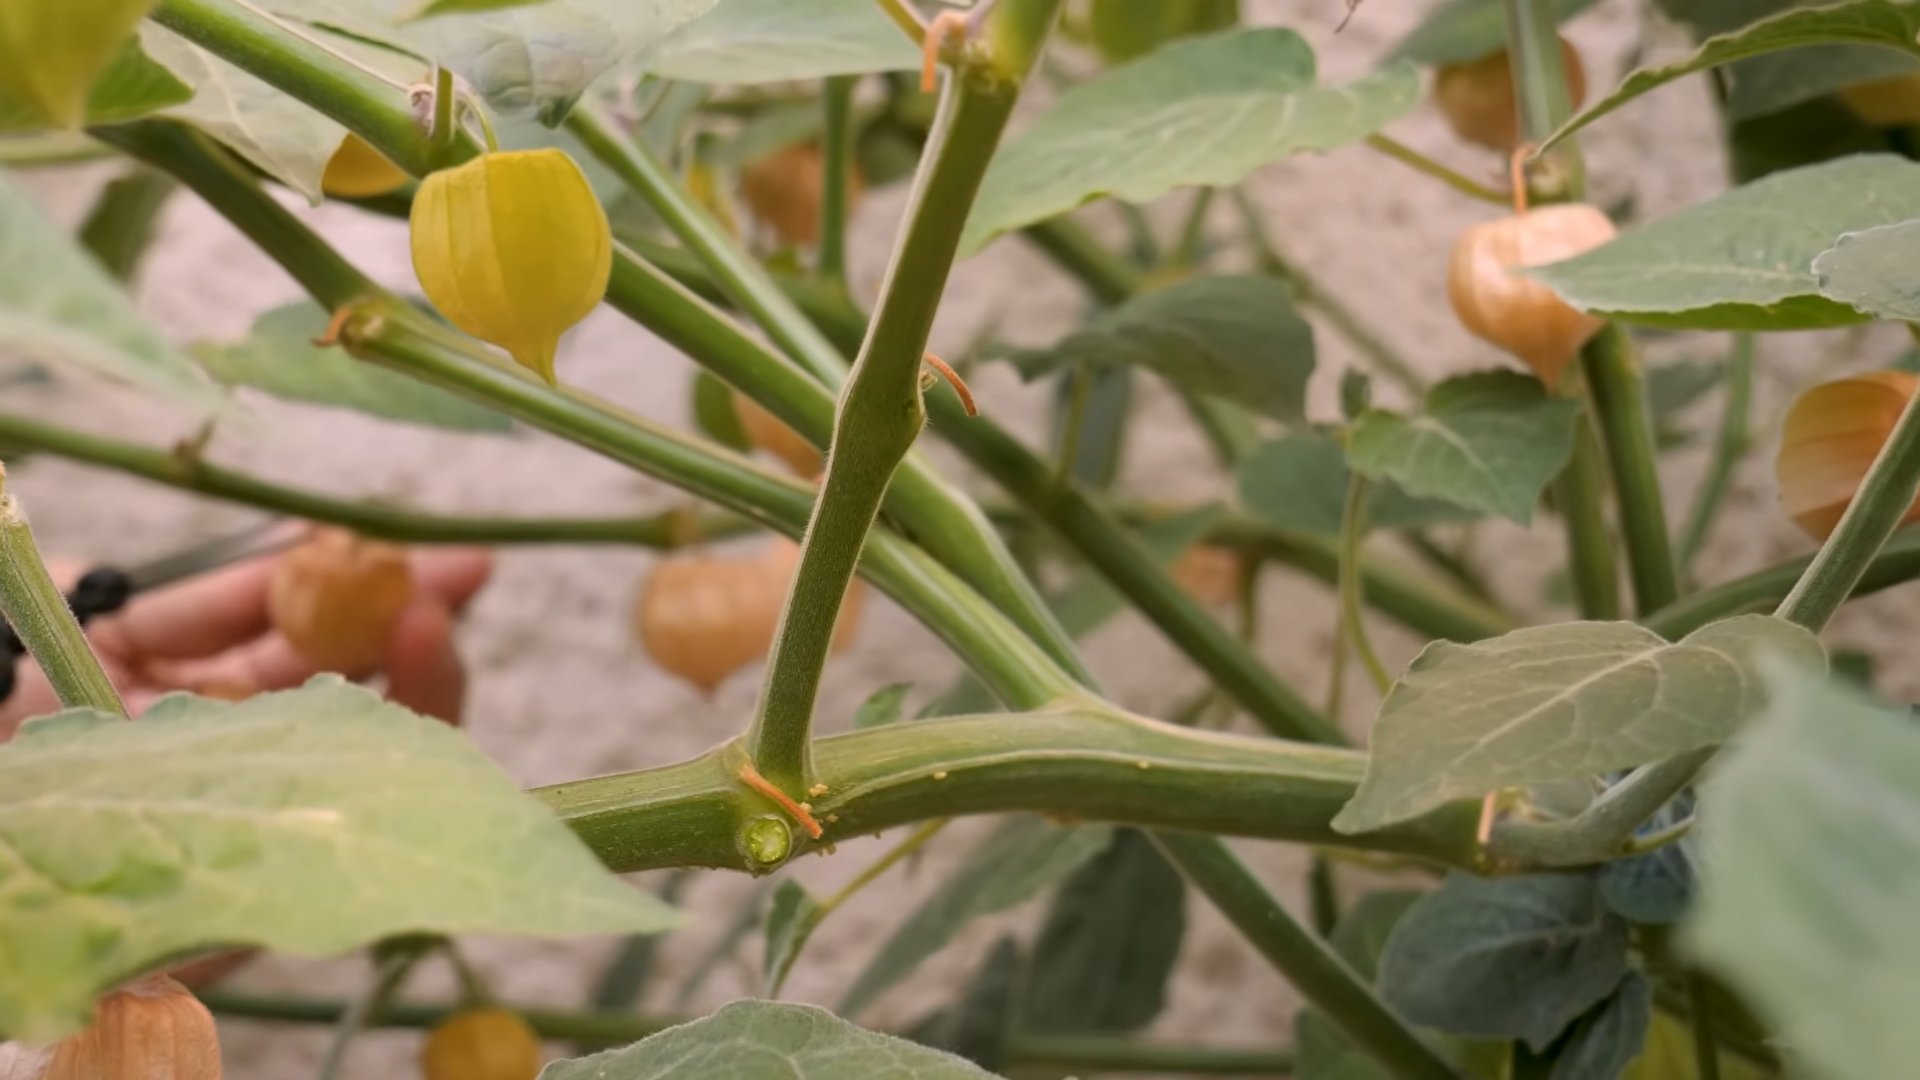
* When to Harvest: Cape Gooseberries are ready to harvest when the papery husks turn brown and dry, and the fruits inside are golden yellow. The fruit will often drop to the ground when ripe.
* How to Harvest: Simply pick the fruits from the plant or collect them from the ground.
* Storage: Cape Gooseberries can be stored in their husks at room temperature for several weeks. You can also refrigerate them to extend their shelf life.
Troubleshooting Common Problems
Even with the best care, you might encounter some problems while growing Cape Gooseberries. Here are a few common issues and how to address them:
* Yellowing Leaves: This could be a sign of overwatering, underwatering, or nutrient deficiency. Check the soil moisture and adjust your watering accordingly. Fertilize with a balanced fertilizer.
* Lack of Fruit: This could be due to insufficient sunlight, poor pollination, or nutrient deficiency. Make sure your plants are getting at least 6-8 hours of sunlight a day. You can also try hand-pollinating the flowers. Fertilize with a fertilizer that is high in phosphorus.
* Pests: Check your plants regularly for pests like aphids and whiteflies. Treat any infestations promptly with an appropriate insecticide.
* Diseases: Cape Gooseberries are generally disease resistant, but they can be susceptible to fungal diseases in humid conditions. Improve air circulation around the plants and avoid overhead watering. Treat any fungal diseases with an appropriate fungicide.
Enjoying Your Harvest
Conclusion
So, there you have it! Growing Cape Gooseberries easily at home is not only achievable, but also incredibly rewarding. This simple DIY trick, focusing on [mention the specific trick from the article, e.g., “seed starting with coffee filters” or “creating a DIY support structure”], unlocks a world of fresh, tangy-sweet fruit right in your backyard. Forget expensive grocery store prices and uncertain origins; with a little effort and this straightforward method, you can cultivate your own supply of these golden gems.
But why is this DIY approach a must-try? Beyond the cost savings, it’s about control. You dictate the growing conditions, ensuring your Cape Gooseberries are nurtured without harmful chemicals or pesticides. You get to witness the entire life cycle of the plant, from tiny seed to bountiful harvest, a truly satisfying experience for any gardener, novice or experienced. And let’s not forget the unparalleled flavor of homegrown produce – the taste difference is simply undeniable.
Looking to personalize your Cape Gooseberry growing journey? Consider these variations:
* Experiment with different soil types: While well-draining soil is crucial, try amending your soil with compost or aged manure to boost nutrient levels.
* Explore companion planting: Marigolds, basil, and nasturtiums are known to deter pests and attract beneficial insects, creating a healthier environment for your Cape Gooseberries.
* Vary the support structure: If you’re using a DIY support structure, get creative! Bamboo stakes, repurposed tomato cages, or even woven branches can provide the necessary support as your plants grow.
* Try different varieties: While the common Cape Gooseberry is delicious, explore other varieties like ‘Goldie’ or ‘Giant’ for unique flavor profiles and fruit sizes.
* Preserve your harvest: Once you’ve harvested your bounty, consider making jams, preserves, or even drying them for a delicious and healthy snack.
This DIY trick for growing Cape Gooseberries easily is more than just a gardening hack; it’s an invitation to connect with nature, cultivate your own food, and enjoy the fruits (literally!) of your labor. We are confident that with a little patience and our guide, you will be enjoying your own homegrown Cape Gooseberries in no time.
We wholeheartedly encourage you to give this DIY method a try. It’s simpler than you might think, and the rewards are well worth the effort. Don’t be afraid to experiment, adapt the techniques to your specific environment, and most importantly, have fun!
Once you’ve embarked on your Cape Gooseberry growing adventure, we’d love to hear about your experience. Share your successes, challenges, and any variations you’ve tried in the comments below. Let’s build a community of Cape Gooseberry enthusiasts and learn from each other’s experiences. Happy growing!
Frequently Asked Questions (FAQ)
What exactly are Cape Gooseberries, and what do they taste like?
Cape Gooseberries, also known as Golden Berries, Physalis peruviana, or Ground Cherries, are small, round fruits enclosed in a papery husk. They have a unique sweet and tangy flavor, often described as a combination of pineapple, strawberry, and tomato. The taste can vary slightly depending on the ripeness and variety. They are delicious eaten fresh, used in jams and preserves, or added to salads and desserts.
How long does it take to grow Cape Gooseberries from seed?
From seed to harvest, it typically takes around 70-80 days for Cape Gooseberries to mature. Seedlings usually emerge within 10-14 days after sowing. The exact time can vary depending on factors like temperature, sunlight, and soil conditions. Starting seeds indoors 6-8 weeks before the last expected frost can give you a head start.
What are the ideal growing conditions for Cape Gooseberries?
Cape Gooseberries thrive in warm, sunny locations with well-draining soil. They prefer a soil pH between 6.0 and 6.8. They need at least 6-8 hours of direct sunlight per day. While they are relatively drought-tolerant once established, regular watering is essential, especially during fruiting. Protect them from strong winds, which can damage the delicate stems and husks.
Do Cape Gooseberries need support?
Yes, Cape Gooseberry plants can become quite bushy and sprawling, especially when laden with fruit. Providing support, such as stakes, cages, or trellises, is highly recommended to prevent the stems from breaking and to keep the fruit off the ground, reducing the risk of rot and pests. The DIY support structure mentioned in the article is a great option for providing this necessary support.
Are Cape Gooseberries susceptible to any pests or diseases?
While relatively pest-resistant, Cape Gooseberries can be susceptible to aphids, whiteflies, and spider mites. Regularly inspect your plants and treat any infestations promptly with insecticidal soap or neem oil. They can also be affected by fungal diseases like powdery mildew, especially in humid conditions. Ensure good air circulation around the plants and avoid overhead watering to minimize the risk of fungal problems.
How do I know when Cape Gooseberries are ripe?
The easiest way to tell if Cape Gooseberries are ripe is by the color of the husk. When the fruit is ripe, the husk will turn from green to a papery, light brown or tan color. The fruit inside should also be a golden-yellow color. The fruit will often drop from the plant when fully ripe, but you can also gently tug on the husk to see if it comes off easily.
Can I grow Cape Gooseberries in containers?
Yes, Cape Gooseberries can be successfully grown in containers, making them a great option for gardeners with limited space. Choose a pot that is at least 12 inches in diameter and ensure it has good drainage. Use a high-quality potting mix and provide regular watering and fertilization. Container-grown plants may need more frequent watering than those grown in the ground.
Are Cape Gooseberries perennial or annual?
In warmer climates (zones 9-11), Cape Gooseberries can be grown as perennials, meaning they will live for more than two years. However, in colder climates, they are typically grown as annuals, as they are not frost-hardy. You can try overwintering them indoors in a pot if you live in a colder region, but success is not guaranteed.
Can I save seeds from my Cape Gooseberries to plant next year?
Yes, you can save seeds from your Cape Gooseberries to plant the following year. Allow the fruit to fully ripen on the plant, then remove the seeds from the fruit and rinse them thoroughly. Spread the seeds out on a paper towel to dry completely, then store them in an airtight container in a cool, dark place.
Are Cape Gooseberries poisonous?
The ripe fruit of the Cape Gooseberry is safe to eat. However, the unripe fruit, leaves, and stems contain solanine, which is a toxic alkaloid. Eating these parts of the plant can cause nausea, vomiting, and diarrhea. Therefore, it is essential to only consume the ripe fruit and avoid any other parts of the plant.
Leave a Comment