

Grow Bush Beans Containers: Imagine stepping onto your balcony or into your small backyard and harvesting a fresh, vibrant batch of bush beans, ready to be tossed into a salad or steamed for a delicious side dish. Sounds idyllic, right? Well, it’s more achievable than you think, even without acres of land! For centuries, container gardening has allowed people to cultivate their own food, from the hanging gardens of Babylon to the humble window boxes of today. This DIY guide will unlock the secrets to successfully growing bush beans in containers, bringing the joy of fresh produce right to your doorstep.
In today’s world, where access to fresh, healthy food can be a challenge, and grocery bills seem to climb higher every week, learning to grow bush beans containers is more than just a hobby; it’s a practical skill. I’m going to show you how to bypass the need for a large garden and still enjoy the satisfaction of nurturing your own food from seed to table. Plus, it’s incredibly rewarding to know exactly where your food comes from and that it’s free from harmful pesticides. So, grab your gardening gloves, and let’s get started on this exciting journey of growing your own delicious bush beans!

Growing Bush Beans in Containers: A Beginner’s Guide
Hey there, fellow gardening enthusiasts! I’m so excited to share my experience growing bush beans in containers. It’s a fantastic way to enjoy fresh, homegrown beans even if you don’t have a sprawling backyard. Trust me, it’s easier than you think, and the reward of snapping those crisp, delicious beans right off the plant is totally worth it. Let’s dive in!
Choosing the Right Container and Variety
Before we get our hands dirty, let’s talk about the essentials: the container and the bean variety.
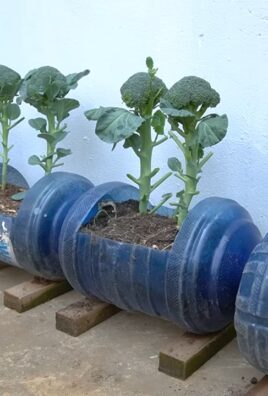
* Container Size: Bush beans don’t need a ton of space, but they do need enough room for their roots to spread. I’ve found that a container that’s at least 12 inches in diameter and 12 inches deep works perfectly. You can use plastic pots, terracotta pots, or even repurposed containers like large buckets or tubs. Just make sure whatever you choose has drainage holes! Soggy roots are a bean plant’s worst enemy.
* Drainage: I can’t stress this enough – drainage is key! If your container doesn’t have drainage holes, you’ll need to drill some. Aim for at least four holes, each about half an inch in diameter.
* Bush Bean Varieties: This is where the fun begins! There are tons of bush bean varieties to choose from, each with its own unique flavor and characteristics. Some of my favorites include:
* Blue Lake Bush: A classic choice, known for its high yields and excellent flavor.
* Contender: An early-maturing variety that’s perfect for shorter growing seasons.
* Provider: Another reliable variety that’s resistant to many common bean diseases.
* Derby: Produces long, slender pods with a delicious, slightly sweet flavor.
* Royal Burgundy: A beautiful variety with purple pods that turn green when cooked.
* Consider Your Climate: When choosing a variety, think about your local climate and growing season. Some varieties are more heat-tolerant than others, while others are better suited for cooler temperatures. Check the seed packet for specific recommendations.
Preparing the Soil and Planting
Now that we’ve got our container and bean variety sorted out, it’s time to get planting!
1. Gather Your Supplies: You’ll need:
* Your chosen container
* High-quality potting mix (not garden soil!)
* Bush bean seeds
* Watering can or hose
* Optional: Slow-release fertilizer
2. Fill the Container: Fill your container with potting mix, leaving about an inch or two of space at the top. Don’t use garden soil, as it tends to compact in containers and doesn’t provide adequate drainage. I like to use a mix that’s specifically formulated for containers, as it contains a good balance of nutrients and drainage.
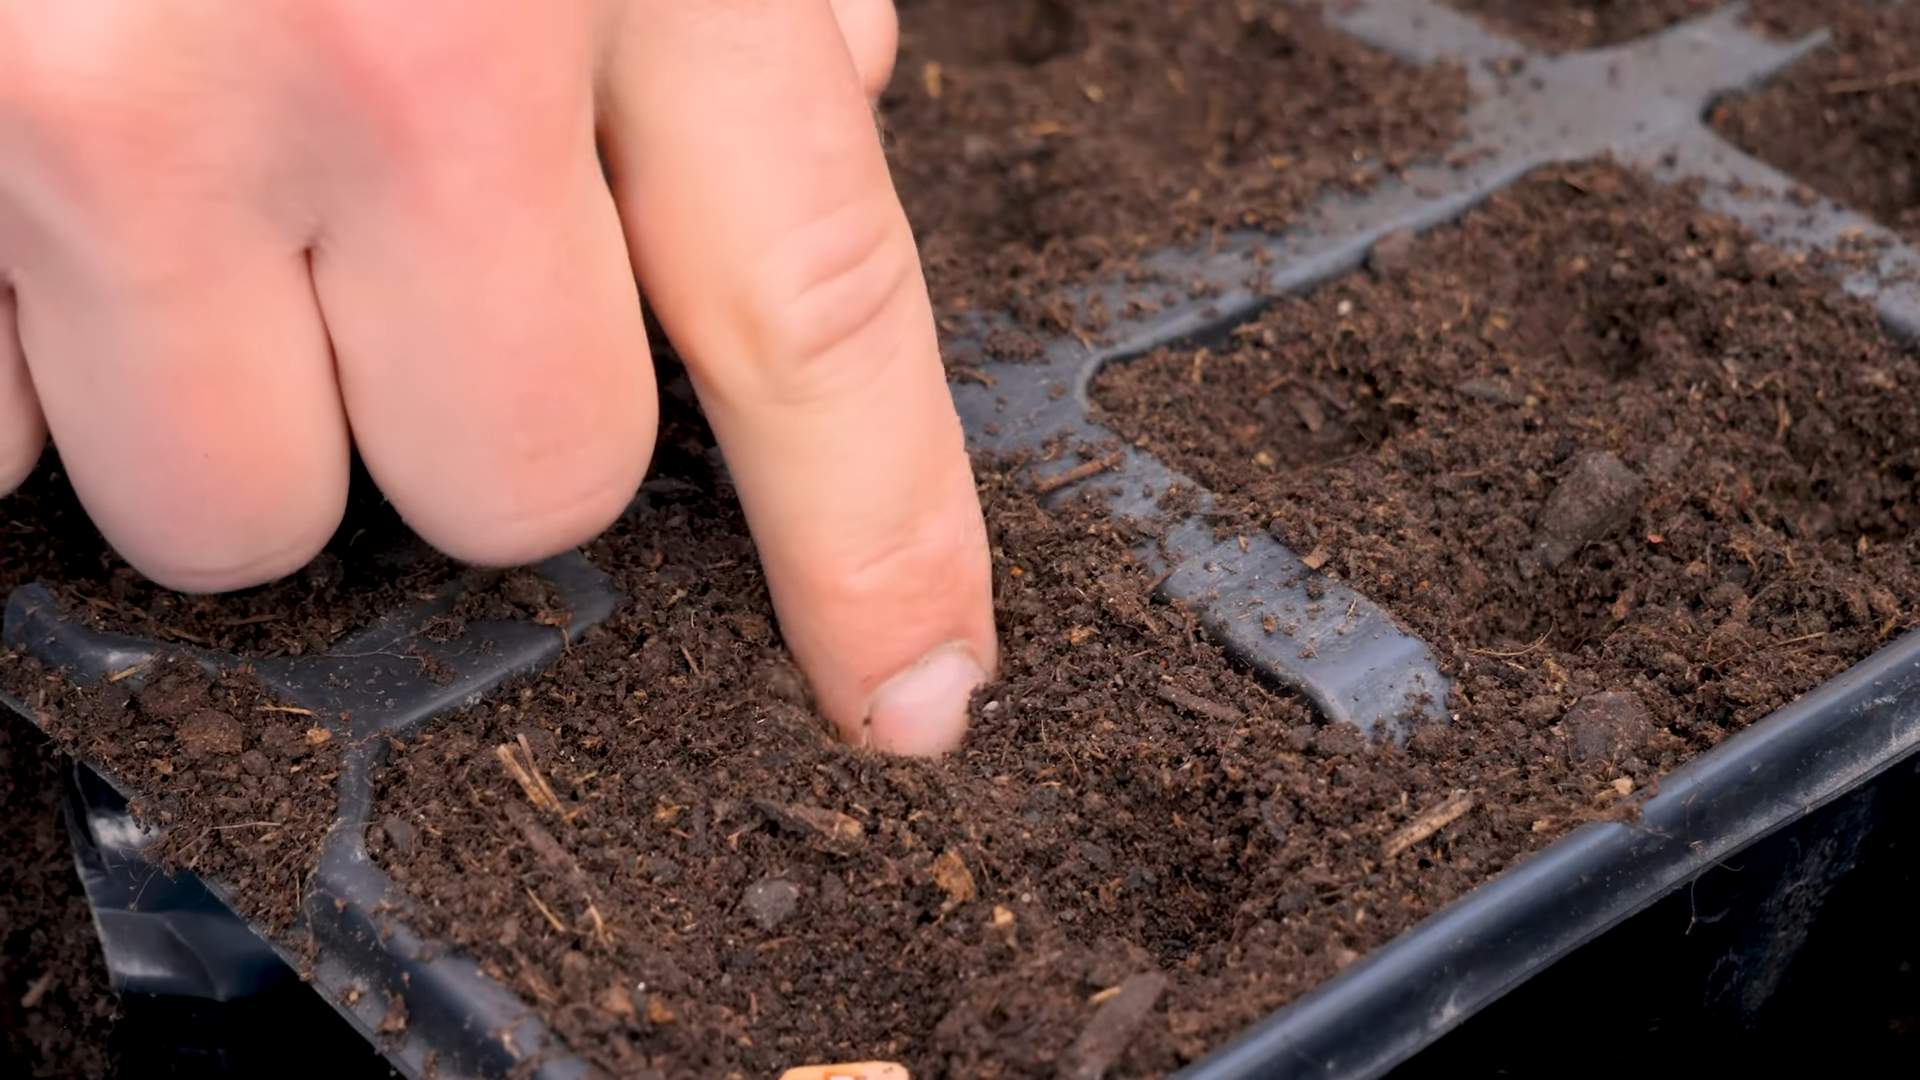
3. Sow the Seeds: Bush beans are pretty easy to germinate. I usually plant the seeds about 1 inch deep and 2-3 inches apart. You can plant multiple seeds in a single container, but be sure to give them enough space to grow.
4. Water Thoroughly: After planting, water the soil thoroughly until it’s evenly moist. Be careful not to overwater, as this can cause the seeds to rot.
5. Add Fertilizer (Optional): If you’re using a slow-release fertilizer, now’s the time to add it. Follow the instructions on the fertilizer package for the correct amount to use. I often skip this step and just amend the soil with compost tea every few weeks.
6. Choose a Sunny Spot: Bush beans need at least 6-8 hours of sunlight per day to thrive. Place your container in a sunny location where it will receive plenty of direct sunlight. A south-facing balcony or patio is usually ideal.
Caring for Your Bush Bean Plants
Once your bean plants have sprouted, it’s important to provide them with the right care to ensure a bountiful harvest.
1. Watering: Bush beans need consistent moisture, especially during hot weather. Water your plants regularly, keeping the soil evenly moist but not soggy. I usually water them deeply every few days, or more often if the soil feels dry to the touch. Check the soil moisture by sticking your finger about an inch into the soil. If it feels dry, it’s time to water.
2. Fertilizing: Bush beans are relatively light feeders, but they will benefit from occasional fertilization. I like to use a liquid fertilizer diluted to half strength every few weeks. You can also amend the soil with compost tea or worm castings. Avoid using fertilizers that are high in nitrogen, as this can promote leafy growth at the expense of bean production.
3. Support (Optional): While bush beans are generally self-supporting, they can sometimes benefit from a little extra support, especially if they’re growing in a windy location. You can use small stakes or a tomato cage to help keep the plants upright. I usually don’t bother with this unless I see the plants starting to flop over.
4. Pest Control: Keep an eye out for common bean pests like aphids, bean beetles, and spider mites. If you spot any pests, you can try spraying the plants with insecticidal soap or neem oil. I prefer to use organic pest control methods whenever possible. Handpicking pests is also an effective way to keep them under control.
5. Weed Control: Keep the container free of weeds, as they can compete with your bean plants for nutrients and water. Hand-pull any weeds that pop up. A layer of mulch can also help to suppress weed growth.
Harvesting Your Bush Beans
The best part of growing bush beans is, of course, harvesting them!
1. When to Harvest: Bush beans are typically ready to harvest about 50-60 days after planting. The pods should be firm, plump, and easy to snap off the plant. Don’t let the pods get too large or they will become tough and stringy.
2. How to Harvest: Gently snap the bean pods off the plant, being careful not to damage the stems or leaves. I like to use scissors or pruning shears to make a clean cut.
3. Harvest Regularly: Harvest your beans regularly, as this will encourage the plant to produce more beans. I usually harvest every few days, or even daily during peak season.
4. Enjoy Your Harvest: Freshly harvested bush beans are delicious steamed, sautéed, or added to salads and soups. You can also freeze or can them for later use. I love to blanch them quickly and then freeze them for use in winter stews.
Troubleshooting Common Problems
Even with the best care, you may encounter some problems when growing bush beans in containers. Here are a few common issues and how to address them:
* Yellowing Leaves: Yellowing leaves can be a sign of overwatering, underwatering, or nutrient deficiency. Check the soil moisture and adjust your watering schedule accordingly. If the soil is dry, water deeply. If the soil is soggy, allow it to dry out before watering again. You can also try fertilizing the plants with a balanced fertilizer.
* Lack of Bean Production: If your bean plants are growing well but not producing any beans, it could be due to a lack of pollination. Bush beans are self-pollinating, but sometimes they need a little help. You can try gently shaking the plants to help distribute the pollen.
* Pest Infestations: As mentioned earlier, bean plants are susceptible to various pests. Regularly inspect your plants for signs of pests and take action promptly if you spot any.
* Disease: Bean plants can also be affected by diseases like powdery mildew and bean rust. To prevent disease, provide good air circulation and avoid overhead watering. If you notice any signs of disease, remove the affected leaves and spray the plants with a fungicide.
Extending the Harvest
Want to keep those beans coming? Here are a few tips for extending your bush bean harvest:
* Succession Planting: Plant a new batch of seeds every few weeks to ensure a continuous supply of beans throughout the growing season.
* Choose Heat-Tolerant Varieties: If you live in a hot climate, choose bean varieties that are known to be heat-tolerant.
* Provide Shade: During the hottest part of the day, provide your bean plants with some shade to prevent them from overheating. You can use shade cloth or move the containers to a shadier location.
Growing bush beans in containers is a rewarding experience that anyone can enjoy. With a little bit of planning and care, you can harvest a bountiful crop of fresh, delicious beans right from your own patio or balcony. Happy gardening!
Conclusion
So, there you have it! Growing bush beans in containers is not only achievable, but it’s also incredibly rewarding. We’ve walked through the simple steps, highlighted the benefits, and armed you with the knowledge to cultivate your own thriving bean patch, even without a traditional garden. This DIY trick is a must-try for anyone seeking fresh, homegrown produce, regardless of their space constraints. Imagine stepping outside your door and harvesting crisp, delicious bush beans for your next meal – it’s a culinary dream within easy reach.
But the beauty of container gardening lies in its adaptability. Feel free to experiment with different varieties of bush beans. Consider trying ‘Blue Lake Bush,’ known for its exceptional flavor and productivity, or ‘Contender,’ a reliable and early-maturing option. You can also explore different container sizes and materials. While we recommended a 5-gallon container, larger containers will provide even more room for root development and potentially lead to higher yields. Just remember to adjust your watering and fertilization schedule accordingly.
Another exciting variation is companion planting. Try interplanting your bush beans with herbs like rosemary or thyme, which can help deter pests. Marigolds are also excellent companions, adding a splash of color and further discouraging unwanted insects. These additions not only enhance the aesthetic appeal of your container garden but also contribute to a healthier and more productive growing environment.
Don’t be afraid to get creative with your container placement, too. While bush beans thrive in full sun, you can strategically position your containers to maximize sunlight exposure throughout the day. If you live in a particularly hot climate, consider providing some afternoon shade to prevent the plants from overheating.
Ultimately, the key to success with growing bush beans in containers is observation and adaptation. Pay close attention to your plants’ needs, adjust your care routine as necessary, and don’t be discouraged by occasional setbacks. Gardening is a learning process, and every experience, whether successful or not, provides valuable insights.
We are confident that you’ll find growing bush beans in containers to be a fulfilling and delicious endeavor. So, grab your seeds, gather your supplies, and get ready to embark on this exciting gardening adventure. We encourage you to try this DIY trick and share your experiences with us! Let us know what varieties you chose, what challenges you encountered, and what successes you celebrated. Your feedback will not only inspire other readers but also help us refine our recommendations and provide even better guidance in the future. Share your photos and stories in the comments below – we can’t wait to see your container gardens flourish! Happy gardening!
Frequently Asked Questions (FAQ)
What is the best time of year to plant bush beans in containers?
The best time to plant bush beans is after the last frost in your area. Bush beans are warm-season crops and are sensitive to cold temperatures. Soil temperatures should be consistently above 60°F (15°C) for optimal germination. Check your local weather forecast and planting guides to determine the ideal planting window for your specific region. If you’re unsure, it’s always better to err on the side of caution and wait a week or two after the last expected frost. You can also start seeds indoors 2-3 weeks before the last frost to get a head start on the growing season, but be sure to harden them off before transplanting them into your containers.
How often should I water my container-grown bush beans?
Watering frequency depends on several factors, including the size of your container, the type of potting mix you’re using, the weather conditions, and the stage of plant growth. Generally, you should water your bush beans whenever the top inch of soil feels dry to the touch. During hot, dry weather, you may need to water daily, or even twice a day, especially if your containers are made of terracotta, which tends to dry out quickly. Avoid overwatering, as this can lead to root rot. Ensure your containers have adequate drainage holes to prevent water from accumulating at the bottom. A good rule of thumb is to water deeply until water drains out of the bottom of the container.
What kind of fertilizer should I use for bush beans in containers?
Bush beans benefit from regular fertilization, especially during their active growing season. A balanced fertilizer with an NPK ratio of 5-10-10 is a good choice. This means it contains 5% nitrogen, 10% phosphorus, and 10% potassium. Phosphorus promotes root development and flowering, while potassium supports overall plant health and disease resistance. Avoid using fertilizers that are too high in nitrogen, as this can lead to excessive foliage growth at the expense of bean production. You can use either a liquid fertilizer or a slow-release granular fertilizer. If using a liquid fertilizer, apply it every 2-3 weeks according to the package instructions. If using a slow-release fertilizer, incorporate it into the potting mix at planting time. You can also supplement with compost tea or other organic fertilizers to provide additional nutrients and beneficial microbes to the soil.
How much sunlight do bush beans need?
Bush beans require at least 6-8 hours of direct sunlight per day to thrive. Choose a location for your containers that receives ample sunlight throughout the day. If you don’t have a spot that gets full sun, try to provide as much sunlight as possible. Even a few hours of direct sunlight can make a difference. If you’re growing your beans indoors, you may need to supplement with grow lights to ensure they receive enough light. Rotate your containers regularly to ensure that all sides of the plants receive equal sunlight exposure.
What are some common pests and diseases that affect bush beans, and how can I prevent them?
Common pests that affect bush beans include aphids, bean beetles, and spider mites. Diseases include powdery mildew, bean rust, and anthracnose. To prevent pests and diseases, start with healthy seeds and use a well-draining potting mix. Avoid overcrowding your plants, as this can create a humid environment that encourages disease development. Regularly inspect your plants for signs of pests or diseases. If you spot any problems, take action immediately. You can use insecticidal soap or neem oil to control pests. For diseases, remove infected leaves and improve air circulation. Consider using organic fungicides if necessary. Companion planting with herbs like rosemary and thyme can also help deter pests.
How long does it take for bush beans to mature and be ready for harvest?
Bush beans typically mature in 50-60 days from planting. However, the exact time will depend on the variety of bean and the growing conditions. You’ll know your beans are ready to harvest when the pods are firm, plump, and easily snap off the plant. Avoid letting the pods become too large and tough, as this will affect their flavor and texture. Harvest your beans regularly to encourage continued production.
Can I grow bush beans in the same container as other plants?
Yes, you can grow bush beans in the same container as other plants, but it’s important to choose companion plants that will benefit the beans and not compete for resources. Good companion plants for bush beans include marigolds, rosemary, thyme, and nasturtiums. Avoid planting bush beans near onions or garlic, as these can inhibit their growth. Be sure to provide enough space for all the plants to grow and ensure that they all receive adequate sunlight and water.
Can I save seeds from my bush beans to plant next year?
Yes, you can save seeds from your bush beans to plant next year, but it’s important to choose open-pollinated varieties. Hybrid varieties will not produce true-to-type seeds. To save seeds, allow some of the bean pods to dry completely on the plant. Once the pods are dry and brittle, remove the seeds and store them in an airtight container in a cool, dry place. Be sure to label the container with the variety of bean and the date of harvest.


Leave a Comment