

Grow Bitter Melon Balcony: Imagine stepping onto your balcony and harvesting fresh, vibrant bitter melons, ready to add a unique and healthy twist to your meals. Sounds like a dream, right? Well, it doesn’t have to be! For centuries, cultivating food in small spaces has been a vital practice, especially in urban environments. From ancient rooftop gardens to modern-day apartment balconies, the desire to connect with nature and grow our own food remains strong.
But let’s be honest, growing bitter melon, especially on a balcony, can seem a bit daunting. Maybe you’ve tried before and struggled with space, sunlight, or even just knowing where to start. That’s where this DIY guide comes in! I’m here to share my tried-and-true tricks and hacks to help you successfully grow bitter melon balcony style, even if you’re a complete beginner.
This isn’t just about having a pretty plant; it’s about accessing fresh, nutritious food, reducing your carbon footprint, and experiencing the joy of nurturing something from seed to harvest. Plus, bitter melon is packed with health benefits! So, are you ready to transform your balcony into a thriving mini-farm? Let’s get started!
Bittermelon auf dem Balkon ziehen: Mein DIY-Leitfaden für eine reiche Ernte
Hallo liebe Gartenfreunde! Ich liebe es, frisches Gemüse direkt vom Balkon zu ernten. Dieses Jahr habe ich mich entschieden, Bittermelonen anzubauen, und ich muss sagen, es war ein voller Erfolg! Ich möchte meine Erfahrungen und Tipps mit euch teilen, damit auch ihr diese exotische Frucht auf eurem Balkon ziehen könnt. Keine Angst, es ist einfacher als ihr denkt!
Was du für den Bittermelon-Anbau auf dem Balkon brauchst:
* Bittermelonensamen: Am besten Bio-Samen von einem vertrauenswürdigen Händler.
* Anzuchttöpfe: Kleine Töpfe oder Anzuchtschalen für die Voranzucht.
* Anzuchterde: Spezielle Erde für die Anzucht von Sämlingen, die nährstoffarm und locker ist.
* Große Pflanzgefäße: Mindestens 20 Liter Volumen pro Pflanze, idealerweise mit guter Drainage.
* Kletterhilfe: Ein Rankgitter, Spalier oder ähnliches, da Bittermelonen Kletterpflanzen sind.
* Universelle Blumenerde: Hochwertige Blumenerde für die Pflanzgefäße.
* Organischer Dünger: Kompost, Hornspäne oder ein spezieller Gemüsedünger.
* Gießkanne oder Schlauch: Zum regelmäßigen Gießen.
* Sprühflasche: Für die Bewässerung der Blätter.
* Gartenschere: Zum Beschneiden der Pflanze.
* Geduld und Liebe: Das Wichtigste!
Phase 1: Die Voranzucht (ca. 4-6 Wochen vor dem letzten Frost)
Bittermelonen brauchen eine lange Wachstumsperiode, daher ist die Voranzucht im Haus unerlässlich. Ich beginne damit meistens im April.
1. Samen vorbereiten: Bittermelonensamen haben eine harte Schale. Um die Keimung zu beschleunigen, raue ich die Samen leicht mit Schleifpapier an oder ritze sie vorsichtig mit einem Messer ein. Achtung: Nicht zu tief schneiden, nur die äußere Schicht! Anschließend lege ich die Samen für 24 Stunden in lauwarmes Wasser. Das hilft, die Schale aufzuweichen.
2. Aussaat: Fülle die Anzuchttöpfe mit Anzuchterde. Lege in jeden Topf 1-2 Samen, etwa 1-2 cm tief. Bedecke die Samen mit Erde und gieße sie vorsichtig an.
3. Standort: Stelle die Anzuchttöpfe an einen warmen und hellen Ort. Eine Fensterbank über der Heizung ist ideal. Die Keimtemperatur sollte zwischen 25 und 30 Grad Celsius liegen.
4. Feuchtigkeit: Halte die Erde feucht, aber nicht nass. Ich sprühe die Erde regelmäßig mit einer Sprühflasche ein.
5. Keimung: Nach etwa 1-2 Wochen sollten die ersten Keimlinge erscheinen.
6. Vereinzeln: Wenn in einem Topf zwei Keimlinge aufgegangen sind, entferne den schwächeren, damit der stärkere genügend Platz hat.
Phase 2: Das Umpflanzen ins Freie (nach dem letzten Frost)
Sobald keine Frostgefahr mehr besteht (meist Mitte Mai), können die Jungpflanzen ins Freie umziehen.
1. Vorbereitung der Pflanzgefäße: Fülle die großen Pflanzgefäße mit hochwertiger Blumenerde. Mische etwas Kompost oder Hornspäne unter die Erde, um die Pflanzen mit Nährstoffen zu versorgen.
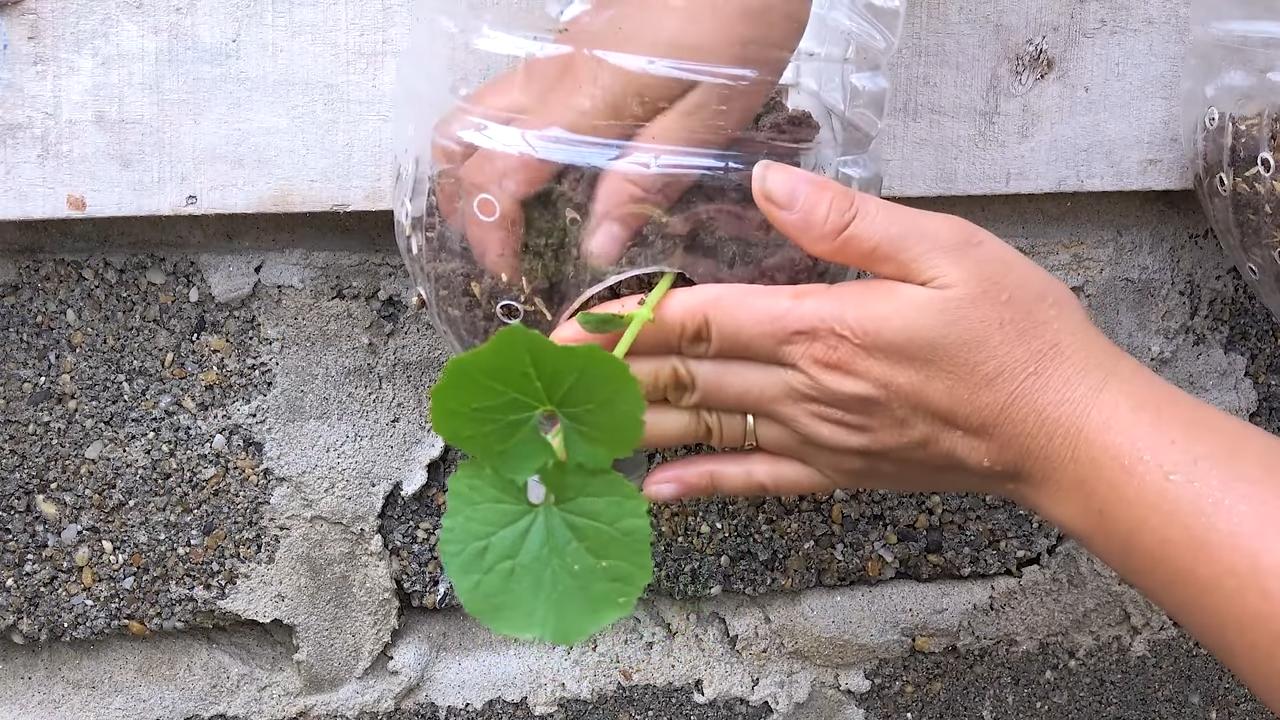
2. Umpflanzen: Hebe die Jungpflanzen vorsichtig aus den Anzuchttöpfen. Achte darauf, die Wurzeln nicht zu beschädigen. Setze die Pflanzen in die Pflanzgefäße und fülle die Lücken mit Erde auf. Gieße die Pflanzen gründlich an.
3. Standort: Bittermelonen lieben die Sonne! Wähle einen sonnigen und windgeschützten Standort auf deinem Balkon.
4. Kletterhilfe anbringen: Stelle sicher, dass die Pflanzen eine stabile Kletterhilfe haben. Ich habe ein Rankgitter an der Balkonwand befestigt.
Phase 3: Pflege und Düngung
Die richtige Pflege ist entscheidend für eine reiche Ernte.
1. Gießen: Bittermelonen brauchen regelmäßig Wasser, besonders an heißen Tagen. Gieße die Pflanzen am besten morgens oder abends, wenn die Sonne nicht scheint. Vermeide Staunässe.
2. Düngen: Dünge die Pflanzen alle 2-3 Wochen mit einem organischen Gemüsedünger. Ich verwende gerne Komposttee oder verdünnte Brennnesseljauche.
3. Beschneiden: Bittermelonen können sehr wuchern. Schneide die Pflanzen regelmäßig zurück, um die Fruchtbildung zu fördern. Entferne Seitentriebe, die keine Blüten tragen.
4. Bestäubung: Bittermelonen sind einhäusig, das heißt, sie haben männliche und weibliche Blüten auf derselben Pflanze. Die Bestäubung erfolgt in der Regel durch Insekten. Wenn du auf Nummer sicher gehen willst, kannst du die Blüten auch von Hand bestäuben. Übertrage dazu mit einem Pinsel Pollen von einer männlichen Blüte auf eine weibliche Blüte. Weibliche Blüten erkennst du an dem kleinen Fruchtansatz unterhalb der Blüte.
5. Schutz vor Schädlingen: Bittermelonen sind relativ robust, können aber von Blattläusen oder Spinnmilben befallen werden. Kontrolliere die Pflanzen regelmäßig und bekämpfe Schädlinge bei Bedarf mit natürlichen Mitteln, zum Beispiel mit einer Seifenlauge.
Zusätzliche Tipps für eine erfolgreiche Ernte:
* Mulchen: Bedecke die Erde um die Pflanzen mit Mulch, zum Beispiel mit Stroh oder Rasenschnitt. Das hält die Feuchtigkeit im Boden und unterdrückt Unkraut.
* Regelmäßige Kontrolle: Untersuche die Pflanzen regelmäßig auf Schädlinge und Krankheiten. Je früher du Probleme erkennst, desto einfacher lassen sie sich beheben.
* Geduld: Bittermelonen brauchen Zeit, um zu reifen. Die Erntezeit ist meist im Spätsommer oder Herbst.
Wann und wie du deine Bittermelonen erntest:
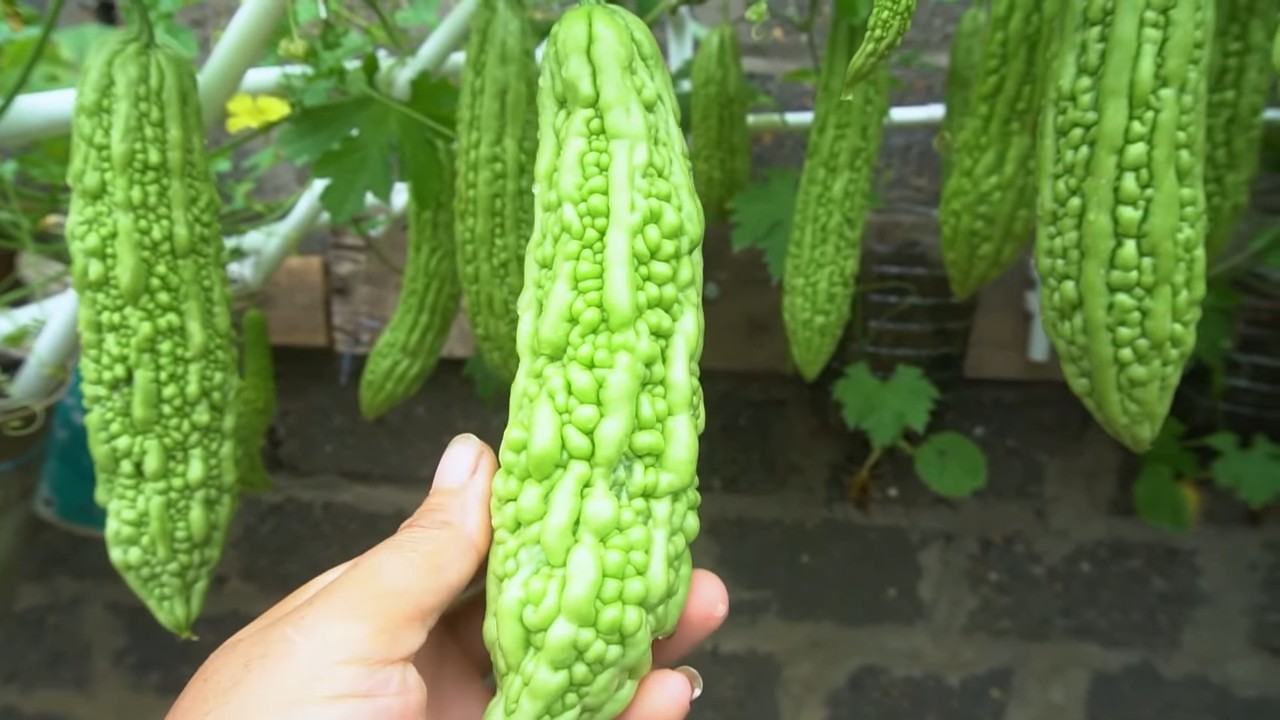
Die Bittermelonen sind erntereif, wenn sie ihre typische Form und Farbe erreicht haben. Die Farbe variiert je nach Sorte von grün über gelb bis orange. Die Früchte sollten sich fest anfühlen.
1. Ernte: Schneide die Bittermelonen mit einer Gartenschere vom Stiel ab.
2. Lagerung: Bittermelonen sind nicht lange haltbar. Am besten verarbeitest du sie sofort nach der Ernte. Im Kühlschrank halten sie sich einige Tage.
Bittermelonen in der Küche:
Bittermelonen haben einen sehr bitteren Geschmack, daher sollte man sie vor der Zubereitung blanchieren oder in Salzwasser einlegen. Sie können in Currys, Suppen oder Pfannengerichten verwendet werden. In Asien sind sie eine beliebte Zutat. Ich persönlich mag sie am liebsten gefüllt mit Hackfleisch und Reis.
Ich hoffe, dieser Leitfaden hilft dir dabei, deine eigenen Bittermelonen auf dem Balkon zu ziehen. Es ist ein lohnendes Projekt, das dich mit frischen, gesunden und exotischen Früchten belohnt. Viel Erfolg und viel Spaß beim Gärtnern!
Conclusion
So, there you have it! Growing bitter melon on your balcony isn’t just a whimsical gardening project; it’s a rewarding journey that brings fresh, healthy produce right to your doorstep. We’ve walked you through the essentials, from selecting the right variety and preparing the perfect potting mix to providing the necessary support and diligently caring for your burgeoning vines.
Why is this DIY trick a must-try? Because it empowers you to take control of your food source, even in the limited space of a balcony. Imagine the satisfaction of harvesting your own bitter melons, knowing exactly where they came from and how they were grown. Beyond the health benefits of consuming fresh, homegrown produce, this project offers a unique connection to nature and a sense of accomplishment that’s hard to replicate.
But the beauty of balcony gardening lies in its adaptability. Feel free to experiment with different trellis designs to maximize vertical space and create a stunning green wall. Consider companion planting with herbs like basil or marigolds to deter pests naturally and enhance the overall health of your bitter melon plants. You could even try growing different varieties of bitter melon, each with its unique shape, size, and flavor profile. For example, you can try growing the Chinese variety which is longer and lighter in color, or the Indian variety which is smaller and darker green with pointed ends.
Don’t be afraid to get creative with your container choices, either. While we recommended specific sizes and materials, you can repurpose old buckets, baskets, or even tires to create unique and eco-friendly planters. Just ensure that your chosen container provides adequate drainage and is sturdy enough to support the weight of the mature plant.
Ultimately, the success of your balcony bitter melon garden hinges on your dedication and willingness to learn. Pay close attention to your plants’ needs, adjust your watering and fertilizing schedule as necessary, and don’t hesitate to seek advice from fellow gardeners or online resources.
We are confident that with a little effort and patience, you can successfully grow bitter melon on your balcony and enjoy the fruits (or rather, vegetables) of your labor. So, grab your gardening gloves, gather your supplies, and embark on this exciting adventure. We encourage you to try this DIY trick and share your experiences with us. Post pictures of your thriving bitter melon vines, share your tips and tricks, and let us know what challenges you encountered and how you overcame them. Together, we can create a community of balcony gardeners who are passionate about growing their own food and sharing their knowledge with others. Let’s make balcony gardening a thriving trend! Remember, growing your own food, especially something as unique as bitter melon, is a rewarding experience that connects you to nature and provides you with fresh, healthy produce.
Frequently Asked Questions (FAQ)
1. What is the best time of year to start growing bitter melon on my balcony?
The best time to start growing bitter melon is in the late spring or early summer, after the last frost has passed. Bitter melon thrives in warm weather and requires a long growing season of at least 90-120 days. If you live in a region with a shorter growing season, you can start your seeds indoors 6-8 weeks before the last expected frost and transplant them to your balcony once the weather warms up. Starting indoors gives the plants a head start and ensures that they have enough time to mature and produce fruit before the end of the growing season. Consider using a heat mat to help with germination, as bitter melon seeds prefer warm soil.
2. How much sunlight does bitter melon need when grown on a balcony?
Bitter melon requires at least 6-8 hours of direct sunlight per day to thrive. Choose a location on your balcony that receives ample sunlight throughout the day. If your balcony doesn’t receive enough direct sunlight, you may need to supplement with artificial lighting, such as grow lights. Position the grow lights about 12-18 inches above the plants and keep them on for 12-14 hours per day. Rotate the plants regularly to ensure that all sides receive adequate light exposure. Insufficient sunlight can lead to leggy growth, reduced flowering, and smaller fruit.
3. What type of soil is best for growing bitter melon in containers?
Bitter melon prefers well-draining, fertile soil that is rich in organic matter. A good potting mix for bitter melon should consist of equal parts of compost, peat moss, and perlite or vermiculite. Compost provides essential nutrients, peat moss helps retain moisture, and perlite or vermiculite improves drainage. Avoid using garden soil in containers, as it can become compacted and poorly drained. You can also amend your potting mix with slow-release fertilizer to provide a steady supply of nutrients throughout the growing season. Ensure the pH of the soil is between 6.0 and 6.8 for optimal growth.
4. How often should I water my bitter melon plants on the balcony?
Water your bitter melon plants regularly, especially during hot and dry weather. The soil should be kept consistently moist but not waterlogged. Check the soil moisture level daily by sticking your finger about an inch into the soil. If the soil feels dry, it’s time to water. Water deeply, allowing the water to drain out of the bottom of the container. Avoid watering the foliage, as this can promote fungal diseases. During periods of heavy rain, you may need to reduce watering frequency to prevent overwatering. Mulching around the base of the plants can help retain moisture and suppress weeds.
5. What kind of support or trellis should I use for my bitter melon vines?
Bitter melon vines are vigorous climbers and require a sturdy support structure to grow on. You can use a trellis, fence, or even a sturdy tomato cage to support your vines. The trellis should be at least 6-8 feet tall to accommodate the mature size of the vines. Secure the vines to the trellis using plant ties or twine. As the vines grow, train them to climb the trellis by gently guiding them and attaching them to the support structure. Regular pruning can help keep the vines manageable and promote air circulation.
6. How do I deal with pests and diseases that may affect my bitter melon plants?
Bitter melon plants can be susceptible to various pests and diseases, including aphids, spider mites, whiteflies, and powdery mildew. Regularly inspect your plants for signs of infestation or disease. If you notice any pests, you can try spraying them with insecticidal soap or neem oil. For fungal diseases like powdery mildew, you can apply a fungicide or improve air circulation around the plants. Companion planting with herbs like basil or marigolds can also help deter pests naturally. Remove any infected leaves or stems promptly to prevent the spread of disease.
7. When and how do I harvest bitter melon?
Bitter melon is typically ready to harvest about 2-3 months after planting. The fruits should be harvested when they are still green and slightly immature. Overripe bitter melons will turn yellow or orange and become more bitter. Use a sharp knife or pruning shears to cut the fruits from the vine, leaving a short stem attached. Harvest bitter melons regularly to encourage continued production. The size and shape of the fruits will vary depending on the variety.
8. Can I save seeds from my homegrown bitter melon for future planting?
Yes, you can save seeds from your homegrown bitter melon for future planting. Allow a few fruits to fully mature on the vine until they turn yellow or orange. Once the fruits are ripe, harvest them and extract the seeds. Wash the seeds thoroughly and allow them to dry completely before storing them in an airtight container in a cool, dark place. Keep in mind that seeds saved from hybrid varieties may not produce plants that are true to type. It’s generally best to save seeds from open-pollinated varieties.
9. How can I reduce the bitterness of my homegrown bitter melon?
Bitter melon is known for its distinctive bitter taste, but there are several ways to reduce its bitterness. Soaking the sliced bitter melon in salted water for about 30 minutes can help draw out some of the bitterness. You can also blanch the sliced bitter melon in boiling water for a few minutes before cooking. Another trick is to remove the white pith and seeds from the center of the fruit, as this is where most of the bitterness is concentrated. Cooking bitter melon with acidic ingredients like vinegar or lemon juice can also help balance out the bitterness.
10. What are some creative ways to use my homegrown bitter melon in cooking?
Bitter melon can be used in a variety of dishes, both savory and sweet. It is commonly used in stir-fries, curries, soups, and salads. You can also stuff bitter melon with meat or vegetables and bake it. In some cultures, bitter melon is even used to make juice or tea. Experiment with different recipes and flavor combinations to find your favorite way to enjoy this unique vegetable. Consider pairing bitter melon with ingredients that have strong flavors, such as garlic, ginger, chili peppers, or soy sauce.


Leave a Comment