

Easy Terrace Sweet Potatoes: Your Guide to a Bountiful Harvest
Easy Terrace Sweet Potatoes – who knew growing your own delicious sweet potatoes could be so simple? I’ve always loved the taste of homegrown vegetables, but I never thought I could manage it in my tiny city terrace. That’s why I’m so excited to share these easy terrace sweet potato growing tips with you! This isn’t just about harvesting your own healthy, organic sweet potatoes; it’s about connecting with nature in a surprisingly rewarding way, even if you only have a small space.
The history of sweet potatoes is fascinating! Originating in Central and South America, these nutritious tubers have been a staple food for centuries, playing a vital role in various cultures. Now, you can experience the joy of cultivating this historical crop yourself, regardless of whether you have a sprawling garden or just a sunny terrace.
Why Grow Your Own Sweet Potatoes?
Let’s be honest, store-bought sweet potatoes are often bland and lack the vibrant flavor of freshly harvested ones. Growing your own Easy Terrace Sweet Potatoes guarantees you the sweetest, most flavorful spuds you’ve ever tasted. Plus, you’ll know exactly where your food comes from, avoiding pesticides and other potentially harmful chemicals. It’s a fantastic way to add a touch of nature to your urban life and enjoy the satisfaction of nurturing something from seed to harvest. And the best part? It’s easier than you think! This guide will walk you through every step, from choosing the right slips to harvesting your delicious, homegrown Easy Terrace Sweet Potatoes.
Growing Sweet Potatoes on Your Terrace: A Step-by-Step Guide
I love sweet potatoes, and nothing beats the taste of homegrown ones. Even if you don’t have a garden, you can still grow these delicious tubers on your terrace! This guide will walk you through the process, from preparing your slips to harvesting your sweet potato bounty.
Phase 1: Preparing Your Sweet Potato Slips
- Choosing the right sweet potatoes: Select healthy, organically grown sweet potatoes that are firm and free from blemishes. Avoid potatoes that are already sprouting excessively, as these might be too old.
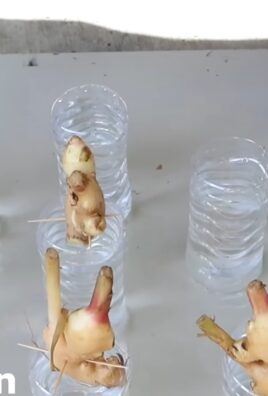
- Sprouting your sweet potatoes: Find a sunny spot indoors. Place your sweet potatoes in a shallow tray or container, partially buried in moist potting mix, leaving the top third exposed. Keep the soil consistently moist but not soggy. This usually takes 2-4 weeks, depending on the temperature and the variety of sweet potato.
- Growing strong slips: Once sprouts, or “slips”, emerge, you’ll want to encourage their growth. Ensure they receive plenty of sunlight. If necessary, supplement with grow lights, especially during shorter winter days. You’ll want slips that are at least 4-6 inches long with a good root system before planting.
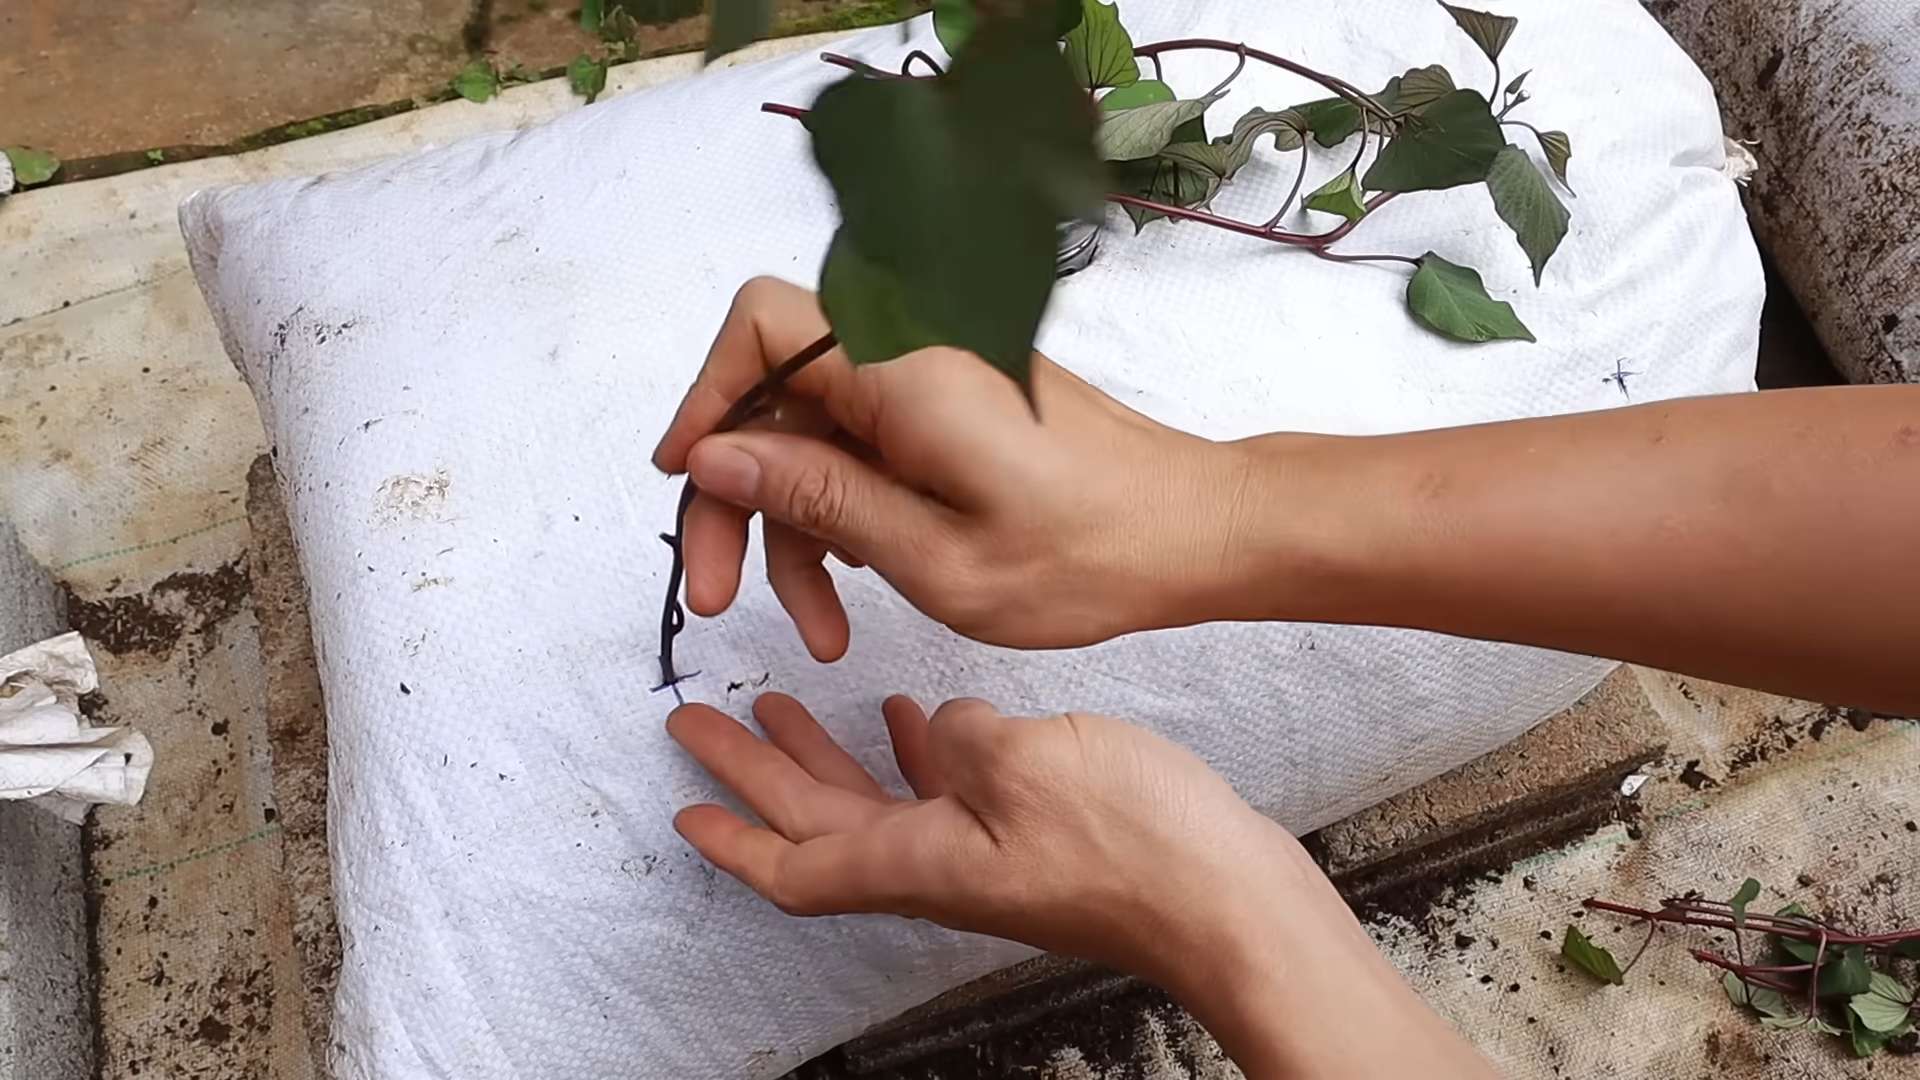
- Preparing the slips for planting: Gently remove the slips from the parent potato, being careful not to damage the roots. You can carefully separate multiple slips from a single potato. If the slips are very long, you can even cut them into smaller pieces, ensuring each piece has at least a few nodes (the small bumps along the stem where roots will grow). Allow the cut ends to callous over for a day or two before planting to prevent rot.
Phase 2: Planting and Growing Your Sweet Potatoes
- Choosing your containers: Sweet potatoes need ample space to grow. Large containers, at least 12-15 gallons in size, are ideal. Make sure they have drainage holes to prevent waterlogging. You can use plastic pots, fabric grow bags, or even repurposed containers like large buckets.
- Preparing the soil: Use a well-draining potting mix. You can amend your potting mix with compost to improve its fertility and water retention. Avoid using heavy clay soils, as they can hinder root development.
- Planting the slips: Plant your slips about 4-6 inches deep, spacing them about 12-18 inches apart, depending on the size of your container. Gently firm the soil around the base of each slip.
- Watering: Water thoroughly after planting. Keep the soil consistently moist but not waterlogged. Overwatering can lead to root rot. Check the soil moisture regularly by sticking your finger a couple of inches into the soil. Water when the top inch or two feels dry.
- Providing support: As your sweet potato plants grow, they may need support, especially if they are in larger containers or if you have a particularly vigorous variety. You can use stakes or trellises to keep the vines off the ground and prevent them from becoming tangled.
- Fertilizing: Feed your plants every 2-3 weeks with a balanced liquid fertilizer diluted to half strength. Over-fertilizing can negatively impact the taste of your sweet potatoes. Follow the instructions on your chosen fertilizer carefully.
- Sunlight: Sweet potatoes need at least 6-8 hours of direct sunlight per day. Choose a sunny spot on your terrace for your containers. If your terrace doesn’t receive enough sunlight, consider supplementing with grow lights.
- Pest and disease control: Regularly inspect your plants for pests and diseases. Common pests include aphids and spider mites. Treat any infestations promptly using organic pest control methods. Good air circulation can help prevent fungal diseases.
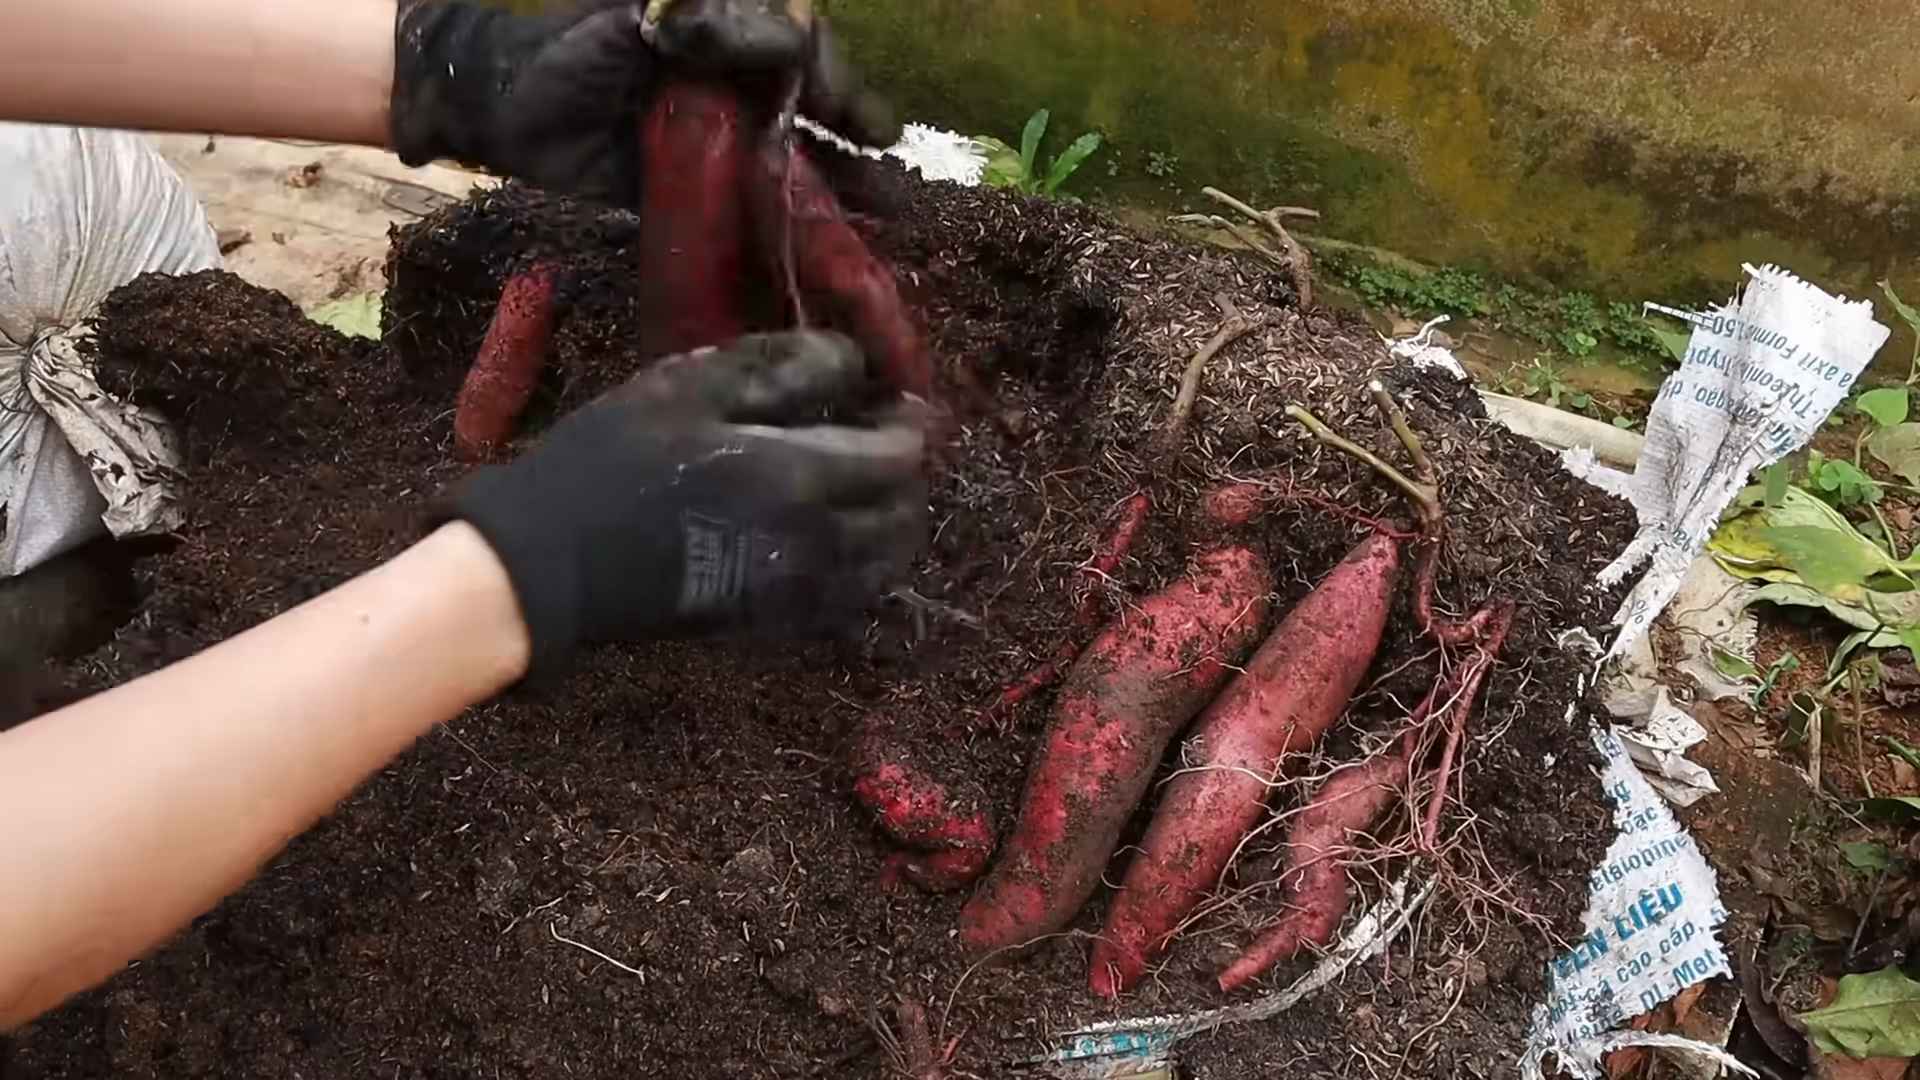
Phase 3: Harvesting Your Sweet Potatoes
- Knowing when to harvest: Sweet potatoes are typically ready for harvest 3-4 months after planting, depending on the variety and growing conditions. The vines will start to die back, and the leaves will turn yellow. This is a good indication that the potatoes are mature.
- Harvesting the potatoes: Carefully remove the plants from their containers. Gently loosen the soil around the roots to reveal the sweet potatoes. Be careful not to damage the potatoes during harvesting. Use a garden fork or your hands to gently lift the potatoes from the soil.
- Curing the sweet potatoes: After harvesting, allow the sweet potatoes to cure for 7-10 days in a warm, dry, and well-ventilated area. This process helps to improve their flavor and storage life. Spread the potatoes in a single layer on a flat surface, ensuring good air circulation.
- Storing the sweet potatoes: Once cured, store your sweet potatoes in a cool, dark, and dry place. Ideal storage temperatures are between 55-60°F (13-16°C). Store them in a well-ventilated container or crate, avoiding stacking them too deeply.
Phase 4: Troubleshooting
Common Problems and Solutions
- Yellowing leaves: This could indicate overwatering, underwatering, nutrient deficiency, or pest infestation. Check your watering schedule, soil moisture, and inspect for pests.
- Stunted growth: This could be due to insufficient sunlight, poor soil drainage, or nutrient deficiency. Ensure your plants receive adequate sunlight and use a well-draining potting mix.
- Root rot: This is often caused by overwatering. Ensure your containers have good drainage and avoid overwatering.
- Pest infestations: Regularly inspect your plants for pests and treat any infestations promptly using organic pest control methods.
Remember to always research the specific needs of your chosen sweet potato variety for optimal results!
Conclusion
This Easy Terrace Sweet Potato method is a game-changer for anyone who loves sweet potatoes but dreads the hassle of traditional baking or boiling. The results are unbelievably tender, perfectly caramelized, and bursting with natural sweetness. By simply utilizing the power of your outdoor terrace and the sun’s radiant heat, you achieve a depth of flavor impossible to replicate with conventional cooking methods. This technique minimizes cleanup, requires minimal effort, and delivers exceptional results, making it a truly must-try for both seasoned cooks and kitchen novices alike. The unique caramelization achieved through sun-baking creates a complex flavor profile that elevates the humble sweet potato to a culinary masterpiece. You’ll be amazed at how simple it is to achieve such impressive results!
Beyond the basic recipe, the possibilities are endless. Experiment with different varieties of sweet potatoes – from the classic orange to the vibrant purple varieties. Each type offers a unique flavor and texture, adding exciting variations to your sun-baked sweet potatoes. Consider adding a sprinkle of herbs like rosemary or thyme before placing them on the terrace for an aromatic twist. A drizzle of maple syrup or a sprinkle of cinnamon after baking adds another layer of deliciousness. For a savory option, try adding a dash of smoked paprika or a sprinkle of chili flakes for a spicy kick. Feel free to get creative and personalize your Easy Terrace Sweet Potatoes to match your taste preferences. The beauty of this method lies in its adaptability and simplicity.
We strongly encourage you to try this Easy Terrace Sweet Potato recipe and share your experience with us! Tag us on social media with your photos and let us know how your sun-baked sweet potatoes turned out. We’d love to see your culinary creations and hear about your favorite variations. This simple yet effective method is a testament to the power of nature and a celebration of fresh, flavorful ingredients. Embrace the sunshine, embrace the simplicity, and embrace the deliciousness of Easy Terrace Sweet Potatoes! It’s a culinary adventure waiting to happen, right on your terrace.
Frequently Asked Questions
What type of terrace is best suited for this method?
Ideally, you’ll want a terrace that receives ample direct sunlight throughout the day. A south-facing terrace (in the Northern Hemisphere) is generally ideal. The key is consistent, strong sunlight to ensure even cooking and caramelization. While a partially shaded terrace might work, the cooking time will be significantly longer and the results may be less consistent.
How long does it take to cook the sweet potatoes using this method?
The cooking time varies depending on the size of the sweet potatoes, the intensity of the sunlight, and the desired level of tenderness. Smaller sweet potatoes might take 4-6 hours, while larger ones could require 6-8 hours or even longer. Regularly check the potatoes for doneness by inserting a fork. They are ready when they are easily pierced and tender throughout.
Can I use this method in other climates?
Yes, this method can be adapted to various climates, but the success depends heavily on the availability of strong sunlight. In areas with less intense sunlight, the cooking time will be significantly longer. You might need to adjust the cooking time based on your local climate and weather conditions. Consider using a glass cover to trap heat and speed up the cooking process in less sunny conditions.
What if my sweet potatoes are not fully cooked after the estimated time?
If your sweet potatoes are not fully cooked after the estimated time, simply leave them on the terrace for a longer period, checking them periodically. You can also consider covering them with a glass or plastic cover to trap more heat and accelerate the cooking process. Remember to monitor them closely to prevent burning.
Can I store leftover Easy Terrace Sweet Potatoes?
Yes, leftover Easy Terrace Sweet Potatoes can be stored in an airtight container in the refrigerator for up to 3-4 days. They can be reheated in the microwave or oven. The texture might slightly change after reheating, but they will still retain their delicious flavor.
What are some other vegetables I can cook using this method?
While this recipe focuses on sweet potatoes, you can experiment with other root vegetables like carrots, parsnips, and beets. However, keep in mind that cooking times may vary depending on the type and size of the vegetable. Always check for doneness by inserting a fork.
Are there any safety concerns I should be aware of?
Always supervise the cooking process, especially if children or pets are around. Ensure the terrace is clean and free of any debris that could contaminate the sweet potatoes. Use caution when handling hot sweet potatoes after cooking. Let them cool slightly before handling to avoid burns.
What if it rains?
If it rains, you will need to bring your sweet potatoes inside to prevent them from getting soggy. You can finish cooking them in an oven at a low temperature (around 300°F or 150°C) until they are tender. Alternatively, you can wait for a sunny day to continue the cooking process.
Leave a Comment