

Easy Sweet Melon Growing – who doesn’t dream of biting into a juicy, sun-ripened melon grown right in their own backyard? Imagine the sweet, refreshing taste of a melon you nurtured from seed to fruit, knowing exactly what went into its care. For centuries, melons have been cultivated across the globe, from the ancient Egyptians who revered them to the vibrant markets of Asia where they symbolize prosperity and good fortune. But let’s be honest, achieving that perfect sweetness and size can sometimes feel like a gardener’s gamble.
That’s where this DIY guide comes in! I’m here to share some tried-and-true tricks and hacks that will transform your melon-growing experience. Forget complicated techniques and expensive equipment. We’re focusing on simple, effective methods that anyone can use, regardless of their gardening experience.
Why do you need these tips? Because store-bought melons often lack the intense flavor and satisfying texture of homegrown varieties. Plus, growing your own allows you to avoid harmful pesticides and enjoy the satisfaction of harvesting your own delicious fruit. With these easy sweet melon growing secrets, you’ll be well on your way to enjoying a bountiful harvest of incredibly sweet and juicy melons this season. Let’s get started!
So einfach baust du deine eigenen süßen Melonen an!
Ich liebe Melonen! Und was gibt es Besseres, als eine saftige, süße Melone aus dem eigenen Garten zu ernten? Es mag einschüchternd wirken, aber glaub mir, mit ein paar Tricks und Kniffen ist der Melonenanbau auch für Anfänger super easy. In diesem Artikel zeige ich dir, wie du Schritt für Schritt deine eigenen köstlichen Melonen ziehen kannst. Los geht’s!
Die richtige Melonensorte wählen
Bevor wir loslegen, ist es wichtig, die richtige Melonensorte für dein Klima und deinen Garten auszuwählen. Es gibt unzählige Sorten, von Wassermelonen über Honigmelonen bis hin zu Cantaloupe-Melonen.
* Wassermelonen: Brauchen viel Platz und Sonne. Beliebte Sorten sind ‘Sugar Baby’ (klein und frühreif) oder ‘Crimson Sweet’ (groß und süß).
* Honigmelonen: Sind etwas anspruchsloser als Wassermelonen und reifen oft schneller. ‘Honey Dew’ ist eine klassische Sorte.
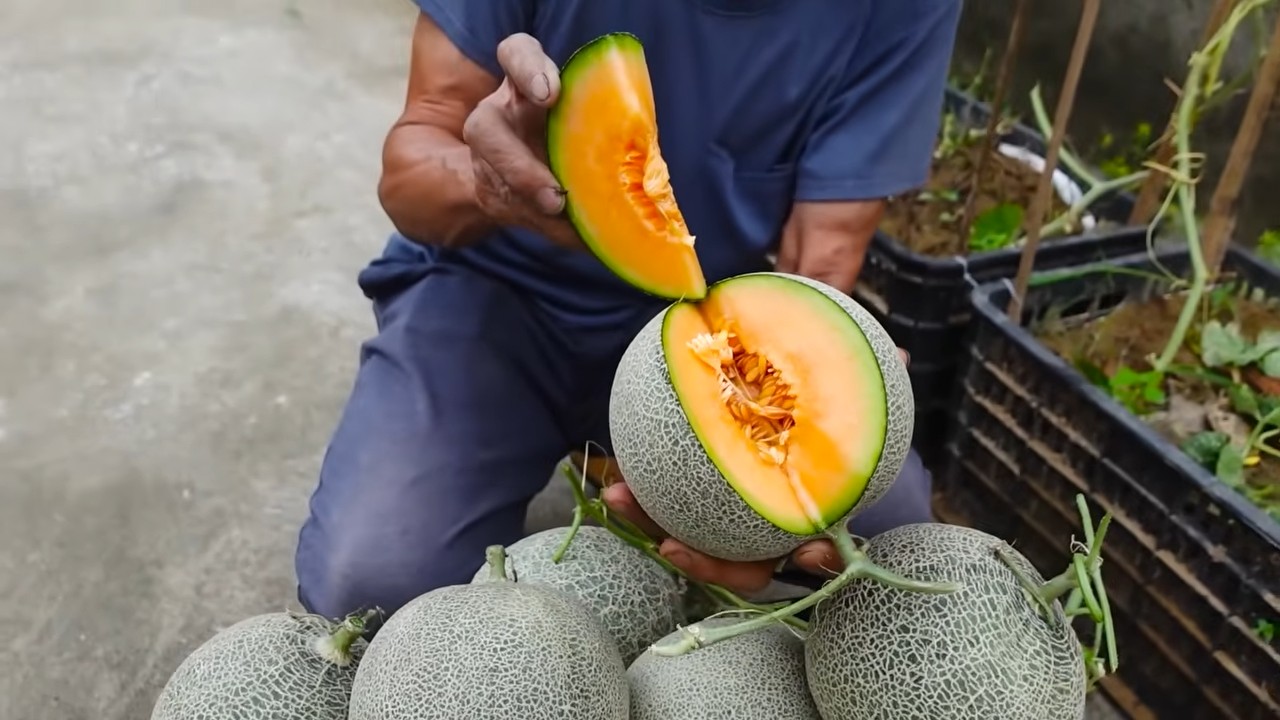
* Cantaloupe-Melonen: Haben ein aromatisches, orangefarbenes Fruchtfleisch. ‘Charentais’ ist eine sehr beliebte und wohlschmeckende Sorte.
* Kleine Melonen: Wenn du wenig Platz hast, sind Mini-Wassermelonen oder Zuckermelonen eine gute Wahl.
Wichtig: Achte beim Kauf von Saatgut oder Jungpflanzen auf die Angaben zur Reifezeit. Je kürzer die Reifezeit, desto besser, besonders wenn du in einer Region mit kurzen Sommern wohnst.
Vorbereitung ist alles: Der perfekte Standort und Boden
Melonen sind Sonnenanbeter! Sie brauchen mindestens 6-8 Stunden direkte Sonneneinstrahlung pro Tag, um optimal zu wachsen und süße Früchte zu entwickeln.
* Standort: Wähle einen sonnigen, warmen und windgeschützten Platz in deinem Garten.
* Boden: Melonen lieben lockeren, gut durchlässigen und nährstoffreichen Boden. Schwere Lehmböden solltest du vor dem Pflanzen mit Kompost oder Sand verbessern.
* pH-Wert: Der ideale pH-Wert für Melonen liegt zwischen 6,0 und 7,0.
Mein Tipp: Bereite den Boden am besten schon im Herbst vor, indem du Kompost oder gut verrotteten Mist einarbeitest. So haben die Nährstoffe genügend Zeit, sich zu zersetzen und den Boden anzureichern.
Aussaat und Anzucht: Der frühe Vogel fängt den Wurm (oder die Melone!)
Du hast zwei Möglichkeiten: Entweder du säst die Melonen direkt ins Beet oder du ziehst sie in Töpfen vor. Ich empfehle die Voranzucht, besonders in kühleren Regionen, da du so den Pflanzen einen Vorsprung verschaffst.
Aussaat im Haus (ca. 4-6 Wochen vor dem letzten Frost):
1. Saatgut vorbereiten: Lege die Melonensamen für 24 Stunden in lauwarmes Wasser. Das beschleunigt die Keimung.
2. Aussaatgefäße vorbereiten: Fülle kleine Töpfe (ca. 8-10 cm Durchmesser) mit Anzuchterde.
3. Aussaat: Lege 2-3 Samen pro Topf ca. 2 cm tief in die Erde.
4. Angießen: Gieße die Erde vorsichtig an, sodass sie feucht, aber nicht nass ist.
5. Warm stellen: Stelle die Töpfe an einen warmen Ort (ca. 22-25°C). Eine Heizmatte kann hier sehr hilfreich sein.
6. Feucht halten: Halte die Erde gleichmäßig feucht, aber vermeide Staunässe.
7. Pikieren: Sobald die Keimlinge 2-3 echte Blätter haben, kannst du sie pikieren. Das bedeutet, du entfernst die schwächsten Pflanzen und lässt nur die stärkste Pflanze pro Topf stehen.
Direktsaat ins Beet (nach dem letzten Frost):
1. Boden vorbereiten: Lockere den Boden gründlich auf und entferne Unkraut.
2. Aussaat: Säe die Samen in Gruppen von 2-3 Samen im Abstand von ca. 60-90 cm.
3. Angießen: Gieße die Erde vorsichtig an.
4. Schutz: Decke die Aussaat mit einem Vlies ab, um sie vor Kälte und Schädlingen zu schützen.
Wichtig: Melonen sind frostempfindlich! Warte unbedingt den letzten Frost ab, bevor du die Jungpflanzen ins Freie setzt oder direkt ins Beet säst.
Aussetzen und Pflegen: Gib deinen Melonen, was sie brauchen!
Sobald die Jungpflanzen kräftig genug sind (ca. 15-20 cm hoch) und keine Frostgefahr mehr besteht, kannst du sie ins Freie setzen.
1. Abhärten: Gewöhne die Jungpflanzen langsam an die Bedingungen im Freien, indem du sie tagsüber für einige Stunden nach draußen stellst und sie abends wieder reinholst.
2. Pflanzlöcher vorbereiten: Grabe Pflanzlöcher im Abstand von ca. 60-90 cm.
3. Pflanzen: Setze die Jungpflanzen vorsichtig in die Pflanzlöcher und fülle sie mit Erde auf.
4. Angießen: Gieße die Pflanzen gründlich an.
5. Mulchen: Bedecke den Boden um die Pflanzen mit Mulch (z.B. Stroh oder Holzhackschnitzel). Das hält den Boden feucht, unterdrückt Unkraut und wärmt den Boden.
Pflege während der Wachstumsphase:
* Gießen: Melonen brauchen viel Wasser, besonders während der Fruchtbildung. Gieße regelmäßig und gründlich, aber vermeide Staunässe. Am besten gießt du morgens, damit die Blätter über Tag abtrocknen können.
* Düngen: Dünge die Melonen regelmäßig mit einem organischen Dünger (z.B. Komposttee oder Hornspäne).
* Ausgeizen: Entferne Seitentriebe, um die Energie der Pflanze auf die Fruchtbildung zu konzentrieren.
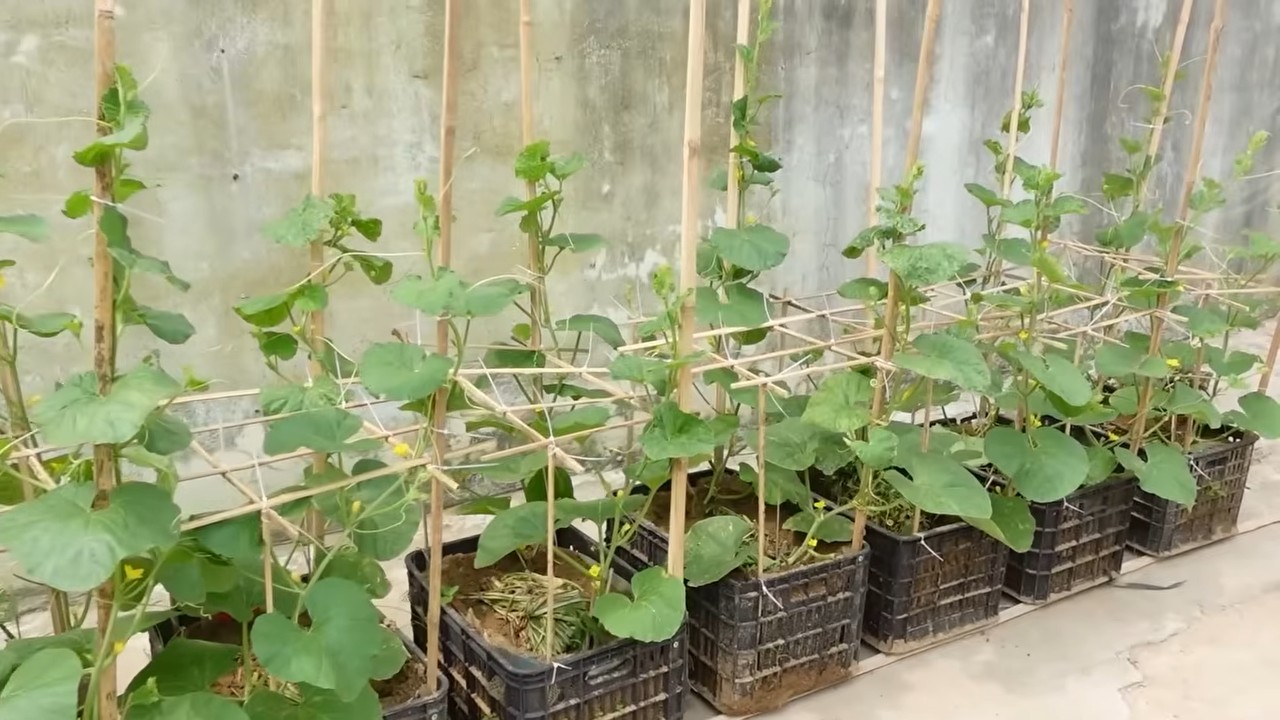
* Rankhilfe: Wenn du wenig Platz hast, kannst du die Melonen an einer Rankhilfe hochziehen.
* Schutz vor Schädlingen: Kontrolliere die Pflanzen regelmäßig auf Schädlinge wie Schnecken, Blattläuse oder Gurkenmosaikvirus. Bei Bedarf kannst du biologische Schädlingsbekämpfungsmittel einsetzen.
Mein Tipp: Lege unter die wachsenden Melonenbretter oder Steine. Das verhindert, dass die Früchte direkten Kontakt mit dem feuchten Boden haben und faulen.
Erntezeit: Der Lohn deiner Mühe!
Die Erntezeit ist der aufregendste Teil! Aber wie erkennst du, ob eine Melone reif ist?
* Wassermelonen: Achte auf den Klang. Wenn du auf die Melone klopfst und sie hohl klingt, ist sie reif. Außerdem sollte die Stelle, an der die Melone auf dem Boden lag, gelblich verfärbt sein.
* Honigmelonen: Die Schale sollte sich leicht gelblich verfärben und einen süßen Duft verströmen.
* Cantaloupe-Melonen: Die Schale sollte sich leicht vom Stiel lösen lassen.
Wichtig: Ernte die Melonen vorsichtig, um sie nicht zu beschädigen. Schneide den Stiel mit einem scharfen Messer ab.
Häufige Probleme und Lösungen: Keine Panik, ich helfe dir!
Auch beim Melonenanbau können Probleme auftreten. Hier sind einige der häufigsten Probleme und wie du sie lösen kannst:
* Blütenendfäule: Braune, faulige Stellen an der Unterseite der Früchte. Ursache ist meist Calciummangel. Lösung: Dünge mit einem calciumhaltigen Dünger und achte auf eine gleichmäßige Bewässerung.
* Falscher Mehltau: Weißer, mehlartiger Belag auf den Blättern. Lösung: Entferne befallene Blätter und behandle die Pflanzen mit einem Fungizid.
* Schnecken: Fressen an den Blättern und Früchten. Lösung: Stelle Schneckenfallen auf oder sammle die Schnecken ab.
* Gurkenmosaikvirus
Conclusion
So, there you have it! Mastering the art of easy sweet melon growing doesn’t require a green thumb blessed by the gardening gods. It’s about understanding the plant’s needs, providing the right environment, and employing a few clever DIY tricks to maximize sweetness and yield. We’ve explored how simple adjustments to your watering schedule, strategic pruning, and even a homemade sugar boost can transform your melons from ordinary to extraordinary.
Why is this DIY approach a must-try? Because it empowers you to take control of your melon’s destiny! Store-bought melons often lack the intense sweetness and satisfying texture we crave. By implementing these techniques, you’re not just growing melons; you’re cultivating an experience – a burst of summer flavor that’s uniquely yours. Plus, there’s an unparalleled satisfaction in harvesting something you’ve nurtured from seed to succulent fruit.
But don’t stop there! Experimentation is key to unlocking the full potential of your melon patch. Consider these variations:
* Honey Infusion: Try injecting a small amount of diluted honey into the melon a few days before harvest for an extra layer of sweetness. Be careful not to overdo it, as this can attract pests.
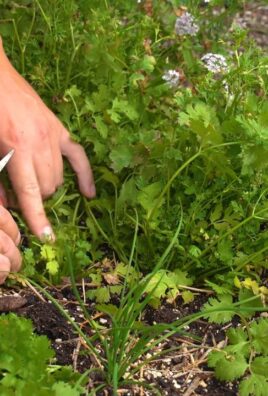
* Companion Planting Power: Explore companion planting to naturally deter pests and improve soil health. Marigolds, nasturtiums, and basil are excellent choices for melon companions.
* Vertical Growing: If space is limited, consider training your melon vines to grow vertically on a trellis. This improves air circulation and reduces the risk of fungal diseases.
* Different Melon Varieties: Once you’ve mastered the basics, branch out and try different melon varieties! Each type has its unique flavor profile and growing requirements. Honeydew, cantaloupe, watermelon – the possibilities are endless.
* Soil Amendments: While we focused on a simple sugar boost, consider experimenting with other soil amendments like Epsom salts (for magnesium) or bone meal (for phosphorus) to further enhance nutrient availability. Always test your soil first to determine its specific needs.
We wholeheartedly encourage you to put these DIY tricks to the test in your own garden. The results might surprise you! Imagine biting into a perfectly ripe, intensely sweet melon that you grew yourself – a true testament to your gardening prowess.
Don’t be afraid to get your hands dirty, embrace the learning process, and most importantly, have fun! Gardening should be a joyful experience, and the reward of a delicious, homegrown melon is well worth the effort.
We’re eager to hear about your experiences! Share your successes, challenges, and any variations you’ve tried in the comments below. Let’s create a community of melon-growing enthusiasts and learn from each other’s journeys. Together, we can unlock the secrets to growing the sweetest, most flavorful melons imaginable. Happy gardening!
Frequently Asked Questions (FAQ)
Q: How often should I water my melon plants?
A: Watering frequency depends on several factors, including your climate, soil type, and the stage of growth. Generally, young melon plants need consistent moisture to establish strong roots. Water deeply and regularly, aiming for about 1-2 inches of water per week. As the melons begin to ripen, reduce watering to concentrate the sugars and enhance sweetness. Overwatering during this stage can lead to bland, watery melons. Check the soil moisture regularly by sticking your finger about an inch deep. If it feels dry, it’s time to water.
Q: What kind of sugar should I use for the sugar boost?
A: Plain white granulated sugar is the most effective and readily available option for the sugar boost. Avoid using brown sugar, as it contains molasses that can attract pests. Dissolve the sugar in water as directed in the instructions to create a simple syrup. The goal is to provide a readily available source of sucrose for the plant to convert into fructose and glucose, the sugars that contribute to sweetness.
Q: When is the best time to harvest my melons?
A: Determining the perfect harvest time is crucial for maximizing sweetness and flavor. Here are a few indicators to look for:
* The stem near the melon should start to dry and crack. This indicates that the melon is no longer actively drawing nutrients from the vine.
* The rind should change color. The specific color change depends on the melon variety, but generally, it will become more vibrant and less dull.
* The melon should have a sweet aroma. Sniff the blossom end of the melon. If it smells sweet and fragrant, it’s likely ripe.
* The “thump” test. Gently thump the melon with your knuckles. A ripe melon will have a deep, hollow sound.
* For cantaloupes, the stem should slip easily from the vine with gentle pressure. This is a reliable indicator of ripeness.
Q: My melon plants are attracting pests. What can I do?
A: Pests can be a frustrating challenge for melon growers. Here are a few strategies for pest control:
* Companion planting: As mentioned earlier, planting marigolds, nasturtiums, and basil near your melon plants can help deter pests naturally.
* Row covers: Use row covers to protect young plants from pests early in the season. Remove the covers when the plants begin to flower to allow for pollination.
* Insecticidal soap: Insecticidal soap is an effective organic treatment for aphids, whiteflies, and other soft-bodied insects.
* Neem oil: Neem oil is another organic option that can control a wide range of pests and fungal diseases.
* Handpicking: For larger pests like squash bugs or cucumber beetles, handpicking them off the plants can be an effective control method.
* Attract beneficial insects: Encourage beneficial insects like ladybugs and lacewings to your garden by planting flowers that attract them. These insects will prey on harmful pests.
Q: Can I use this DIY trick on all types of melons?
A: Yes, the principles of this DIY trick can be applied to most types of melons, including cantaloupe, honeydew, and watermelon. However, the specific watering schedule and sugar boost concentration may need to be adjusted based on the variety. Research the specific needs of your chosen melon variety for best results. For example, watermelons generally require more water than cantaloupes.
Q: My melons are splitting. What’s causing this?
A: Melon splitting is usually caused by inconsistent watering. When the soil dries out and then is suddenly saturated with water, the melon can absorb too much water too quickly, causing the rind to crack. To prevent splitting, maintain consistent soil moisture and avoid overwatering, especially as the melons are ripening. Mulching around the plants can also help retain moisture and prevent fluctuations in soil moisture levels.
Q: How can I improve pollination for my melon plants?
A: Proper pollination is essential for fruit set. Here are a few tips to improve pollination:
* Attract pollinators: Plant flowers that attract bees and other pollinators near your melon plants.
* Hand-pollination: If you’re not seeing enough bee activity, you can hand-pollinate your melon flowers. Use a small paintbrush to transfer pollen from the male flowers to the female flowers.
* Provide water for pollinators: Place a shallow dish of water with pebbles in your garden to provide a water source for bees and other pollinators.
* Avoid using pesticides: Pesticides can harm pollinators, so avoid using them in your garden, especially when the plants are flowering.
Q: What kind of soil is best for growing melons?
A: Melons thrive in well-drained, fertile soil with a pH of 6.0 to 6.8. Amend your soil with compost or other organic matter to improve drainage and fertility. Avoid heavy clay soils, as they can retain too much water and lead to root rot. If you have clay soil, consider growing your melons in raised beds or containers.
Q: How much sunlight do melon plants need?
A: Melon plants need at least 6-8 hours of direct sunlight per day to thrive. Choose a sunny location in your garden for your melon patch. If you live in a hot climate, some afternoon shade may be beneficial to prevent the plants from overheating.
Q: Can I grow melons in containers?
A: Yes, you can grow melons in containers, but you’ll need to choose a large container (at least 20 gallons) and provide adequate support for the vines. Dwarf or bush varieties of melons are best suited for container growing. Be sure to water and fertilize your container-grown melons regularly, as they will dry out more quickly than melons grown in the ground.


Leave a Comment