

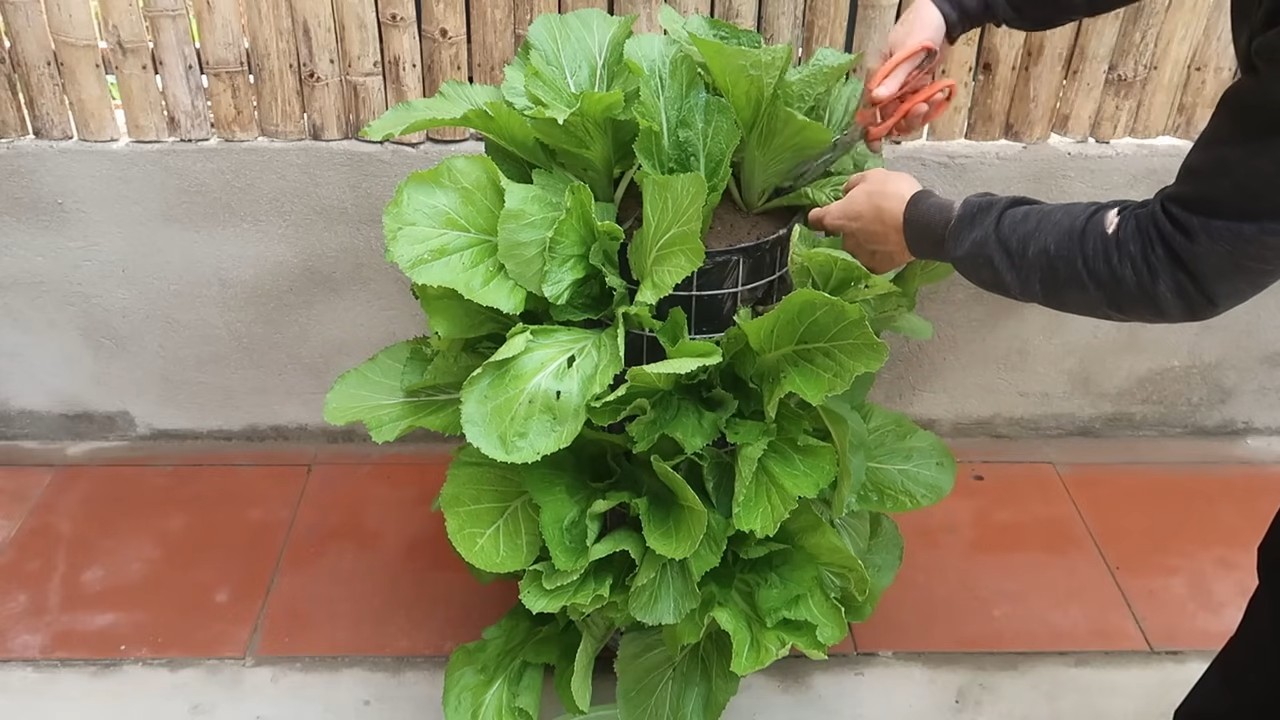
DIY Vertical Garden Watering: Tired of lugging around a watering can and struggling to reach those plants perched high in your vertical garden? I know the feeling! Creating a lush, thriving vertical garden is incredibly rewarding, adding a touch of green to even the smallest spaces. But let’s be honest, keeping those vertical beauties properly hydrated can quickly become a chore.
Vertical gardens, while a relatively modern trend in urban landscaping, draw inspiration from ancient practices like the Hanging Gardens of Babylon, showcasing humanity’s long-standing desire to bring nature closer. Today, with space at a premium, vertical gardens are booming, offering a fantastic solution for apartment dwellers and anyone looking to maximize their green footprint.
That’s where this DIY guide comes in! I’m going to share some clever and easy-to-implement DIY vertical garden watering tricks and hacks that will save you time, water, and a whole lot of backache. Imagine a system that automatically delivers the perfect amount of moisture to each plant, ensuring healthy growth and vibrant blooms. No more guesswork, no more overwatering, and definitely no more struggling with that awkward watering can. Let’s dive in and create a self-sufficient oasis that will be the envy of all your neighbors!
DIY Vertikale Gartenbewässerung: Dein automatisches Bewässerungssystem für die Wand
Hallo liebe Gartenfreunde! Habt ihr auch so einen kleinen Balkon oder eine Terrasse und träumt von einem üppigen, vertikalen Garten? Das Problem ist oft die Bewässerung, oder? Ständig gießen, besonders im Sommer, kann ganz schön anstrengend sein. Aber keine Sorge, ich zeige euch, wie ihr ein automatisches Bewässerungssystem für euren vertikalen Garten selber bauen könnt. Und das Beste: Es ist gar nicht so schwer, wie es klingt!
Was du für dein DIY Bewässerungssystem brauchst
Bevor wir loslegen, hier eine Liste mit allen Materialien und Werkzeugen, die du benötigst. Keine Sorge, vieles davon hast du vielleicht schon zu Hause!
* Eine Wasserpumpe: Eine kleine Tauchpumpe für Aquarien oder Zimmerbrunnen ist ideal. Achte darauf, dass sie genügend Förderhöhe hat, um das Wasser bis zum obersten Pflanzgefäß zu pumpen.
* Ein Wasserreservoir: Ein Eimer, eine alte Regentonne oder ein großer Pflanzkübel – alles, was wasserdicht ist und genügend Volumen hat, um deine Pflanzen ausreichend zu versorgen.
* Bewässerungsschlauch: Ein flexibler Schlauch (z.B. 4mm oder 6mm Innendurchmesser) ist perfekt, um das Wasser zu den einzelnen Pflanzen zu leiten.
* Tropfer oder Micro-Sprinkler: Diese werden an den Schlauch angeschlossen und geben das Wasser tröpfchenweise oder als feinen Sprühnebel ab.
* Verbinder und T-Stücke: Um den Schlauch zu verbinden und zu verzweigen, brauchst du passende Verbinder und T-Stücke.
* Zeitschaltuhr: Eine Zeitschaltuhr steuert die Pumpe und sorgt dafür, dass deine Pflanzen automatisch bewässert werden.
* Filter: Ein kleiner Filter am Ansaugstutzen der Pumpe verhindert, dass Schmutzpartikel die Pumpe verstopfen.
* Kabelbinder oder Schlauchschellen: Um den Schlauch sicher an den Pflanzgefäßen zu befestigen.
* Bohrmaschine mit kleinem Bohrer: Um Löcher für die Schlauchdurchführung in den Pflanzgefäßen zu bohren.
* Schere oder Messer: Zum Zuschneiden des Schlauchs.
* Optional: Ein Feuchtigkeitssensor, der die Bewässerung nur dann startet, wenn die Erde trocken ist.
Schritt-für-Schritt Anleitung: So baust du dein Bewässerungssystem
Jetzt geht’s ans Eingemachte! Folge diesen Schritten, um dein eigenes automatisches Bewässerungssystem für deinen vertikalen Garten zu bauen.
1. Vorbereitung des Wasserreservoirs
1. Reinigung: Reinige dein Wasserreservoir gründlich, um Algenbildung und Verstopfungen zu vermeiden.
2. Platzierung: Stelle das Reservoir an einem geeigneten Ort auf. Achte darauf, dass es stabil steht und vor direkter Sonneneinstrahlung geschützt ist, um die Algenbildung zu minimieren.
3. Pumpe installieren: Platziere die Tauchpumpe im Wasserreservoir. Achte darauf, dass sie vollständig mit Wasser bedeckt ist, bevor du sie einschaltest. Befestige den Filter am Ansaugstutzen der Pumpe.
2. Verlegung des Bewässerungsschlauchs
1. Schlauch zuschneiden: Schneide den Bewässerungsschlauch in die benötigten Längen zu. Plane dabei genügend Spielraum ein, um den Schlauch flexibel verlegen zu können.
2. Schlauch verlegen: Beginne am Auslass der Pumpe und verlege den Schlauch nach oben zu den einzelnen Pflanzgefäßen. Verwende T-Stücke, um den Schlauch zu verzweigen und jeden Pflanzgefäß zu erreichen.
3. Löcher bohren: Bohre mit der Bohrmaschine kleine Löcher in die Pflanzgefäße, durch die du den Schlauch führst. Achte darauf, dass die Löcher nicht zu groß sind, damit der Schlauch nicht herausrutscht.
4. Schlauch befestigen: Befestige den Schlauch mit Kabelbindern oder Schlauchschellen an den Pflanzgefäßen, um ihn sicher zu fixieren.
3. Installation der Tropfer oder Micro-Sprinkler
1. Tropfer/Sprinkler anbringen: Stecke die Tropfer oder Micro-Sprinkler an das Ende des Schlauchs, der zu jedem Pflanzgefäß führt. Achte darauf, dass sie fest sitzen.
2. Positionierung: Positioniere die Tropfer oder Sprinkler so, dass sie die Pflanzenwurzeln optimal bewässern. Bei größeren Pflanzen kannst du auch mehrere Tropfer pro Pflanze verwenden.
4. Anschluss der Zeitschaltuhr
1. Zeitschaltuhr installieren: Schließe die Pumpe an die Zeitschaltuhr an.
2. Bewässerungszeiten programmieren: Stelle die Zeitschaltuhr so ein, dass die Pumpe zu den gewünschten Zeiten für eine bestimmte Dauer eingeschaltet wird. Beginne mit kurzen Bewässerungszeiten und beobachte, wie deine Pflanzen darauf reagieren. Passe die Zeiten bei Bedarf an.
5. Testlauf und Feinjustierung
1. Testlauf durchführen: Schalte die Pumpe manuell ein und überprüfe, ob alle Tropfer oder Sprinkler funktionieren und das Wasser gleichmäßig verteilt wird.
2. Feinjustierung: Passe die Position der Tropfer oder Sprinkler an, um sicherzustellen, dass alle Pflanzen ausreichend bewässert werden. Überprüfe auch, ob der Wasserdruck ausreichend ist, um alle Pflanzen zu erreichen.
3. Beobachtung: Beobachte deine Pflanzen in den ersten Tagen genau, um sicherzustellen, dass sie ausreichend Wasser bekommen. Passe die Bewässerungszeiten bei Bedarf an.
Zusätzliche Tipps und Tricks für dein Bewässerungssystem
* Wahl der richtigen Pumpe: Die Größe der Pumpe hängt von der Anzahl der Pflanzen und der Höhe deines vertikalen Gartens ab. Eine zu kleine Pumpe kann nicht genügend Wasserdruck erzeugen, während eine zu große Pumpe unnötig Energie verbraucht.
* Verwendung eines Filters: Ein Filter ist unerlässlich, um die Pumpe vor Verstopfungen zu schützen. Reinige den Filter regelmäßig, um eine optimale Leistung zu gewährleisten.
* Anpassung der Bewässerungszeiten: Die Bewässerungszeiten hängen von verschiedenen Faktoren ab, wie z.B. der Art der Pflanzen, dem Wetter und der Jahreszeit. Beobachte deine Pflanzen genau und passe die Zeiten entsprechend an.
* Verwendung eines Feuchtigkeitssensors: Ein Feuchtigkeitssensor kann dir helfen, die Bewässerung noch effizienter zu gestalten. Er misst die Feuchtigkeit im Boden und startet die Bewässerung nur dann, wenn sie wirklich benötigt wird.
* Winterfest machen: Im Winter solltest du das Bewässerungssystem entleeren und die Pumpe frostfrei lagern, um Schäden zu vermeiden.
Häufige Probleme und Lösungen
* Tropfer verstopft: Reinige die Tropfer regelmäßig mit einer Nadel oder einem feinen Draht.
* Pumpe funktioniert nicht: Überprüfe, ob die Pumpe richtig angeschlossen ist und ob der Filter sauber ist.
* Schlauch undicht: Verwende Schlauchschellen oder Kabelbinder, um den Schlauch fester zu fixieren.
* Algenbildung im Reservoir: Reinige das Reservoir regelmäßig und stelle es an einen schattigen Ort.
Abschließende Gedanken
Ich hoffe, diese Anleitung hilft dir dabei, dein eigenes automatisches Bewässerungssystem für deinen vertikalen Garten zu bauen. Es ist ein tolles Projekt, das nicht nur Zeit und Mühe spart, sondern auch dazu beiträgt, dass deine Pflanzen gesund und glücklich sind. Viel Spaß beim Gärtnern! Und denk daran: Beobachte deine Pflanzen genau und passe das System bei Bedarf an. So wirst du lange Freude an deinem grünen Paradies haben!

Conclusion
So, there you have it! Creating your own DIY vertical garden watering system isn’t just a fun project; it’s a game-changer for anyone looking to cultivate a thriving green wall without the constant hassle of manual watering. We’ve explored a simple, effective method that saves you time, conserves water, and ultimately, helps your plants flourish.
Why is this DIY trick a must-try? Because it addresses the core challenges of vertical gardening: consistent and even watering. Neglecting this aspect can lead to dry patches, nutrient deficiencies, and ultimately, unhappy plants. Our system, however, ensures that every plant receives the hydration it needs, promoting healthy growth and vibrant foliage. Imagine the satisfaction of watching your vertical garden thrive, knowing you built the system that made it possible.
But the beauty of DIY lies in its adaptability. Feel free to experiment with variations to suit your specific needs and preferences. For instance, if you’re using larger containers, consider increasing the diameter of the tubing or adding multiple drip emitters per pot. If you live in an area with hard water, you might want to incorporate a filter into your system to prevent mineral buildup in the tubing and emitters. You could even integrate a timer to automate the watering process further, setting it to water your plants at specific intervals. Another option is to use a solar-powered pump for an eco-friendly and energy-efficient solution. Think about adding a fertilizer injector to the system to provide your plants with a consistent supply of nutrients. This is especially beneficial for demanding plants like herbs and vegetables.
Don’t be afraid to get creative with the design of your system. You can use different types of containers, arrange them in unique patterns, and even incorporate decorative elements to enhance the visual appeal of your vertical garden. The possibilities are endless!
We’ve provided a solid foundation, but the real magic happens when you personalize it to fit your unique space and gardening style. Remember, the key is to ensure that the water is distributed evenly and efficiently to all your plants.
We are confident that this DIY vertical garden watering system will transform your gardening experience. It’s a cost-effective, environmentally friendly, and incredibly rewarding project. So, gather your materials, follow our instructions, and get ready to witness the incredible growth of your vertical garden.
Now, we want to hear from you! We encourage you to try this DIY trick and share your experiences with us. What challenges did you encounter? What modifications did you make? What are your tips and tricks for creating a successful vertical garden watering system? Your feedback is invaluable and will help us improve this guide for future gardeners. Share your photos and stories on our social media channels using the hashtag #DIYVerticalGardenWatering. Let’s build a community of passionate vertical gardeners and inspire others to create their own thriving green walls. We can’t wait to see what you create!
Frequently Asked Questions (FAQ)
What type of pump should I use for my DIY vertical garden watering system?
The type of pump you need depends on the size and height of your vertical garden. For smaller gardens with only a few tiers, a small submersible pump designed for aquariums or fountains will likely suffice. These pumps are typically inexpensive and readily available. However, for larger, taller gardens, you’ll need a more powerful pump that can generate enough pressure to push water to the top tier. Consider a pump specifically designed for hydroponics or irrigation systems. Look for a pump with adjustable flow control so you can fine-tune the watering rate. When selecting a pump, pay attention to its head height rating, which indicates the maximum height it can pump water. Make sure the head height is sufficient for your vertical garden’s height. Also, consider the pump’s power consumption and choose an energy-efficient model to save on electricity costs.
How often should I water my vertical garden using this system?
The watering frequency depends on several factors, including the type of plants you’re growing, the climate, and the type of potting mix you’re using. As a general rule, check the moisture level of the soil daily. If the top inch of soil feels dry to the touch, it’s time to water. However, avoid overwatering, as this can lead to root rot. A good starting point is to water your vertical garden every other day, but adjust the frequency as needed based on your observations. During hot, dry weather, you may need to water more frequently, while during cooler, wetter weather, you may need to water less often. Consider using a soil moisture meter to get a more accurate reading of the soil’s moisture level. You can also adjust the timer on your system (if you have one) to control the duration and frequency of watering.
What type of tubing and emitters should I use?
For the tubing, use flexible, UV-resistant tubing designed for irrigation systems. This type of tubing is durable and won’t degrade in sunlight. The diameter of the tubing will depend on the size of your pump and the number of plants you’re watering. For smaller systems, 1/4-inch tubing is usually sufficient, while larger systems may require 1/2-inch tubing. For the emitters, use adjustable drip emitters that allow you to control the flow rate of water to each plant. This is important because different plants have different watering needs. Choose emitters that are easy to adjust and clean. You can also use micro-sprinklers for plants that prefer a more even distribution of water. Make sure the emitters are compatible with the tubing you’re using.
How do I prevent clogging in my DIY vertical garden watering system?
Clogging is a common problem in irrigation systems, but there are several things you can do to prevent it. First, use filtered water to prevent mineral buildup in the tubing and emitters. You can install a simple inline filter to remove sediment and debris from the water. Second, flush the system regularly to remove any accumulated debris. To do this, simply disconnect the emitters and run water through the tubing for a few minutes. Third, clean the emitters periodically to remove any mineral deposits or algae growth. You can soak the emitters in vinegar or a commercial cleaning solution designed for irrigation systems. Finally, avoid using fertilizers that contain insoluble particles, as these can clog the emitters.
Can I use this system for all types of plants?
While this system is versatile, it’s not suitable for all types of plants. Plants that prefer dry soil, such as succulents and cacti, may not thrive in a vertical garden watered by this system. Similarly, plants that require very wet soil, such as bog plants, may not get enough water from this system. Choose plants that are well-suited to vertical gardening and have similar watering needs. Herbs, leafy greens, and many flowering plants are excellent choices for vertical gardens. Research the specific watering requirements of each plant before incorporating it into your vertical garden.
How do I winterize my DIY vertical garden watering system?
If you live in an area with freezing temperatures, you’ll need to winterize your watering system to prevent damage. First, disconnect the pump and drain all the water from the system. This is important because water expands when it freezes, which can crack the tubing and damage the pump. Second, store the pump and tubing in a frost-free location, such as a garage or basement. Third, protect your plants from frost by covering them with burlap or moving them indoors. If you’re using a timer, disconnect it and store it in a dry place. By taking these simple steps, you can protect your watering system and your plants from the damaging effects of winter.


Leave a Comment