

DIY stainless steel cleaner – sounds intimidating, right? But trust me, it’s easier than you think, and the results are absolutely dazzling! I’m so excited to share this simple yet effective trick that will transform your grimy, fingerprint-covered stainless steel appliances into gleaming showpieces.
For generations, keeping metal surfaces sparkling has been a household priority. Think about the polished silver of Victorian tea sets or the gleaming copper pots hanging in rustic kitchens. While commercial cleaners have their place, there’s something incredibly satisfying about creating your own solutions, using readily available ingredients. It’s a return to a simpler time, a nod to resourcefulness, and a way to connect with the traditions of home care.
Let’s face it, stainless steel is beautiful, but it’s a magnet for smudges, water spots, and fingerprints. And those expensive stainless steel cleaners? They can be harsh on your skin and your wallet! That’s where this DIY stainless steel cleaner comes in. I’m going to show you how to whip up a powerful, eco-friendly cleaner using ingredients you probably already have in your pantry. Not only will you save money, but you’ll also avoid exposing your family to potentially harmful chemicals. Plus, the satisfaction of seeing your appliances shine, thanks to your own handiwork, is simply priceless. So, grab your supplies, and let’s get started!
DIY Stainless Steel Cleaner: Shine Like New!
Hey there, fellow DIY enthusiasts! Are you tired of those stubborn streaks and fingerprints on your stainless steel appliances? Store-bought cleaners can be expensive and often filled with harsh chemicals. Well, fret no more! I’m going to share my go-to recipe for a homemade stainless steel cleaner that’s not only incredibly effective but also uses ingredients you probably already have in your pantry. Get ready to say goodbye to dull, smudged stainless steel and hello to a sparkling, fingerprint-free finish!
What You’ll Need
Before we dive in, let’s gather our supplies. This is a super simple recipe, so the list is short and sweet:
* White Vinegar: This is our main cleaning agent. Vinegar’s acidity helps cut through grease and grime.
* Olive Oil: This adds a protective layer and gives your stainless steel that beautiful shine.
* Spray Bottle: To easily apply the cleaner.
* Two Microfiber Cloths: One for cleaning and one for buffing. Microfiber is key to avoiding streaks.
* Optional: Essential Oil (Lemon, Orange, or Lavender): A few drops can add a pleasant scent and boost the cleaning power.
The Magic Ratio: Getting the Mix Right
The key to a successful DIY cleaner is getting the proportions right. Here’s what I’ve found works best:
* 1/2 cup White Vinegar
* 1 teaspoon Olive Oil
* 5-10 drops of Essential Oil (optional)
Step-by-Step Instructions: From Dull to Dazzling
Alright, let’s get cleaning! Follow these steps for a streak-free, sparkling finish on your stainless steel.
1. Prepare the Cleaning Solution: In your spray bottle, combine the white vinegar, olive oil, and essential oil (if using). Give it a good shake to ensure everything is well mixed. Remember, the oil and vinegar will separate over time, so shake well before each use.
2. Test in an Inconspicuous Area: Before you go spraying your entire refrigerator, it’s always a good idea to test the cleaner in a small, hidden area. This will ensure that the solution doesn’t damage or discolor your stainless steel. Apply a small amount of the cleaner to a cloth and gently rub it on the test area. If everything looks good, you’re ready to move on!
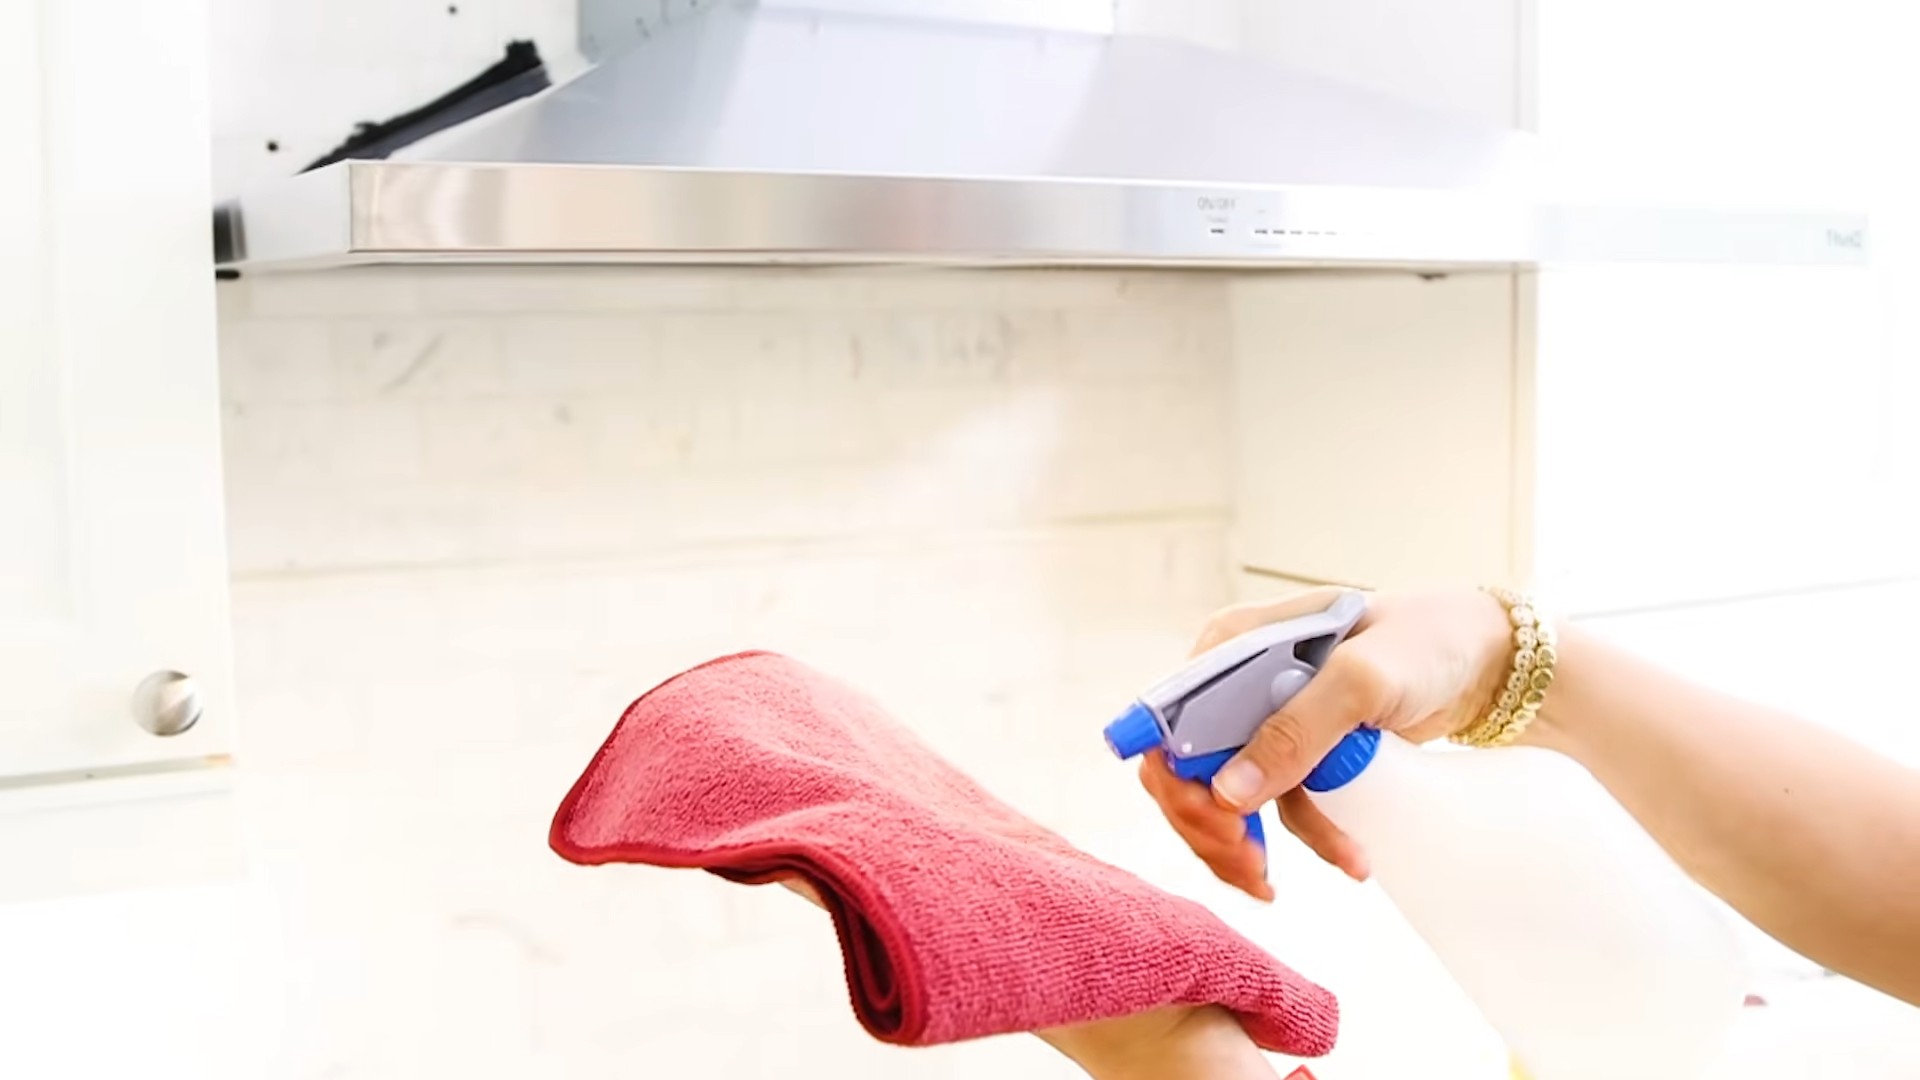
3. Spray the Surface: Lightly spray the stainless steel surface with your homemade cleaner. Don’t overdo it! A light mist is all you need. You want to avoid saturating the surface, as this can lead to streaks.
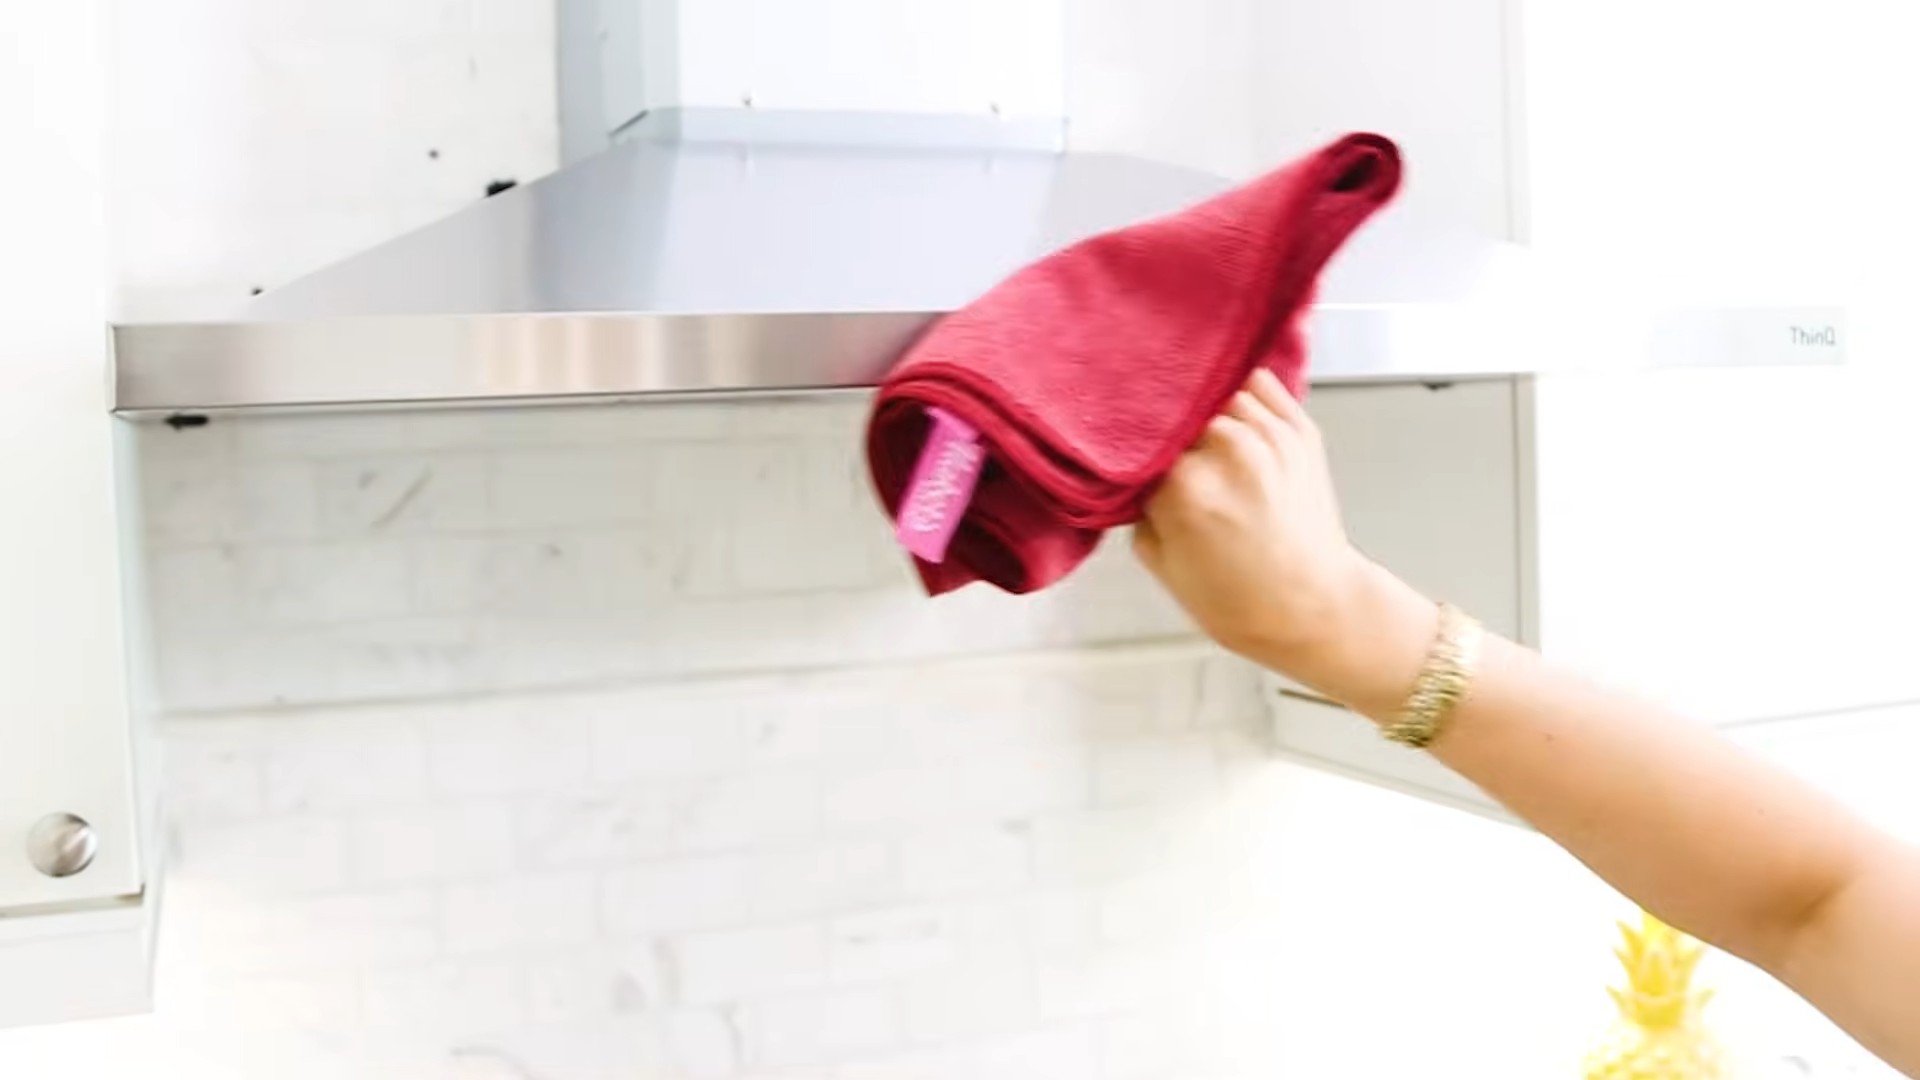
4. Wipe with the First Microfiber Cloth: Using your first microfiber cloth, wipe the surface in the direction of the grain. Stainless steel has a grain, which is the direction the metal was brushed during manufacturing. Wiping with the grain will help prevent streaks and ensure a more even clean. Apply gentle pressure to remove any dirt, grime, or fingerprints.
5. Buff with the Second Microfiber Cloth: Now for the magic touch! Take your second, clean microfiber cloth and buff the surface in the direction of the grain. This will remove any remaining residue and give your stainless steel that beautiful, polished shine. Use a circular motion while buffing to ensure even coverage.
6. Admire Your Work: Step back and admire your sparkling stainless steel! You’ll be amazed at how effective this simple homemade cleaner is.
Tackling Tough Stains and Grime
Sometimes, you’ll encounter stubborn stains or built-up grime that require a little extra elbow grease. Here’s how I handle those situations:
* For Baked-On Food: If you have baked-on food on your stainless steel stovetop or oven door, try making a paste of baking soda and water. Apply the paste to the affected area, let it sit for 15-20 minutes, and then gently scrub with a non-abrasive sponge or cloth. Rinse with water and dry thoroughly.
* For Water Spots: Hard water can leave unsightly spots on your stainless steel. To remove water spots, try wiping the surface with a cloth dampened with white vinegar. The vinegar’s acidity will help dissolve the mineral deposits.
* For Rust: While stainless steel is resistant to rust, it can still occur in certain conditions. To remove rust, try using a commercial stainless steel cleaner specifically designed for rust removal. Alternatively, you can try making a paste of lemon juice and salt. Apply the paste to the rust spot, let it sit for a few minutes, and then gently scrub with a non-abrasive sponge or cloth. Rinse with water and dry thoroughly.
Maintaining Your Stainless Steel Shine
Once you’ve cleaned your stainless steel, you’ll want to keep it looking its best. Here are a few tips for maintaining that shine:
* Wipe Up Spills Immediately: The sooner you wipe up spills, the less likely they are to stain or damage your stainless steel.
* Avoid Abrasive Cleaners: Abrasive cleaners can scratch and damage the surface of your stainless steel. Stick to gentle cleaners and soft cloths.
* Regular Cleaning: Cleaning your stainless steel regularly will prevent dirt and grime from building up, making it easier to maintain its shine. I usually clean my stainless steel appliances once a week.
* Apply a Protective Coating: After cleaning, you can apply a thin layer of olive oil or a commercial stainless steel polish to help protect the surface and prevent fingerprints.
Troubleshooting: Common Issues and Solutions
Even with the best intentions, you might encounter a few hiccups along the way. Here are some common issues and how to fix them:
* Streaks: If you’re getting streaks, it could be due to a few things. Make sure you’re wiping in the direction of the grain, using clean microfiber cloths, and not using too much cleaner. You might also need to buff the surface more thoroughly.
* Greasy Residue: If you’re leaving behind a greasy residue, you might be using too much olive oil. Try reducing the amount of olive oil in your cleaning solution.
* Dull Finish: If your stainless steel isn’t as shiny as you’d like, try buffing it more vigorously with a clean microfiber cloth. You can also try using a commercial stainless steel polish.
Safety First: A Few Words of Caution
While this DIY cleaner is generally safe, it’s always a good idea to take a few precautions:
* Avoid Contact with Eyes: Vinegar can irritate the eyes. If you get any cleaner in your eyes, rinse them thoroughly with water.
* Keep Out of Reach of Children: Store your cleaning solution in a safe place, out of reach of children and pets.
* Ventilation: When cleaning, make sure you have adequate ventilation.
Why This Works: The Science Behind the Shine
You might be wondering why this simple recipe is so effective. Here’s a little bit of the science behind it:
* Vinegar: Vinegar is a mild acid that helps to dissolve grease, grime, and mineral deposits. It’s also a natural disinfectant.
* Olive Oil: Olive oil acts as a protective barrier, preventing fingerprints and water spots. It also adds a beautiful shine to the stainless steel.
* Microfiber Cloths: Microfiber cloths are incredibly absorbent and gentle, making them ideal for cleaning and buffing stainless steel without scratching the surface.
Beyond Appliances: Where Else Can You Use This Cleaner?
This DIY stainless steel cleaner isn’t just for appliances! You can also use it on:
* Stainless Steel Sinks: Keep your sink sparkling clean and free of water spots.
* Stainless Steel Cookware: Remove food residue and keep your pots and pans looking their best.
* Stainless Steel Backsplashes: Clean up splatters and spills with ease.
* Stainless Steel Railings: Maintain the shine on your stainless steel railings and banisters.
Final Thoughts: Enjoy Your Sparkling Stainless Steel!
So there you have it! My simple, effective, and affordable DIY stainless steel cleaner. I hope you found this guide helpful and that you’re now ready to tackle those fingerprints and streaks with confidence. Remember to always test in an inconspicuous area first, wipe in the direction of the grain, and buff with a clean microfiber cloth. With a little bit of effort, you can keep your stainless steel appliances and surfaces looking their best for years to come. Happy cleaning!
Conclusion
So, there you have it! Ditching the expensive, chemical-laden store-bought cleaners and embracing this simple, effective DIY stainless steel cleaner is a game-changer for your kitchen and beyond. We’ve walked you through the easy steps, highlighted the cost-effectiveness, and emphasized the eco-friendly nature of this fantastic alternative. But why is this DIY trick a must-try?
Firstly, it’s about control. You know exactly what’s going into your cleaner – no hidden ingredients or harsh chemicals that could potentially damage your stainless steel or, more importantly, your health. Secondly, it’s incredibly budget-friendly. The ingredients are likely already in your pantry, making this a significantly cheaper option than constantly repurchasing commercial cleaners. Thirdly, and perhaps most importantly, it works! This DIY stainless steel cleaner cuts through grease, removes fingerprints, and leaves your appliances sparkling without streaks.
But the beauty of DIY lies in its adaptability. Feel free to experiment with variations to find what works best for you. For example, if you’re dealing with particularly stubborn stains, try adding a tablespoon of baking soda to the mixture for extra scrubbing power. For a pleasant scent, infuse your vinegar with citrus peels for a few days before using it in the recipe. Lemon, orange, or grapefruit peels all work wonderfully and leave a subtle, refreshing aroma. Another variation is to add a few drops of your favorite essential oil, such as lemon, tea tree, or lavender, for added antibacterial properties and a delightful fragrance. Just be sure to test the essential oil on an inconspicuous area first to ensure it doesn’t react with the stainless steel.
This DIY stainless steel cleaner is more than just a cleaning solution; it’s a step towards a more sustainable and healthier lifestyle. It’s about taking control of the products you use in your home and making informed choices that benefit both your wallet and the environment.
We wholeheartedly encourage you to give this DIY stainless steel cleaner a try. You’ll be amazed at how easy it is to make and how effectively it cleans. And once you’ve experienced the satisfaction of a sparkling clean kitchen, we want to hear about it! Share your experiences, tips, and variations in the comments below. Let’s build a community of DIY enthusiasts who are passionate about creating a cleaner, healthier, and more sustainable world, one stainless steel appliance at a time. Don’t forget to share this recipe with your friends and family so they can enjoy the benefits of this amazing DIY trick too!
Frequently Asked Questions (FAQ)
What type of stainless steel is this DIY cleaner suitable for?
This DIY stainless steel cleaner is generally safe and effective for most types of stainless steel appliances and surfaces, including refrigerators, dishwashers, ovens, sinks, and cookware. However, it’s always a good idea to test the cleaner on a small, inconspicuous area first, especially if you have antique or delicate stainless steel items. This will help ensure that the cleaner doesn’t cause any discoloration or damage. If you’re unsure about the type of stainless steel you have, consult the manufacturer’s instructions or contact a professional cleaner.
Can I use this cleaner on brushed stainless steel?
Yes, this DIY cleaner is safe to use on brushed stainless steel. However, it’s crucial to wipe in the direction of the grain to avoid streaks and ensure a consistent finish. Using a microfiber cloth is highly recommended, as it’s gentle and effective at removing dirt and grime without scratching the surface. Avoid using abrasive scrubbers or steel wool, as these can damage the brushed finish.
How often should I clean my stainless steel appliances with this DIY cleaner?
The frequency of cleaning depends on how often you use your appliances and how prone they are to fingerprints and smudges. For high-traffic areas like refrigerator doors and stovetops, cleaning once or twice a week is generally sufficient. For less frequently used appliances, cleaning every two to four weeks may be enough. Regular cleaning will prevent the buildup of dirt and grime, making it easier to maintain a sparkling clean surface.
What if the vinegar smell is too strong?
The vinegar smell is a common concern, but it dissipates quickly after cleaning. To minimize the odor, you can use a milder vinegar, such as white wine vinegar or apple cider vinegar. As mentioned earlier, infusing the vinegar with citrus peels can also help mask the smell. Alternatively, you can add a few drops of your favorite essential oil to the mixture. Lemon, orange, and grapefruit essential oils are particularly effective at neutralizing the vinegar smell and leaving a fresh, clean scent. Ensure adequate ventilation by opening windows or turning on a fan while cleaning.
Can I store the leftover DIY stainless steel cleaner?
Yes, you can store the leftover DIY stainless steel cleaner in a sealed spray bottle for future use. It’s best to store it in a cool, dark place to prevent the ingredients from degrading. The cleaner should remain effective for several weeks. However, if you notice any changes in color, consistency, or smell, it’s best to discard it and make a fresh batch. Always label the bottle clearly to avoid confusion.
Is this DIY cleaner safe for children and pets?
While this DIY cleaner is generally safer than commercial cleaners, it’s still important to exercise caution when using it around children and pets. Keep the cleaner out of reach of children and pets, and avoid spraying it directly in their presence. If your pet accidentally ingests the cleaner, contact your veterinarian immediately. Although the ingredients are relatively mild, they can still cause stomach upset or irritation.
What if I have hard water? Will it affect the cleaner’s effectiveness?
Hard water can sometimes leave spots or streaks on stainless steel surfaces. To counteract this, you can use distilled water instead of tap water when making the DIY cleaner. Distilled water is free of minerals and impurities, which can help prevent spotting. You can also add a small amount of lemon juice to the mixture, as the citric acid in lemon juice can help dissolve mineral deposits. After cleaning, be sure to dry the surface thoroughly with a clean, dry microfiber cloth to prevent water spots from forming.
Can I use this cleaner on other surfaces besides stainless steel?
While this DIY cleaner is primarily designed for stainless steel, it can also be used on other surfaces, such as chrome, porcelain, and ceramic. However, it’s always a good idea to test the cleaner on a small, inconspicuous area first to ensure that it doesn’t cause any damage or discoloration. Avoid using the cleaner on delicate surfaces like marble or granite, as the vinegar can etch or dull the finish.
What are some other uses for this DIY stainless steel cleaner?
Besides cleaning appliances and surfaces, this DIY stainless steel cleaner can also be used to clean stainless steel cookware, such as pots, pans, and utensils. It’s particularly effective at removing burnt-on food and grease. You can also use it to clean stainless steel sinks, faucets, and showerheads. The cleaner’s mild acidity helps dissolve mineral deposits and soap scum, leaving these fixtures sparkling clean.
What if I don’t have vinegar? Can I substitute it with something else?
Vinegar is a key ingredient in this DIY cleaner due to its acidity and cleaning properties. However, if you don’t have vinegar on hand, you can try substituting it with lemon juice. Lemon juice is also acidic and has natural cleaning and disinfecting properties. Use an equal amount of lemon juice in place of the vinegar. Keep in mind that lemon juice may not be as effective as vinegar at removing stubborn stains and grease.

Leave a Comment