

DIY grime cleaning paste – sounds like something your grandma used to whip up, right? Well, maybe she did! The history of homemade cleaning solutions stretches back centuries, long before fancy store-bought products lined our shelves. Think about it: resourceful folks have always sought effective, natural ways to keep their homes sparkling. From using vinegar and baking soda to harnessing the power of citrus, the tradition of DIY cleaning is deeply rooted in resourcefulness and a desire for a healthier home environment.
But why bother with a DIY grime cleaning paste today? Because let’s face it, life gets messy! Whether it’s stubborn grease in the kitchen, scuff marks on your walls, or grimy buildup in the bathroom, we all encounter those tough cleaning challenges. And while commercial cleaners can be effective, they often come with harsh chemicals and hefty price tags. That’s where this amazing DIY trick comes in. I’m going to show you how to create a powerful, all-natural cleaning paste using ingredients you probably already have in your pantry. Not only will it save you money and reduce your exposure to harmful chemicals, but it’s also incredibly satisfying to create something so effective with your own two hands. Get ready to say goodbye to grime and hello to a sparkling clean home, the natural way!
DIY Grime-Busting Cleaning Paste: Say Goodbye to Stubborn Stains!
Okay, friends, let’s talk grime. That stubborn, stuck-on, seemingly impossible-to-remove grime that plagues our kitchens, bathrooms, and well, just about everywhere else. I’ve tried countless commercial cleaners, and while some work okay, they often come with a hefty price tag and a whole lot of harsh chemicals. That’s why I’m so excited to share my go-to DIY grime-busting cleaning paste recipe! It’s cheap, effective, and uses ingredients you probably already have in your pantry. Trust me, this stuff is magic.
What Makes This Paste So Effective?
Before we dive into the recipe, let’s quickly break down why this paste works so well. It’s all about the combination of ingredients:
* Baking Soda: This is our gentle abrasive. It helps to lift grime without scratching most surfaces.
* Dish Soap: Cuts through grease and helps to emulsify the dirt, making it easier to wipe away.
* Hydrogen Peroxide: A mild bleaching agent that helps to brighten surfaces and disinfect.
* Essential Oils (Optional): Not only do they add a pleasant scent, but some essential oils, like tea tree and lemon, have antibacterial and antifungal properties.
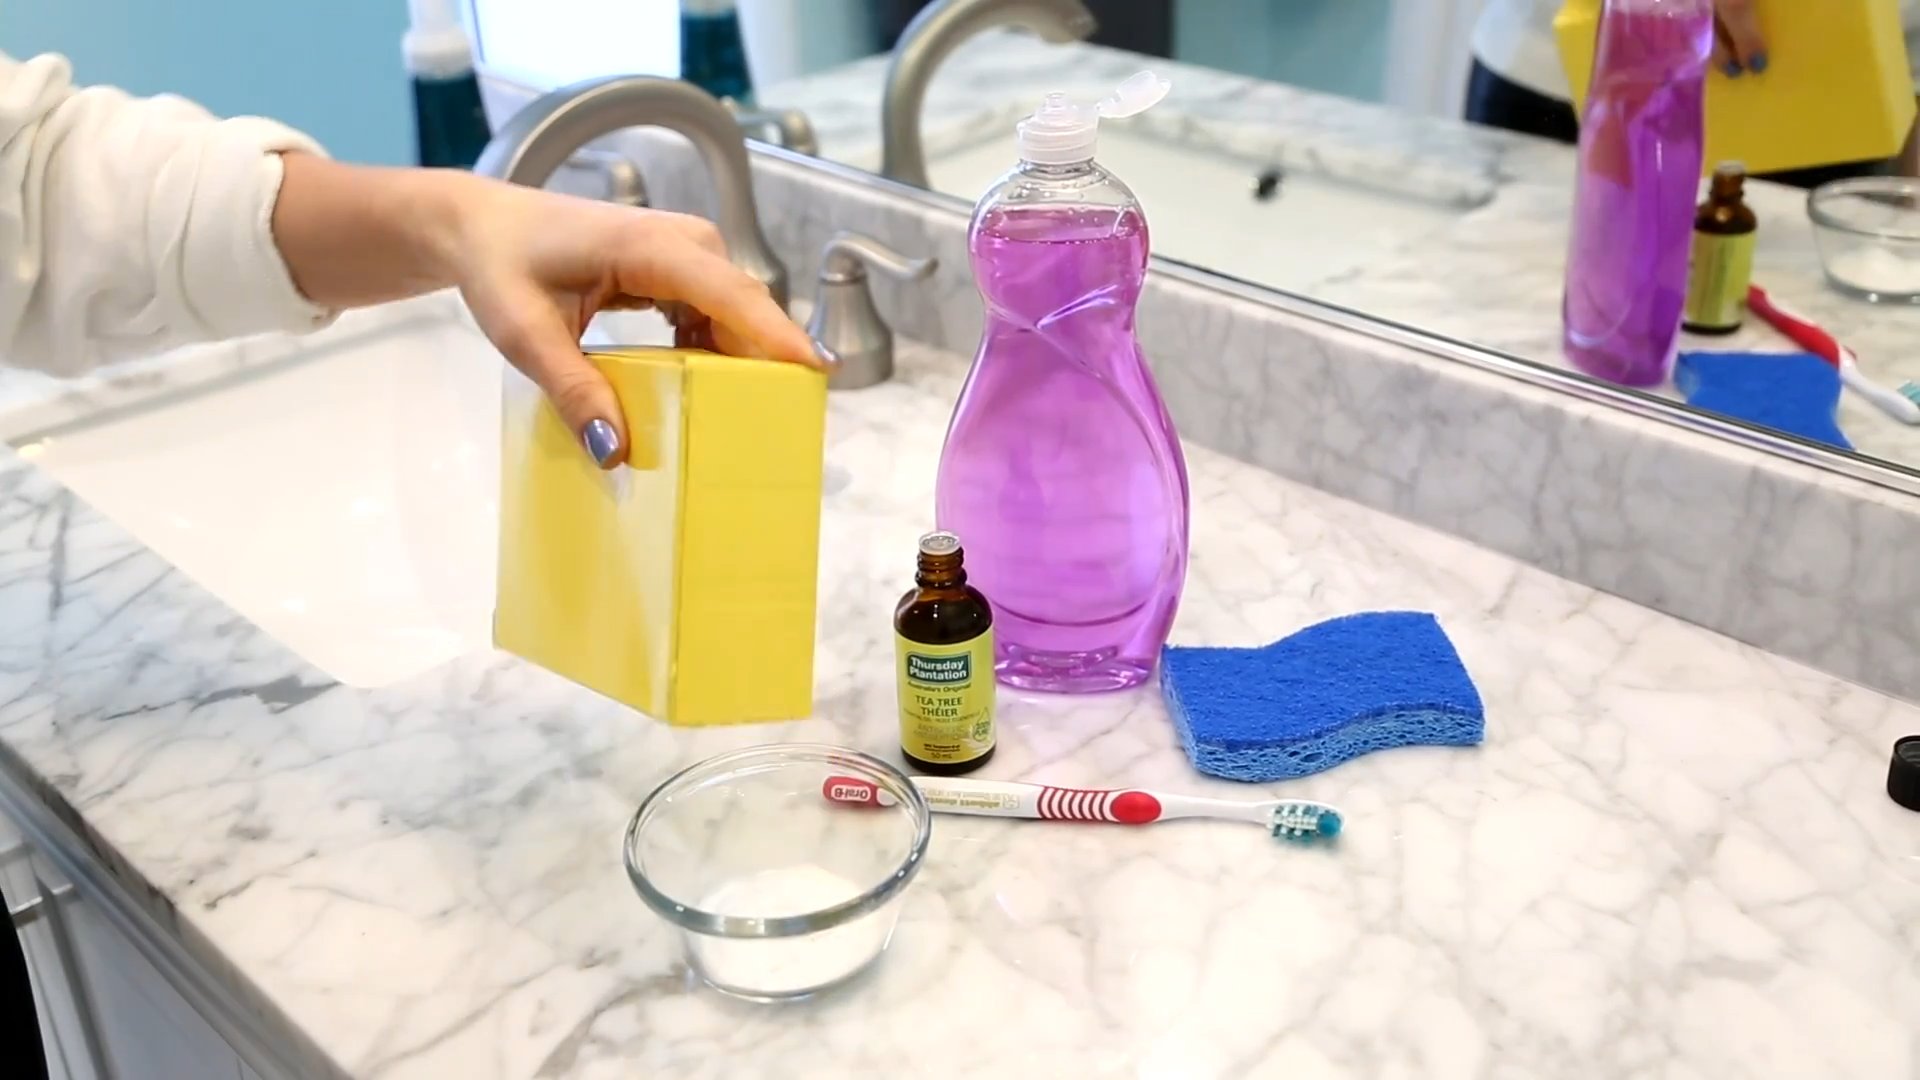
Gather Your Supplies
Alright, let’s get started! Here’s what you’ll need:
* 1 cup baking soda
* 1/4 cup dish soap (I prefer Dawn, but any grease-cutting dish soap will work)
* 1-2 tablespoons hydrogen peroxide (3% solution)
* 5-10 drops of your favorite essential oil (optional, but I love lemon or tea tree)
* A small bowl
* A spoon or spatula for mixing
* An airtight container for storage (a small jar or plastic container works great)
* Cleaning cloths or sponges
* An old toothbrush (for scrubbing tight spots)
Step-by-Step Instructions: Making the Grime-Busting Paste
Now for the fun part! Follow these steps to create your own grime-fighting superhero:
1. Combine the Baking Soda and Dish Soap: In your small bowl, pour in the 1 cup of baking soda. Then, add the 1/4 cup of dish soap. Use your spoon or spatula to mix these two ingredients together. It will form a thick, slightly clumpy paste. Don’t worry if it’s not perfectly smooth at this point.
2. Add the Hydrogen Peroxide Gradually: This is where things start to get interesting! Slowly add the hydrogen peroxide, one tablespoon at a time. Mix well after each addition. You’re looking for a consistency that’s thick enough to stick to surfaces but still spreadable. You might not need the full two tablespoons, so add it gradually until you reach the desired consistency. The mixture will start to fizz a little, which is perfectly normal.
3. Incorporate the Essential Oils (Optional): If you’re using essential oils, now’s the time to add them. I usually go for 5-10 drops, depending on the strength of the oil and my personal preference. Stir well to distribute the essential oils evenly throughout the paste.
4. Transfer to an Airtight Container: Once your paste is mixed to the right consistency and you’ve added your essential oils (if using), transfer it to your airtight container. This will prevent it from drying out and keep it fresh for longer.
Using Your DIY Grime-Busting Paste: A Guide to Sparkling Clean
Okay, you’ve made your paste! Now, let’s put it to work. Here’s how to use it on different surfaces:
1. Test in an Inconspicuous Area: This is crucial! Before applying the paste to a large area, test it in a small, hidden spot to make sure it doesn’t damage the surface. This is especially important for delicate surfaces like painted walls or certain types of countertops.
2. Apply the Paste: Using a cleaning cloth, sponge, or old toothbrush, apply a small amount of the paste to the grimy area. For stubborn stains, let the paste sit for a few minutes to allow it to work its magic. I usually let it sit for 5-10 minutes, but you can experiment to see what works best for you.
3. Scrub Gently: Using a circular motion, gently scrub the area with your cleaning cloth, sponge, or toothbrush. Avoid using excessive force, as this could scratch the surface. The baking soda will act as a gentle abrasive to lift the grime.
4. Rinse Thoroughly: Once you’ve scrubbed the area, rinse it thoroughly with clean water. Make sure to remove all traces of the paste.
5. Dry the Surface: Finally, dry the surface with a clean cloth. Admire your sparkling clean results!
Where to Use Your Grime-Busting Paste:
This paste is incredibly versatile! Here are some of my favorite places to use it:
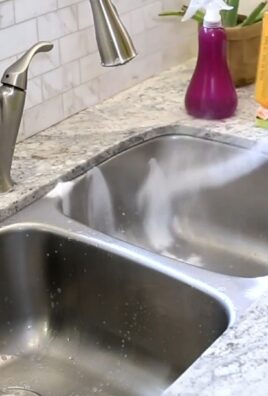
* Kitchen:
* Stovetop: This paste works wonders on baked-on food and grease splatters.
* Oven: Use it to clean the inside of your oven, but be sure to rinse thoroughly.
* Sink: Removes water stains and grime from stainless steel or porcelain sinks.
* Countertops: Great for cleaning up spills and stains, but test in an inconspicuous area first, especially on granite or marble.
* Grout: Use an old toothbrush to scrub grout lines and remove mildew and grime.
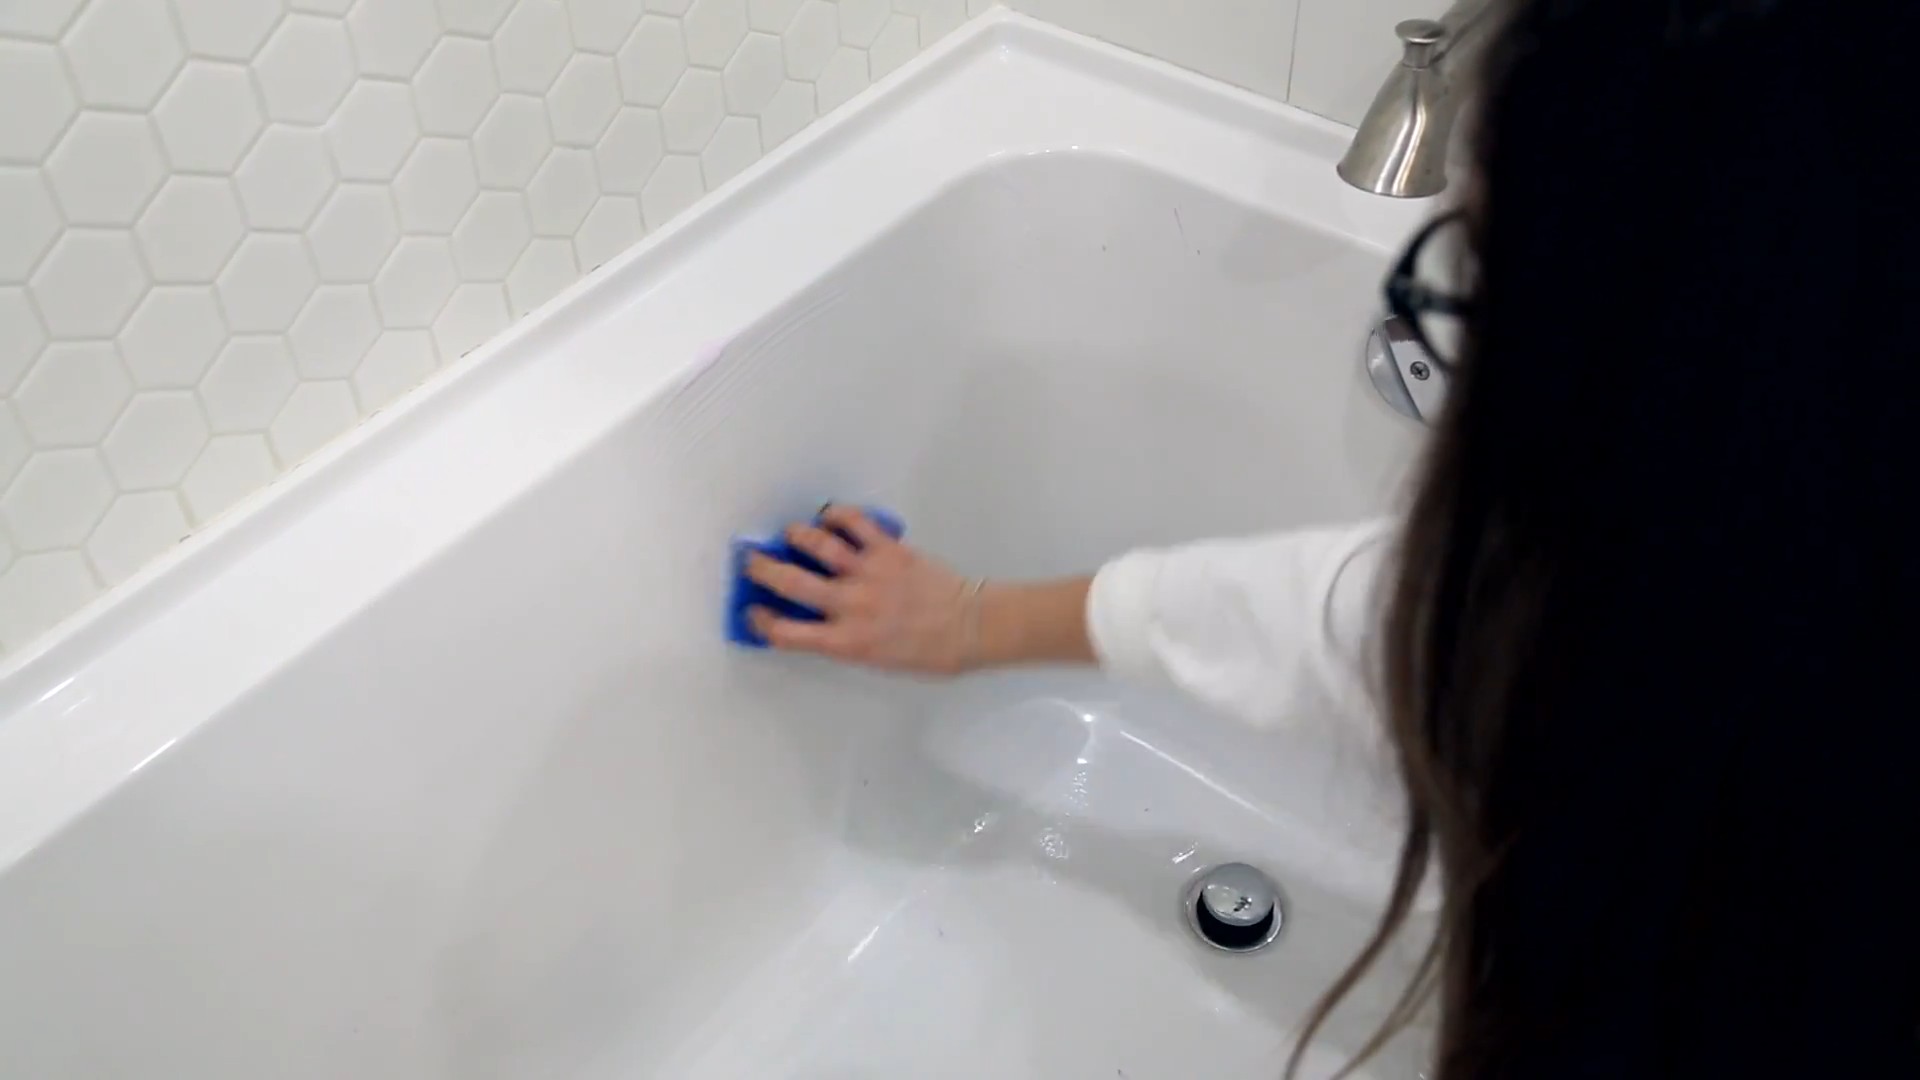
* Bathroom:
* Shower and Tub: Removes soap scum and mildew.
* Toilet: Cleans and disinfects the toilet bowl.
* Sink: Removes toothpaste splatters and water stains.
* Grout: Again, an old toothbrush is your best friend for cleaning grout lines.
* Other Areas:
* Shoes: Cleans scuff marks from sneakers and other shoes.
* Outdoor Furniture: Removes dirt and grime from patio furniture.
* Walls: Gently removes scuff marks and fingerprints, but test in an inconspicuous area first.
Important Considerations and Safety Tips:
While this paste is generally safe to use, here are a few things to keep in mind:
* Always test in an inconspicuous area first. I can’t stress this enough!
* Avoid using on delicate surfaces like polished wood, aluminum, or certain types of plastic.
* Wear gloves to protect your hands, especially if you have sensitive skin.
* Do not mix with other cleaning products, especially bleach. This can create dangerous fumes.
* Keep out of reach of children and pets.
* Store in a cool, dry place.
* The paste may separate over time. Simply stir it before each use.
* Use caution when cleaning vertical surfaces, as the paste may drip.
Troubleshooting:
* Paste is too thick: Add a little more hydrogen peroxide, a teaspoon at a time, until you reach the desired consistency.
* Paste is too thin: Add a little more baking soda, a tablespoon at a time, until it thickens up.
* Not removing stubborn stains: Let the paste sit for a longer period of time before scrubbing. You can also try using a more abrasive scrubbing tool, like a scrub brush.
* Leaving a residue: Make sure you’re rinsing the surface thoroughly with clean water.
Variations and Add-ins:
Want to customize your grime-busting paste? Here are a few ideas:
* Borax: Add a tablespoon of borax for extra cleaning power. Borax is a natural mineral that helps to boost the cleaning action of the paste.
* Vinegar: Add a tablespoon of white vinegar for extra stain-fighting power. However, be careful when mixing vinegar with baking soda, as it can create a fizzing reaction. Add the vinegar slowly and mix well.
* Lemon Juice: Add a tablespoon of lemon juice for extra brightening power and a fresh scent.
* Different Essential Oils: Experiment with different essential oils to find your favorite scent. Lavender, eucalyptus, and peppermint are all great options.
Why I Love This DIY Cleaning Paste:
Honestly, this DIY grime-busting cleaning paste has been a game-changer for me. It’s so much cheaper than buying commercial cleaners, and I love that I know exactly what’s in it. Plus, it’s incredibly effective at removing even the most stubborn grime. I feel good about using a more natural cleaning solution in my home, and the essential oils leave everything smelling fresh and clean. I hope you love it as much as I do! Give it a try and let me know what you think! Happy cleaning!
Conclusion
So, there you have it! This simple DIY grime cleaning paste is more than just a recipe; it’s a game-changer for your cleaning routine. We’ve shown you how to create a powerful, effective, and eco-friendly solution using ingredients you likely already have in your pantry. Forget those harsh chemicals and expensive store-bought cleaners. This homemade paste tackles stubborn grime with ease, leaving your surfaces sparkling and your conscience clear.
Why is this a must-try? Because it’s incredibly versatile. From greasy stovetops and grimy ovens to soap-scummed showers and stained grout, this paste handles it all. It’s also gentle enough for many surfaces, but always test in an inconspicuous area first, just to be safe. The cost savings alone are significant, and you’ll be reducing your environmental impact by avoiding plastic packaging and harsh chemicals.
But the real magic lies in its effectiveness. The combination of baking soda’s gentle abrasive power, the degreasing action of dish soap, and the optional boost from essential oils creates a synergistic effect that lifts grime and dirt effortlessly. You’ll be amazed at how easily this paste cuts through even the most stubborn messes.
Looking for variations? Absolutely! For extra scrubbing power, try adding a tablespoon of fine salt or even a bit of powdered pumice. For a fresh, citrusy scent, use lemon or orange essential oil. If you’re dealing with mold or mildew, a few drops of tea tree oil can be a powerful addition. And for those extra-tough stains, let the paste sit for a bit longer before scrubbing.
Don’t be afraid to experiment and customize this recipe to suit your specific needs and preferences. The beauty of DIY is that you have complete control over the ingredients and the process.
We are confident that once you try this DIY grime cleaning paste, you’ll never go back to store-bought cleaners. It’s effective, affordable, eco-friendly, and easy to make. What more could you ask for?
So, grab your ingredients, mix up a batch, and prepare to be amazed. We encourage you to try this DIY grime cleaning paste and share your experiences with us! Let us know what surfaces you’ve cleaned, what variations you’ve tried, and what results you’ve achieved. Your feedback will help others discover the power of this simple yet effective cleaning solution. Share your before-and-after photos on social media using #DIYGrimePaste and inspire others to ditch the chemicals and embrace the power of homemade cleaning. We can’t wait to see your sparkling results!
FAQ
What exactly *is* grime, and why is it so hard to clean?
Grime is a general term for accumulated dirt, grease, and other unwanted substances that cling to surfaces. Its tenacity comes from a combination of factors. Grease, being hydrophobic (water-repelling), resists water-based cleaners. Dirt particles often become embedded in the grease, creating a sticky, stubborn layer. Over time, grime can harden and become even more difficult to remove. This DIY grime cleaning paste works by breaking down the grease and loosening the dirt particles, making them easier to wipe away.
Is this DIY grime cleaning paste safe to use on all surfaces?
While this paste is generally safe for many surfaces, it’s crucial to test it in an inconspicuous area first. The baking soda has a mild abrasive quality, which could potentially scratch delicate surfaces like polished marble, certain types of plastic, or painted finishes. Avoid using it on surfaces that are known to be sensitive to abrasives. Good candidates for this paste include ceramic tile, porcelain, stainless steel, glass, and sealed grout. When in doubt, err on the side of caution and test before applying liberally.
Can I store the leftover grime cleaning paste? If so, how?
Yes, you can definitely store leftover paste! The best way to store it is in an airtight container, such as a glass jar or a plastic container with a tight-fitting lid. This will prevent the paste from drying out and maintain its effectiveness. Store it in a cool, dry place, away from direct sunlight. The paste should last for several weeks, if not longer, when stored properly. If you notice any changes in texture or smell, it’s best to discard it and make a fresh batch.
How do I adjust the consistency of the paste?
The consistency of the paste is easily adjustable to suit your needs. If the paste is too thick, add a little more dish soap, a teaspoon at a time, until you reach the desired consistency. If it’s too thin, add a bit more baking soda, a teaspoon at a time, until it thickens up. Remember that the consistency will also depend on the type of dish soap you use. Some dish soaps are naturally thicker than others.
What kind of dish soap should I use? Does it matter?
While any dish soap will work, some are more effective than others. A dish soap that is specifically designed to cut through grease will generally yield better results. Avoid using dish soaps that contain added moisturizers or lotions, as these can leave a residue on the surface you’re cleaning. A clear, basic dish soap is usually the best choice.
Can I use this paste to clean my oven?
Yes, this paste is excellent for cleaning ovens! However, for heavily soiled ovens, you may need to let the paste sit for a longer period of time, perhaps several hours or even overnight. Apply a generous layer of paste to the interior of the oven, avoiding the heating elements. Let it sit, then scrub thoroughly with a non-abrasive sponge or brush. Wipe away the residue with a damp cloth. For stubborn baked-on food, you may need to repeat the process.
What essential oils are best to use in this paste?
The choice of essential oils is entirely up to you and your personal preferences. Lemon, orange, and grapefruit essential oils are popular choices for their fresh, citrusy scents and their degreasing properties. Tea tree oil is a great option for its antibacterial and antifungal properties, making it ideal for cleaning bathrooms and other areas prone to mold and mildew. Lavender essential oil adds a calming scent and also has antibacterial properties. Peppermint essential oil provides a refreshing scent and can help to cut through grease. Experiment with different essential oils to find your favorite combination.
Is this paste safe for septic systems?
Yes, this paste is generally considered safe for septic systems. The ingredients – baking soda and dish soap – are biodegradable and do not contain harsh chemicals that can harm the beneficial bacteria in your septic tank. However, it’s always a good idea to use cleaning products sparingly, even those that are considered septic-safe. Avoid flushing large amounts of the paste down the drain at once.
What if I don’t have essential oils? Can I still make the paste?
Absolutely! Essential oils are optional and are primarily added for their scent and potential antibacterial properties. The paste will still be effective without them. Simply omit the essential oils from the recipe.
How often should I use this DIY grime cleaning paste?
The frequency of use will depend on how often your surfaces get dirty. For areas that are prone to grime buildup, such as stovetops and showers, you may want to use the paste once a week or as needed. For other surfaces, you may only need to use it occasionally.
My paste seems to be leaving a white residue. What am I doing wrong?
A white residue is usually caused by excess baking soda. Make sure you’re using the correct proportions of ingredients. When wiping away the paste, use a clean, damp cloth and rinse it frequently. You may also need to go over the surface with a dry cloth to buff away any remaining residue.
Can I use this paste on my car?
While the ingredients themselves aren’t inherently harmful to car paint, the abrasive nature of baking soda could potentially scratch the clear coat. It’s best to avoid using this paste on your car’s exterior. There are many car-specific cleaning products available that are designed to be safe for automotive finishes.
What are some other uses for this DIY grime cleaning paste?
Beyond the uses already mentioned, this paste can also be used to clean:
* Dirty sneakers (especially the rubber soles)
* Barbecue grills (after they’ve cooled down)
* Garden tools
* Plastic outdoor furniture
* And many other grimy surfaces around your home!
Remember to always test in an inconspicuous area first, and adjust the recipe as needed to suit your specific cleaning needs.


Leave a Comment