

Cupcake Liner Hacks and Tips: Who knew those humble little paper cups could be so much more than just vessels for delicious treats? I’m always on the lookout for clever ways to simplify life and save a few bucks, and let me tell you, cupcake liners are a secret weapon hiding in plain sight! From organizing your craft supplies to protecting your plants, these little wonders are surprisingly versatile.
While cupcake liners might seem like a modern invention, the concept of using paper to contain food dates back centuries. Think of the delicate paper wrappers used for candies in Victorian England or the parchment cones used by apothecaries. Today, we’ve taken that idea and run wild with it, creating a rainbow of colors and patterns perfect for unleashing our inner DIY guru.
But why do you *need* these cupcake liner hacks and tips? Because life is busy! We’re all looking for ways to streamline our routines, declutter our homes, and maybe even add a touch of whimsy to our everyday lives. These simple tricks can save you time, money, and a whole lot of frustration. Plus, they’re a fantastic way to repurpose those extra liners you have lying around after your last baking spree. So, get ready to be amazed at the unexpected uses for these baking essentials – I promise you’ll never look at a cupcake liner the same way again!
Unleash the Power of Cupcake Liners: More Than Just Baking!
Hey there, fellow DIY enthusiasts! I’m about to blow your mind with the sheer versatility of cupcake liners. Forget just using them for cupcakes – these little paper (or silicone!) wonders can be repurposed in so many creative and practical ways around your home. Get ready to be amazed!
Organization & Storage Hacks
Cupcake liners are fantastic for organizing small items. Seriously, they’re a game-changer!
* Jewelry Organizer: Keep your earrings, rings, and necklaces tangle-free.
* Craft Supply Storage: Sort beads, buttons, sequins, and other small craft supplies.
* Hardware Organizer: Organize screws, nails, washers, and other small hardware items.
* Snack Portions: Pre-portion snacks for kids (or yourself!) for easy grab-and-go options.
* Seed Starters: Start your garden indoors with individual seed starters.
Jewelry Organizer: No More Tangles!
Tired of untangling your necklaces every morning? This is the solution!
1. Gather Your Supplies: You’ll need cupcake liners (paper or silicone work), a shallow drawer or box, and your jewelry.
2. Prepare the Liners: If you’re using paper liners, you might want to double them up for extra sturdiness. Silicone liners are naturally more durable.
3. Arrange the Liners: Place the cupcake liners in your drawer or box, spacing them evenly. You can use double-sided tape to secure them if you want, but it’s usually not necessary.
4. Organize Your Jewelry: Place each piece of jewelry in its own cupcake liner. Earrings, rings, and small pendants fit perfectly. For necklaces, coil them gently and place them inside. This prevents them from tangling with other pieces.
5. Enjoy Your Organized Jewelry: Say goodbye to tangled messes! Now you can easily find and access your favorite pieces.
Craft Supply Storage: Tidy Up Your Craft Room
My craft room used to be a disaster zone. Cupcake liners saved the day!
1. Gather Your Supplies: Cupcake liners, a drawer or container, and your craft supplies (beads, buttons, sequins, etc.).
2. Sort Your Supplies: Separate your craft supplies into categories. This will make it easier to organize them in the liners.
3. Fill the Liners: Place each category of craft supplies into its own cupcake liner. Don’t overfill them, or they might spill.
4. Arrange the Liners: Arrange the filled liners in your drawer or container. You can label the liners if you want, so you know what’s inside each one.
5. Admire Your Organized Craft Room: Finally, a place for everything, and everything in its place!
Hardware Organizer: No More Mystery Screws!
We’ve all been there: a pile of random screws and nails with no idea where they belong.
1. Gather Your Supplies: Cupcake liners, a toolbox or container, and your hardware (screws, nails, washers, etc.).
2. Sort Your Hardware: Separate your hardware by size and type. This will make it easier to find the right piece when you need it.
3. Fill the Liners: Place each type of hardware into its own cupcake liner.
4. Arrange the Liners: Arrange the filled liners in your toolbox or container. Labeling is highly recommended here!
5. Find the Right Hardware, Every Time: No more rummaging through a messy pile!
Snack Portions: Healthy Eating Made Easy
This is a great way to control portion sizes and make healthy snacking more convenient.
1. Gather Your Supplies: Cupcake liners, a container, and your snacks (nuts, seeds, dried fruit, etc.).
2. Portion Your Snacks: Fill each cupcake liner with a single serving of your chosen snack.
3. Arrange the Liners: Arrange the filled liners in your container.
4. Grab and Go: Now you have pre-portioned snacks ready to go whenever you need them.
Seed Starters: Give Your Garden a Head Start
Starting seeds indoors is a great way to get a jump on the growing season.
1. Gather Your Supplies: Cupcake liners, a tray or container, potting soil, and seeds.
2. Prepare the Liners: Place the cupcake liners in your tray or container.
3. Fill the Liners: Fill each liner with potting soil.
4. Plant Your Seeds: Plant a few seeds in each liner, following the instructions on the seed packet.
5. Water and Wait: Water the soil gently and keep it moist until the seeds germinate. Once the seedlings are big enough, you can transplant them into your garden.
Cleaning Hacks
Believe it or not, cupcake liners can also be used for cleaning!
* Paint Can Drip Catchers: Place a liner under your paint can to catch drips.
* Furniture Protectors: Place liners under furniture legs to protect your floors.
* Dusting Small Items: Use a liner to dust delicate items like figurines.
Paint Can Drip Catchers: Keep Your Surfaces Clean
Painting can be messy, but this simple trick can help keep your surfaces clean.
1. Gather Your Supplies: Cupcake liners and your paint can.
2. Place the Liner: Place a cupcake liner under your paint can before you start painting.
3. Catch the Drips: The liner will catch any drips that run down the side of the can, preventing them from getting on your surfaces.
4. Easy Cleanup: When you’re finished painting, simply discard the liner.
Furniture Protectors: Protect Your Floors
Prevent scratches and scuffs on your floors with this easy hack.
1. Gather Your Supplies: Cupcake liners and your furniture.
2. Place the Liners: Place a cupcake liner under each furniture leg.
3. Protect Your Floors: The liners will act as a barrier between the furniture legs and your floors, preventing scratches and scuffs.
4. Replace as Needed: Replace the liners as they wear out.
Dusting Small Items: Gentle Cleaning
Dusting delicate items can be tricky, but a cupcake liner can make it easier.
1. Gather Your Supplies: Cupcake liners and your delicate items.
2. Wrap the Item: Gently wrap the item in a cupcake liner.
3. Dust Away: Use the liner to gently dust the item. The liner will protect the item from scratches and help to collect the dust.
Creative & Decorative Hacks
Let your creativity shine with these fun and decorative uses for cupcake liners!
* Mini Gift Baskets: Create adorable mini gift baskets for small treats or trinkets.
* Party Decorations: Make garlands, banners, or cupcake toppers for parties.
* Flower Crafts: Create paper flowers for decorations or crafts.
* String Lights Decoration: Decorate string lights for a festive touch.
Mini Gift Baskets: Adorable and Easy
These are perfect for small gifts like candies, jewelry, or small toys.
1. Gather Your Supplies: Cupcake liners, scissors, glue or tape, and ribbon or twine.
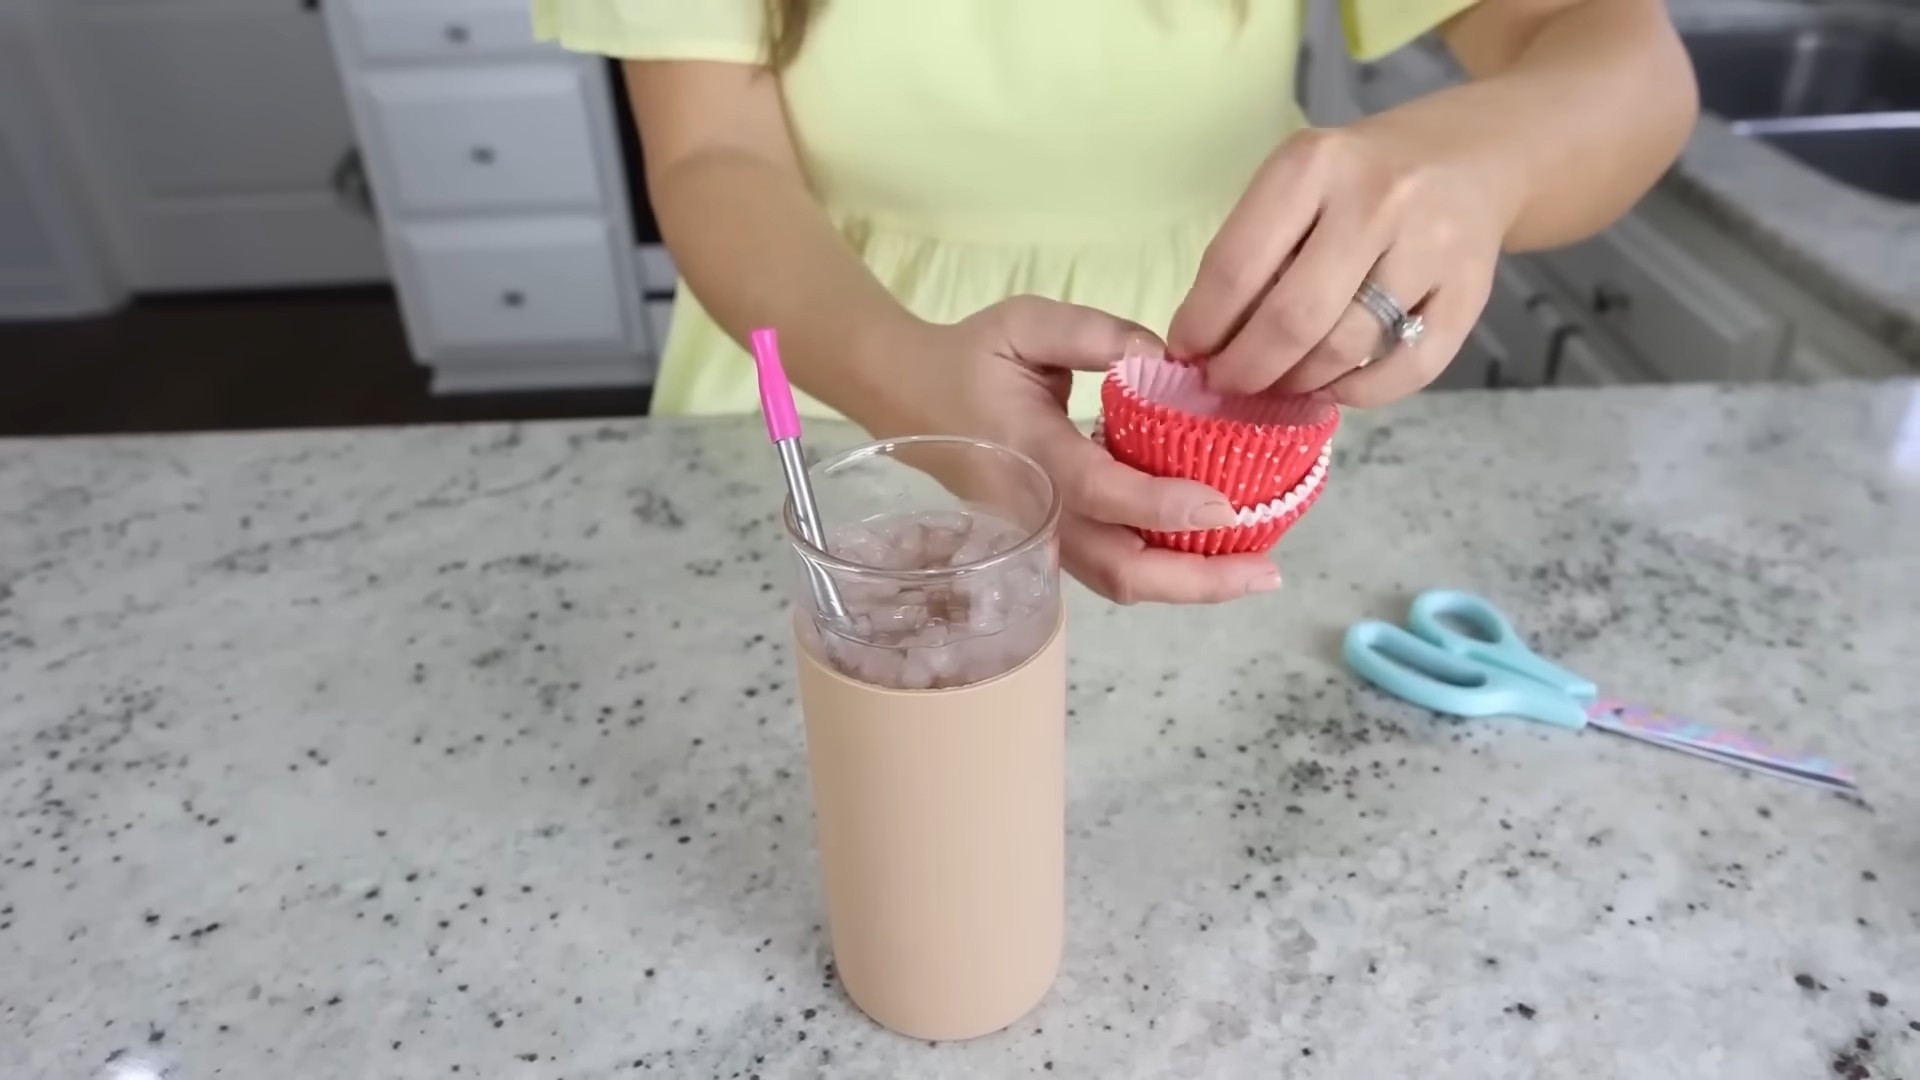
2. Shape the Liner: Flatten the cupcake liner and cut slits around the edges, about halfway to the center.
3. Fold and Secure: Fold the cut edges inward and secure them with glue or tape to create a basket shape.
4. Add a Handle: Attach a ribbon or twine handle to the basket.
5. Fill and Gift: Fill the basket with your chosen treats or trinkets and give it to someone special.
Party Decorations: Festive and Frugal
Cupcake liners are a budget-friendly way to add a festive touch to any party.
1. Garlands: Flatten cupcake liners and string them together to create a garland. You can use different colors and patterns to match your party theme.
2. Banners: Cut cupcake liners into different shapes and attach them to a string to create a banner.
3. Cupcake Toppers: Glue cupcake liners to toothpicks or skewers to create cupcake toppers. You can add glitter, beads, or other embellishments to make them even more festive.
Flower Crafts: Beautiful and Easy to Make
These paper flowers are perfect for decorations, crafts, or even as a gift.
1. Gather Your Supplies: Cupcake liners, scissors, glue, and optional: glitter, beads, or other embellishments.
2. Stack and Fold: Stack several cupcake liners together and fold them in half, then in half again.
3. Cut the Edges: Cut the edges of the folded liners into
Conclusion
So, there you have it! Transforming ordinary cupcake liners into extraordinary tools and decorations is not just a fun craft project; it’s a game-changer in the kitchen and beyond. We’ve explored a myriad of ways to repurpose these humble paper cups, from creating elegant floral decorations to organizing small items and even preventing messy drips. The versatility of cupcake liners is truly astounding, and the possibilities are limited only by your imagination.
Why is this DIY trick a must-try? Because it’s economical, resourceful, and incredibly satisfying. Instead of tossing those leftover liners, you’re giving them a new lease on life, reducing waste and saving money in the process. Plus, the creative outlet it provides is a fantastic stress reliever. Imagine the satisfaction of crafting beautiful cupcake liner flowers for a party centerpiece or neatly organizing your jewelry with repurposed liners. It’s a win-win situation!
Looking for some inspiration to get started? Consider these variations:
* Themed Parties: Use patterned or colored cupcake liners to create decorations that match your party theme. Think red and green for Christmas, pastel shades for Easter, or spooky designs for Halloween.
* Gift Wrapping: Use cupcake liners to add a decorative touch to small gifts. Simply wrap the item in tissue paper and then place it inside a liner, securing it with ribbon or twine.
* Kids’ Crafts: Cupcake liners are a fantastic material for kids’ crafts. Let them create animals, masks, or collages using liners, glue, and other craft supplies.
* Baking Variations: Experiment with different types of cupcake liners to achieve unique textures and appearances in your baked goods. Try using silicone liners for easy release or parchment paper liners for a rustic look.
* Organizing: Use different colored cupcake liners to organize your craft supplies, jewelry, or office supplies. This will help you easily identify and access what you need.
But the real magic happens when you put your own spin on these ideas. Don’t be afraid to experiment with different colors, patterns, and techniques to create something truly unique. The beauty of this DIY trick is that it’s completely customizable to your needs and preferences.
We wholeheartedly encourage you to try these cupcake liner hacks and tips. Whether you’re a seasoned crafter or a complete beginner, you’ll be amazed at how easy and rewarding it is to transform these simple paper cups into something extraordinary. And most importantly, we want to hear about your experiences! Share your creations, tips, and variations with us in the comments below. Let’s inspire each other and unlock the full potential of the humble cupcake liner. We can’t wait to see what you come up with!
Frequently Asked Questions (FAQ)
What types of cupcake liners work best for these DIY projects?
The best type of cupcake liner depends on the specific project. For crafting and decorations, paper liners are generally preferred due to their flexibility and ease of manipulation. However, for baking-related hacks, silicone or parchment paper liners might be more suitable, especially if you’re looking for easy release or a non-stick surface. Consider the project’s requirements and choose the liner that best fits the purpose. For example, metallic cupcake liners can add a touch of elegance to decorations, while plain white liners are versatile for various crafts.
Are there any safety precautions I should take when using cupcake liners for non-food purposes?
Yes, it’s important to exercise caution when using cupcake liners for non-food purposes. Avoid using liners that have been previously used for baking, as they may contain traces of food or grease. When using glue or other adhesives, ensure proper ventilation and follow the manufacturer’s instructions. If children are involved in the crafting process, supervise them closely to prevent accidental ingestion of small parts or adhesives. Also, be mindful of potential fire hazards when using cupcake liners near open flames or heat sources.
How can I prevent cupcake liners from losing their shape when using them for decorations?
To maintain the shape of cupcake liners when using them for decorations, consider stiffening them with a thin layer of glue or Mod Podge. This will help them hold their form and prevent them from collapsing or losing their shape over time. You can also use multiple layers of liners to create a more robust structure. Another tip is to use a shaping tool, such as a pencil or skewer, to mold the liners into the desired shape and then allow them to dry completely before assembling your decoration.
Can I use cupcake liners to organize items other than jewelry and craft supplies?
Absolutely! Cupcake liners are incredibly versatile for organizing a wide range of items. They can be used to sort and store small office supplies like paper clips, rubber bands, and pushpins. In the bathroom, they can hold cotton balls, swabs, and makeup sponges. In the garage, they can organize small hardware items like screws, nuts, and bolts. The key is to use different sizes and colors of liners to categorize and easily identify the contents.
How do I clean cupcake liners if I want to reuse them for crafting?
If you’re using paper cupcake liners that have been lightly used for baking, you can try gently wiping them clean with a damp cloth. However, heavily soiled liners are generally not suitable for reuse. Silicone liners, on the other hand, can be easily washed with soap and water or even placed in the dishwasher. Ensure that the liners are completely dry before storing them or using them for crafting.
What are some creative ways to use cupcake liners for party decorations besides flowers?
Beyond flowers, cupcake liners can be transformed into a variety of festive party decorations. You can create garlands by stringing liners together, make miniature hats for party favors, or craft whimsical animals and characters for centerpieces. Another idea is to use liners to decorate cupcakes or other desserts, adding a pop of color and texture to your treats. Get creative with different colors, patterns, and textures to match your party theme and create a memorable celebration.
Are there any eco-friendly alternatives to traditional paper cupcake liners?
Yes, there are several eco-friendly alternatives to traditional paper cupcake liners. Silicone liners are reusable and can be washed and used multiple times, reducing waste. Parchment paper liners are biodegradable and compostable, making them a more sustainable option. You can also find unbleached paper liners, which are made from recycled materials and are free from harmful chemicals. When choosing cupcake liners, consider the environmental impact and opt for the most sustainable option available.
How can I involve children in these cupcake liner DIY projects?
Involving children in cupcake liner DIY projects is a fantastic way to foster their creativity and fine motor skills. Start with simple projects that are easy for them to manage, such as making cupcake liner animals or creating colorful collages. Provide them with a variety of materials, such as glue, glitter, and googly eyes, and let them explore their imagination. Supervise them closely, especially when using glue or scissors, and encourage them to experiment and have fun. Remember to praise their efforts and celebrate their creations.
Leave a Comment